All products were chosen independently by our editorial team. This review contains affiliate links and we may receive a commission for purchases made. Please read our affiliates FAQ page to find out more.

Master the art of shirring with our shirred dress pattern

Make beautiful gatherings in your clothing with shirring! Learn how to sew shirring and make your own gorgeous shirred dress.

6 issues of Simply Sewing magazine for £14.99|Save 78%!

Published: June 5, 2023 at 2:30 pm

Welcome to the world of shirring! Shirring is a fantastic sewing technique used to create shapes and decorations on garments.

To help you master shirring, we’ve created a complete guide covering all the basics. We explain what shirring is, how to create it and how to use shirring elastic.

We also have a step-by-step tutorial on how to create a shirred dress which is the perfect summer dress sewing pattern!

Before we get started, make sure you check out our sewing for beginners guide to brush up on all your basic knowledge.

What is shirring in sewing?

Shirring is a sewing technique where you stitch elasticated threads in rows. This gathers the fabric, reducing its size to create a cinched, decorative look.

It’s an incredibly popular sewing technique and often features on The Great British Sewing Bee!

What is the difference between shirring and smocking?

The main difference between shirring and smocking is the ratio of the fabric gathering. Shirring mainly gathers on a 2:1 ratio while smocking gathers on a 3:1 ratio.

Apart from this, the techniques are very similar.

What is shirring elastic?

Shirring elastic is also known as elastic thread and can be bought in a variety of colours and quantities.

The elastic is wound onto the sewing machine bobbin, and ordinary thread is used in the needle. Although the elastic will be on the back of your fabric, it still needs to blend in, so choose a colour to match your fabric.

Sewing with elastic is called ‘gathering’ if you only stitch one row, and ‘shirring’ if you stitch more than one.

Before you begin sewing with elastic, take time to read your sewing machine manual as some machines may require you to change the tension of your bobbin.

Head over to our how to use a sewing machine tutorial to learn how to do this.

How to use shirring elastic

Step one

sewing projects shot in the studio

Mark a line on your fabric where you want the elastic to be sewn. Use tailor’s chalk or an erasable fabric marker so the line won’t show afterwards.

Step two 
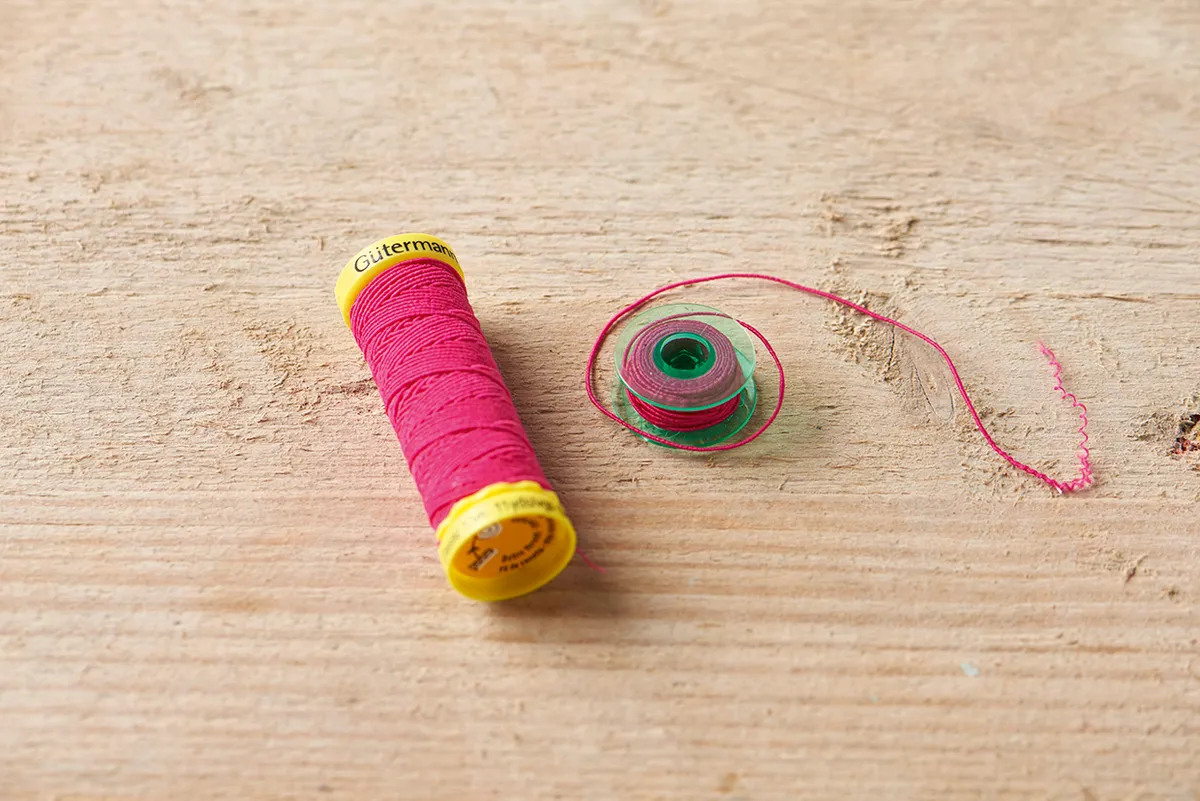
Use ordinary sewing thread for the top thread in your sewing machine, but wind the shirring elastic onto the bobbin.

This must be done by hand to ensure the correct tension.

Pull the elastic slightly so it doesn’t lie loosely around the bobbin, but don’t pull it too much or it will be overstretched.

This is fairly quick once you get into a rhythm of pulling it to just the right tension so it winds neatly around the bobbin.

Step three Set your sewing machine to its longest stitch length, to allow a longer length of elastic for each stitch, giving the fabric more stretch and pull when it’s finished.

Step four Stitch along the marked line as you would normally, keeping the fabric flat as you are stitching.

Reverse stitch at the beginning and end to secure the thread and elastic.

Step five

sewing projects shot in the studio

If you are stitching more than one row, then the fabric will already be gathered after the first one.

Hold the fabric in front and behind the needle to keep it flat, taking care not to overstretch it.
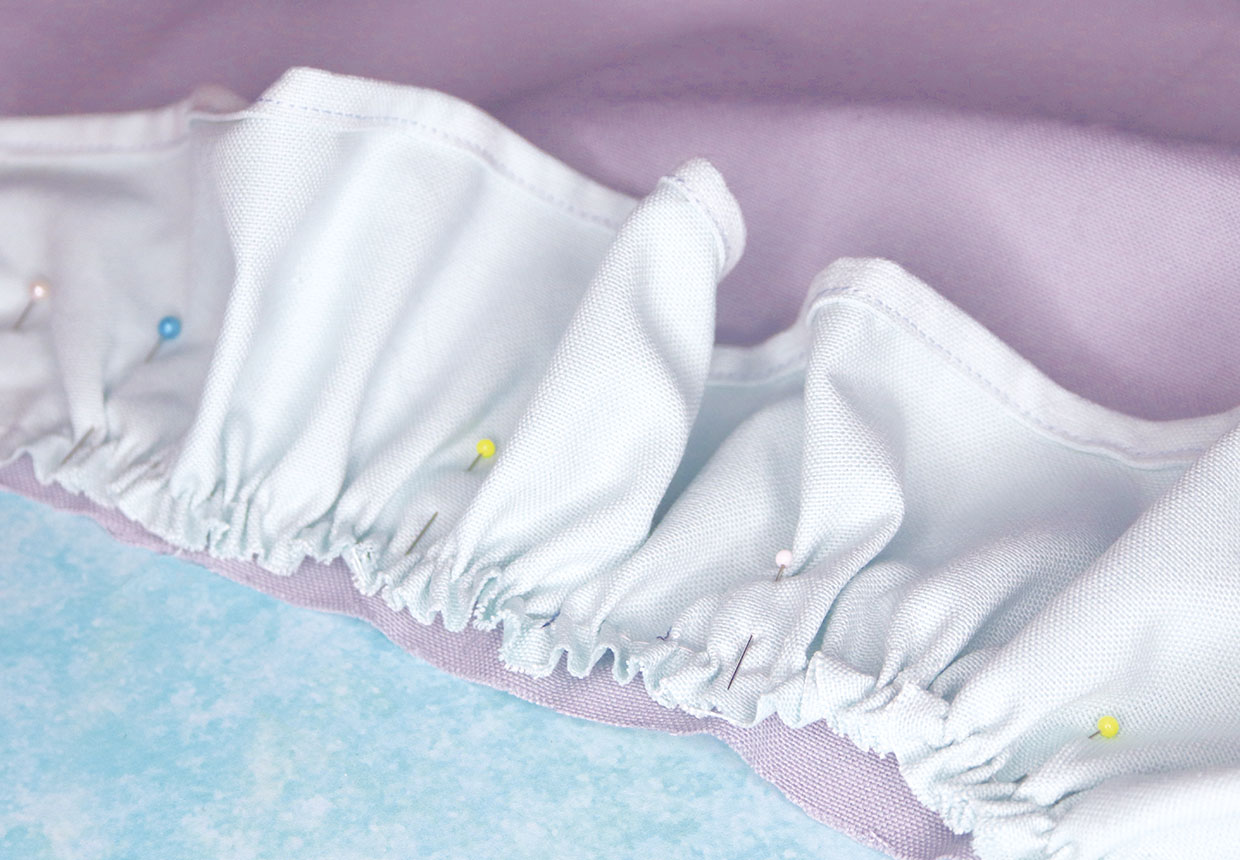
How to sew shirring

Top tips for shirring

Measurements for your shirring dress

  • Waist: 1.5 x bust at the fullest part
  • Length: distance from armpit crease to the desired hem

Your shirring dress fabric requirements

Fabric requirements are dependent on whether the waist exceeds the width of your fabric.

If the waist fits within the width of your fabric (as does our example) then 1.5m will be sufficient to create this dress from a single rectangle with a centre back seam.

If the waist exceeds the width of your fabric, you will need to double the fabric quantity (3m) to create the dress from two rectangles, with side seams.

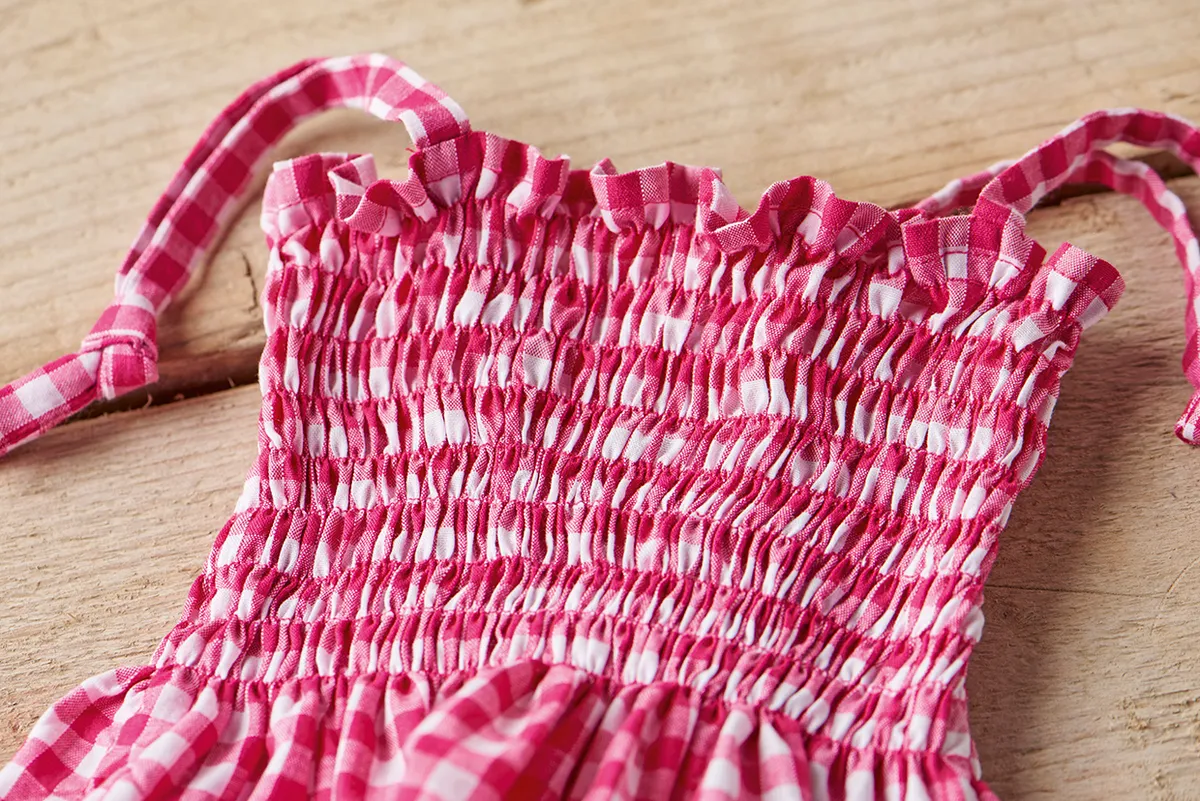
The fabric we used for our shirring dress is Gingham cotton double gauze in Smokey from Atelier Brunette

How to make a shirred dress

How to sew shirring

Making a shirring swatch

You will need:

  • Lightweight fabric (see notes) (1.5–3m)
  • Shirring elastic (2–3 reels)
  • Matching thread
  • Basic sewing kit

Step 1

The key to shirring is finding the right balance of tension and stitch length for your machine and the particular fabric you are using. Practice on a scrap of your fabric first to find the right combination for your project.

How to sew a shirring dress STEP 1

For our machine, this meant winding the shirring elastic onto the bobbin (always do this by hand) with as little tension as possible and setting a slightly longer stitch length (ours was set to 3).

We could get two lines of shirring out of each bobbin, so it helps to wind multiple bobbins at a time in advance.

Step 2

How to sew a shirring dress STEP 1a

Backstitch at the beginning and end of each line of shirring. Make sure you regularly check the back of your work to ensure proper tension between the top thread and the bobbin elastic before proceeding to the next line of shirring.

Start shirring with these sewing machines!

Head over to our collection of the best sewing machines and pick up a new piece of equipment. All these machines are ideal for sewing shirring.

Step 3

Constructing your shirring dress

How to sew a shirring dress STEP 2

Cut a rectangle where the width is equivalent to the waist plus the desired seam allowance and the length is equivalent to the length plus hemming allowance top and bottom.

If you are using two rectangles, join them along one side at this stage to create one large rectangle.

Step 4

How to sew a shirring dress STEP 3

Turn and hem the top edge of your rectangle.

The depth of this top hem will determine the size of the paper bag effect around the top of the dress.

Make it deeper for a more dramatic detail or narrower for something more subtle.

Step 5

How to sew a shirring dress STEP 4

Place your first line of shirring 2–3mm under the top hem, running the full width of your rectangle and remembering to backstitch at the start and finish.

Step 6

How to sew a shirring dress STEP 5

Add subsequent rows of shirring at equally spaced intervals. Here we’re using the gingham check itself as a handy guide.

Be sure to gently stretch/smooth the fabric out flat in front of the presser foot just before it passes under the needle, and backstitch at the start and end of each row.

Step 7

How to sew a shirring dress STEP 7

Continue adding rows of shirring until the shirred section is long enough to cover your bust and however far past that you would like to go.

As a guide, our shirred section is just over 7in long.

Step 8

How to sew a shirring dressSTEP 8

When you’re happy, pin and then sew the long edge wrong sides (WS) together, catching all thread/elastic ends in the seam.

Step 9

How to sew a shirring dress STEP 9

Trim the seam allowance to 3mm from the stitching line.

Step 10

How to sew a shirring dress STEP 10

Turn WS out and sew a French seam, enclosing all raw edges approximately 5 mm from the fold.

Step 11

How to sew a shirring dressSTEP 11

You will now have a tube that looks something like the photo. Try it on to check hem length.

Step 12

How to sew a shirring dress STEP 12

Turn, press and then sew the bottom.

How to sew a shirring dress

Your shirred dress is complete!

Create statement dresses with shirring

Shirring is a fantastic sewing technique that is both practical and decorative.

Once you’ve mastered it, you’ll be able to add it to a huge range of garments including our collection of free sewing patterns.

Remember, practice makes perfect! Start with our shirred dress pattern and it won’t be long till you’re sewing shirred clothing every weekend.

Add more sewing techniques to your repertoire

Now you’ve mastered shirring, why not tackle ruffles?

Head over to our how to sew ruffles tutorial and add some flair to your garments.