Block printing is a fun and creative form of printmaking and can be used to produce beautiful patterns on paper or fabric. Traditionally block prints were made using wooden blocks, but these days the term is often used interchangeably to refer to lino printing as well.
Block printing often features repeating patterns and can be used to create your own unique fabrics or art prints for your home. You can even use it to print onto clothing!
In this guide, we'll explain the basics of block printing and where to buy all the materials that you'll need to create your own stunning designs, including buying the inks and carving your own designs into a lino block.
Interested in learning more about other kinds of printing? Take a look at our lino printing for beginners guide and our beginners guide to silk screen printing.
Block printing for beginners guide
What is block printing?
Block printing is an ancient form of printmaking which has been used for over two thousand years. It has its roots in East Asia and evidence has been found of block printing in China dating back to the 2nd century BC! While block printing has a long and varied history, it's still popular with contemporary artists who use it to create beautiful printed textiles.
Today a lot of block printed fabric is made in India, where traditional techniques are still used to create elaborately printed textiles. It's a time-consuming process, but one that produces incredible results.
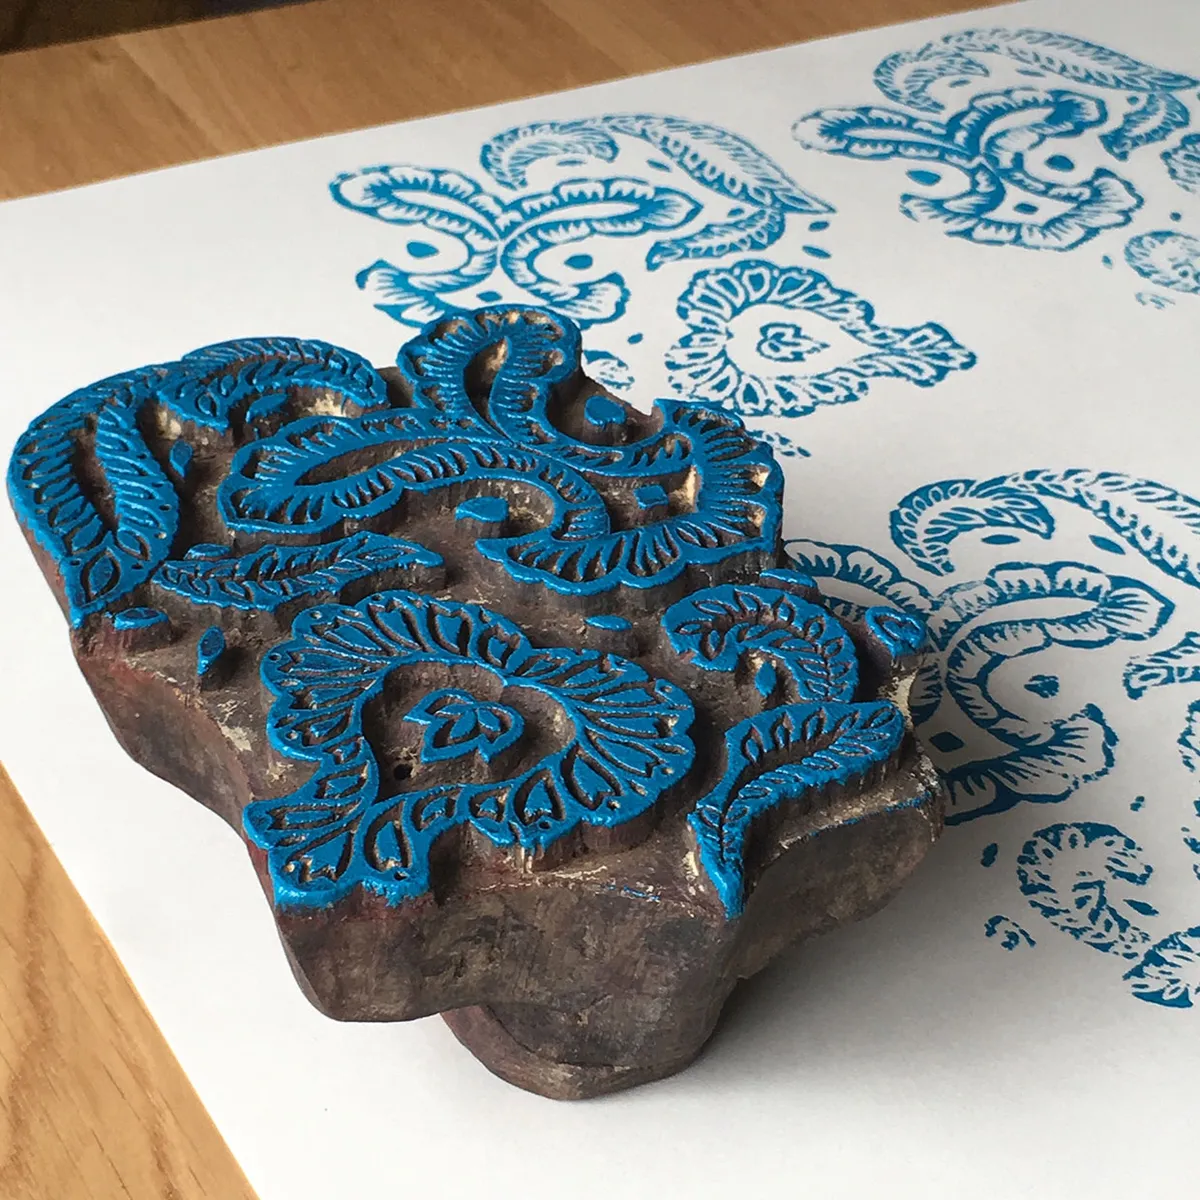
Block prints are often made using carved wooden blocks. While you can carve these yourself, this is often very fiddly work if you're not used to carving wood. The good news is that you can buy ready made wooden blocks to use. These can be found in craft shops or online craft stores, but you occasionally find vintage wooden blocks at markets or in antique shops, so it's worth looking out for them. Here is a traditional wooden printing block that I found at a market:
If you're interested in learning more about the origins of wood block printing, we'd recommend looking at this wood block printing guide from our sister website Homes & Antiques.
Alternatively, you can make your own blocks using linoleum block printing techniques.
So what is linoleum block printing? It's essentially lino printing (lino printing is often referred to as block printing). You use some carving tools known as gouges to carve a design into a sheet of special lino that's used for printmaking. Then you ink up your design and press it onto fabric or paper to reveal the pattern.
In this guide, we'll mostly focus on block printing using lino, as it's a more accessible form of block printing for beginners. It gives you the freedom to come up with your own designs and put them into practice.
Before we show you how to block print, we'll begin by looking at the supplies you need to get started.
Where to buy block printing supplies
Looking for where to buy block printing supplies? Basic printing kits are widely available in craft shops or to order through online stores such as Amazon, Cass Art, SAA and Hobbycraft in the UK. In the US, Amazon, Dickblick and Joann are all good places to find block printing supplies.
As your printing improves, you will probably want to upgrade your supplies or experiment with other printing materials. If you're looking for professional block printing supplies in the UK, I'd recommend visiting Jackson's, Lawrence Art Supplies or Pegasus Art.
Before you begin, decide whether you're going to print your design onto paper or fabric. Some inks are better suited to printing onto fabric because they can be fixed permanently (heat set) onto the material using heat from an iron or by being left to cure for a week or so. You don't want to see your precious print disappear when you wash your fabric, so make sure you check before you buy! Read on to find out where to buy block printing ink and what tools you'll need.
If you're using lino printing techniques, take a look at our lino printing kit guide to learn more about tools, materials and inks.
If you don't want to carve your own design onto lino, you can buy ready-made wooden blocks for printing. You'll need to apply the ink using a sponge and place a layer of foam under the paper or fabric before you print for best results. These beautiful printed blocks often use traditional Indian patterns and motifs. Here are a few wooden printing blocks to buy:
- Fairtrade Cat Indian wooden printing block (Etsy, £3.50)
- Fairtrade Fox Indian wooden printing block (Etsy, £5.49)
- Strawberry Indian wooden printing block (Etsy, £13.58)
- Leaf Patterned wooden block stamp (Etsy, £20.83)
Here are some block printing inks you could buy for printing onto fabric:
- Caligo Safe Wash Inks (Cass Art, from £6.95) – Cranfield's range of Caligo Safe Wash Inks are my go-to brand. They have a fantastic selection of colours available and you'll always see excellent results. These inks can be used on paper or fabric. They're not specifically designed for printing onto fabric, but lots of artists still use them for block printing onto fabric. After printing, the inks will need to be heat set.
- Speedball Fabric Block Printing Ink (Amazon, £11.73) – this ink is specifically designed for printing onto fabric, but can be used on paper as well. There's a great selection of colours available too.
- Permaset Aqua Fabric Printing Ink (Amazon, £15.52) – the Permaset block printing ink range is a little more expensive, but produces excellent results when used on fabric. Unlike the Speedball ink, you will need to set the ink using heat.
Here are some block printing inks for printing onto paper:
- Schmincke Aqua Linoldruck (Cass Art, from £6.50) – I'm a big fan of Schmincke's ink range! It's a brilliant block printing ink that comes in a wide range of vibrant shades.
- Essdee Premium Quality Printing ink set (Amazon, £16.10) – a good choice for absolute beginners. This ink is water-based, so it will rinse out easily if you spill it on anything. Not suitable for printing onto fabric.
To make your printing blocks, you'll also need to buy some lino to carve your design. Here are some of our top picks:
- Essdee Lino Printing Block 150x100mm set of two (Amazon, £2.75) – start small and use these lino blocks to practice carving your designs.
- Essdee Mounted Lino Block set of two (Amazon, £7.13) – if you're planning to do a lot of printing onto fabric or want to reuse your design over a long period of time, then buying a mounted block is a really good idea. It gives the lino some extra support and prevents it from warping or bending.
- Essdee Lino Printing Block 400x300mm set of two (Amazon, £12.74) – this set is a good choice if you want to make larger prints. The grey lino is soft and easy to carve, so this is a popular choice for many artists.
- Zieler Lino Printing Block 150x100mm set of ten (Amazon, £13.95) – this is a soft lino type that's very easy to carve. It's double-sided, so you can use both sides of the block for printing, provided you don't carve too deeply.
In order to carve your lino, you'll need to buy a set of tools known as gouges. These tools are often available in art shops, but the cheaper types can be blunt and frustrating to use. Here are a few of my recommended lino gouges:
- Wood Cut Knife set of five (Jackson's, £5.40) – these tools are not designed for lino printing, but include similar tools. These are an affordable option and you'll find that they work better than many gouges you find in craft shops.
- Abig Wooden Handle Gouge (Amazon, £11.99) – this is a good starter set for beginners to use.
- Pfeil Lino Gouge L11/1 (Amazon, £25.39) – once you've been printing for a while and want to carve fine details, it's worth investing in a Pfeil tool. They're extremely high quality and will last for years if you look after them. They also have a wooden handle that fits very comfortably in the palm of your hand.
You'll also need a brayer (roller) to apply the ink to your block. Here are a few brayers you can buy:
- Artway 5.5cm brayer (Amazon, £5.95) – a handy brayer for small blocks.
- Rubber brayer set (Amazon, £9.98) – contains three different sizes so you can choose the one that works for you!
To roll out your ink, you'll need to buy a tray (alternatively, a glass cutting mat works well):
There are lots of different kinds of paper you can use for printing. You can use mixed media paper when you're learning to print and experiment with other types of paper once you've built up your confidence. A lot of block print artists like to use Japanese papers such as hosho or masa paper. I also like khadi paper, which ideal for textured, rustic prints.
- Buy the Cass Art mixed media spiral pad (A4) from (Cass Art, £10.95)
- Buy the khadi paper block book 21 x 25cm (40 pages) from (Pegasus Art, £17.10)
- Buy the hosho pad (48 sheets) from (Amazon, £20.01)
- Buy Awagami Washi masa paper 53 x 78cm (per sheet – there's a minimum order of 5 sheets) (Jackson's, £1.20)
If you want to print onto fabric, it's a good idea to practice on a smooth material such as cotton. If you print onto rougher fabrics, your designs may not print clearly. I would suggest practising on white cotton – if you like the results, you can always turn it into a cushion cover!
Other useful accessories to have:
- Essdee bench hook (Cass Art, £7.95) – to stop your lino moving around as you carve it
- A baren – used to smooth down the back of a piece of paper to reveal the print
- Pencils
- An eraser
- Kitchen towel
- Wet wipes – to keep your hands clean
- An apron – to protect your clothes
5 block printing kits to buy
If you don't want to buy all of the materials separately, you may find that a kit contains most of the supplies you need to get started. Here are five of our favourite kits to try:
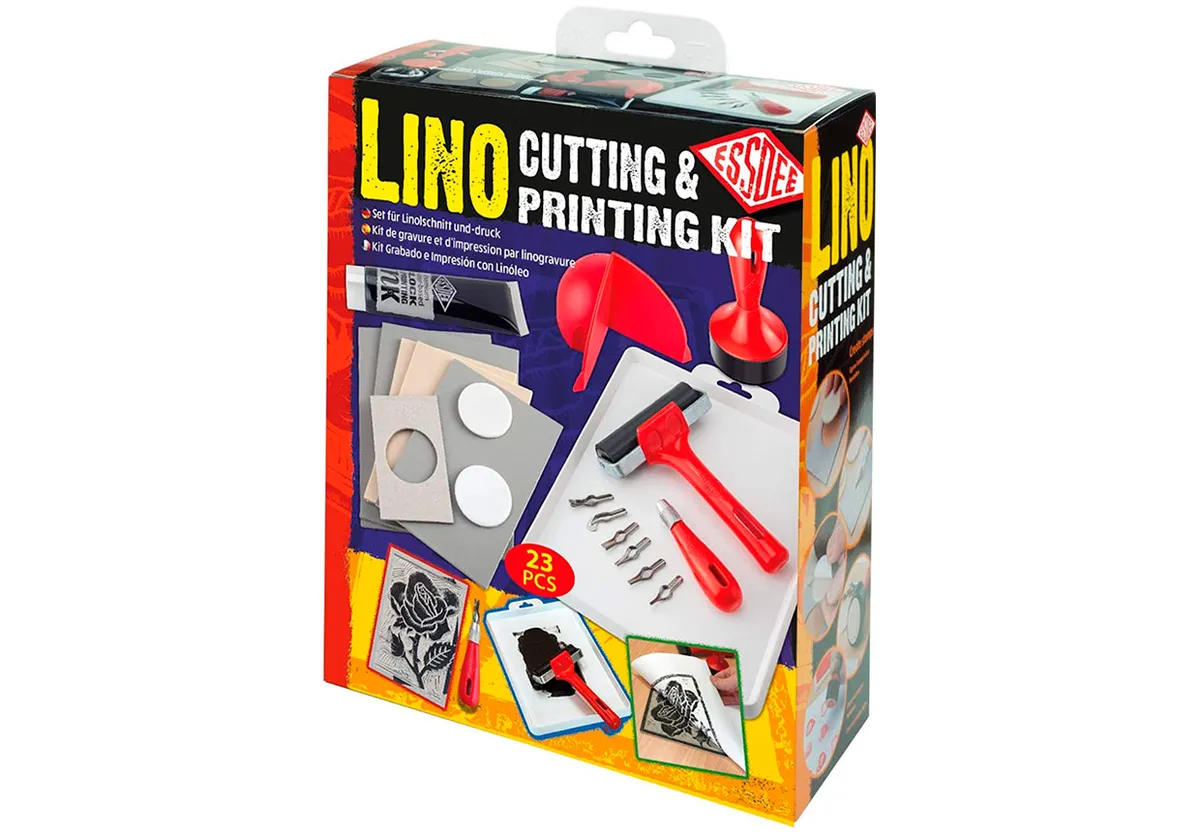
1. Essdee lino printing kit
The Essdee lino printing kit is widely available in craft stores and online. It's very popular with beginners and contains everything you need to get started. This is a good choice if you want to give lino printing a try, but don't want to commit to buying lots of expensive materials.
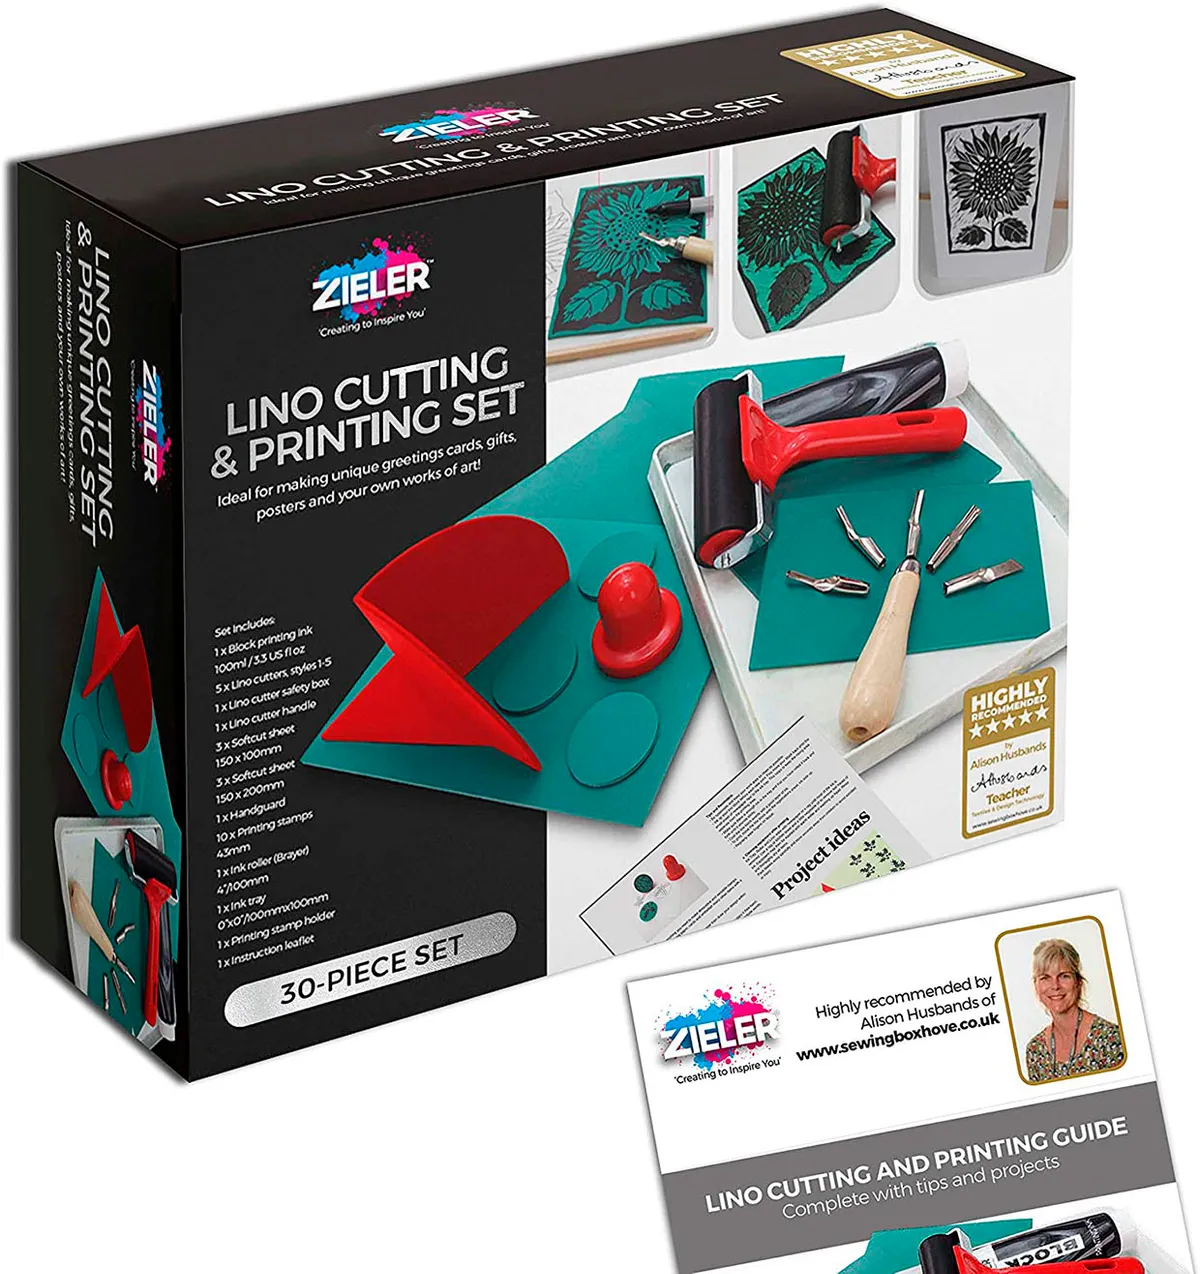
2. Zieler lino printing kit
The Zieler block printing kit includes lino, printing tools, 10 printing stamps, an instructional booklet with lots of printing tips and everything else you could possibly need. The carving tool in this set has a smooth wooden handle, making it comfortable to carve with.
3. Love to Print lino printing kit
This block printing kit is ideal for complete beginners or people who have a little previous printing experience. This set contains a roller, lino cutters, ink, lino, printing paper and water-based ink. It also comes with a helpful instruction sheet explaining basic printmaking techniques for you to try. It's well-presented and would make a wonderful gift.

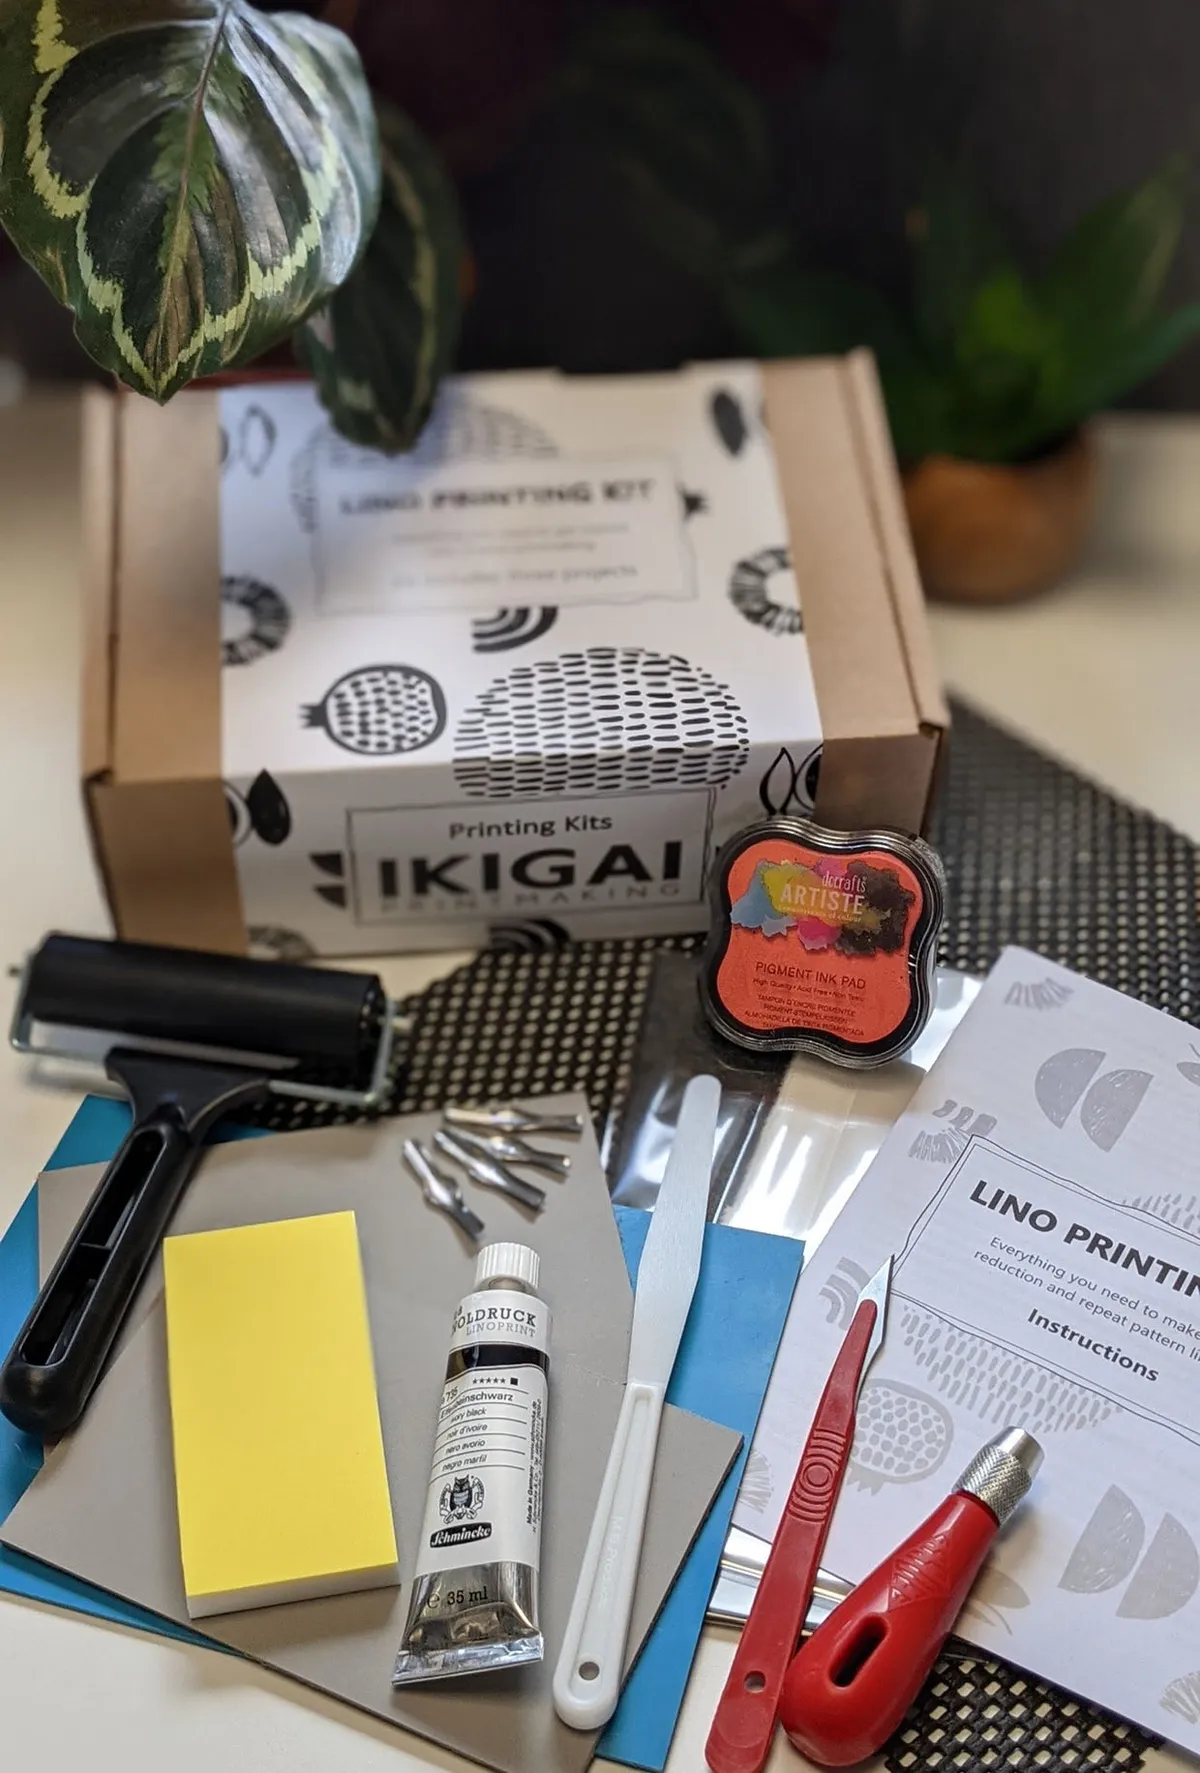
4. Ikigai lino printing kit
This block printing kit has been put together in a thoughtful way and includes everything you could need to start creating your own prints. This kit comes with wood carving tools (sharper than basic carving tools), lino, ink, a palette knife, Schmincke ink, an ink pad for stamping, a non-stick mat and a baren (used for pressing on the back of your paper to reveal a print). There are even some samples of Japanese paper for you to try out, allowing you to find the one that suits your block printing style.
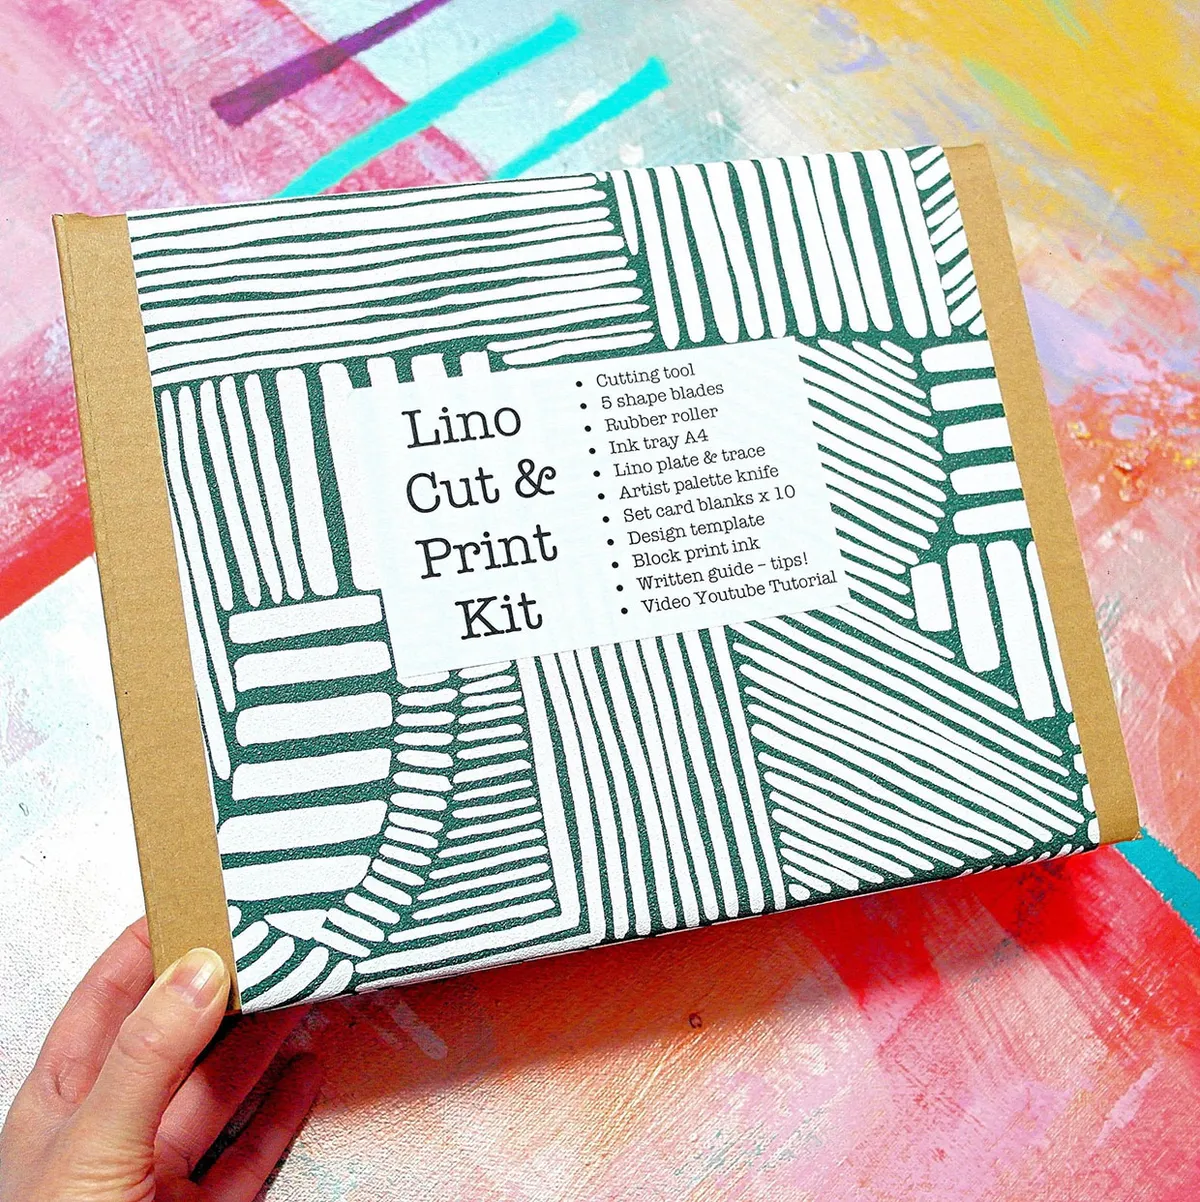
5. Premium linocut printing kit
This handy kit includes lots of materials and tools to help you produce fantastic block prints. The set comes with 18 items including an artist's palette knife, lino, brayers, a printing tray, card blanks, templates to try and a selection of inks. Plus there's a written booklet and YouTube video tutorials to help you get the most out of your block printing kit.
As an added bonus, you can pick an ink colour selection that you like and upgrade for extra materials.
How to do block printing
In this section, I'm going to show you some basic printing techniques that you can use to produce your own block prints. If you're interested in printing onto fabric, check out how to block print on fabric tutorial which shows how you can print your own cushion cover.
Before we begin, I'll explain how to use block printing tools (sometimes called gouges) to carve your design. If you look at the tools within your set, you'll notice that some of them are different shapes. Hold them up with the tips pointing towards you and you'll notice that some of them have U-shaped tips, while others are V-shaped. Others look more like knives.
V-shaped tools are usually used for carving fine, straight lines, which U-shaped tools are better for carving curves and circles. To carve using the tools, hold them in your hand at a low angle can press them into the lino to carve it away. If you lift your hand too high, the tool may dig too deeply into the lino – it takes a little practice to learn this technique. You may find it easier to carve the lino if you guide the end of the tool using the finger of your opposite hand.
Important note: always carve away from your body and make sure the hand not holding the tool is out of the way. The tools are very sharp, so they'll cut you if they slip. It can help to put some non-slip matting underneath the lino (available from kitchenware shops) to stop it moving around. If the lino is difficult to carve, you can warm it up using a hairdryer or put it on the radiator for a little while to soften it up.
The knife tool can be used to cut clean lines: cut slightly to the right of your line at a 45º angle, then cut along the line with the knife upright. You should be able to remove a flake of lino leaving a neat line behind. Practice on a spare piece of lino to see what kind of shapes and textures you can make on your block!
Remember that any design you carve into lino will be reversed when you print it, so if you include any words or letters they will appear backwards. It's a good idea to sketch your design first, then trace it onto your printing block.
Struggling to see the lines? Rub the surface of the lino with some coloured acrylic paint before you start carving so that you can see your marks clearly. It can also help if you go over the pencil lines with a Sharpie or fineliner so that they stand out.


