You’ll find basic lino cutting kits for beginners in most art or craft shops, but if you’re new to printmaking it can be difficult to know where to begin. But don’t worry, we’re here to help!
In this guide, we’ll take you through some simple techniques to kick start your new craft obsession.
Follow the links below to jump to a section of the guide:
- Lino cutting: step by step
- Lino cutting techniques
- How to use your lino cutting tools
- Lino cutting kits and tools: what do you need to start lino cutting?
What is lino cutting?
Linoleum was first used as a floor covering in the 1860s, but it wasn’t until the early 20th century that lino cutting developed as a new printing technique. Many famous artists experimented with lino cutting techniques including MC Escher, Matisse and Picasso.
It's seen a bit of a resurgence in recent years and if you look on Instagram or Pinterest, you'll quickly discover thousands of beautiful prints and designs – all created using lino printing techniques.
To make a lino print, you need to carve away the soft, rubbery surface of a sheet of lino using a cutting tool (sometimes called a gouge) to create your design.
The printing block is then covered with a special ink using a roller (or brayer) and pressed onto paper or fabric, either by hand or using a printing press.
Benefits of lino printing
One of the benefits of linocutting is that once you’ve carved your design you can use it create as many prints as you want, although many professional artists destroy their printing blocks after creating a limited edition print run.
What do you need for lino printing?
Lino printing does require some specialist equipment to get started, but most craft shops will stock lino printing kits and tools. You'll soon be creating your own beautiful prints at home! You can try printing with older children under adult supervision, but it's not recommended for younger children due to the sharp nature of the tools.
Other ways to do printmaking
Printmaking is wide subject area and there are lots of different ways to create beautiful prints. Screenprinting is also a lot of fun – check out our guide to the best screen printing supplies to find everything you'll need and take a look at our screen printing for beginners guide. We even have a few screenprinting projects to help you get started, including a DIY cushion screen printing tutorial and a DIY screen printing tea towels project.
Want to try your hand at block printing? Take a look at our block printing for beginners guide for more tips and advice.
Read on to learn how to create your own linocut prints step by step…
Lino cutting: step by step
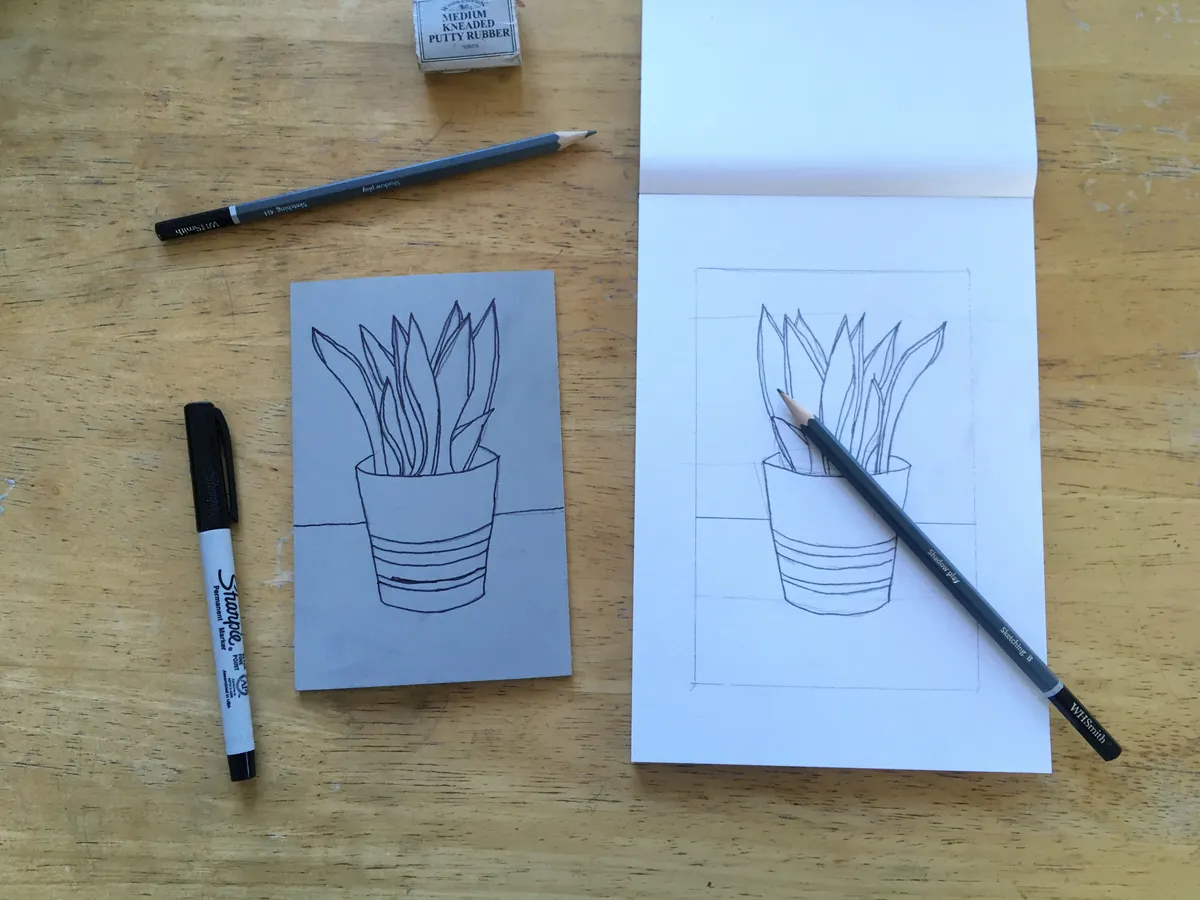
Create your design
It’s always a good idea to sketch out your design before you get started – unless you are going for a more abstract style. Once you’ve carved your design, it will be very difficult to make any changes.

Transfer your design onto your lino
Using some tracing paper or greaseproof paper, trace your design and transfer it onto your lino. Your design should be back-to-front on the lino, as it will appear reversed when you print it. This is very important to remember if you’re including writing as part of your print!
You may find it useful to go over your traced design with a black permanent marker, such as a Sharpie. This will make your design easier to see and the marker ink won’t transfer onto your paper.
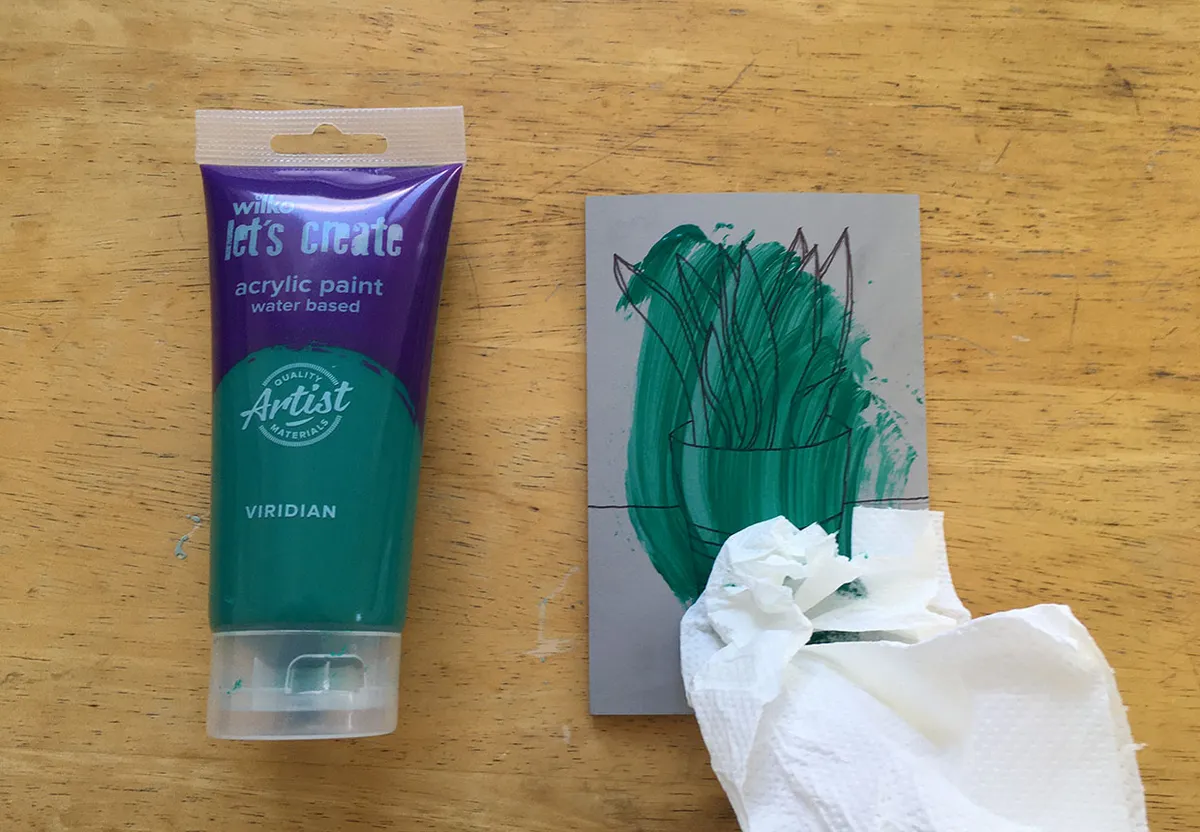
Prepare your lino
Get some acrylic paint and rub a little blob onto your lino using some kitchen paper or a sponge. This will help you to see your cut marks more clearly.
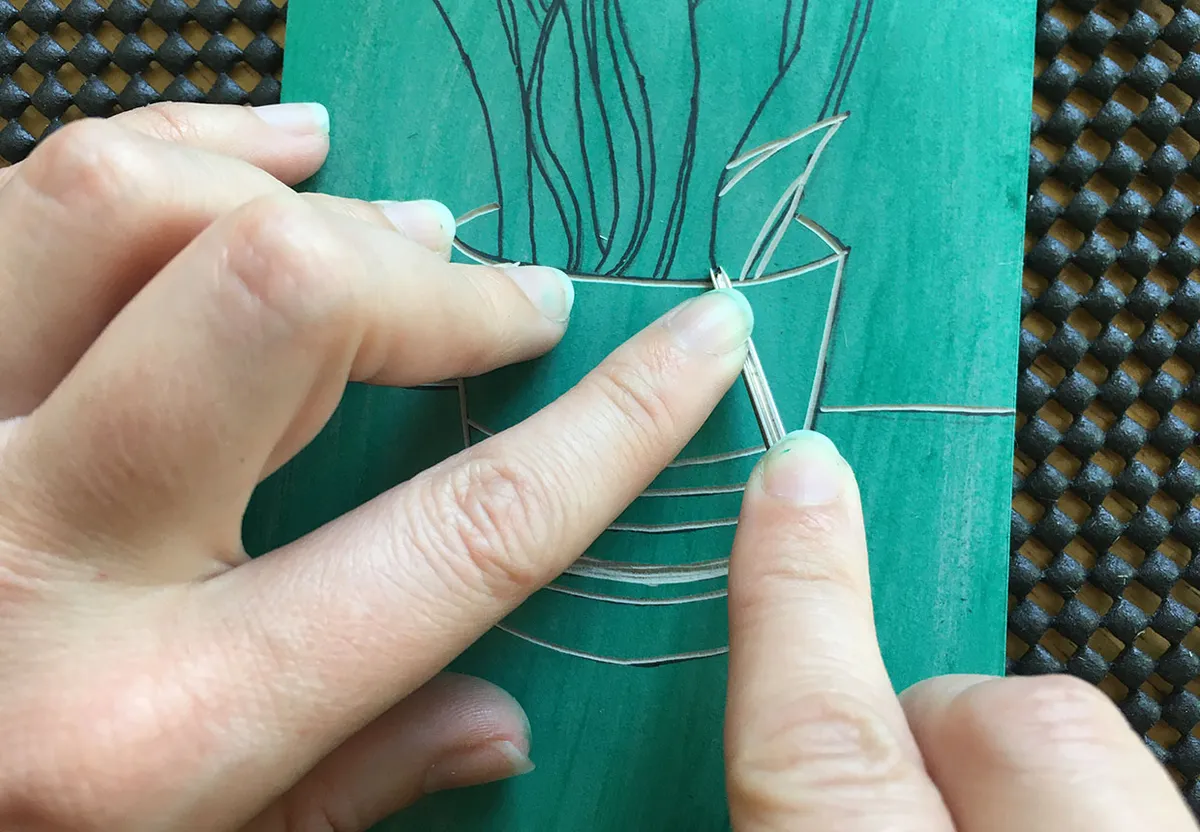
Carve your design
Take your carving tool and begin to cut away at the lino. We’ll explore different techniques and how to use the tools later in this guide.
Always cut away from you and make sure that you don’t put your fingers in front of the cutting tools – they can be very sharp and it’s easy to slip and cut your fingers. Keep some plasters nearby in case you need them. You may find it harder to carve your lino in cold weather. If you find that the lino is tough and difficult to cut, it can be useful to warm it up using a hairdryer or a convenient radiator.
If you find that your lino slips when you try to make a cut, then it’s a good idea to use a bench hook or a tray to stop it moving around. Another great way to keep your lino still is to put some non-stick matting underneath it – it’s cheap and you can find it in most kitchenware shops.
If you'd like to see how your print is coming along without inking the block, take a pencil rubbing using some thin paper or tracing paper. It's a quick way to see how your print is going to turn out as you carve. Once you’ve finished carving, rub your lino with a toothbrush to remove any excess rubber flakes.
Roll out your ink
Choose your ink colour and squeeze a little onto a printing tray (a glass cutting mat from a kitchen shop also works well for this). Take your brayer (or roller) and begin to roll your ink across the tray.
Try not to use too much ink to begin with – if there’s a sticky sound when you roll out the ink then you’ve probably used too much. Try to roll it out onto a larger area for more even coverage.

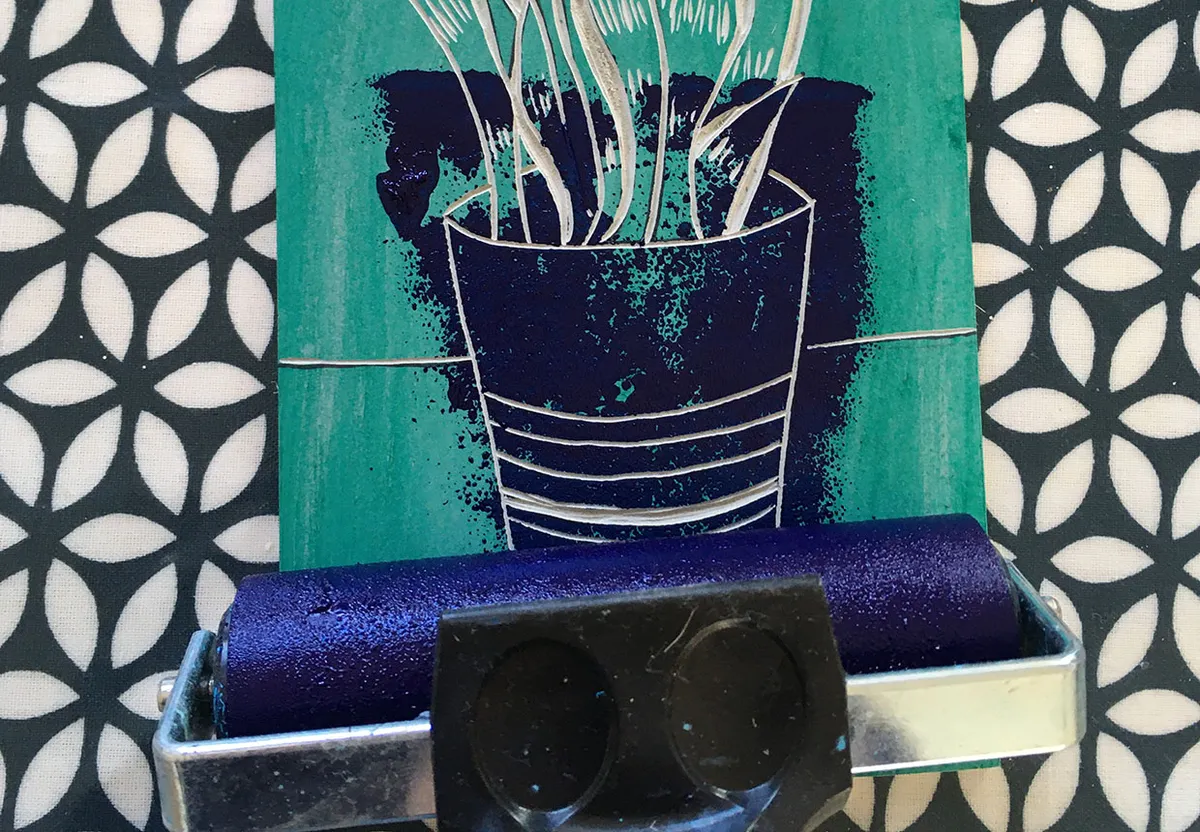
Roll the ink onto your lino
Take your brayer and move it repeatedly across your ink – in one direction only. Once your roller has a good covering of ink, roll it across your lino. Again, make sure you only roll in one direction, as this will help you to get an even print.
Make sure you don’t miss the edges. You might like to use a smaller brayer for more detailed areas.
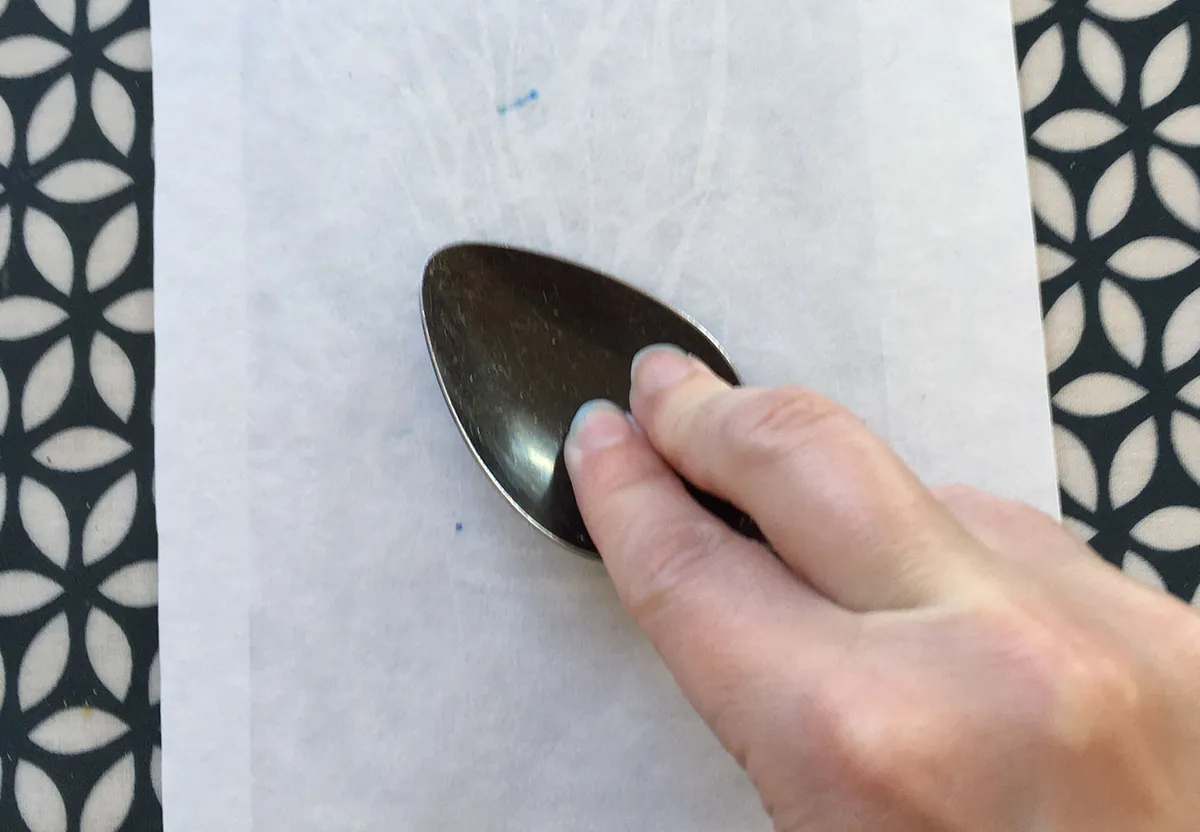
Print your design onto paper
Move your inked-up lino to a clean workspace and carefully place your printing paper over the top. Gently smooth it down with your hand.
You can use a tool called a baren to press the print onto your paper, but the back of a spoon works just as well. Take your baren or spoon and rub the back of the paper using a small circular motion. It’s a good idea to do this for a couple of minutes to get a clear print and to make sure any delicate areas are picked up. If you get really into printmaking then it’s worth investing in a printing press, but you can still achieve great results using hand-printing techniques.
If you’re using a thinner paper, you’ll see a faint outline of your print appearing through the back of the paper. Don’t rub too hard or your paper will tear.
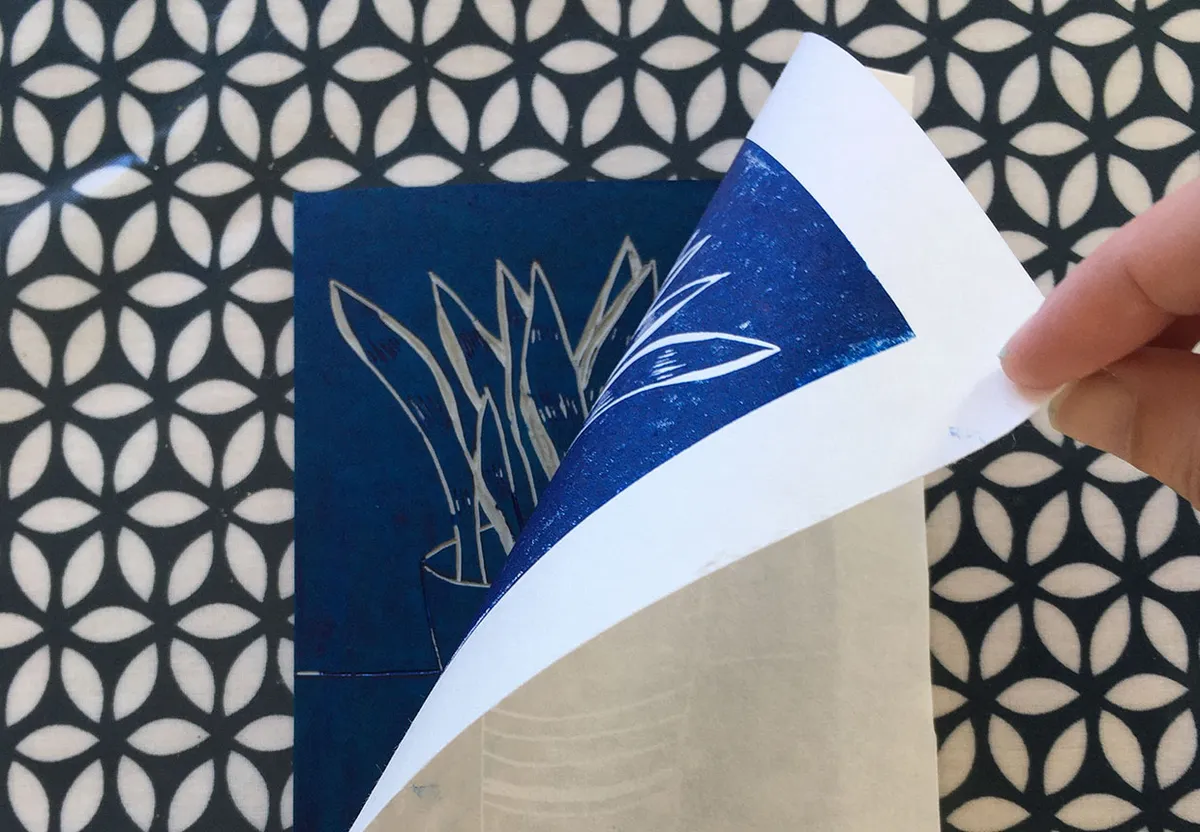
Reveal your print
Pick up the corner of the paper and carefully peel it back to reveal your linocut print. It’s usually a good idea to do a test print on rough paper first before you start using good quality paper.
The test print will reveal if there are any areas you need to carve in more detail or if there are any unwanted ridges picking up ink from your roller.
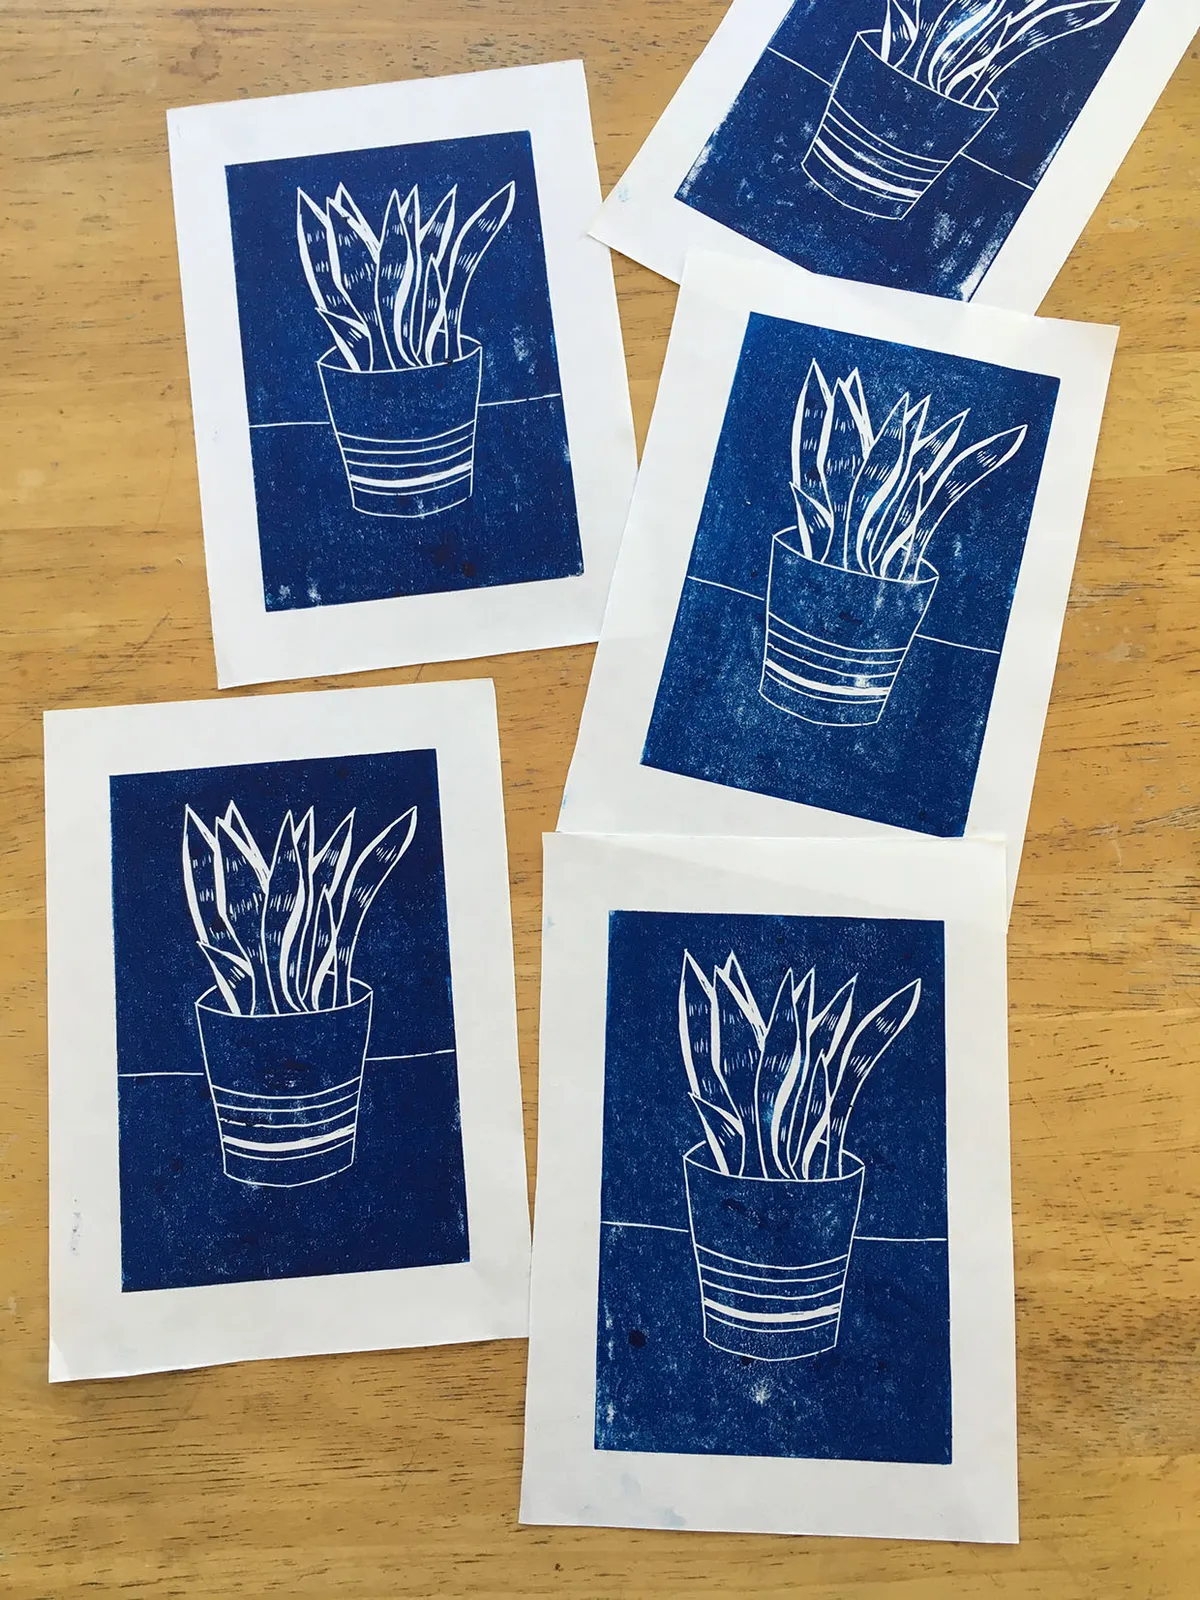
Set aside your print and leave it to dry. Water-based inks will dry very quickly, but oil-based inks may take up to a week to completely dry.
Leave your prints to dry
Find a safe place to leave your prints to dry. You can hang them up to dry pegged to a line, on a table, pinned to a noticeboard or on a drying rack.
Cleaning up
If you’re using water-based inks, you’ll be able to remove the ink from your equipment using a little warm water and washing up liquid. To remove oil-based inks, you can apply a little vegetable oil and rub your equipment with paper to lift off the ink. You can them wipe them down using vinegar to reduce any oiliness. Rinse with water and dry them thoroughly.
Fancy having a go at printing onto fabric? Try making our phases of the moon wallhanging project.
Lino cutting techniques
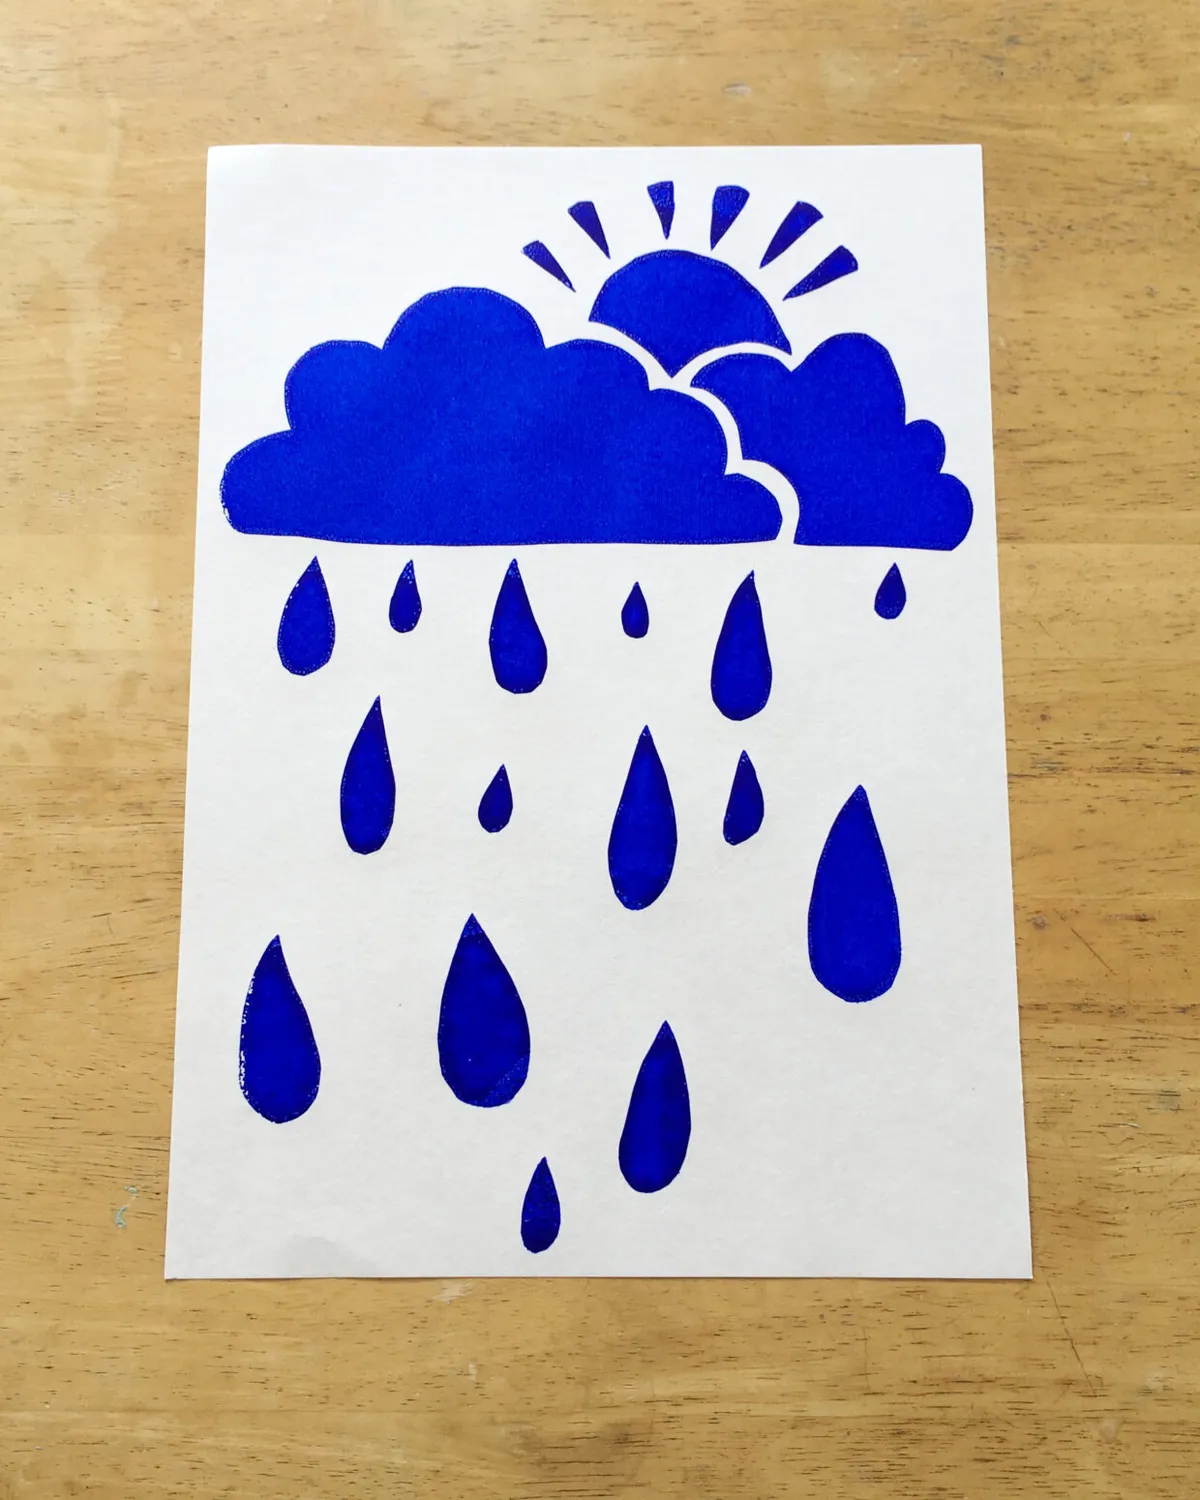
Reduction printing
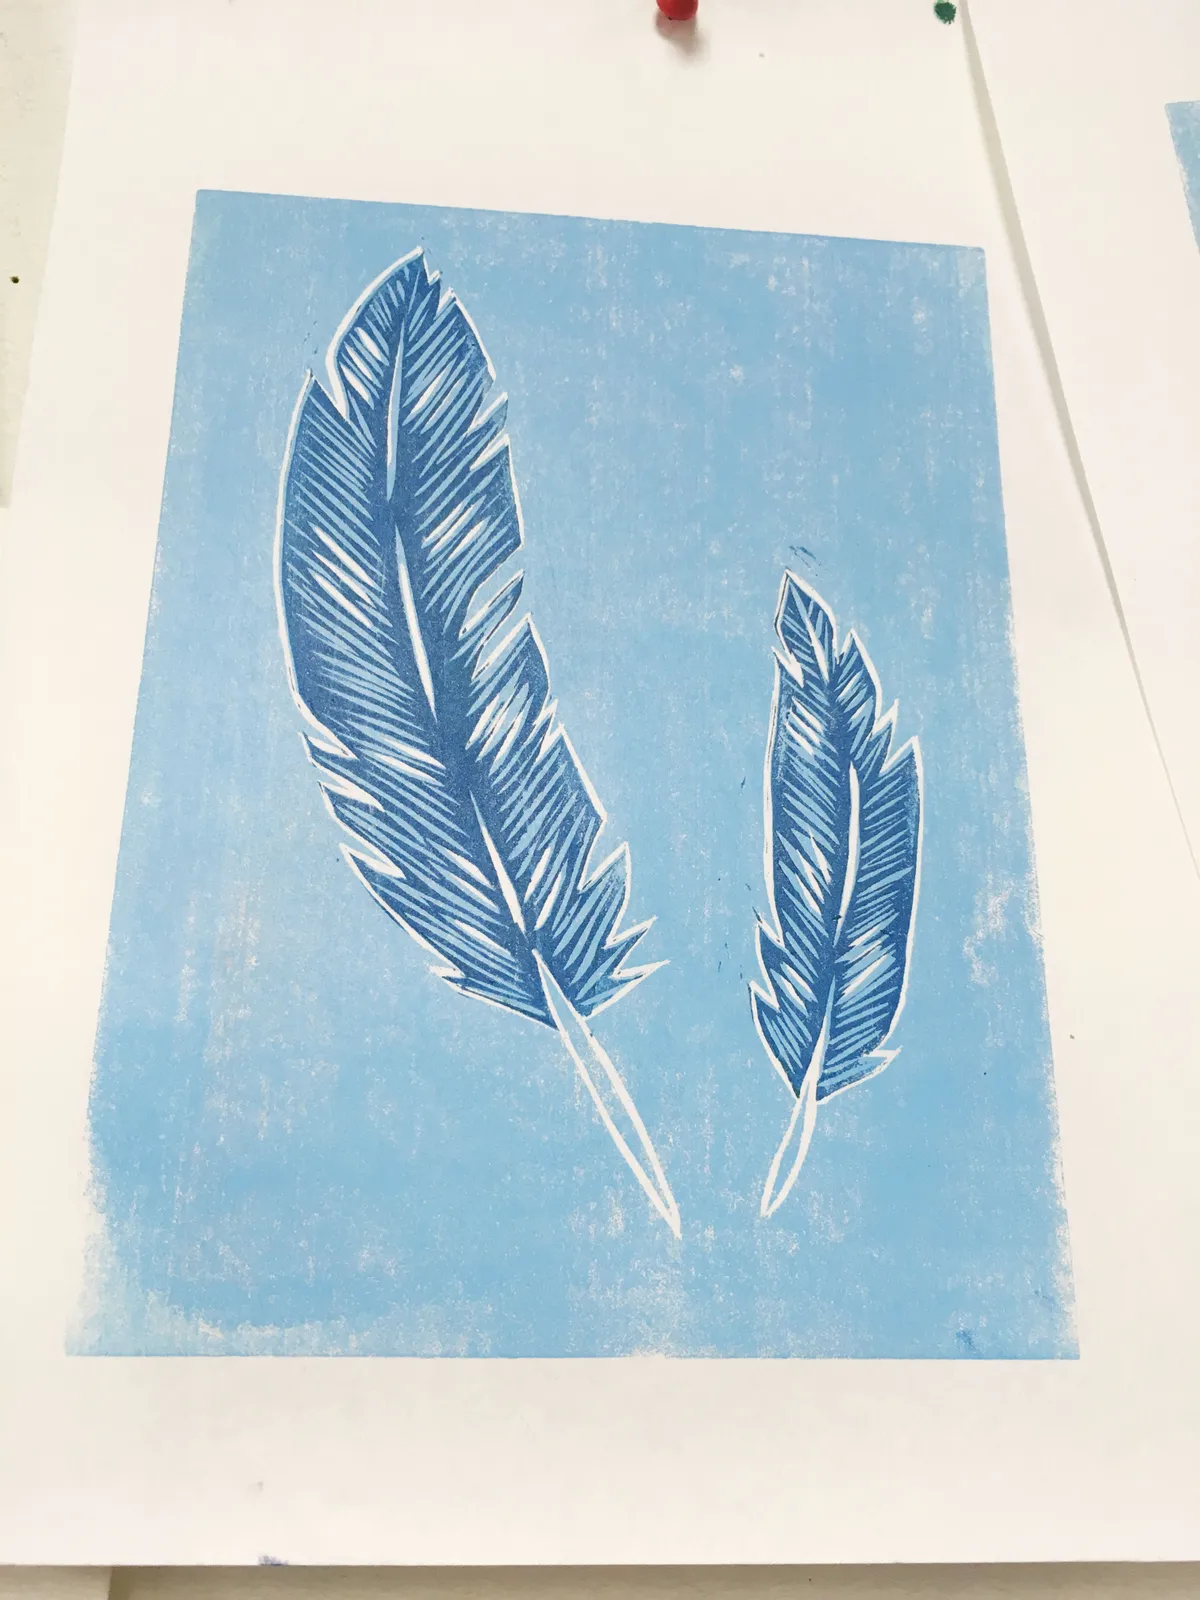
Reduction printing (shown below) is a great way to produce layered, multicoloured prints. To create a reduction print, you only use one sheet of lino and cut away sections each time you print a new layer.
It’s best to start with lighter shades and print darker colours over the top. Don’t be too ambitious to start with – you can achieve stunning results by creating a linocut reduction print in just two or three colours.
To master this technique, you will need to make sure that your printing block and paper are lined up exactly every time you print a new layer. You can do this by creating a template (or register) to help you position them precisely each time.
Another way to line up your prints is by using the pin and tab registration printing technique. You attach some metal pins onto a board using strong parcel tape and stick some plastic tabs onto your paper. By clipping your plastic tabs onto the metal pins, you can ensure that the paper is in the right place every single time. Then you just need to worry about getting the lino in the right place!
If you’re making a reduction print, always start with a larger number of prints than you think you’ll need, because some of them will inevitably go wrong. You'll smudge them, the design won't quite line up or you'll get inky fingerprints on them (I always find that it's a good idea to have wipes or a damp cloth on hand to keep your fingers clean – or wear gloves).
If you’d like to have slightly translucent layers, you can mix a product called ink extender into your printing ink.
Block printing
Block printing is an accessible way to create colourful graphic prints and it’s a great technique for beginners to experiment with. You can really let your imagination go wild!
You can create block prints using offcuts from other prints or by cutting up a larger sheet of lino into separate parts. To make a block print, you would usually ink up the sections in different colours and print them all at once. Alternatively, you can mark a template on a piece of paper or board (this is called a registration board) and use it to line up all of the separate parts.
Once you’ve got everything where you want it, you simply need to smooth your paper over the top and burnish it with a baren (or a spoon, if that’s what you’re using). Set your print aside and leave it to dry.
Stamping
Use leftover scraps of lino to create your own stamps! These are handy when you want to cover a piece of fabric or paper with a recurring pattern or motif.
Stamps are particularly handy if you want to make your own unique Christmas wrapping paper. You can use them as you would normal wooden stamps and can switch printing inks for an ink pad. These stamps are great to give to young children too.
To make a stamp, you just need to carve your design onto the lino, then stick it on to a hard backing (such as wood or sturdy board). In some craft shops, you can buy lino that’s already attached to a wooden block – perfect for stamping! If you’re making tiny stamps, you can glue them on to old wine corks. This is particularly helpful if you’re making stamps for children because it’s easy for them to grip the stamp with their small hands.
How to use your lino cutting tools
Lino cutting tools or gouges come in a variety of shapes and sizes. If you buy a set of tools, you’ll probably end up using your V and U shaped tools the most. Pick up a tool and look at it from the sharp end to see the distinctive U or V shape.
To use a U or V tool, hold it in your fingers like a pen and press it into the lino at a low angle. If you lift your hand, the mark you’re making will usually become thicker and your cutting tool may cut too deeply. Push forward gently and you’ll see the lino begin to flake away.
Don’t rush – you’ll find it much easier if you take it slow. You may want to press a finger against the side of the tool to guide your carving. You can turn the tool to follow a curved line or slowly rotate the lino and carry on carving. Remember to keep the tool pointing away from your hands in case it slips.
V tools are handy to use when you want to make fine lines on your lino and they’re particularly good for carving straight lines. U tools (depending on their size) are good for carving thicker lines or removing large areas of lino.
Experiment with different ways of making marks with these two tools. You can cross-hatch, cut wavy lines or even create different textures on your lino. You can make a chipped effect with both the U or V tools by digging deep into the lino and an angle, then carefully lifting the tool upwards.
Use the U tool to make a circle by sticking it vertically into the lino and rotating it 360º. You may need to use the edge of the tool to lift out the loose circle of lino.
If you’re using a woodcutting set to carve your lino, it may also include a tool that resembles a knife. This can be used to create smooth straight lines with a little practice. Place the tool at a 45° angle just to the right of the line you want to cut, then follow the line around. Then place the tool vertically directly on the line you want to cut. This should slice away the lino leaving a neat line. This technique is a little harder, so you may find it easier to use the V tool instead.
Lino cutting kits and tools: what do you need to start lino cutting?
Here is our guide to the best lino cutting kits and tools for beginners. As you become more experienced, you may want to invest in a printing press, but we're focusing on the best equipment for beginners here.
5 lino cutting kits for beginners
If you're trying linocut printing for the first time and you're not sure if you want to spend a lot of money, a lino printing kit is a good place to start. Most starter kits will include a cutting tool with interchangeable cutters, a roller for the ink, a rolling tray, a few pieces of lino and a tube of water-based ink. These kits are really only suitable for absolute beginners. If you want to create more detailed prints then you'll need to invest in better tools. The lino cutting tools in start kits tend to be more blunt than the more expensive tools, meaning that you'll find it harder to carve your design into the lino.
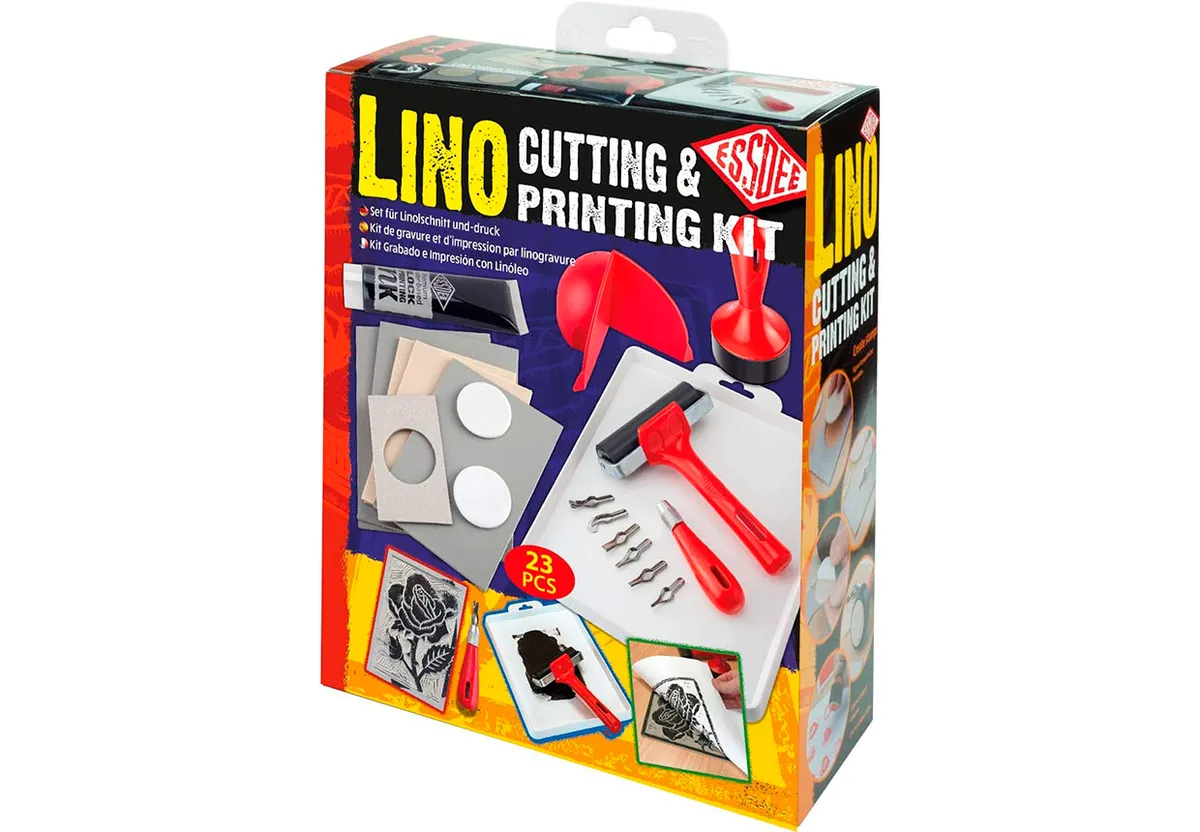
1. Essdee lino printing kit
The Essdee lino printing kit is one of the most popular sets available and you'll be able to pick one up in most craft stores. However, there are a few other sets out there which are great quality and will provide you with everything you need to try this fun craft.
2. Zieler lino printing kit
The Zieler lino printing kit comes with printing tools, ink, lino and everything else you could need. As an added bonus, it also includes 10 printing stamps and a booklet to guide you through the printing process. The cutting tool in this set has a durable wooden handle, which some people will find more comfortable to use than one with a plastic grip.

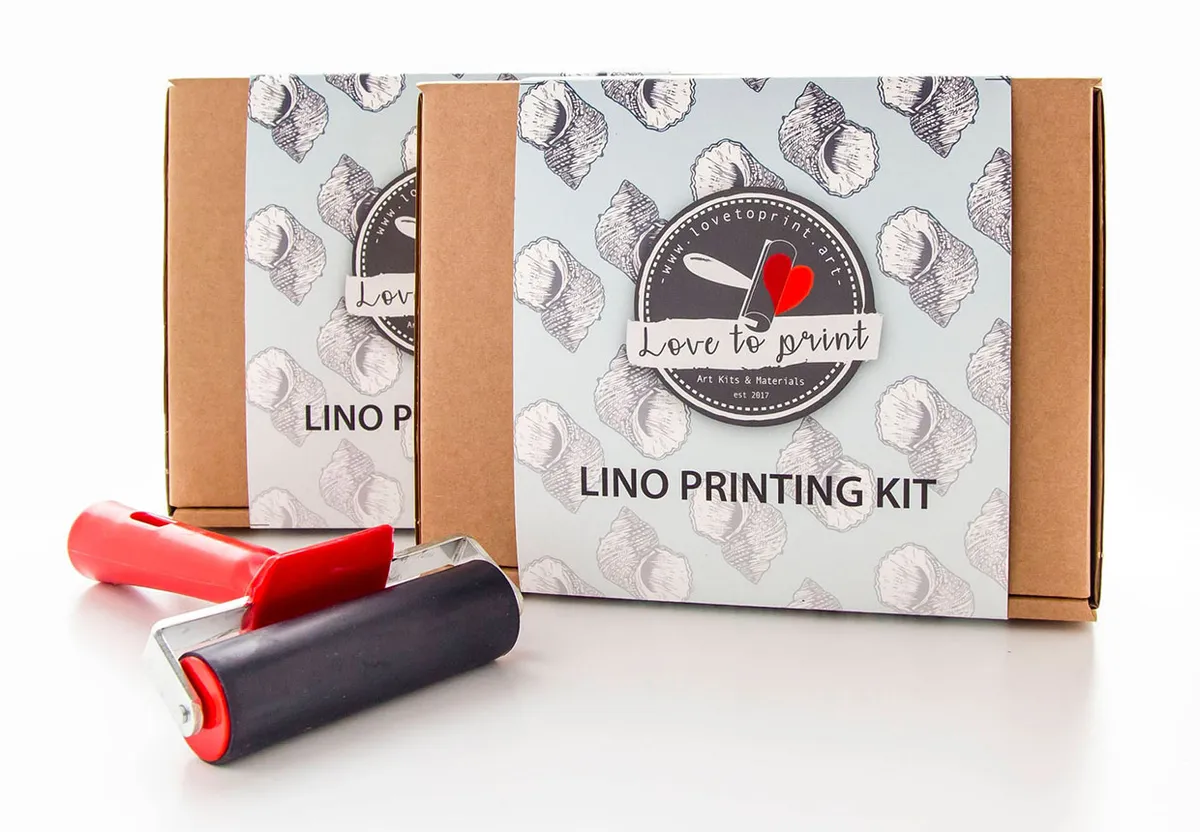
3. Love to Print lino printing kit
This beginner's lino printing kit comes with a roller, lino cutters, ink, lino, 20 sheets of printing paper and water-based printing ink. This is a good kit for complete novices or people who have a little bit of printing experience. This kit also comes with a detailed instruction sheet, which will guide you through the printmaking process and teach you how to print with confidence.
It's beautifully presented and would make a great gift for someone creative.
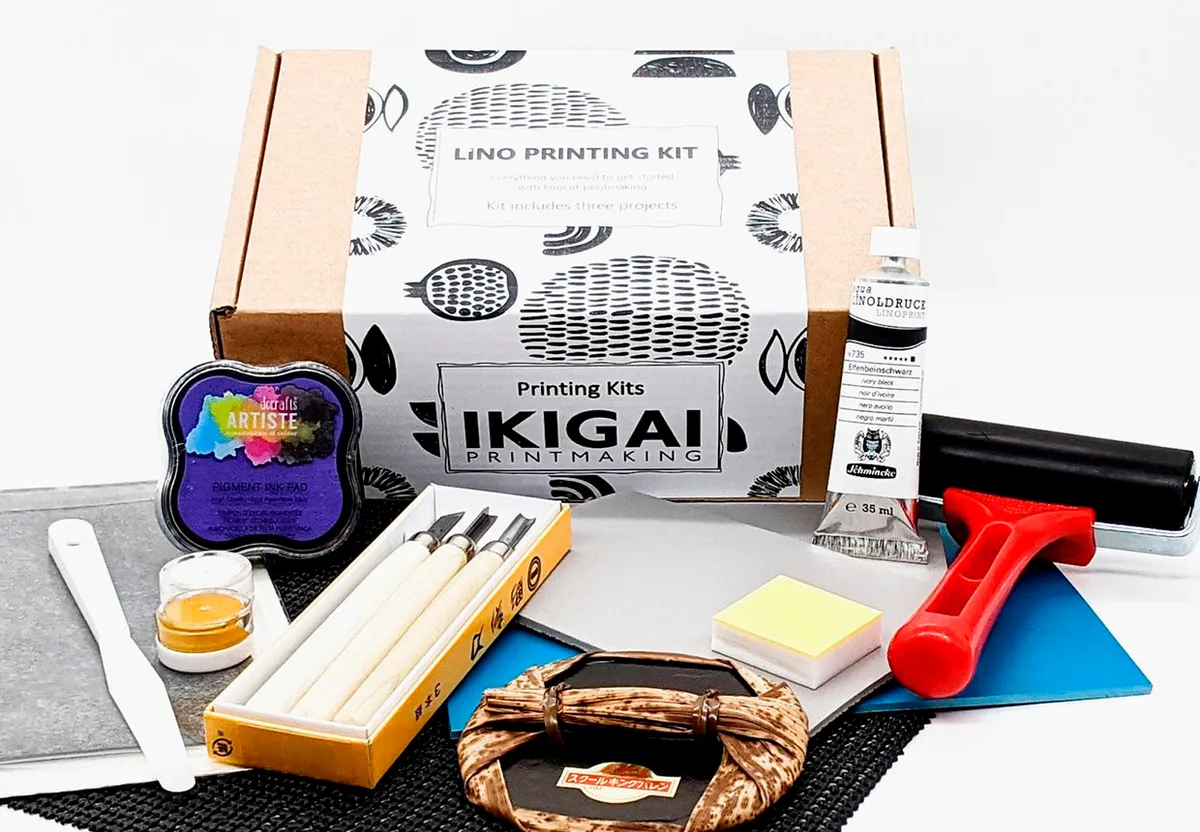
4. Ikigai lino printing kit
The Ikigai lino printing kit has been thoughtfully put together and contains everything you need to start making beautiful prints. It includes wood carving tools, which tend to be sharper than the tools normally included in kits for beginners. As well as cutting tools, lino and ink, this set also contains other useful materials such as a palette knife, high-quality Schmincke ink, an ink pad for stamping, a non-stick mat and a baren (used for pressing down the back of the paper when you're printing by hand). This set also includes some samples of Japanese paper for you to try, so you can discover which suits your printmaking style.
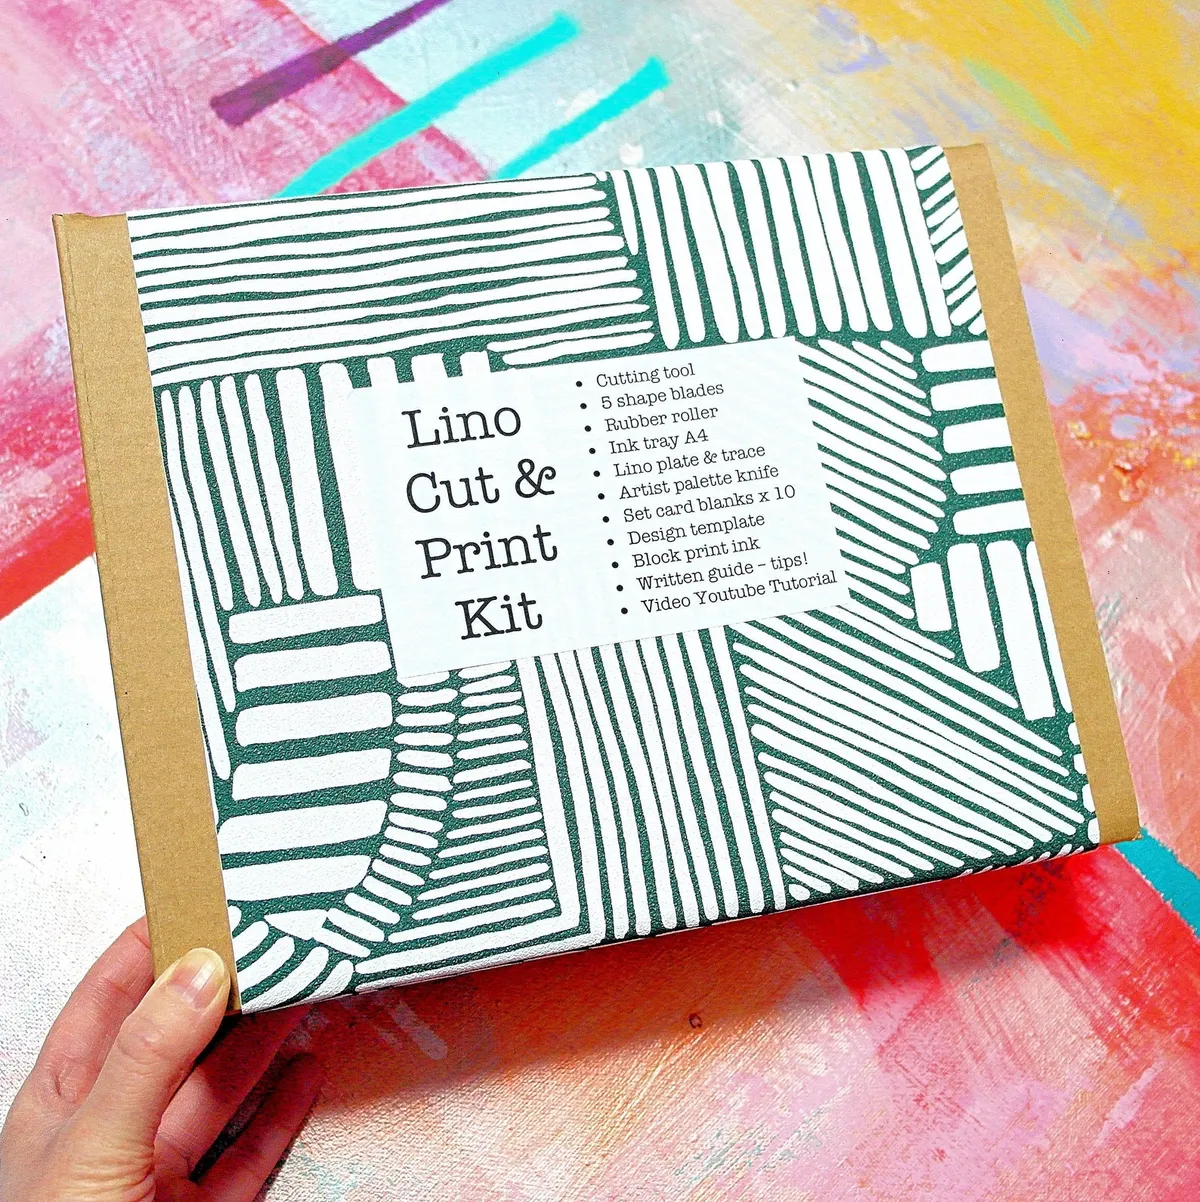
5. Premium linocut printing kit
This handy kit produced by CreativeCleverHands on Etsy includes the tools and materials you need to create beautiful linocut prints. The kit contains 18 items, including lino, rollers, an artist's palette knife, an ink tray, card blanks, design templates to try, a written booklet and selection of inks. There are also Youtube tutorial videos to guide you through your first prints.
You can even pick your ink colour selection to choose the ones that suit you! You can also upgrade to add extra ink colours, a bamboo baren or some lokta paper. This kit is great value for money and really does contain everything you could need.
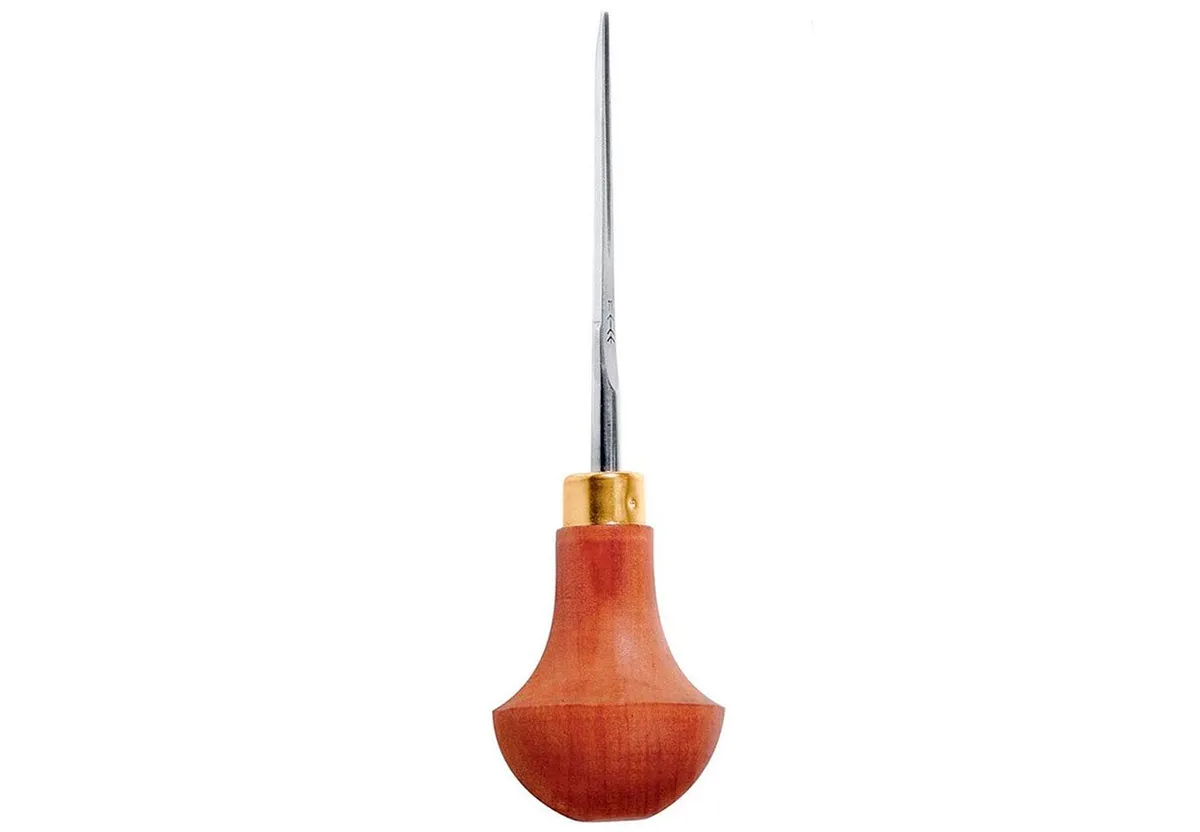
Lino cutting tools
There are a variety of lino cutting tools on the market to suit all budgets, starting from around £5. You can easily find a budget set of gouges or wood carving tools for under £10, which are ideal for beginners. The Abig lino cutting tools set is great value for a beginner to buy, with a wooden grip and interchangeable blades.
If you like to carve fine details, we'd recommend getting a better quality tool produced by one of the bigger printmaking brands, such as Pfeil. Even if you only buy one tool to carve the trickier bits, you're bound to notice an improvement in your prints. This Pfeil lino cutting tool would make a perfect addition to your printmaking kit. At around £25 per tool, the Pfeil tools may seem very expensive, but if you look after them they'll last a lifetime.
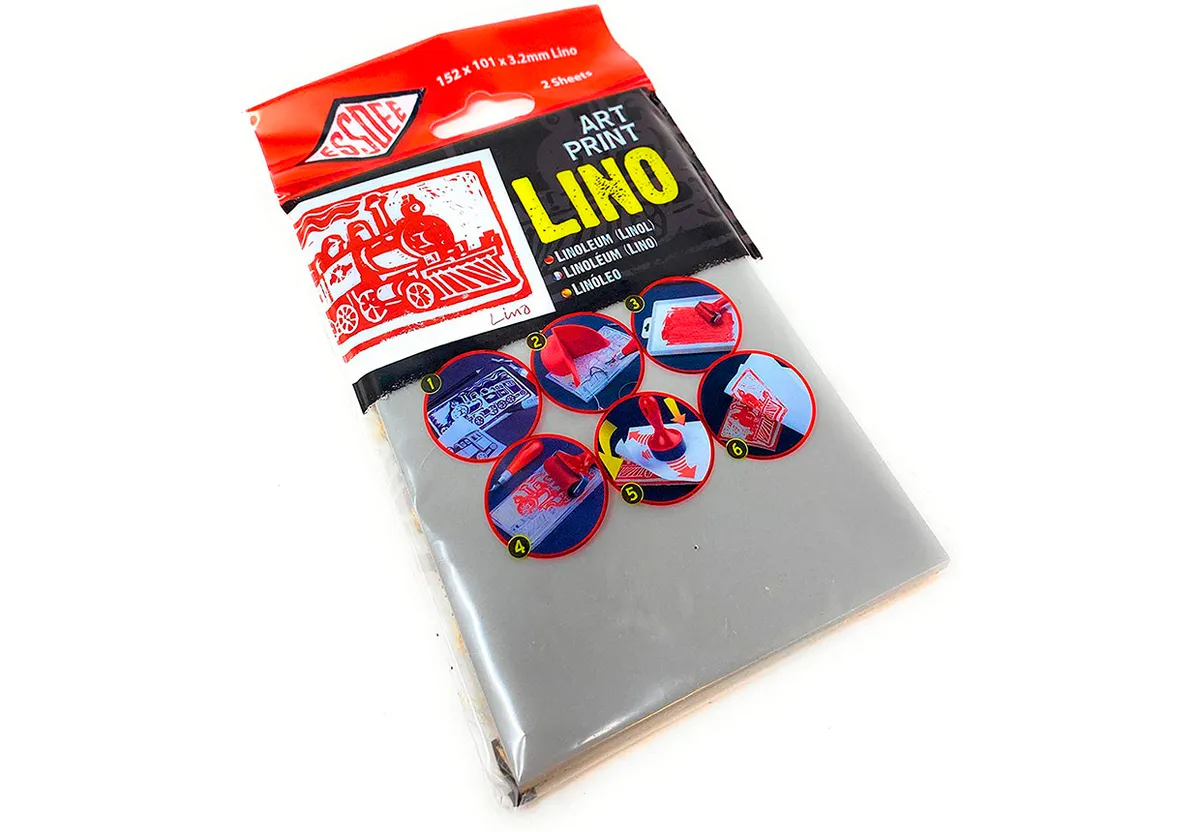
Lino
Lino is available in various forms and usually comes in packs of different sizes. There are a few different types to choose from, but traditional grey lino and softcut are probably the most popular. Try both kinds and see which you prefer! Softcut tends to be more rubbery to carve, while grey lino flakes away as you cut into it.
Lino packs are often available in packs of two and start from £2.75 for the smallest sizes. Here are a few packs to help you get started:
Grey lino:
- Buy Essdee lino 15 x 10cm (set of 2) from Amazon for £2.75
- Buy Essdee lino 20 x 15cm (set of 2) from Amazon for £4.75
- Buy Essdee lino 35 x 21cm (set of 2) from Amazon for £8.72
Softcut lino:
- Buy Essdee softcut lino 15 x 10cm (set of 2) from Amazon for £2.75
- Buy Essdee softcut lino 20 x 15cm (set of 2) from Amazon for £4.54
- Buy Essdee softcut lino 30 x 20 cm (set of 2) from Amazon for £8.75
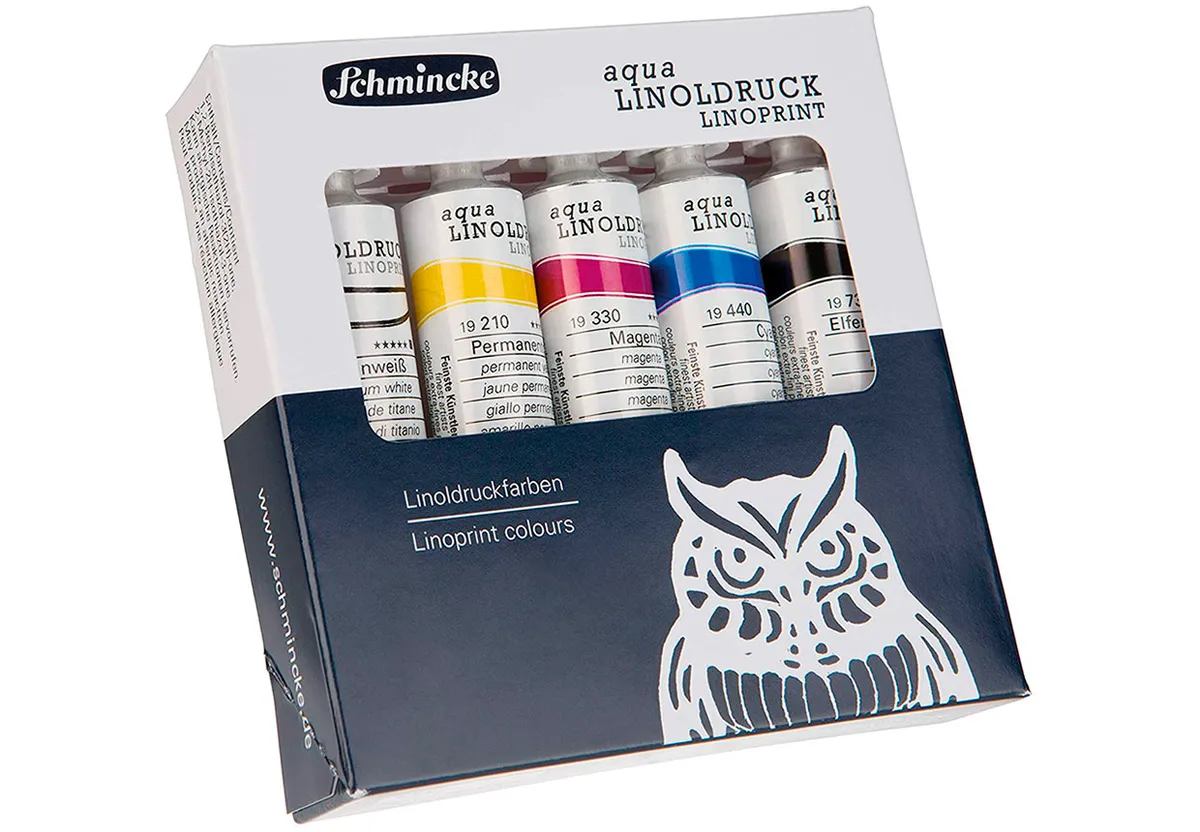
Lino printing inks
You can buy two different types of printing ink: water-based ink and oil-based ink. If you're starting out (or printing with kids!) then you might want to begin with water-based inks. These wash off more easily and dry more quickly than oil-based inks. Water-based inks will dry quickly in less than an hour, while oil-based inks may take up to a week to completely dry if they're thickly applied. Water-based inks are easier to clean up and are good for simple, bold designs, but if you want smoother prints and richer colours then opt for oil-based inks.
Water-based inks are usually cheaper and can be bought in large tubes. Oil-based inks often come in smaller tubes, but a little goes a long way.
The Essdee inks we've picked for this guide are good value for money and they're water-based. We've also included a similar oil-based set produced by Schmincke for you to try. If you're not sure if oil-based inks are for you, we'd recommend buying an individual tube to test them out.
Here are a couple of ink sets to help you begin printing:
- Buy Essdee block printing inks (pack of 5 colours) from Amazon for £18.23
- Buy Schmincke Aqua linoprint inks (pack of 5 colours) from Amazon for £20.40
Lino printing paper
When you're buying paper for printing, look for pads specifically designed for printing. You can buy multimedia paper pads which are suitable for drawing, printing and painting, which are a good choice for beginners.
As you become more experienced, you'll probably want to experiment with other types of paper. Japanese paper is very popular with printmakers because it's not too thick and takes up the ink easily. There are a wide range of different types of Japanese paper available including hosho, okawara and tengujo. Many art suppliers sell sample books of Japanese papers, so you can test out different types of paper to find the type that you like.
If you're hand-burnishing your prints (rubbing on the back with a baren or a spoon), then go for a thinner paper. You'll be able to see the design appearing through the back of the paper as you rub on the inked block. This is a good way to make sure you don't miss a bit! Personally, I'm a fan of hosho or masa paper, which is a little thicker but absorbs the ink well.
For rough-edged, rustic-looking prints go for thick khadi paper, which has a more textured surface.
Here are some different types of paper for you to try out:
- Buy the Cass Art mixed media spiral pad (A4) from Cass Art for £15.50
- Buy the khadi paper block book 21 x 25cm (40 pages) from Pegasus Art for £17.10
- Buy the hosho pad (48 sheets) from Amazon for £20.01
- Buy Awagami Washi masa paper 53 x 78cm (per sheet – there's a minimum order of 5 sheets) from Jackson Art for £1.20
Lino printing rollers (brayers)
A brayer or roller is an essential piece of kit for lino printing! These come in various sizes ranging from very wide rollers (great for inking up large blocks!) to narrow rollers (useful for inking small blocks or small areas on your lino).
Most lino cutting sets will come with a standard sized roller that's suitable for most of your printing needs. If you want to ink up smaller areas of your print using one of these rollers, you can mask the surrounding area with some paper to keep the rest of the lino block clean.
Make sure you store your rollers with the rubber pointing upwards – if the roller is left lying on a surface it can flatten on one side, which will make it harder to get smooth prints.
Here are a few rollers of different sizes for your lino printing:
- JSSM rubber brayer rollers (set of 2 – small and medium) from Amazon for £9.99
- Kurtzy 15cm ink roller (wide) from Amazon for £10.99
Other useful printmaking accessories
It's possible to print without these additional tools, but you may find them useful!
- Non-stick mat
- Palette knife (for mixing inks)
- A sheet of glass or smooth plastic (to roll out the inks instead of a tray). Glass chopping boards work well for this
- A marble rolling pin. You can roll this on the back of your paper to get an even print – it's like a cheap printing press!
- Bench hook (to stop your lino moving around when you're carving it)
Lino printing for beautiful artwork
More printing techniques to try
Learn the art of silk screen printing in our beginner's guide to screen printing and find out everything you need to know about this gorgeous craft.