Screen printing at home is a fun way to create original works of art or print designs onto fabric. You won't need to attend any classes – once you've mastered a few basic techniques, you'll find it easy to produce your own beautiful screen prints.
Screen printing is known for its vibrant, graphical style and it can be used to create lots of prints in one go. It's very popular with artists, but screen printing kits are often sold in craft shops, so you won't struggle to get hold of the supplies you need to try this creative art form.
In this guide, we'll show you basic screen printing techniques for beginners and explain what screen printing kit you'll need to get started.
Read on to learn how to do screen printing at home…
Want to try other forms of printing? Check out our guide to lino printing for beginners or learn how to block print on fabric.
What is screen printing?
Screen printing, or silk screen printing, works by pushing ink through a thin mesh that's supported by a wooden or metal frame. You can make a design by using a stencil or by applying screen block onto your screen.
Screen printing has a long history and is believed to have originated in China in the 10th century. The screens were originally made of silk, which is why it's often referred to as silk screen printing, but these days synthetic fabrics are used instead.
Artists started to use screen printing techniques in the 1910s when printers began to experiment with photoreactive chemicals. In the 1960s, screen printing was adopted by artists such as Andy Warhol, who used this technique to create bold pop culture prints.
How does screen printing work?
Screen printing can be used to produce striking graphical prints, but how does screen printing work? Let's explore the basic techniques needed to create screen prints at home…
As we've already mentioned, screen prints are made using a fine material (silk or nylon) that's been stretched over a frame. A design is applied to the frame using either a stencil or a special paint called screen block. Both of these block the mesh so that the ink only goes through the material where you want it to print. It's also possible to use photo stencilling techniques, but as this guide is intended for beginners we will just look at using stencils and screen block.
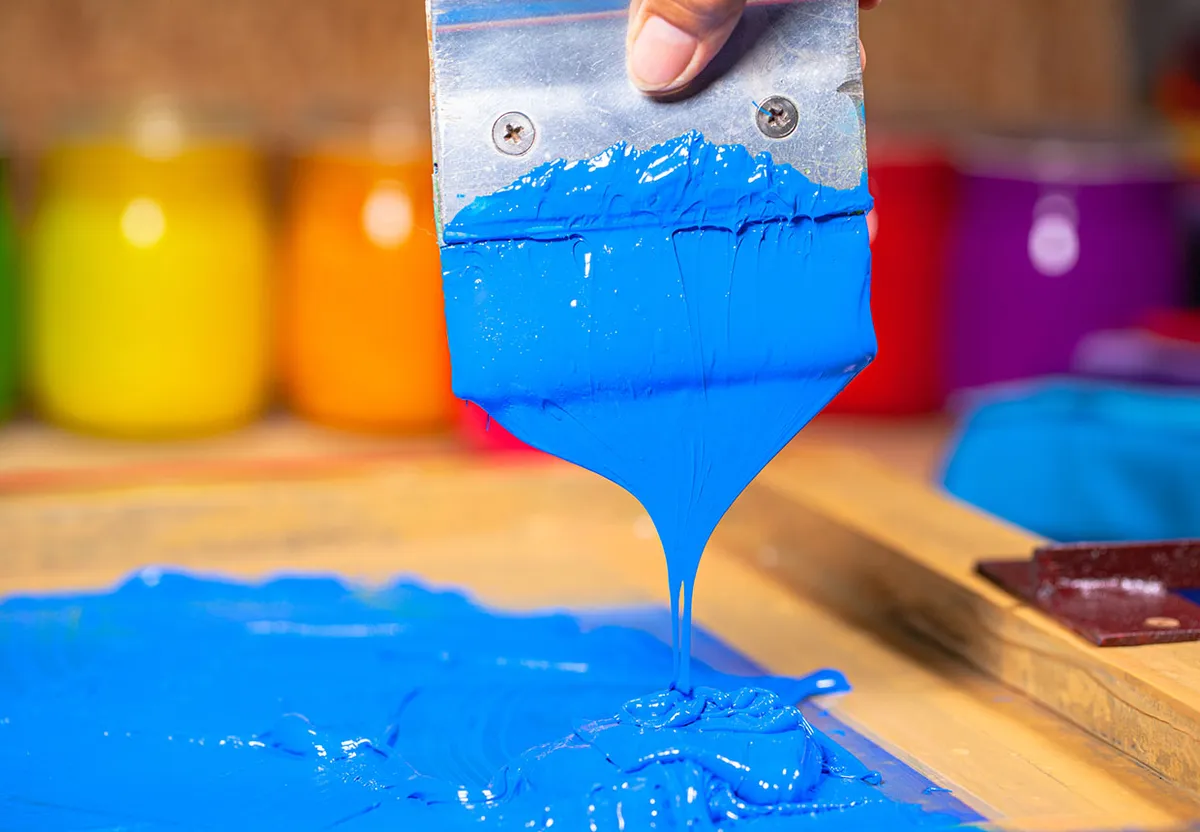
The ink is applied to the screen using a blade or squeegie. The first sweep across the frame fills the fine mesh with ink, then the return sweep pushes the ink onto the fabric or paper.
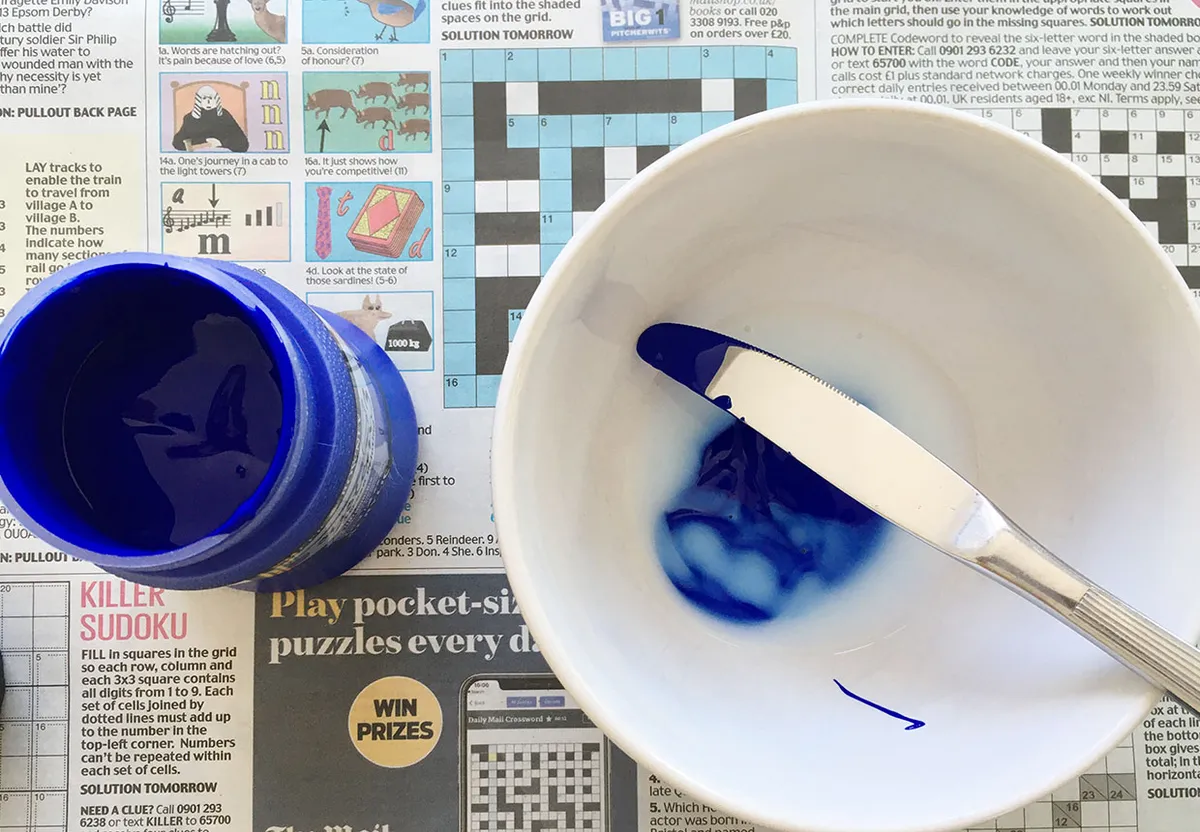
When you're producing screen prints, you'll use an acrylic paint-based ink which usually comes in large tubs. This ink is then mixed with acrylic printing medium before it's applied to the screen.
The ratio of ink to printing medium should be 50:50 to print an opaque area of colour. If you want a more translucent effect, change the ratio and use more printing medium than ink. You may need to experiment a little to achieve the results that you're looking for.
The lovely thing about screen printing is that you can layer the inks on top of each other, so you could add a more translucent ink over a heavier block of colour and achieve beautiful results. You can print in a single colour and create some bold designs or you can add as many colours as you want. Bear in mind that you can only print one colour at a time using this technique and you'll need to wait for each layer to dry before applying the next colour.
Screen printing frames come in various sizes and if you buy a kit it will usually include an A4 or A3-sized frame. If you want to try making your own frame at home, take a look at our DIY screen printing frames article to see just how easy it is.
When you're learning how to do screen printing at home, it's best to start with a simple design that's bold and eye-catching – even a basic shape like a star or heart can look striking!
If you're planning to print onto fabric, we'd recommend testing your design on some paper or old clothes first so you don't waste any fabric.
Looking to buy screen printing equipment? Explore our guide to the best screen printing kit available to buy.
Silk screen printing supplies
To create a basic screen print, you will need:
- A screen printing frame.
- Acrylic ink.
- Printing medium.
- A stencil.
- Some paper or fabric to print onto.
- A squeegee.
There are other methods of screen printing, but when you're learning how to screen print it's a good idea to begin with the easiest technique. See our screen printing kits and supplies article to browse kits and supplies you need to make your own designs.
How to do screen printing
Now we'll look at how to do screen printing at home – it's very simple to create basic designs very quickly and you may find it addictive once you get started! We'll guide you through producing a very simple print so you can see how it's done and try it for yourself.
Design your print
First, you'll need to design your print. Draw your design onto some thin card or paper. If you want to reuse the same design, you can cut it into sheets of acetate. Some kits come with their own stencils, so if you've bought one of those you can skip this step.
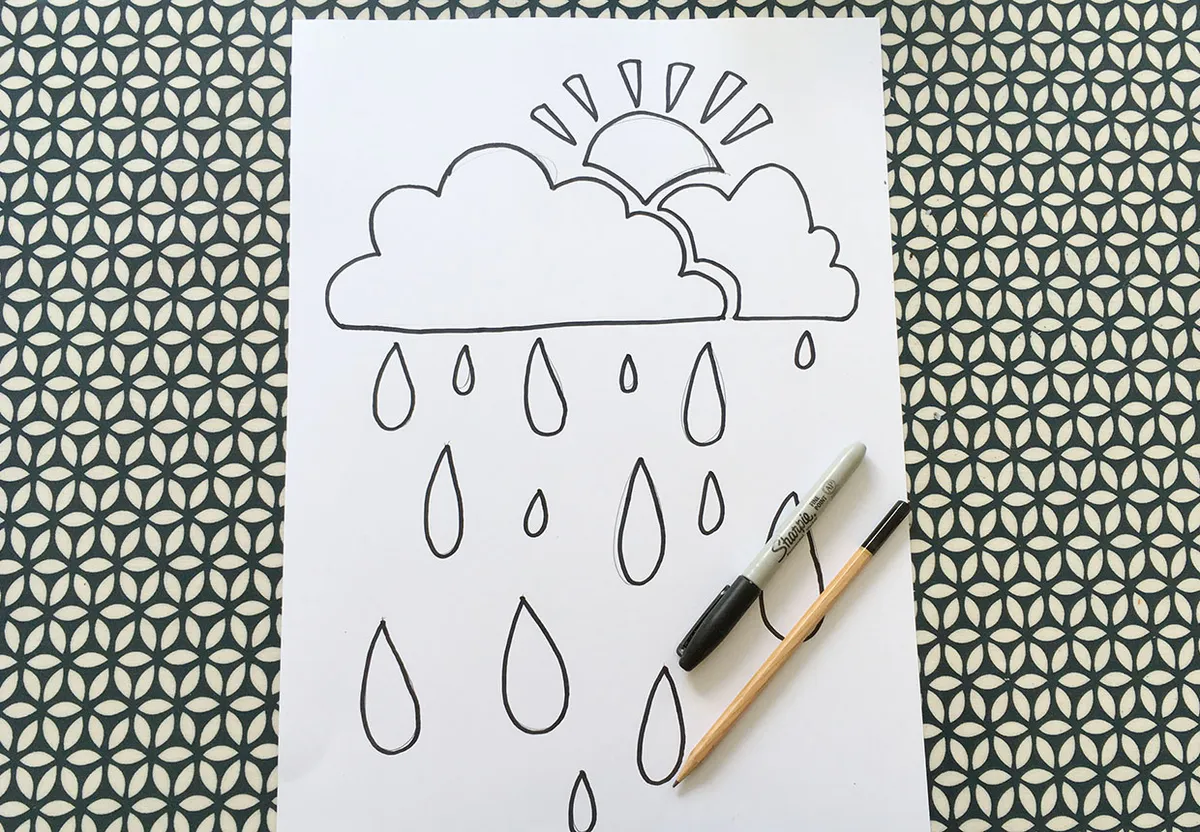
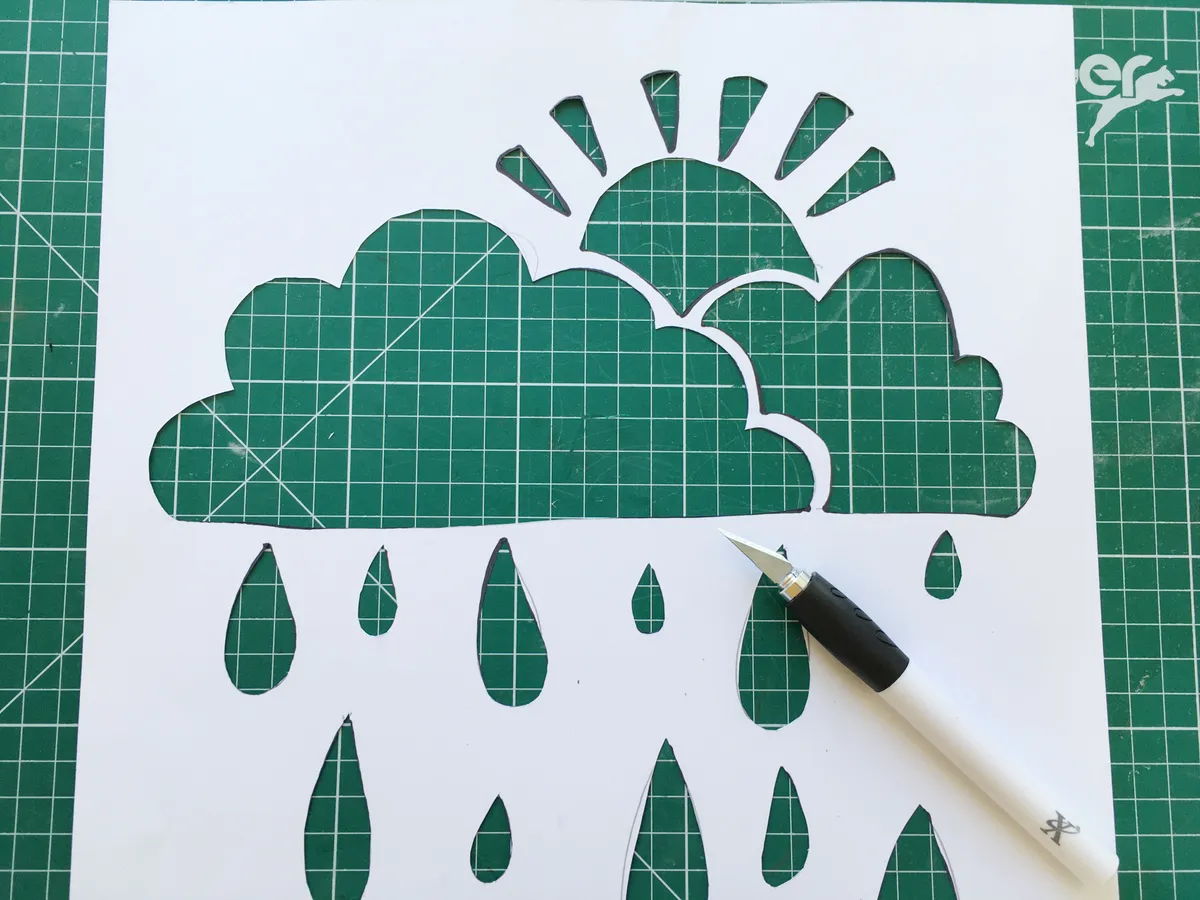
Cut out the design
Cut out your design using a craft knife and a cutting mat.
Prepare to print
For this print, we'll use a single colour to keep things simple. Cut out your stencil and place it over your paper or fabric – you may need to use a bit of masking tape to hold your design in place. Mix your ink with the printing medium. The ratio should be 50:50.
Apply the ink
Apply your ink to the frame by adding a line of ink along the top side.
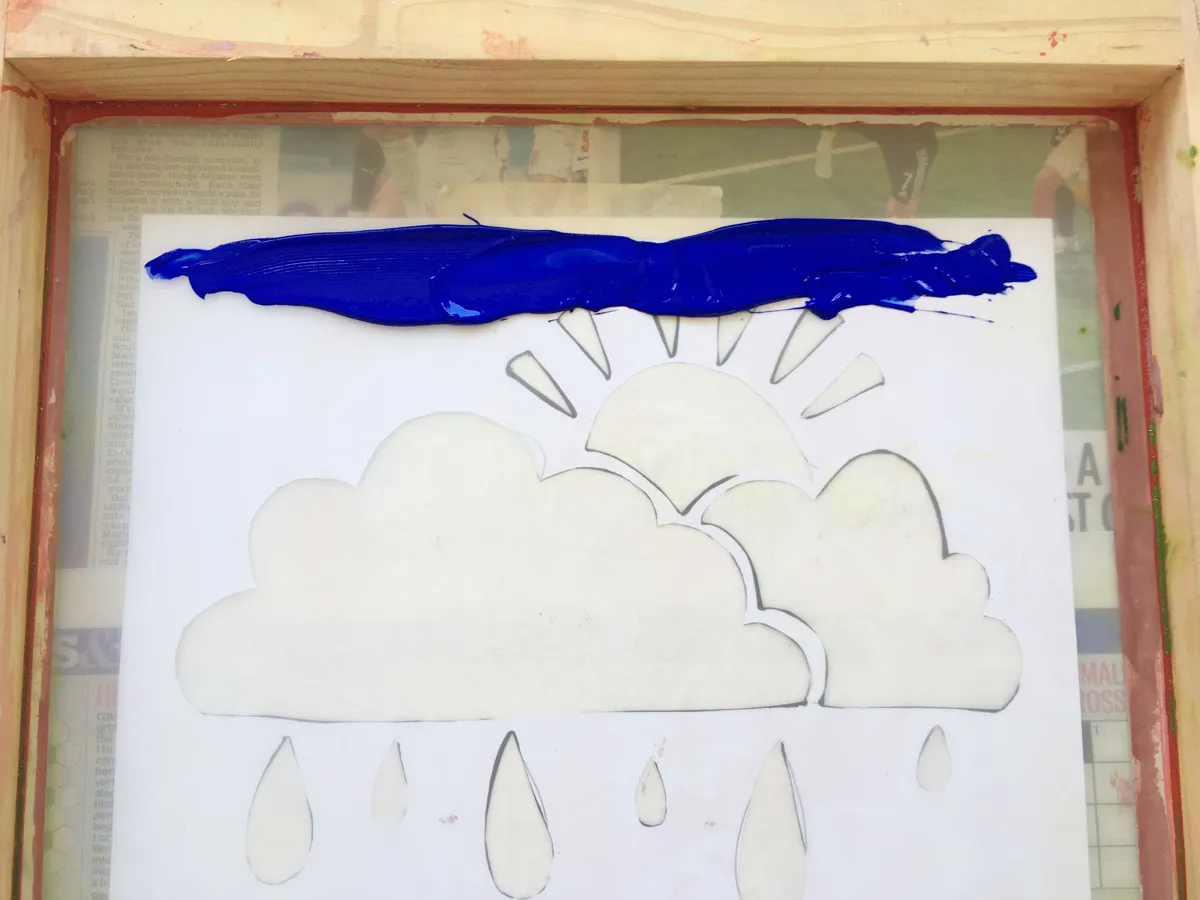
Print your design
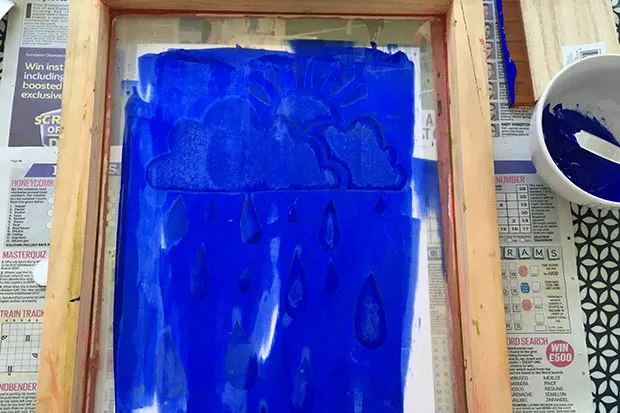
Cover the screen with the ink using your squeegee. Do this lightly the first time to ensure that the screen has been evenly covered. This is called flooding the screen. Then bring the squeegee across the screen again. You'll need to hold your squeegee at an angle to get a clear print – only the edge of the blade should be in contact with the screen. Pull the squeegee back over the screen in the opposite direction to push the ink through the screen and onto your paper.
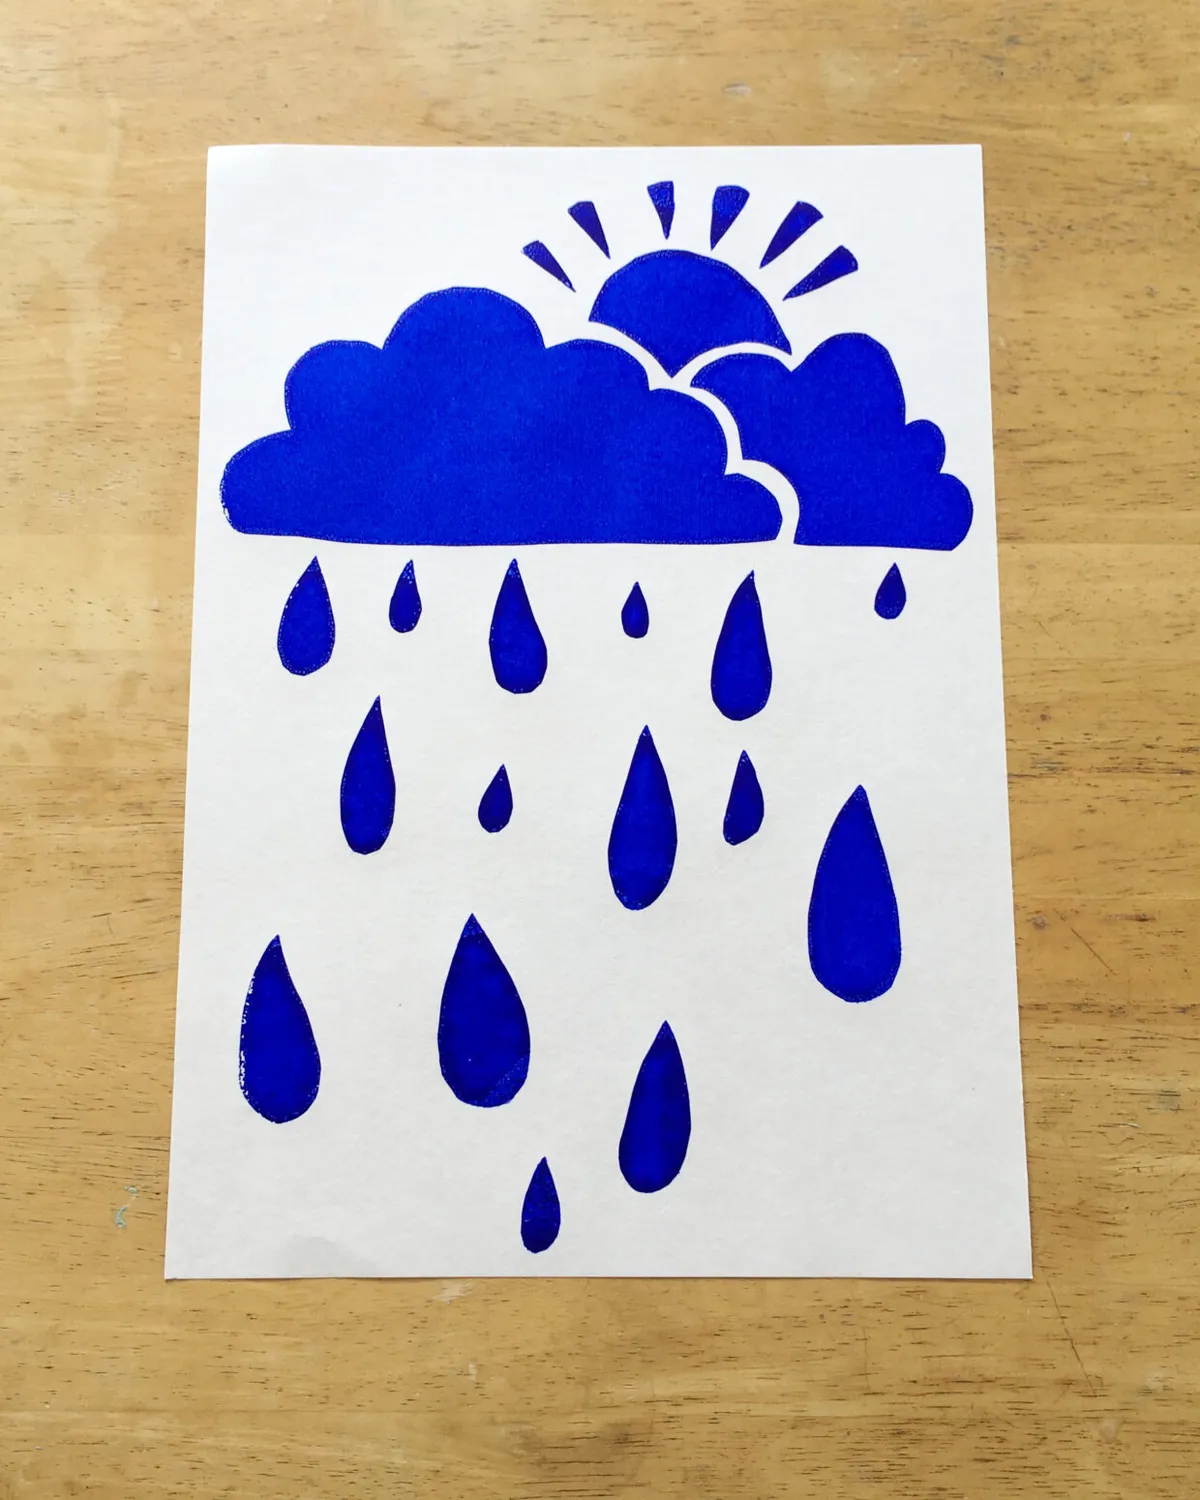
Reveal your finished design
Leave your print to dry. Once it's dry, you can apply more colours if you like. You can add different colours to different sections of a design by covering areas you don't want to print with paper. For this design, I could have printed the sun first in yellow, then covered it up to add a layer of blue ink. Alternatively, you could create a separate template for each colour if you're planning to do a large number of prints.
If you're printing onto fabric, you'll need to heat set the design. Place a piece of fabric on top of the printed design and iron over the top – this should set your design so that it doesn't wash out.
Don't forget to clean your frame thoroughly after each use so that it's ready for the next time you want to print. Cold water and a sponge should remove the ink easily, but it may take a little longer if you've used dark inks.
More screen printing to try
We hope you have found this beginners guide to screen printing useful. You'll find plenty of inspiration and advice on how to use screen printing right here on Gathered! Discover the kit you need to produce your own screens and look after them well in our screen printing kit buyers guide. Looking for some screen printing inspiration? Try this DIY screen printing tea towels project or have a go at this screen printing tutorial and make a bee cushion. The cushion project shows a great alternative method of screen printing which makes use of Mod Podge to block out your design. If you want to try our the technique without buying a screen printing kit, try our DIY screen printing frames to explore making your own screen using embroidery hoops.
