How to make a vintage height chart

Transform an old plank of wood into homeware that's off the scale with this vintage-style height chart, perfect for kids' bedrooms!

Try our magazines – get 6 issues from just £9.99!

Published: September 1, 2021 at 5:54 am

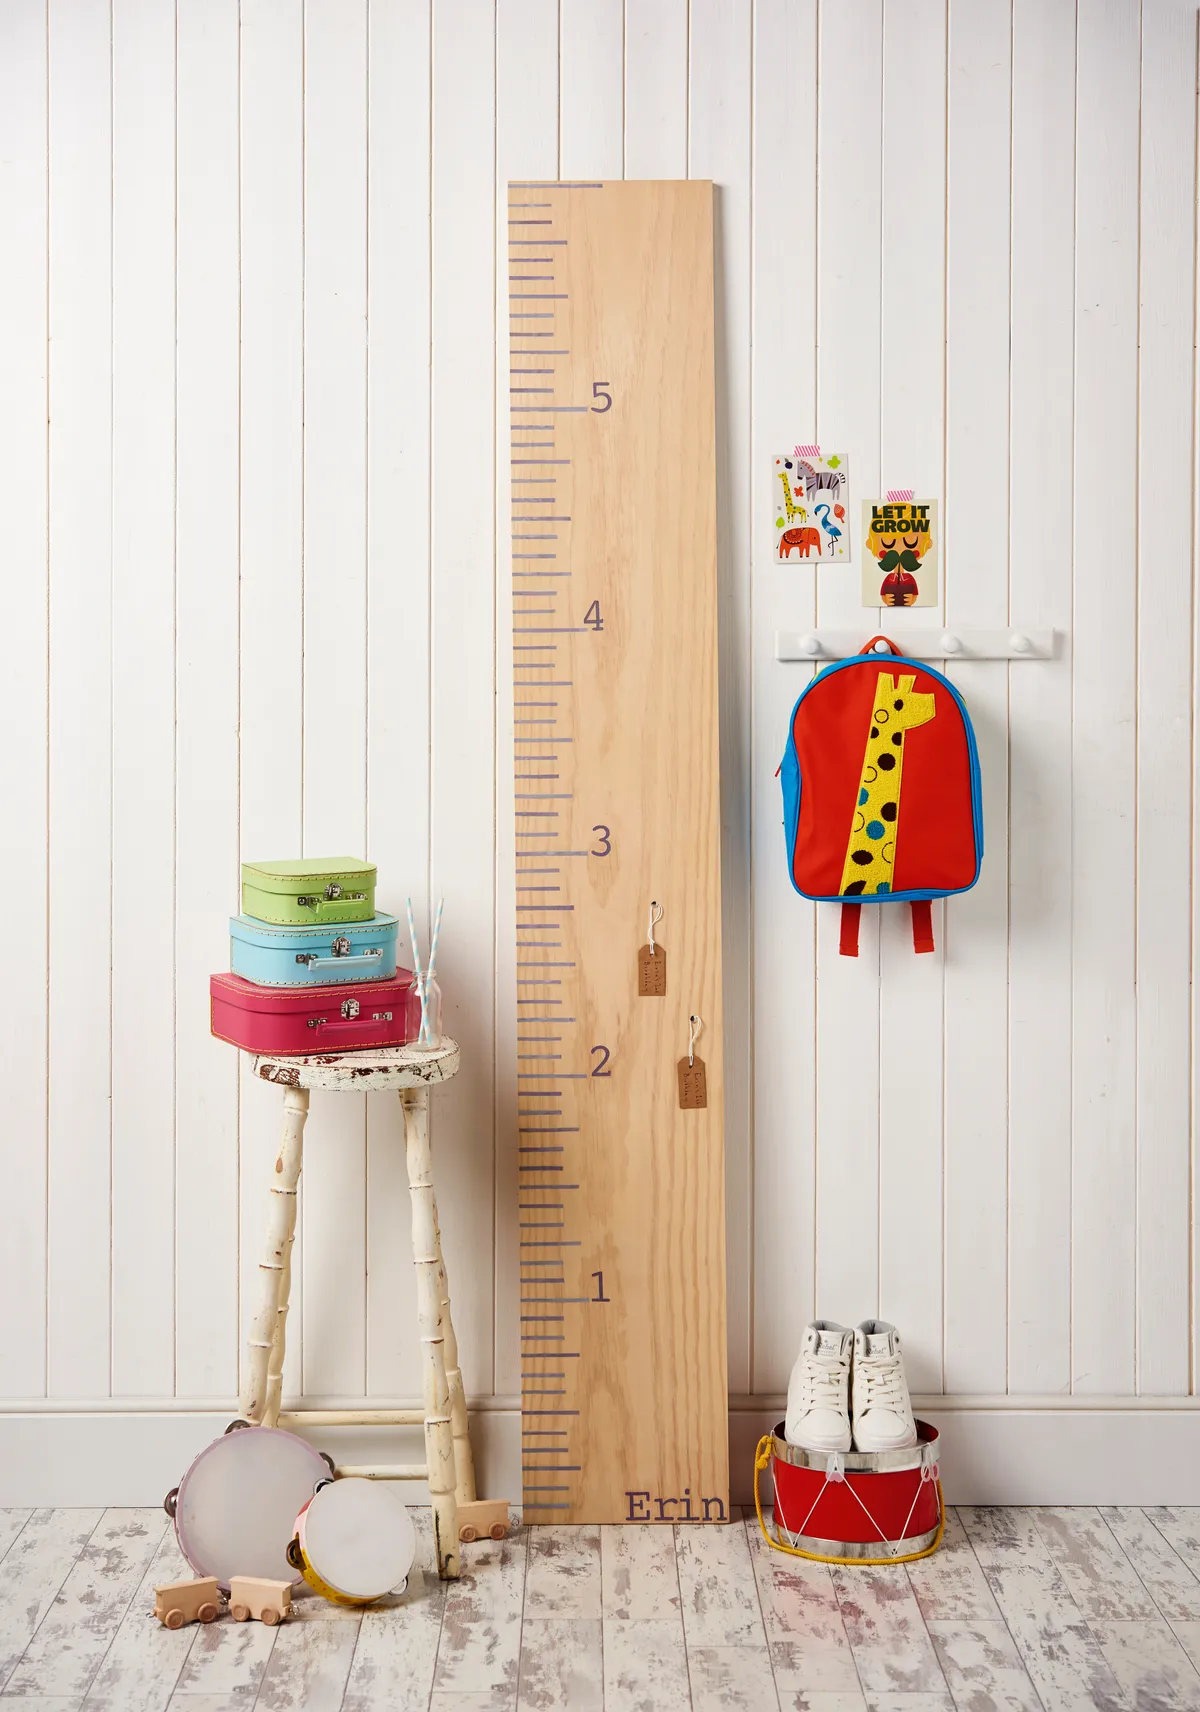
There's plenty of profit to be made when you come up with cool and creative makes for kids, and this wooden height chart is one of the best ideas we've seen yet! Parents will love the chance to record the growth of their little ones on this old-school ruler that will add a touch of vintage charm to any nursery or playroom. As a side note - who's parents or grandparents still have their height record on a doorframe? Let us know in the comments below!

It's easy to make using a plank of wood and printed numbers. Customise each one with the tot's name or use a surname so you can add details of new little ones as your family grows. Here's a top tip: try stencilling or woodburning the numbers for a different look!

We have lots of other brilliant upcycling projects here on Gathered – we add new articles all the time, so bookmark our upcycling projects page. Check out these fun and colourful upcycled jam jars (featuring dinosaurs!), or how about indulging in a spot of birding and making a DIY birdhouse? And if you love to decoupage – check out this beautiful way to upcycle a table.

We love seeing what you make, so don’t forget to share your upcycling or craft projects with us on Instagram, Facebook or Twitter, too!

How to make a vintage height chart - upcycled wood project - full

You will need

  • Plank of wood measuring 182 x 28cm (6ft x 11in)
  • Tape measure
  • Craft knife
  • PVA glue and paintbrush
  • Set square
  • Natural beeswax and rag
  • Pencil
  • Grey paper
  • Letters and numbers printed from a computer – we used a retro font at a point size of 250

How to make a vintage height chart

Step 1

Using a tape measure and pencil, mark the measurements onto the plank with a small dot. Use a set square and start with the feet measurements; to make each foot, draw a light pencil line 13cm (5in) in from the outside edge. Now draw a line every two inches between the feet measurements. Alternate two 6cm-long lines, followed by an 8cm-long line.

Step 2

Using a craft knife and set square, cut the grey paper into thin strips that are 5mm wide in the following lengths: 48 x 6cm (2½in)-long strips, 18 x 8cm (3¼in)-long strips and 6 x 13cm (5in)-long strips. Stick these strips over the pencil lines on the plank, working from the left side in, using PVA glue and a paintbrush. Apply a thin coat of PVA and water mix (50/50 mix) over the top to secure each one in place.

Step 3

Use a craft knife to cut out the printed letters and numbers and arrange them onto the ruler, as shown. When you are happy with their positioning, stick them down with PVA glue, then apply a thin coat of the PVA and water mix on top, as before.

How to make a vintage height chart – upcycled wood project 2

Step 4

Once the PVA is completely dry, then wax the whole chart with clear beeswax. Use silver drawing pins to attach brown paper tags to the height chart that the recipient can use to note his or her height on their first and second birthdays.

How to make a vintage height chart – upcycled wood project


We hope you’ve enjoyed this quick and easy tutorial on how to make a vintage height chart. If you like organising, why not make this seed storage box or these fun upcycled jam jars – check out our upcycling projects for more brilliant inspiration.