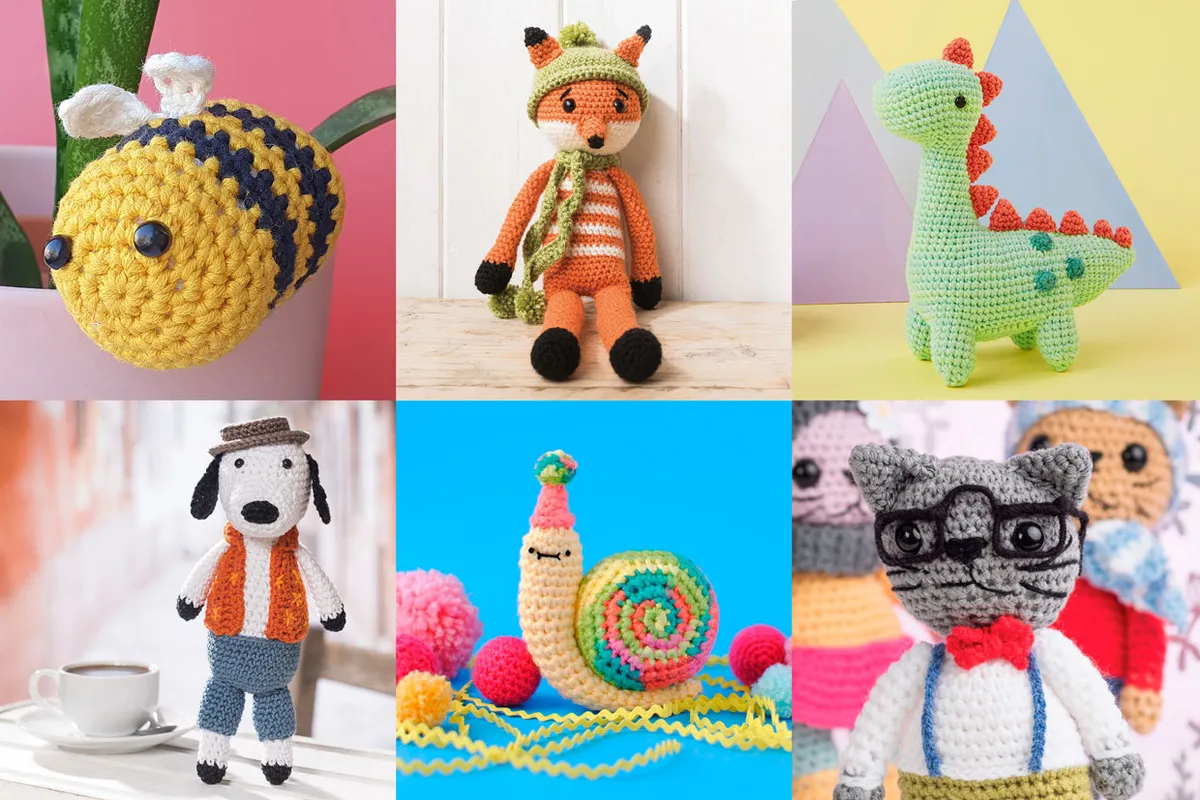
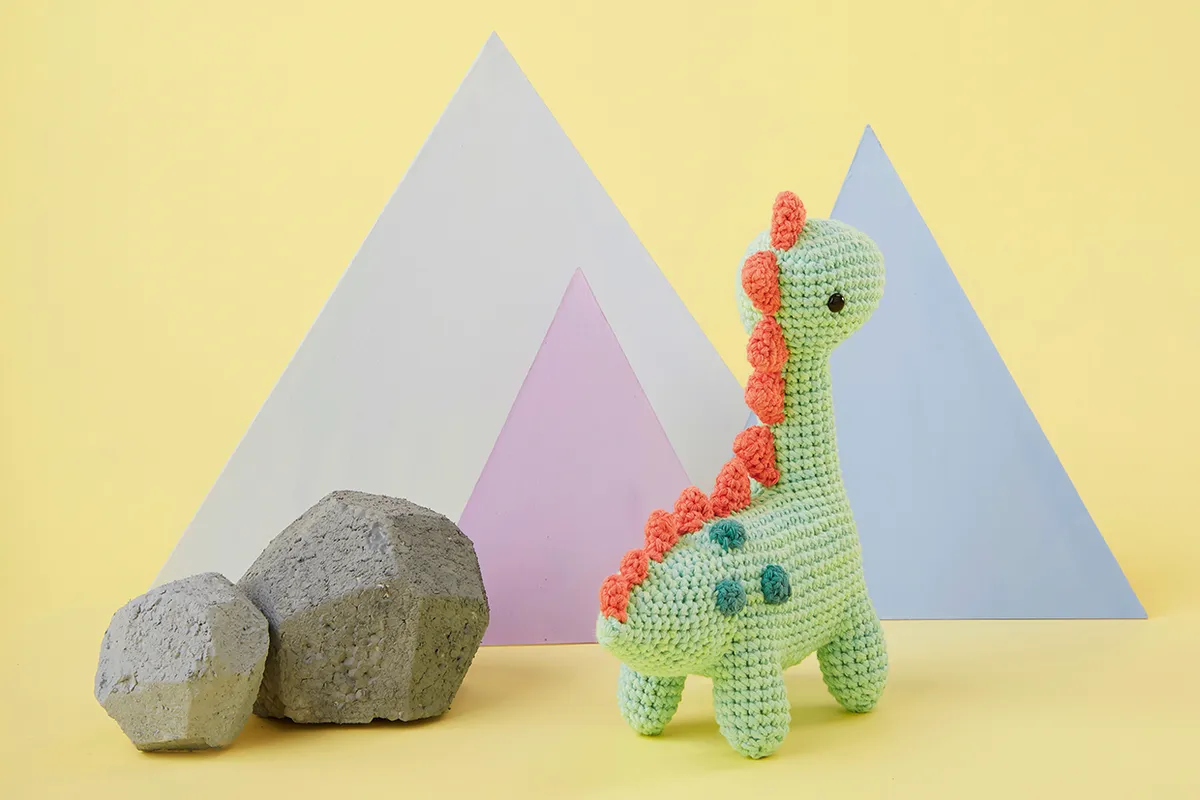
Rawr-some dinosaur crochet pattern you’ll love making
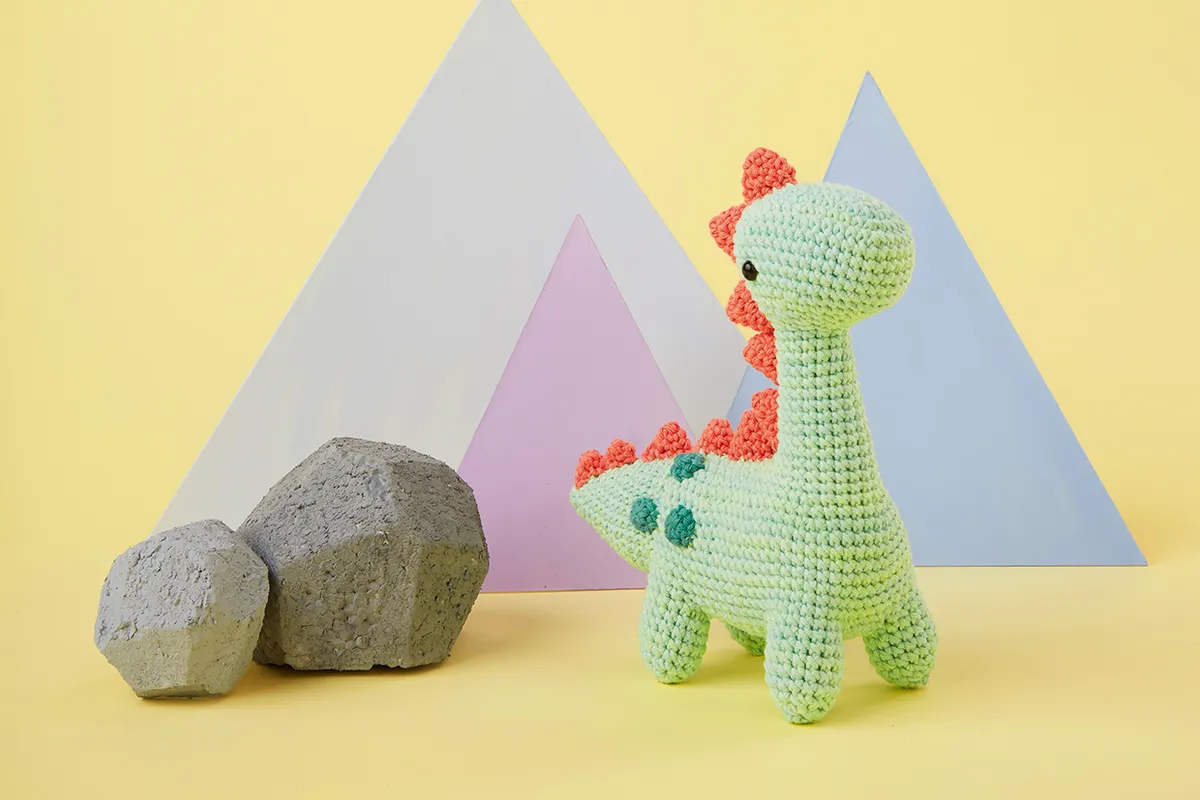
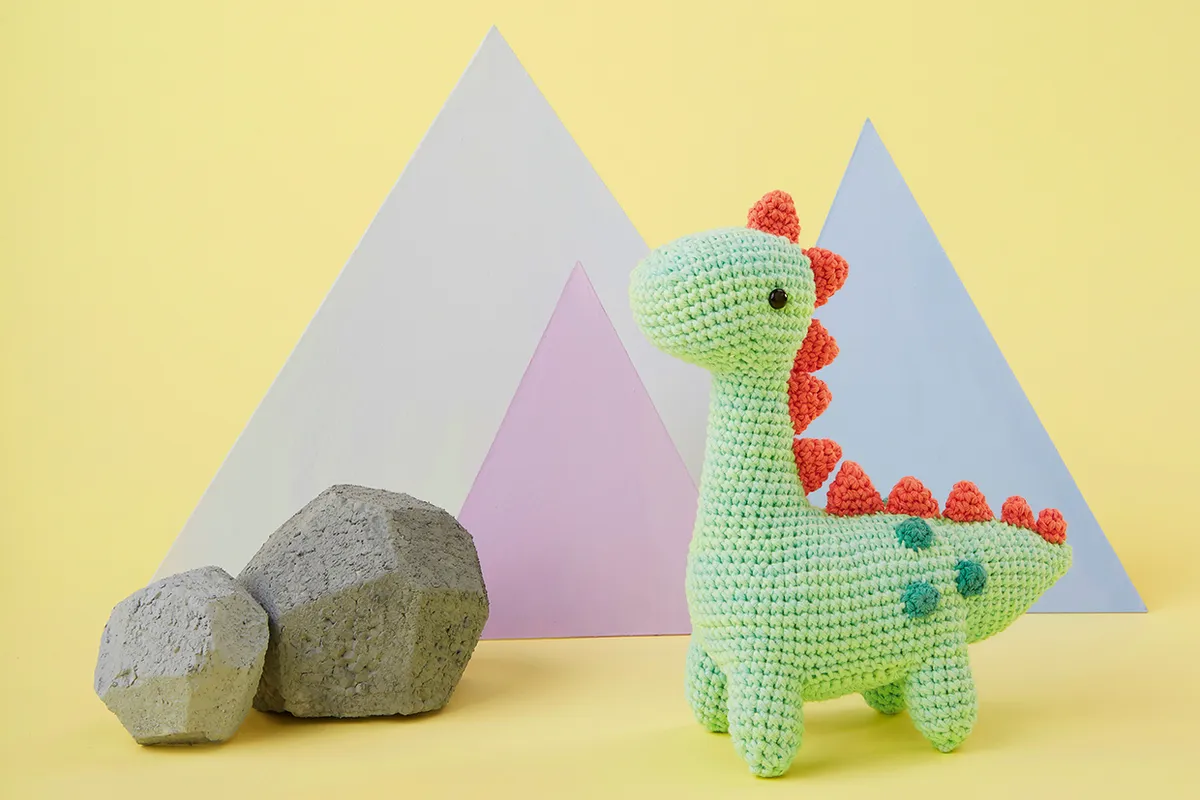
Rawr! Meet Eduardo the amigurumi dinosaur, designed by Yan Schenkel of Pica Pau. No need to worry – this dinosaur crochet pattern is all cuddles, no claws!
Our free amigurumi dinosaur is made with clever techniques to create unique shapes and keep joining and assembly to a minimum. This may prove a little tricky for complete crochet beginners, but you can always check out our guide on how to crochet amigurumi.
For the dinosaur crochet pattern you will need
DMC Natura Just Cotton, 100% cotton, 50g/155m, or alternative 4ply yarn
- two balls in Light Green (12)
- one ball each in Coral (8)
- Small quantity of Jade (20)
2.75mm (UK 11) crochet hook
Toy stuffing
Two 8mm black safety eyes
Stitch marker
Yarn needle
Important notes about this free dinosaur crochet pattern
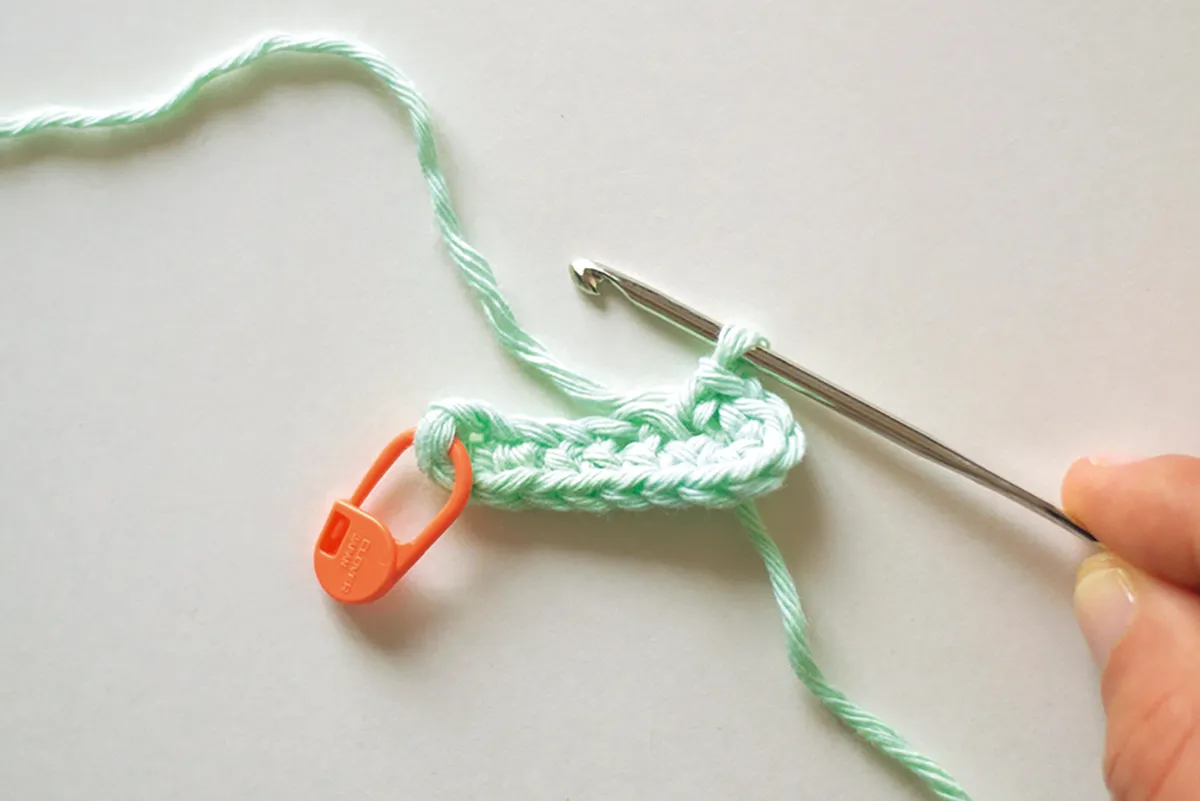
This crochet dinosaur pattern is made in a continuous spiral, from a foundation chain (instead of a magic ring) and worked in one piece – yep, he’s practically seamless. As it's a continuous spiral, it helps to place a stitch marker at the start of each round.
The head, body and legs are made in one piece. The tail, spikes and spots are made separately and sewn together.
Once finished your amigurumi dinosaur should measure approx. 19cm (7½") high.
Tension
Tension is not critical for this project, ensure that the stitches of your amigurumi dinosaur are dense enough for no stuffing to poke through.
If you're giving your crochet dinosaur to a particularly young child or baby then it's best to avoid safety eyes and embroider some on instead.
Abbreviations
You can find a full list of all abbreviations we use in our abbreviations and conversions guide. The free crochet dinosaur pattern is written in UK terminology but you can easily convert it to US terms using the guide.
Remember, if you need any help with your crochet stitches, you can always check out our crochet for beginners guide.
Start your free dinosaur crochet pattern
Head and Neck
Using light green yarn, ch8. Stitches will be worked around both sides of this foundation chain.
Round 1 2dc in second ch from hook, dc in next 5 sts, 4dc in next (last) st, continue on the other side of the foundation chain, dc in next 5 sts, 2dc in last st [18sts]
Don’t forget to put the stitch marker at the first st at the beginning of each round.
Round 2 2dc in next st, dc in next 7 sts, 2dc in next 2 sts, dc in next 7 sts, 2dc in next st [22sts]
Round 3 2dc in each of next 2 sts, dc in next 8 sts, 2dc in each of next 3 sts, dc in next 8 sts, 2dc in next st [28sts]
Round 4 2dc in each of next 3 sts, dc in next 10 sts, 2dc in each of next 4 sts, dc in next 10 sts, 2dc in next st [36sts]
Round 5 (dc in next 5 sts, 2dc in next st) 6 times [42sts]

Rounds 6–10 dc in each st around
Round 11 (Dc in next 5 sts, dc2tog) 6 times [36sts]
Round 12 Dc in next 7 sts, (dc in next 2 sts, dc2tog) 6 times, dc in next 5 sts [30sts]
Round 13 (Dc in next 3 sts, dc2tog) 6 times [24sts]
Round 14 Dc in next 4 sts, (dc in next st, dc2tog) 6 times, dc in next 2 sts [18sts]
Insert the safety eyes, using the image as a guide for placement. Fill the head firmly with stuffing and, from this point, continue stuffing
as you go.

Round 15 Dc in next 8 sts, (dc2tog) 3 times, dc in next 4 sts [15sts]
Rounds 16–17 Dc in each st around
Round 18 Dc in next 2 sts, 2dc in next st, 12dc [16sts]
Round 19 Dc in each st around
Round 20 Dc in next 3 sts, 2dc in next st, dc in next 12 sts [17sts]
Round 21 Dc in each st around
Round 22 Dc in next 3 sts, 2dc in next st, dc in next 13 sts [18sts]
Round 23 Dc in each st around
Round 24 Dc in next 4 sts, 2dc in next st, dc in next 13 sts [19sts]
Round 25 Dc in each st around
Round 26 Dc in next 5 sts, 2dc in next st, dc in next 13 sts [20sts]
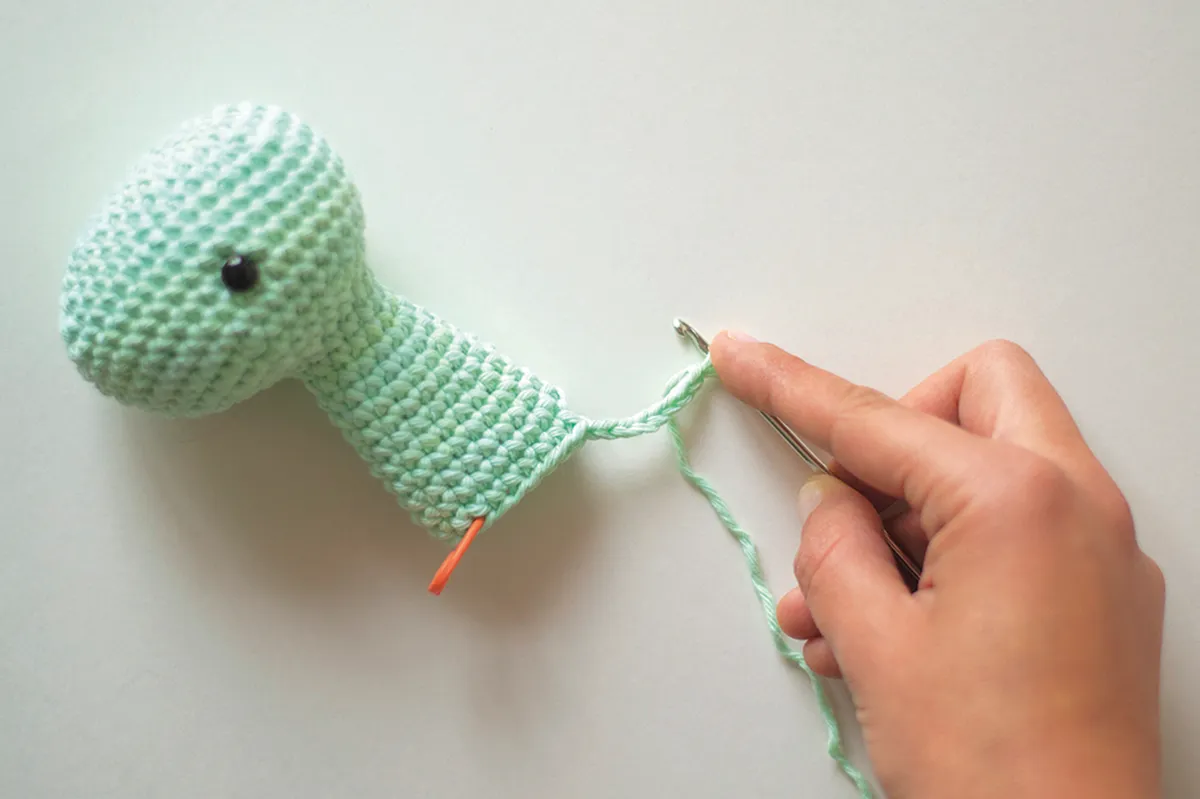
Round 27 dc in next 7 sts, ch8 (to form the backbone of the dinosaur), you now work around this ch8 in the same way as the first round of the head (both sides of the new foundation chain, plus the neck). Place your stitch marker in the next st (as this is going to be the beginning of each round from this point), 2dc in 2nd ch from the hook, dc in the next 33 sts, 2dc in the last st [37sts]
Round 28 2dc in each of next 2 sts, dc in next 33 sts, 2dc in each of next 2 sts [41sts]
Round 29 2dc in each of next 3 sts, dc in next 36 sts, 2dc in each of next 2 sts [46sts]
Round 30 (Dc in next 4 sts, 2dc in next st) 9 times, dc in last st [55sts]
Round 31 Dc in each st around
Round 32 (Dc in next 5 sts, 2dc in next st) 9 times, dc in last st [64sts]
(At this point your critter will look just like Nessie emerging from the Loch)
Rounds 33–39 Dc in each st around
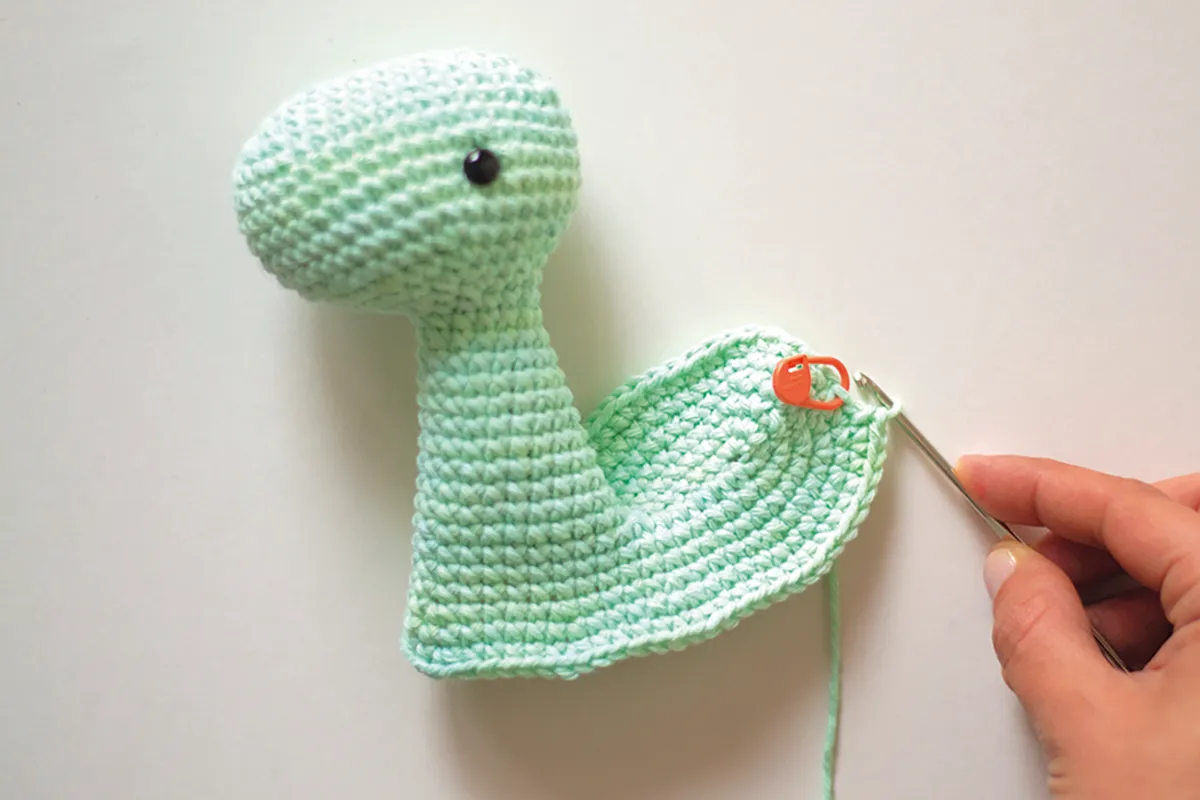
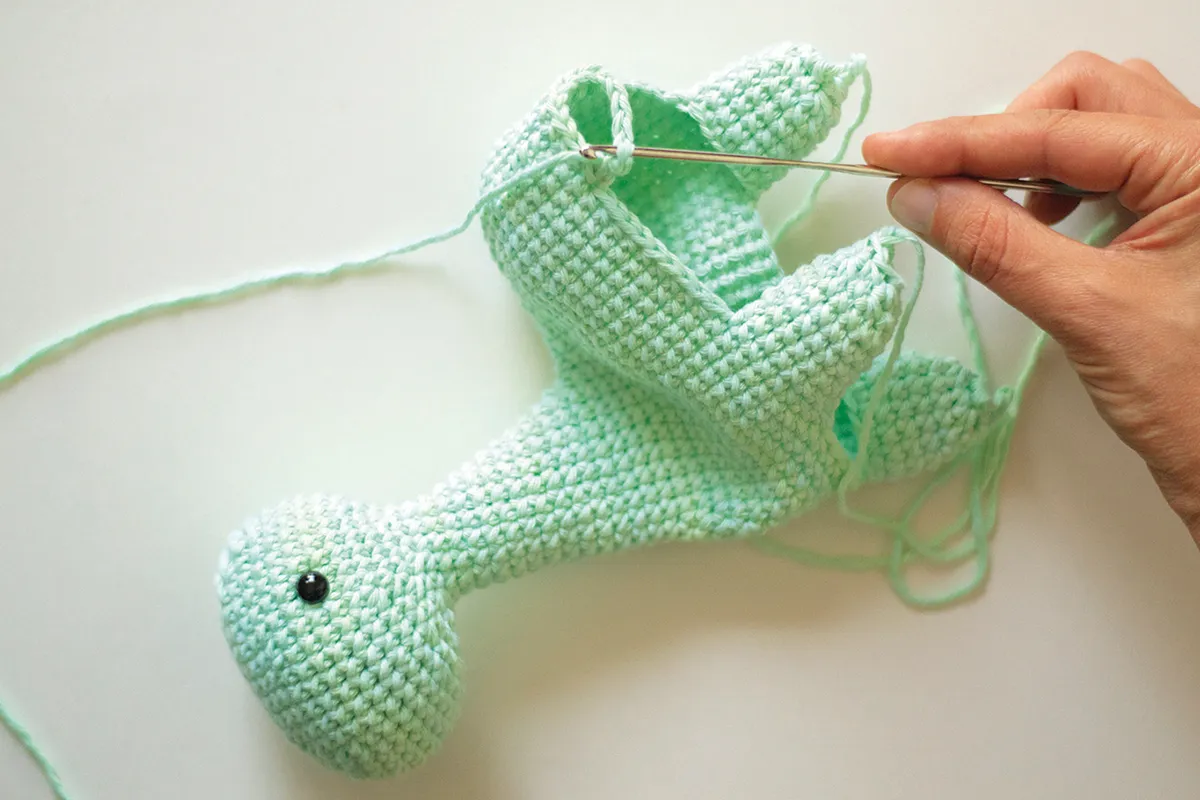
First back leg
Divide the work to crochet the four legs. In order to do this, you have to find the middle of the dinosaur's body at the back. Continue crocheting 1dc in each stitch around until that point (if you’re not already in there)...
Then work dc in the next 2 sts, place the stitch marker in the next st, dc in the next 9 sts, ch6. Join the last ch and the marked dc with a ss. The leg will be formed by working around the 9dc on the body and the new 6ch foundation chain.
Continue working the first back leg:
Round 1 Dc in next 15 sts (9 from the body and 6 from the ch) [15sts]
Rounds 2–5 Dc in each st around
Round 6 (Dc, dc2tog) 5 times [10sts]
Round 7 Dc2tog 5 times [5sts]
Fasten off leaving a long tail. Using your yarn needle, weave the yarn tail through the front loop of each remaining stitch and pull it tight
to close.
Cute crochet creatures
If you're in love with the super-cute stying of this free crochet dinosaur pattern, then you should check out the 'Friends of Pica Pau' crochet pattern book by designer Yan Schenkel.
Alternatively, you can find some individual patterns on her Etsy store.
First front leg
Count 9 sts along from where the first back leg is (this will become the belly) and attach the yarn to the next st (10th st along).
Dc in the next 9 sts, ch6 and join the last ch and the first dc with a ss.
Repeat Rounds 1-7 as the first back leg.
Second front leg
Count 5 sts along to the left from where the second front leg is (this is the space between the legs) and attach the yarn to the next st (6th st along).
Dc in the next 9 sts, ch6 and join the last ch and the first dc with a ss.
Repeat Rounds 1-7 as the first back leg.
Second back leg
Count 9 sts along to the left from where the first front leg is (this is the other side of the belly) and attach the yarn to the next st (10th
st along).
Dc in the next 9 sts, ch6 and join the last ch and the first dc with a ss.
Repeat Rounds 1-7 as the first back leg.
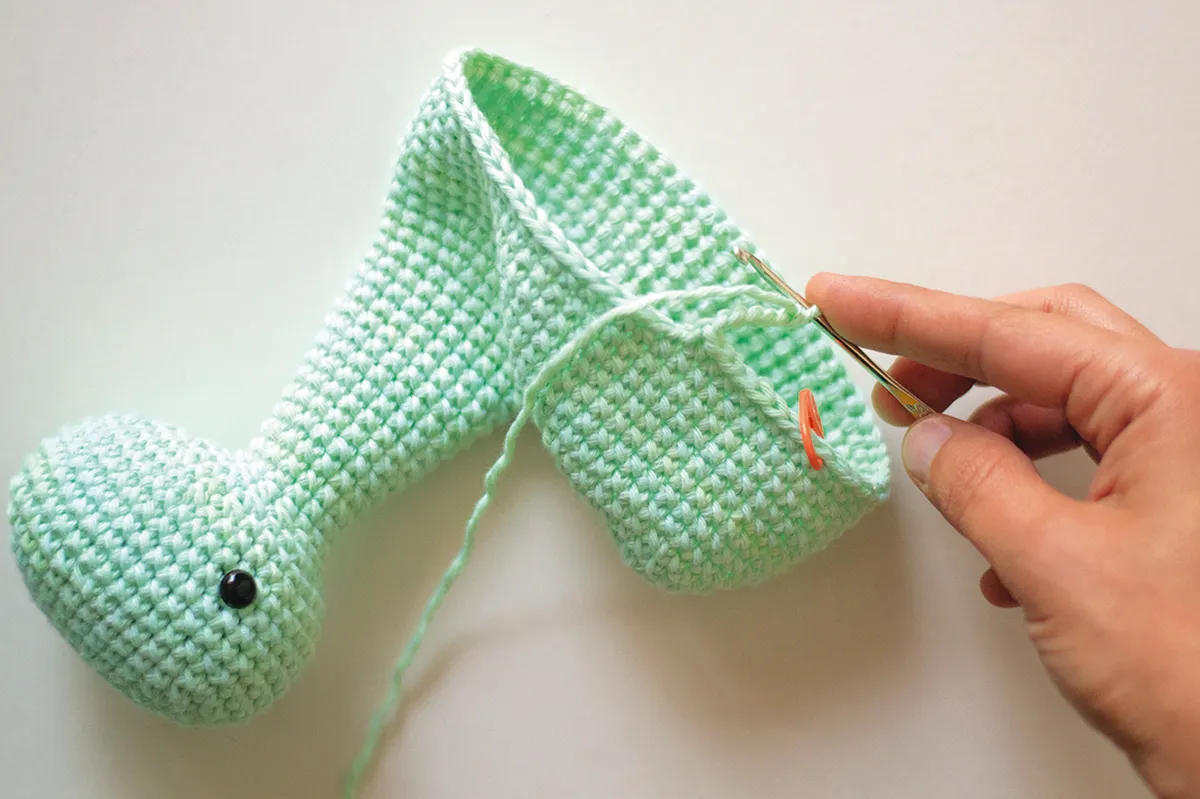
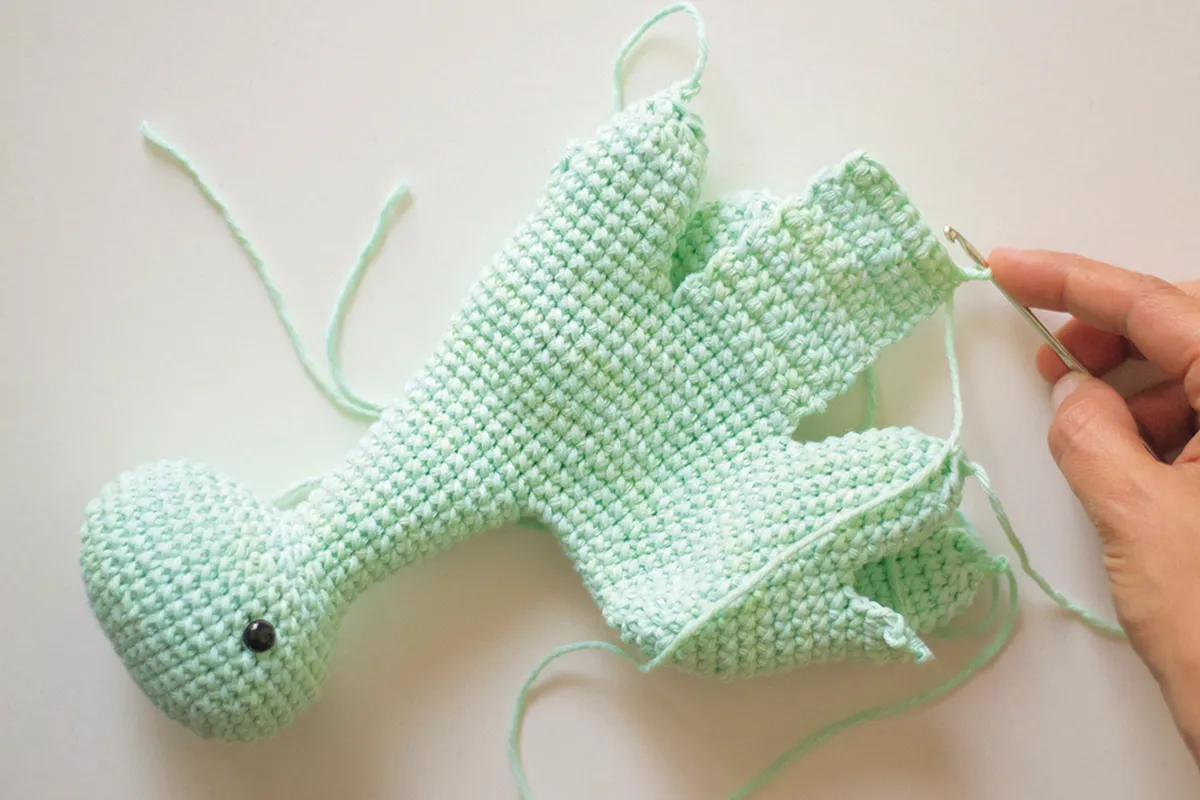
Belly
Between the legs, you have 9st spaces along the sides and 5st spaces at front and back. The belly is made by creating flaps from these sts.
Start with the 9st space between the back and the front legs. Attach the yarn to 1st st next to the first leg you made.
Row 1 9dc, turn
Rows 2-12 Ch1 (does not count as st), dc in next 9 sts, turn
Fasten off, leaving a long tail for sewing.
The back underbelly is made in the same way. Attach the yarn to the 1st st after the last leg you made.
Row 1 Dc in next 5 sts, turn
Rows 2-3 ch1 (does not count as st), dc in next 5 sts, turn
Fasten off, leaving a long tail for sewing.
Work the flap between the front legs in the same way.
Using the tapestry needle, sew the front flap to both front legs and the back flap to both back legs.
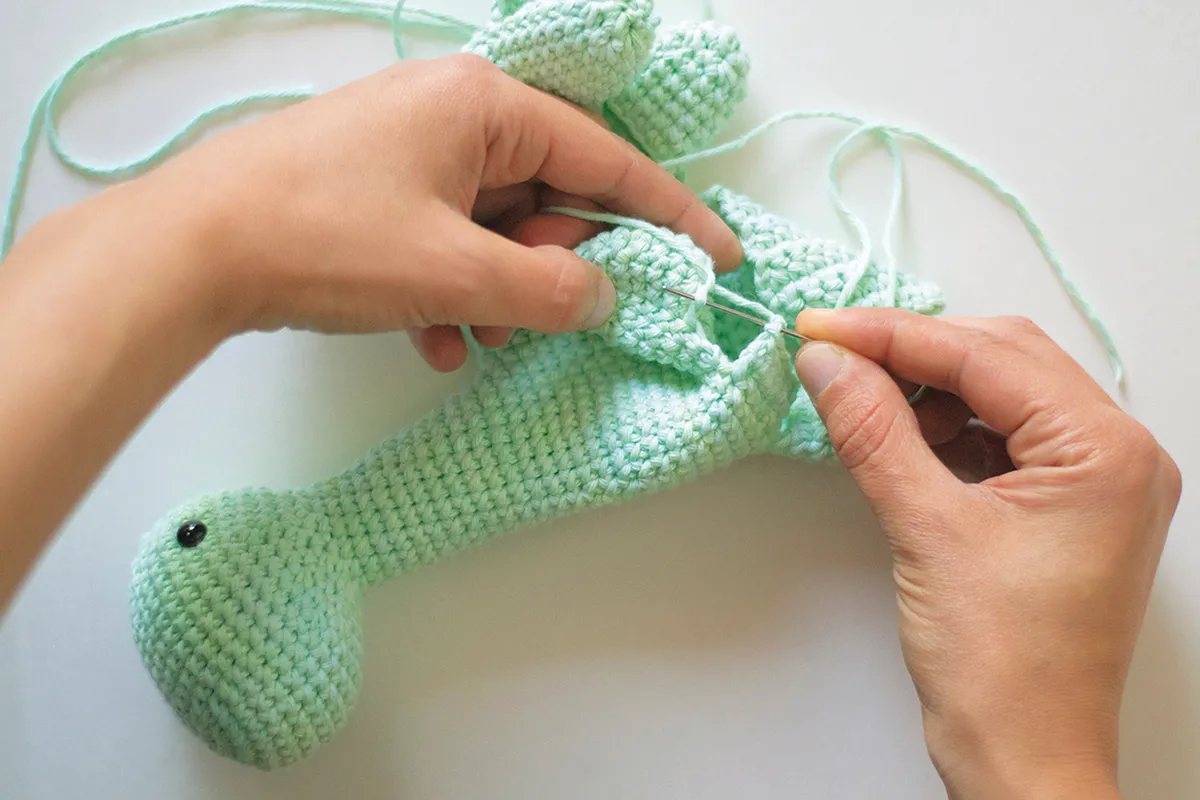
Fill each leg with stuffing. Using the tapestry needle, sew the wide belly flap to the other side of the dinosaur. Then sew the belly flap to both the legs and the flaps between them, stuffing the body as you go.
Tail
Round 1 Using light green yarn, start with a crochet magic loop., 5dc in ring, pull ring tight [5sts]
Round 2 Dc in each st around
Round 3 2dc in each st around [10sts]
Round 4 Dc in each st around
Round 5 (Dc, 2dc in next st) 5 times [15sts]
Round 6 Dc in each st around
Round 7 (Dc in next 2 sts, 2dc in next st) 5 times [20sts]
Round 8 Dc in each st around
Round 9 (Dc in next 3 sts, 2dc in next st) 5 times [25sts]
Round 10 Dc in each st around
Round 11 (Dc in next 4 sts, 2dc in next st) 5 times [30sts]
Rounds 12–14 Dc in each st around
Fasten off leaving a long tail for sewing. Fill with stuffing.
Large spikes (make 6)
Round 1 Using coral yarn, start with a crochet magic loop, 5dc in ring, pull ring tight [5sts]
Round 2 Dc in each st around
Round 3 2dc in each st around [10sts]
Round 4 Dc in each st around.
Fasten off leaving long tail for sewing. Don’t stuff.
Medium spikes (make 2)
Round 1 Using coral yarn, start with a crochet magic loop, 5dc in ring, pull ring tight [5sts]
Round 2 Dc in each st around
Round 3 2dc in each st around [10sts]
Fasten off leaving long tail for sewing. Don’t stuff.
Small spikes (make 2)
Round 1 Using coral yarn, start with a crochet magic loop, 5dc in ring, pull ring tight [5sts]
Round 2 Dc in each st around
Fasten off leaving long tail for sewing. Don’t stuff.
Spots (make 6)
Round 1 Using jade yarn, start with a crochet magic loop, 6dc in ring, pull ring tight.
Fasten off leaving a long tail for sewing.
Finishing
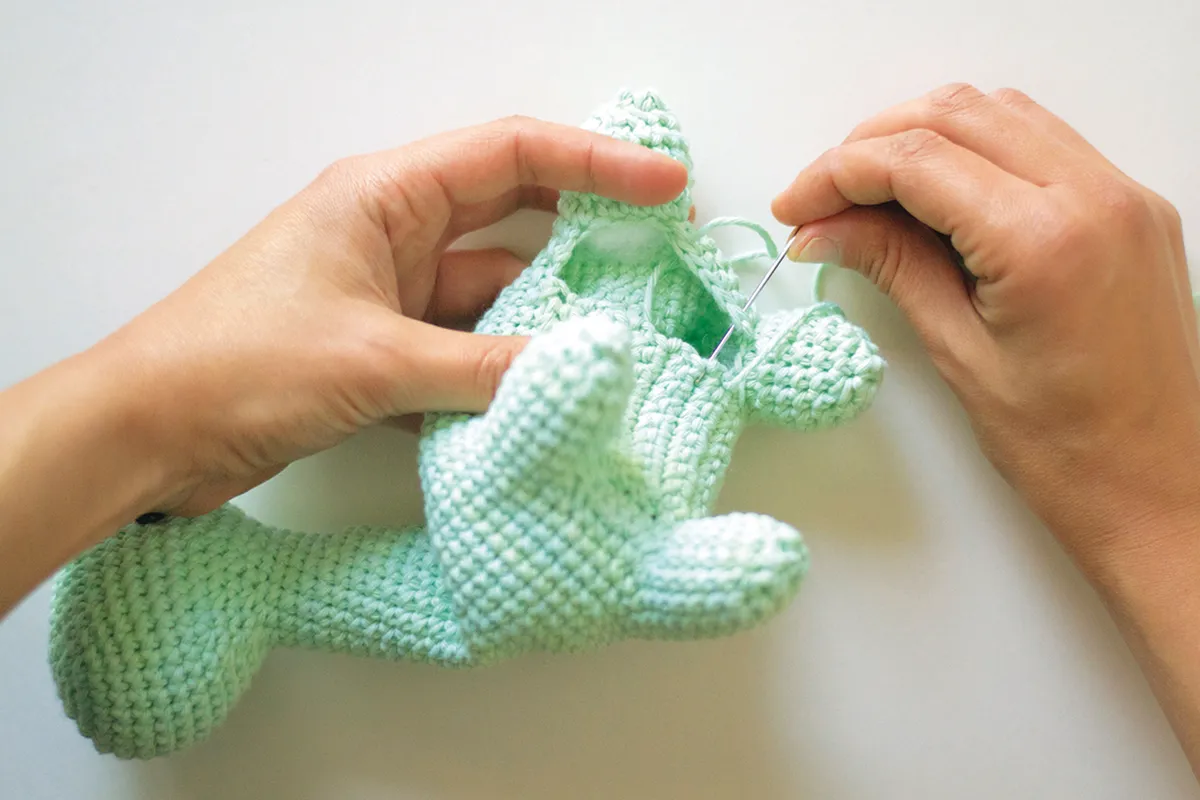
Stuff the tail and then sew it to the body. Sew the 10 spikes, descending from the largest to the smallest ones along the dinosaur's back spine towards the tail.
Finally, sew the spots to the body using the image as a guide for placement. There you go – Your crochet dinosaur is ready for adventures!
More cretaceous crafts!
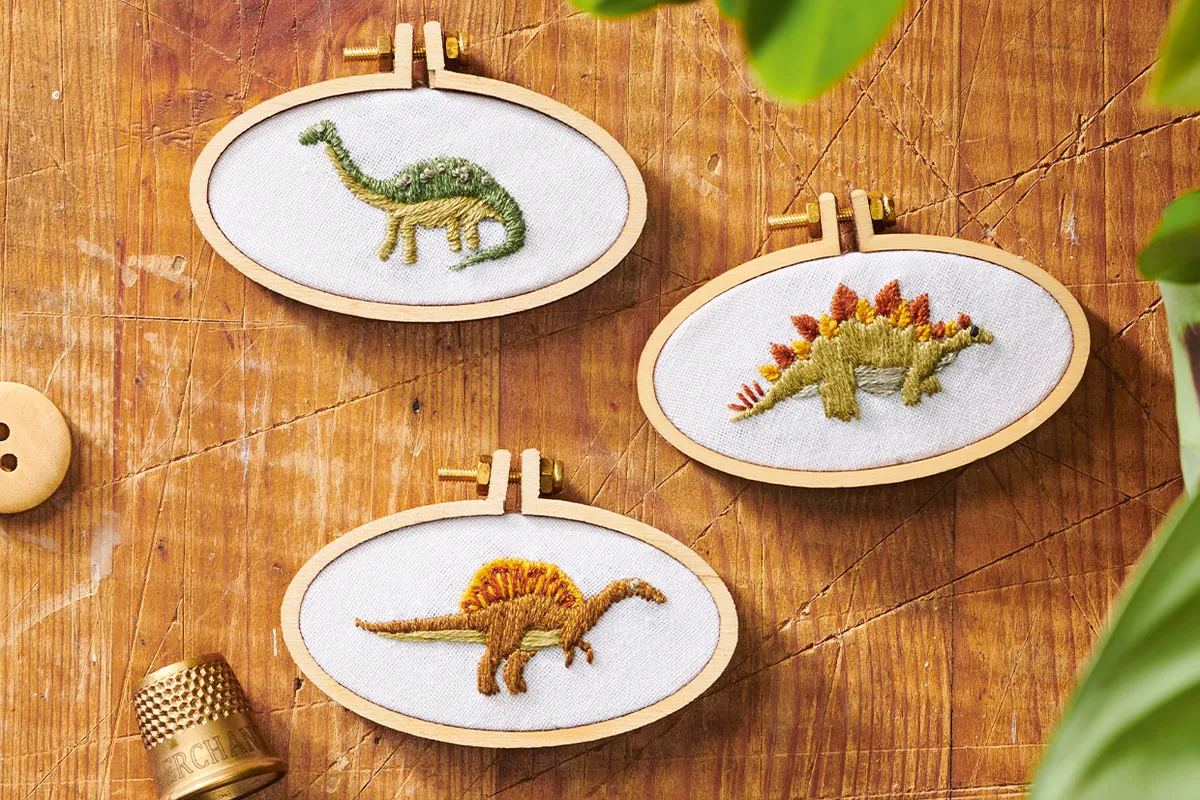
If you're obsessed with dinosaurs, why not flex your crafty skills and try making our free dinosaur sewing pattern, or you can keep things small with our free quick dinosaur embroidery patterns!
Enjoy a fantastic Jurassic creation with our dinosaur crochet pattern!
Now that you've completed this amazing dinosaur crochet pattern, it's time to give it a home! It would make a great kids toy, but equally, adults will love this cute character too! Wherever your delightful dino ends up, you can guarantee this one won't go extinct - he's going to be loved forever!
Find your next amazing amigurumi project
Make your crochet dinosaur some amigurumi friends by checking out the Top 40 amigurumi crochet patterns from Gathered.