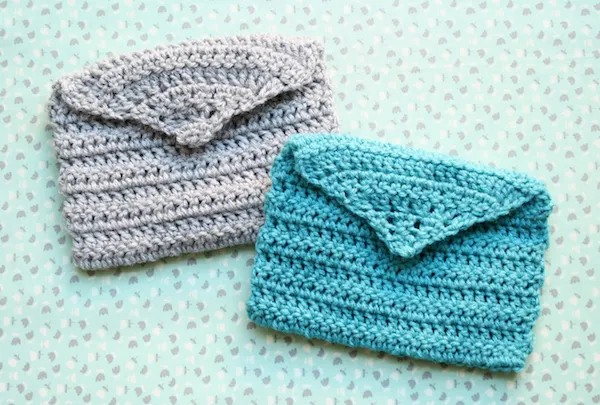
Keep your special letters and stationery safe inside these fun little crochet envelopes! They make handy little storage pouches but can be used for multipurposes making them a great sustainable craft. You could use yours to gift presents in (much more eco-friendly than plastic wrapping), store loose items in your handbag, keep needles and sharp craft tools away from kids, and much, much more. We've decided to crochet our envelopes as a place to store and cherish important cards, letters, notes, and keepsakes but the choice is yours. Did we mention it's a great stash buster project too? Use scrap threads to decorate yours with some embroidery or make the front, back and top of the envelope different colours using up all those leftover pieces.
Oh and don't worry if you're new to crochet. Our crochet envelopes are beginner-friendly and we have complete crochet for beginners guide right here on Gathered. We've even rounded up the best crochet hooks if you're looking to build your first crochet kit! Right, now let's get on and make some crochet envelopes!
You'll need:
• Worsted yarn
• Crochet hook size UK 5mm (US H8)
• Scissors
• Tapestry needle
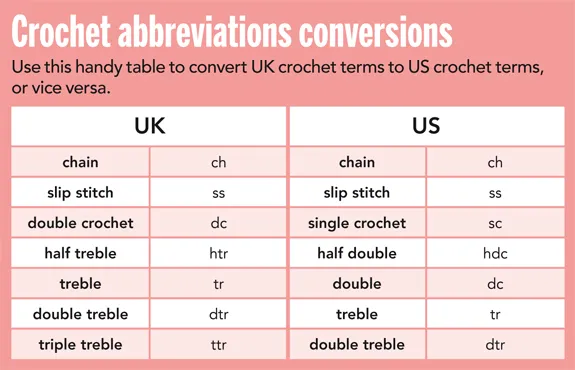
Abbreviations
Please note: US crochet terms used throughout. You can find a full list of all abbreviations we use in our abbreviations and conversions guide. This pattern is written in UK terminology but you can easily convert it to US terms using this handy chart.