How to embroider: A complete guide to embroidery for beginners
Embroidery is such a rich and exciting skill to learn. Just like painting, the creative possibilities are endless! But instead of using paint, you'll express your creativity using thread.
At a very basic level embroidery is as simple as drawing on a piece of fabric and then stitching over it. The form of the different stitches is how variation is created.
In this embroidery for beginners guide, you'll find out everything you need to know, even if you're completely new to the craft. By the time you reach the end, you'll have completed your first stitches.
First up, we will explore how to embroider by hand in our step-by-step guide. We'll also show you how to create an even tension to keep your stitches looking neat and uniform.
Let's get started on your embroidery adventure!
Embroidery for beginners – start today
In this embroidery guide, you'll learn...
- Embroidery essentials for beginners
- How to embroider by hand: step by step
- How to use an embroidery hoop
- How to finish embroidery
- Embroidery stitches for beginners
Embroidery essentials for beginners
What do you need to start embroidery? Here we give you a run-through of the essential supplies you need to get going. Luckily you don't need much to build your kit.
Needle
Embroidery needles have a long eye which makes them easy to thread. Opt for a size 7 and 9 needle for embroidery, as they're well-suited for hand sewing.
SQUIRREL_13196843
Fabric
It’s best to stitch on a closely woven fabric so your stitches don’t disappear between the fabric threads. Cotton and linens are ideal. Love Crafts have a good range of fabrics for embroidery to get you started.
Threads
There are many different threads you can use, but stranded cotton is the most common. Each length of thread has six strands, so you can use different numbers of strands depending on how thick you want your stitches to be.
DMC thread is always a popular choice with embroidery and is used in most commercial patterns.
Embroidery hoop
Embroidery hoops are inexpensive but essential for getting your fabric tension taunt while you stitch. Without one it can be really tricky not to pull too hard as you stitch, which can cause the fabric to pucker.
SQUIRREL_13078291
Embroidery scissors
Embroidery scissors are smaller than your average scissor, with sharp blades that snip easily through your threads.
They come in some delightful and classic designs and will become one of the most used tools you have in your kit.
SQUIRREL_13118262
Embroidery patterns beginners
Ready to start stitching? Explore the Gathered Shop for a beautiful range of beginner-friendly patterns. Simply choose your favourite and download it instantly!
Visit the Gathered Shop


How to embroider: step-by-step tutorial
Now you've got your kit together, it's time to start on your first stitches!
Step 1
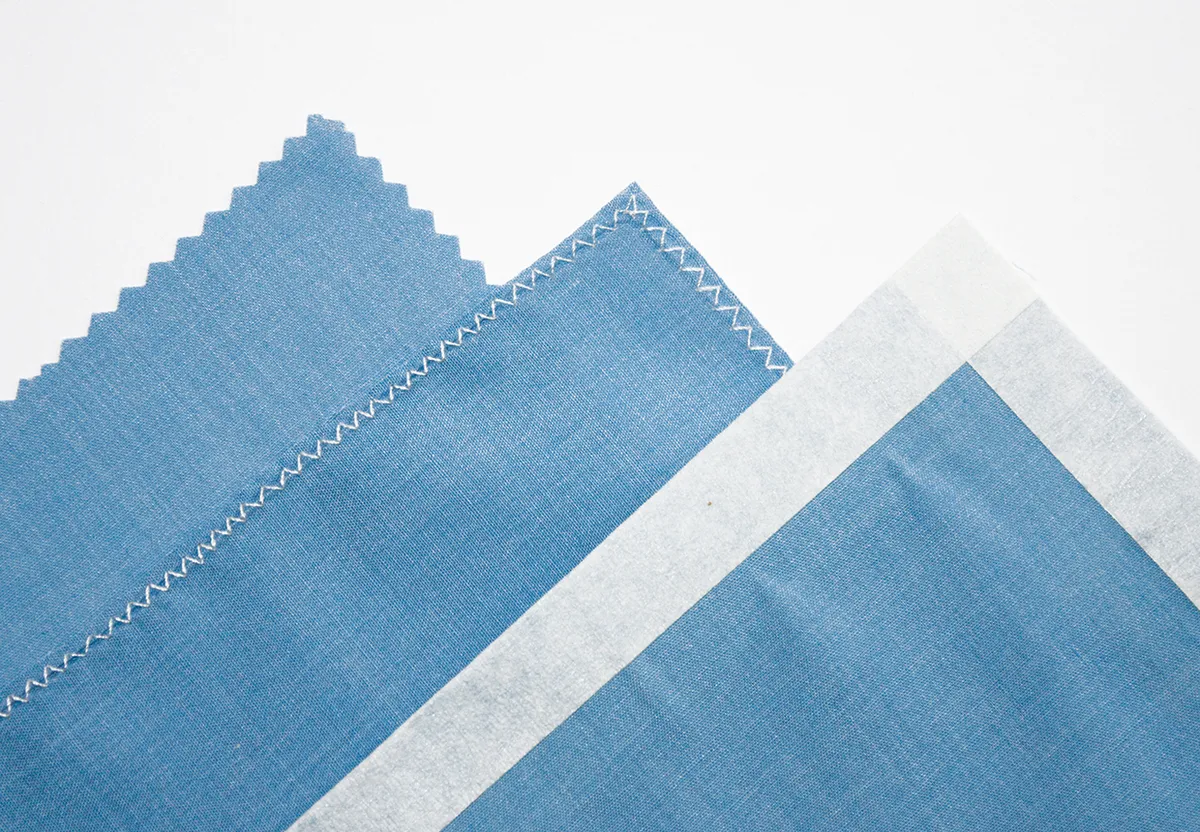
Prepare your fabric to stop it from fraying. There are a few ways to do this. For a quick fix, seal the edges with masking tape, or you can simply trim around the edge with pinking shears.
For the most secure finish, use a sewing machine to stitch a quick zigzag around the edges.
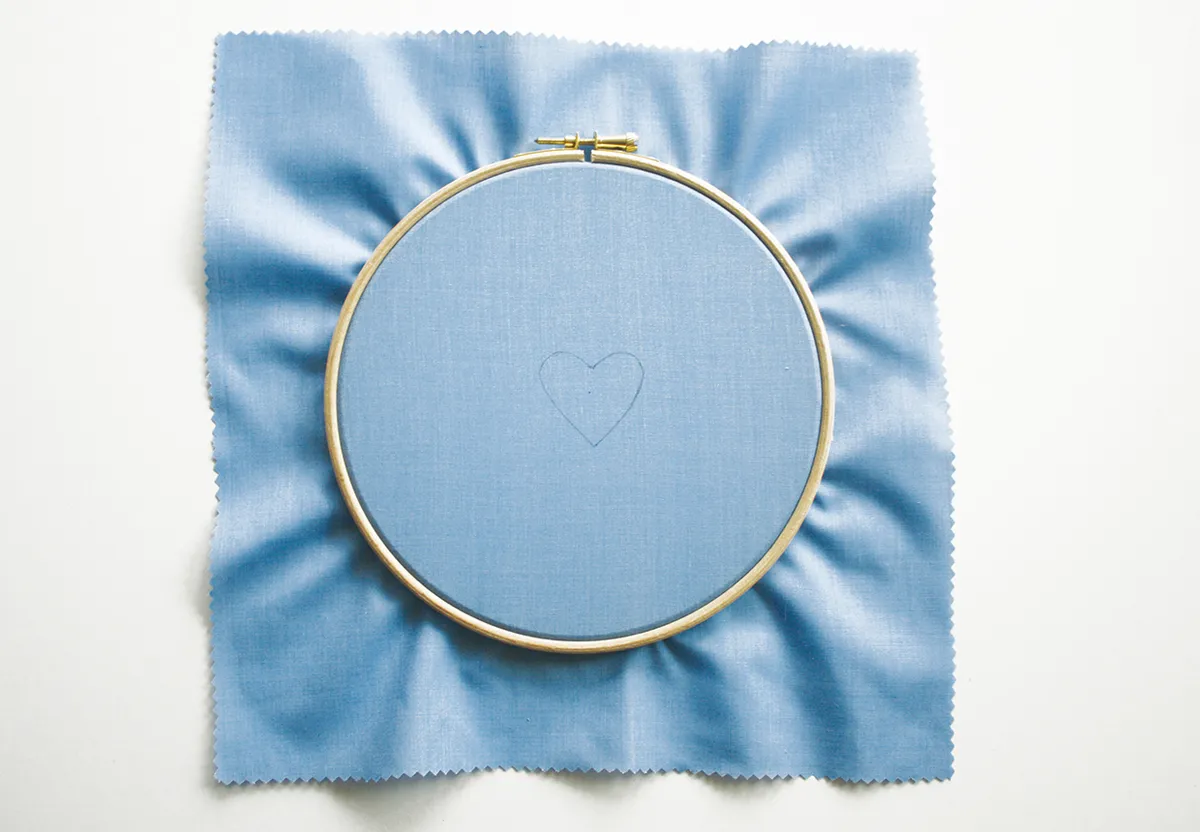
Step 2
Transfer the design. Most embroidery projects use templates, which you’ll need to transfer onto your fabric. The simplest way is to trace it.
Place the fabric right side up over the template and secure with masking tape.
Trace over all the lines using a pencil, water-soluble pen or chalk in a colour that shows up on the fabric.
If you struggle to see the design through the fabric, then tape the design and fabric onto a window or lightbox.
Step 3
Choose your hoop. Once you’ve traced your design, place the fabric into a hoop or frame. This will provide the correct tension and your stitches will be neater.
Step 4
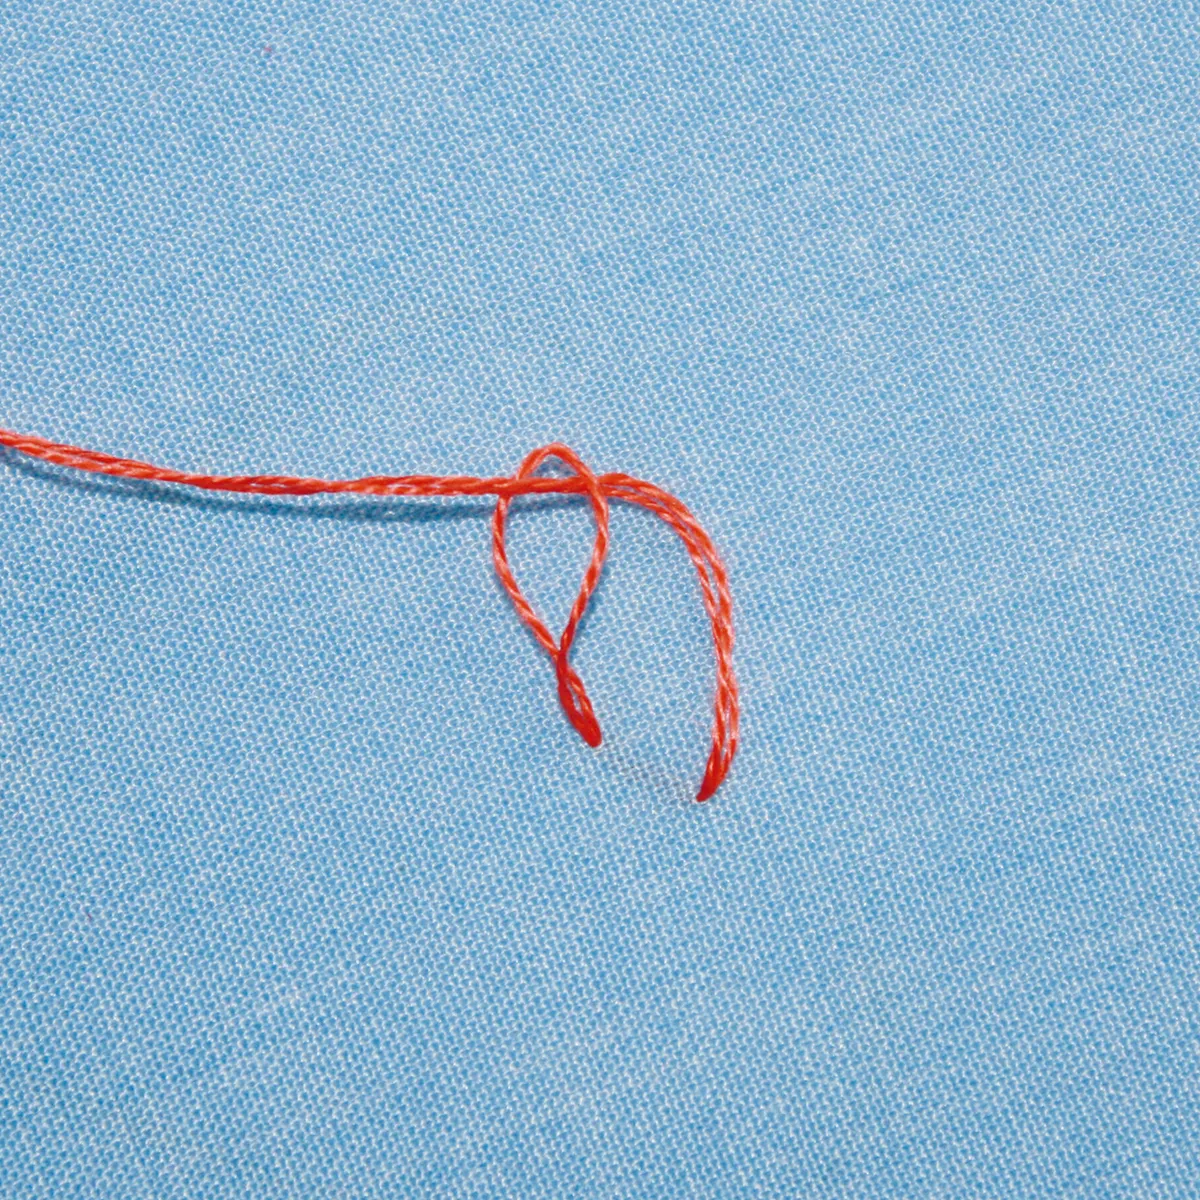
Knot one end of your thread and bring the needle up through the fabric to the front, at your starting point, with the knot at the back.
You're ready to stitch your outline! We would suggest starting with backstitch, it's easy to pick up and a widely used stitch. View our backstitch tutorial, to create the outline of your design.
Step 5
Once you've come to the end of the outline, secure the thread by weaving it through the back of your stitches.
Well done, you have completed your first embroidery stitches! If you want to add more to your design, check out our guide to embroidery stitches. Why not fill your heart design with satin stitch?
How to use an embroidery hoop
Embroidery hoops come with an outer and an inner ring. By securing your fabric between the two layers, you can keep it taunt which makes it easier to stitch on.
Step 1
Separate the two rings. With traditional wooden hoops, you'll see a screw at the top which you loosen to release the inner hoop.
Step 2
Once you've got your inner hoop free, place your fabric over it with the area you want to stitch onto in the centre.
Make sure you have excess fabric left around the outside of the hoop the whole outer boundary of the frame, otherwise your tension won't work.
If your fabric isn't big enough to stretch over the hoop, you need a smaller hoop.
Step 3
Now carefully press the outer frame back on top.
Step 4
Tug the fabric gently around each edge to tighten it and tighten up the screw with a wooden frame.
How to sew a loop knot start
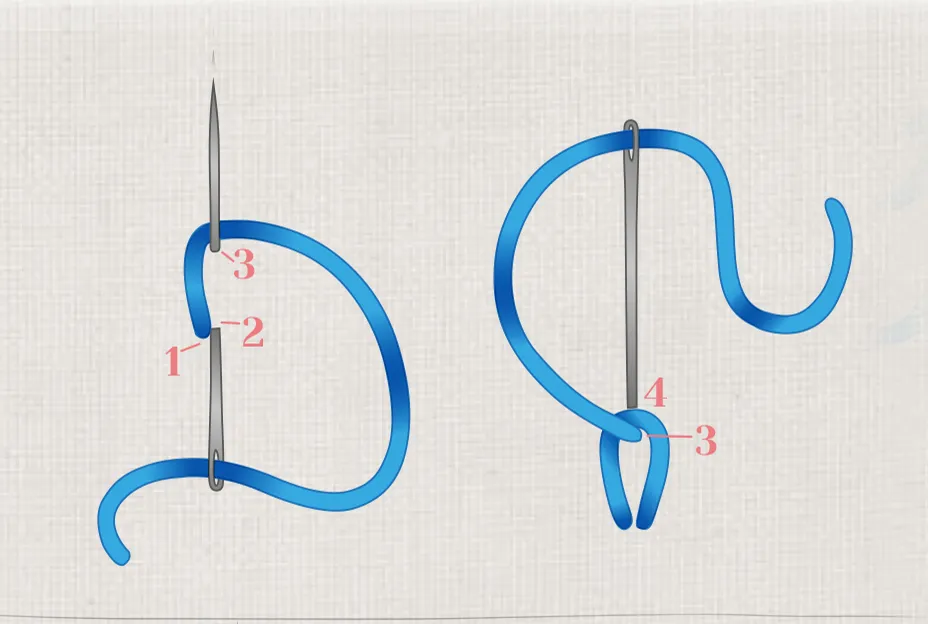
When it comes to embroidery for beginners, if you’re working with two strands, a loop knot is an easy and neat way to start your thread.
Step 1
Cut a single length of thread that is double the length you want to stitch with and fold it in half to create a loop at one end.
Step 2
Thread your needle with the two tail ends. Bring your needle up to the front of your fabric, leaving a small loop of thread on the reverse.
Step 3
Make your first stitch and pass the needle through the loop on the reverse. Pull to secure the thread. Now continue with your stitching as normal.

Easy embroidery ideas to start right now
These simple embroidery ideas are suitable for complete beginners and should help you on your way to becoming an embroidery pro!
How to finish an embroidery
How to wash embroidery
Once you're done stitching, it's time to finish your embroidery project! Washing your fabric after stitching will really bring your embroidery to life and also restore the crispness of cotton or linen.
- Soak your stitched fabric for about 15 minutes in a bowl of warm water with a little gentle detergent, then gently agitate it.
- To remove marks, sponge gently, taking care not to disturb the stitches if possible. Rinse well and roll your stitching in a towel to squeeze out excess water.
- Leave flat to dry.
How to press embroidery
If you have washed your fabric, it’s best to press your fabric while still slightly damp.
- First, pad your ironing board with a thick towel.
- Place your work right side down on top with a thin, clean cloth over it.
- Press carefully until the fabric is dry. The towel will stop the iron from flattening the stitches.
- Press gently, working the point of the iron into the stitches.
Embroidery stitches for beginners
Learn the basics here or see our full guide to embroidery stitches for beginners. We also have several videos on our YouTube channel showing you how to do basic stitches.
View the embroidery stitches video playlist.
Backstitch
Use backstitch for a neat outline. Bring the needle up and take it back over the fabric, as shown. Push the needle back up in front of where you started, making sure you keep all the stitches neat and even.
For more, see our full guide on how to Backstitch.
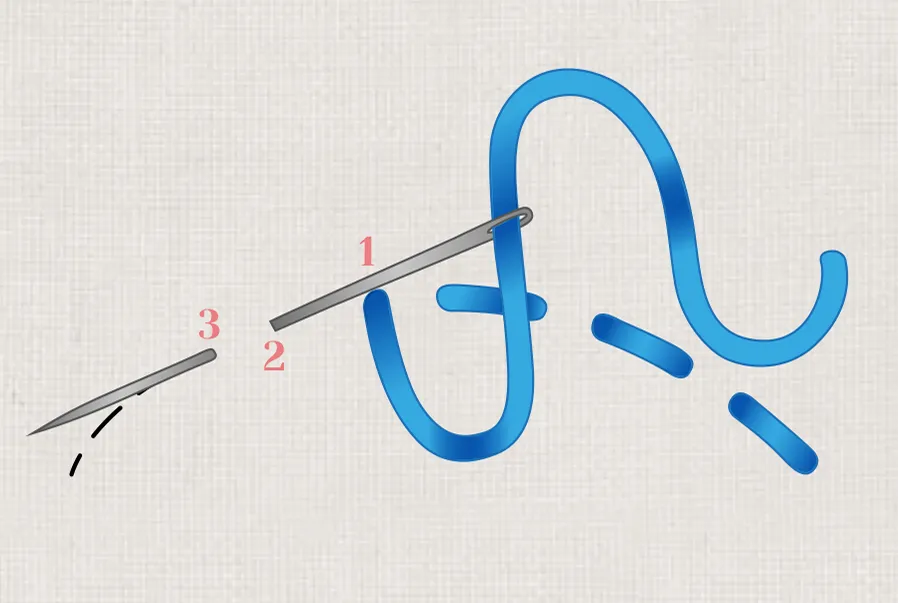
Satin stitch
To work satin stitch, bring the needle up at 1 on one side of the shape then take it back down at 2 on the other side.
Continue stitching this way so all the stitches lie close together without any of the fabric showing through beneath.
For more, see our full guide on how to do satin stitch.
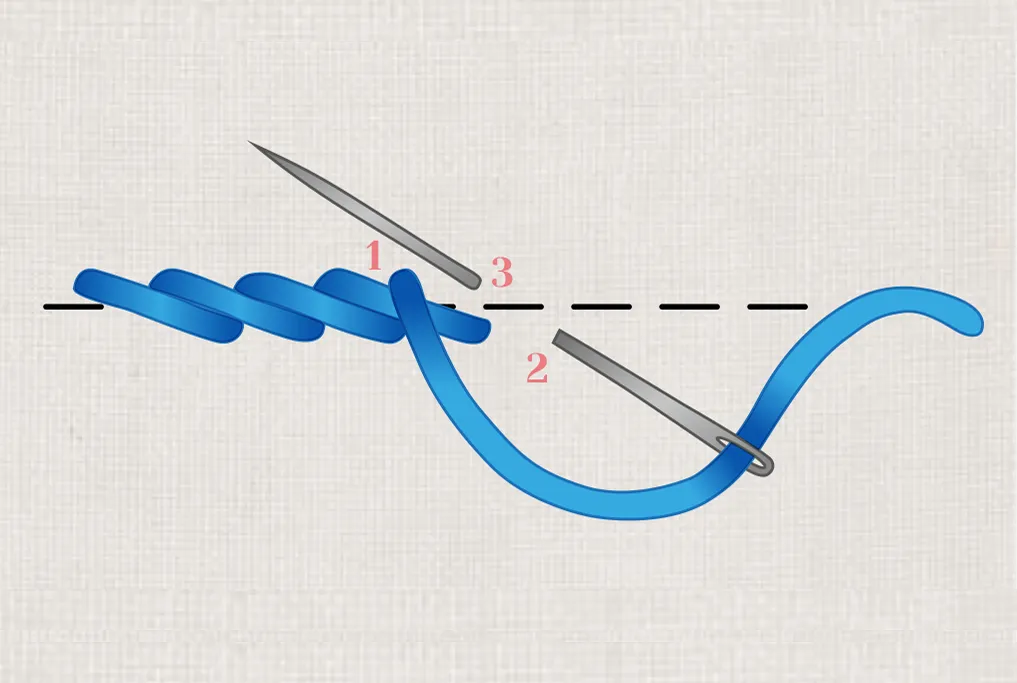
Stem stitch
Work from left to right in regular small stitches along the line of the design. For stem stitch, the thread should always emerge on the left side of the previous stitch.
This stitch is used for flower stems, outlines and so on. For more, see our full guide on how to do stem stitch.
Lazy Daisy stitch
Bring the needle up at 1 and down at 2, without pulling the needle all the way through the fabric. Bring the needle up again at 3, with the thread under the needle, and pull gently to form a loop.
Secure this loop by pushing the needle back in again just on the other side of the loop.
See our full guide on how to do lazy daisy stitch.
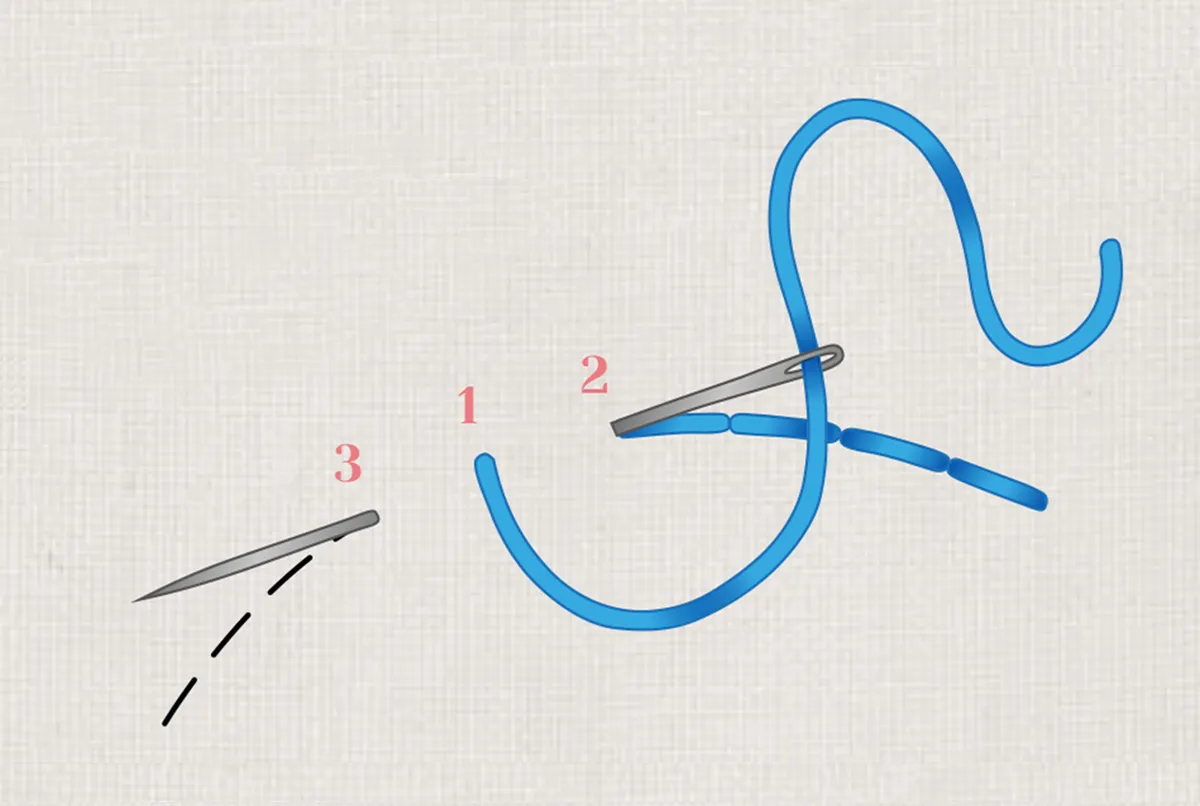
Colonial Knots
Bring the needle up at 1 and loop the thread over it. Next, take the thread over and under the needle in a figure of eight. Follow the thread path on the diagram to see exactly how this is done. Push the needle back down at 2, close to where it first emerged.
Before you pull it all the way through, tighten the loops around the needle and hold them in place. Pull the needle through to form a neat knot.

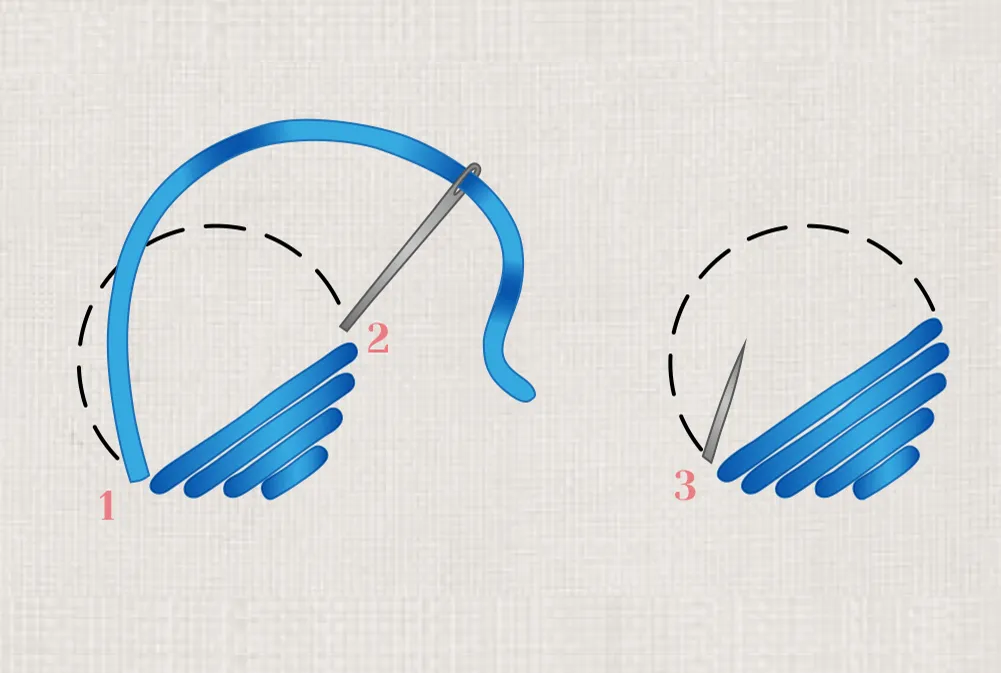
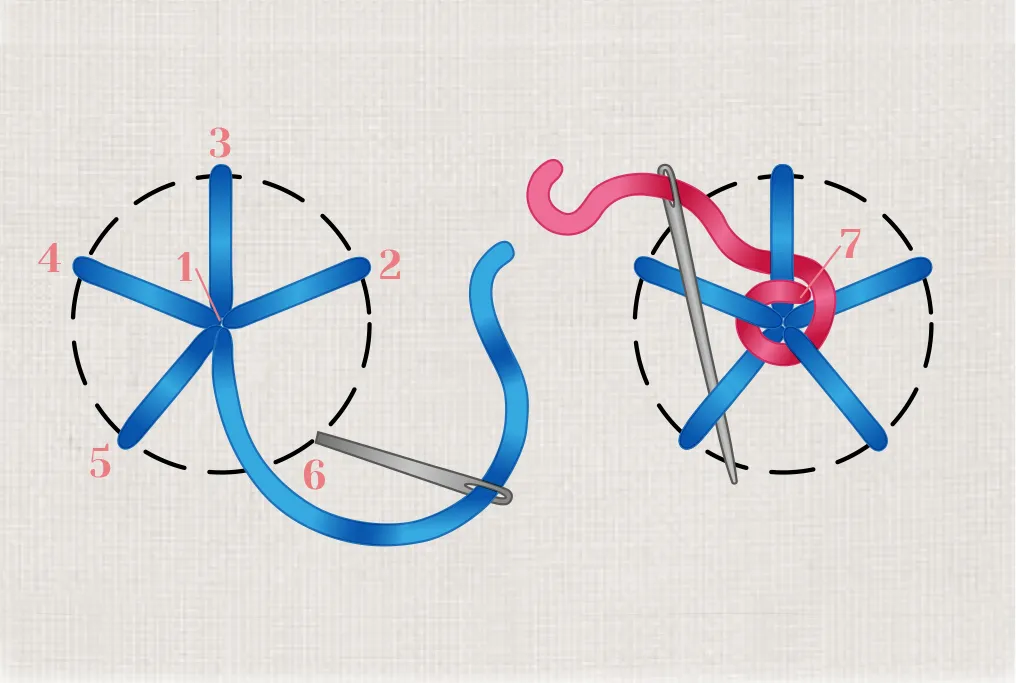
Woven wheel stitch
Work five straight stitches evenly spaced in a circle as shown. Now, bring the needle up at the centre where all the straight stitches meet. Weave it alternately under and over the straight stitches, making sure you don’t stitch through the fabric or stitches.
Continue until you have woven the thread to the outer ends of the straight stitches then take the needle through to the back to finish.
Running stitch
Bring the needle up and down through the fabric to create regular-length stitches. Make sure that all the stitches are the same length and the spaces left between them are that length too for a neat stitch.
Keep the tension even so the stitches lie neatly on the fabric. More on how to do running stitch here.

Should I try machine embroidery?
Machine embroidery is a whole other world of creativity! If you're interested in learning more about it, head to our embroidery machines for beginners guide.
Where to start with embroidery for beginners
Any craft is doable, even if you think it looks tricky. Once it's broken down, you'll find out how easy it is to pick up.
The key is to start simple - follow our step-by-step instructions and practice your stitches. Also work out what equipment you need to get started (it is a low-cost hobby to start). For your first project, choose something quick and easy, that way you'll avoid getting frustrated early on.
Before you know it you'll be stitching more and more complex designs, which you can even gift to friends and family.
Your next adventure in embroidery
Practice makes perfect! The more you stitch, the quicker you'll become a pro. And once you've got into the swing of things you'll be able to create more complex embroidery designs.
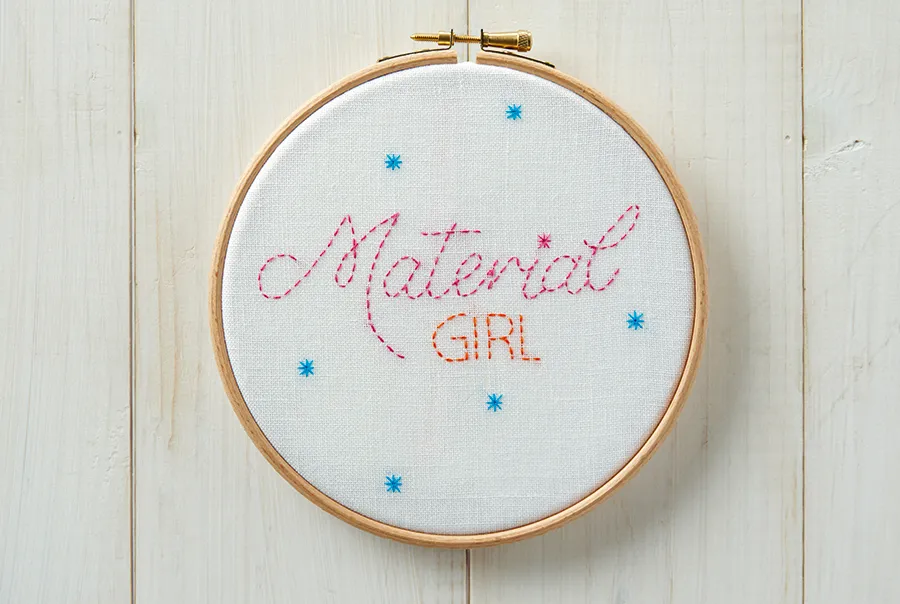
Start your first full project today with our material girl embroidery pattern. This pattern is made up of primarily running stitch – one of the quickest and easiest stitches to pick up.