The ultimate guide to thread painting

Do you want to stitch striking, detailed works of art? You can achieve this through thread painting!

Try 6 issues of Love Embroidery magazine for just £9.99| SAVE 77%

Published: May 3, 2023 at 12:49 pm

Do you want to stitch beautiful, detailed works of art? Thread painting is the stitching technique that will help you do just that!

Whether you want to seamlessly blend colours or produce hyper-realistic shading, thread painting is the surprisingly simple way to achieve these effects.

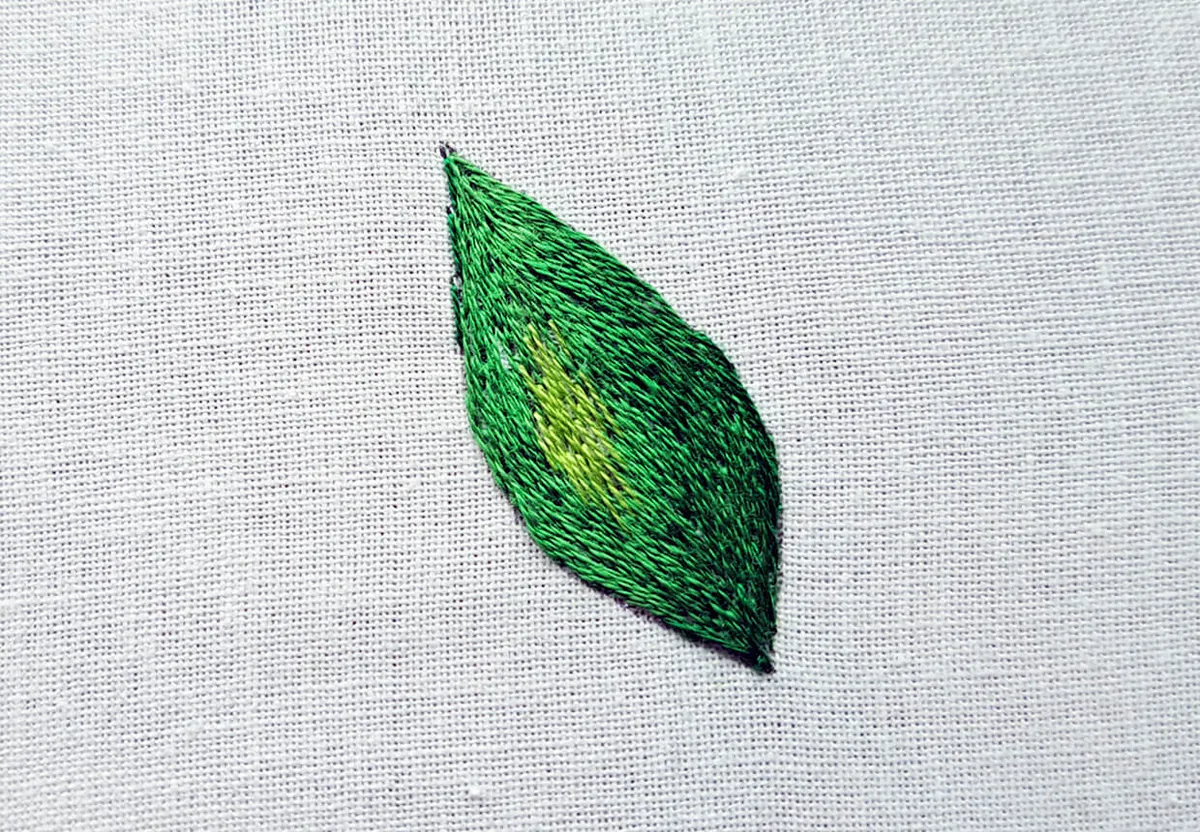
Stick with us and we’ll explain everything you need to know to level up your embroidery game with thread painting. We'll walk you through a thread painting tutorial and you'll create a beautiful leaf with us.

Main image: Thread-painted butterfly by Emillie Ferris from Love Embroidery issue 3. Get your digital copy now.

The ultimate guide to thread painting

What is thread painting?

Thread painting is a hand embroidery technique that uses stranded embroidery thread to create a subtle transition between two or more shades of thread.

Also known as ‘needle painting’ or ‘silk shading’, thread painting is a method of stitching that allows you to create designs that have an appearance closer to a painting than to a piece of embroidery.

The technique allows you to transition smoothly between colours and add subtle light and shade to your chosen design, which will make it look more realistic and three-dimensional.

Leaf thread painting, full tutorial below

Types of stitches used in Thread Painting

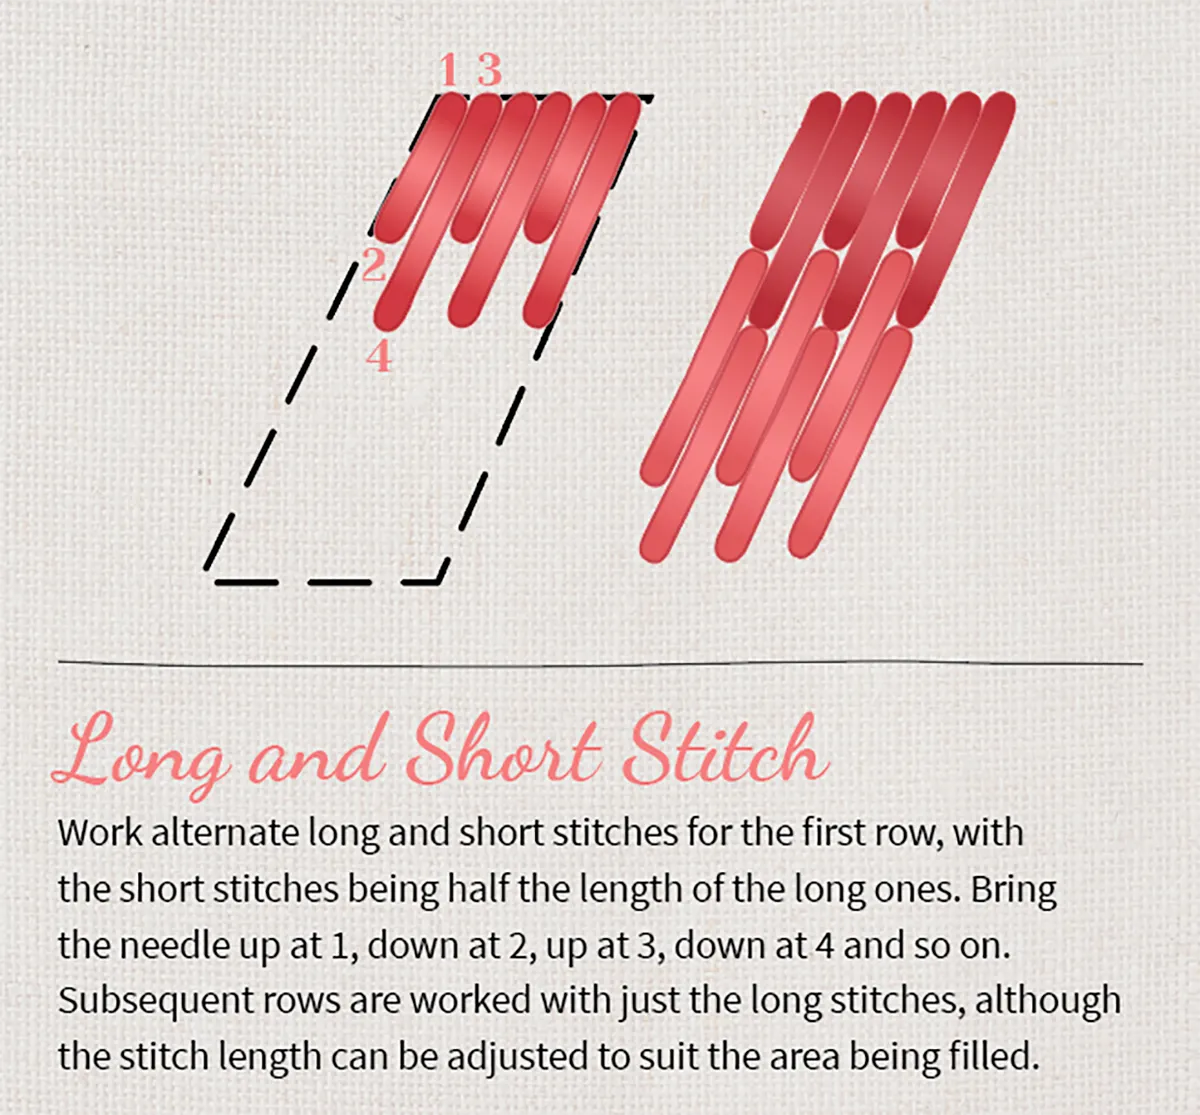
Long and Short Stitch – Thread painting is done predominantly using Long and Short Stitch, as it’s great for producing a smooth transition between two colours across a given area.

The name ‘Long and Short Stitch’ is so called because the first row is worked using stitches in alternating long and short lengths.

All subsequent stitches are worked using long stitches. By staggering the edge of the first row, you prevent clearly defined lines from appearing in your stitches.

Other stitches that can be used for thread painting

Straight Stitch – For creating straight lines. Also great for layering over your Long and Short Stitch to add texture or additional shading, depending on the effect you desire.

Satin Stitch – Ideal for working a solid block in a single colour.

French Knot – This is a great stitch for adding small dots to a design.

Backstitch, Split Stitch, and Stem Stitch– Great for working curved lines and outlining areas.

How to work colour gradients with thread painting

You will need:

  • DMC thread
  • Embroidery hoop
  • Fabric
  • Embroidery needle
  • Basic embroidery kit

Step 1

Before you start, mark your design onto your fabric. You may find it helpful to add lines to your design to show you where you want to switch between shades.

Then mount it into an embroidery hoop. Make sure the fabric is pulled taut, as this stitch is likely to cause your fabric to bunch if it’s not stretched properly.

thread painting step 1

Step 2

Begin by stitching a line of alternating long and short stitches for the first row, with the short stitches half the length of the long ones.

Try to angle your stitches so that they echo the shapes of your design for added realism.

thread painting step 2

Step 3

Then work subsequent rows using just long stitches, although the stitch length can be adjusted to suit the area.

Make sure your stitches come up through the previous ones so that no fabric is showing through.

thread painting step 3

Step 4

When you are ready, switch to the next colour – again using long stitches in a colour that’s close to the current shade for a subtle transition.

You want both colours of stitching to overlap the line you used to mark the change in colours.

thread painting step 4

Step 5

Continue incorporating extra colours if your design requires it. Adding more colour will increase the depth and realism of your design.

thread painting step 5

Step 6

Add some optional straight stitches in a very light or dark colour to create more highlights and shading.

thread painting step 6

Top tips for perfecting your thread painting

Vary your stitch length 

When working Long and Short Stitch, try changing the length of your stitches randomly across an area.

Doing this is a great way to prevent a repetitive pattern from becoming visible – thereby increasing the subtlety of the transition between shades.

Become an expert in thread painting with Love Embroidery

For more projects featuring thread painting and Long and Short Stitch, pick up a copy of Love Embroidery: each issue is full of great modern embroidery projects and comes with clear, step-by-step instructions and stitch guides.

Select the right colours

Blending between different colours is more effective when the shades are similar.

Picking threads in the same colour run is a great way to ensure a gradual transition from one shade to the next – which will look more natural.

A shade card has the colours laid out, moving from the lightest to the darkest of each colour family.

For a more dramatic transition between shades, pick colours with strong contrast.

thread painting colours

Use fewer strands of thread

Reduce the number of strands used for an even smoother finish. The fewer the number of strands, the more seamless the transition between shades will be, we recommend using only one strand of thread.

This will also mean that the threads will lay flush to the fabric, as they won’t be prone to twist around each other as you stitch.

Angle your stitches

Change the direction of your Long and Short stitches to echo the shape of an area.

Whether you are trying to emulate the way fur would lie on an animal or to make a shape appear more 3D, it is a great way to add realism to a design.

Try drawing additional lines across the area before you begin stitching to act as a guide for direction.

thread painting directional guide


Mastering the art of thread painting

Despite being comprised of very simple stitches, it can take a little bit of practice to get the smooth transitions that you’re aiming for. But if you follow our instructions and top tips, you’ll be an expert in no time!

An organised space makes it easier to learn!

As thread painting relies on precise and neat stitching with the use of multiple colours, keeping your threads organised is essential! Check out our embroidery thread storage solutions to give your space a refresh.

embroidery thread storage