For the hanging decorations
Step 1

Using a guillotine, or a ruler, pencil and scissors, cut one sheet of A4 into six 8 x 8cm (3⅛ x 3⅛") squares. Cut the remaining two sheets into 24 6 x 6cm (2⅜ x 2⅜") squares. Place one of the larger squares patterned side down and fold the square in half vertically. Unfold, then fold both outer edges into the centre fold.
Step 2

Unfold the right-hand side and fold a triangle at the top right corner, aligning the top edge with the closest fold. Fold the outer edge back into the centre, rotate the paper 180°, then repeat.
Step 3

Fold up the bottom edge from the bottom right corner to align it with the left-hand edge. Next, fold down the top edge from the top left corner to align it with the right-hand edge. These two folds should both meet horizontally along the centre.
Step 4

Tuck the large triangle at the bottom underneath the left-hand half of the paper. Rotate the paper 180° and repeat.
Step 5

Turn the folded paper over, then fold the bottom left corner up to the top left corner on the same edge to create a small triangle. Rotate 180° and repeat to create a small square with two triangular tabs – this is a sonobe unit.
Step 6

Repeat Steps 1-5 with the remaining five larger squares. Take two sonobe units and hold them at 90° to each other, as shown. Tuck the triangular tab from one unit into the pocket of folds at the centre of the other unit.
Step 7

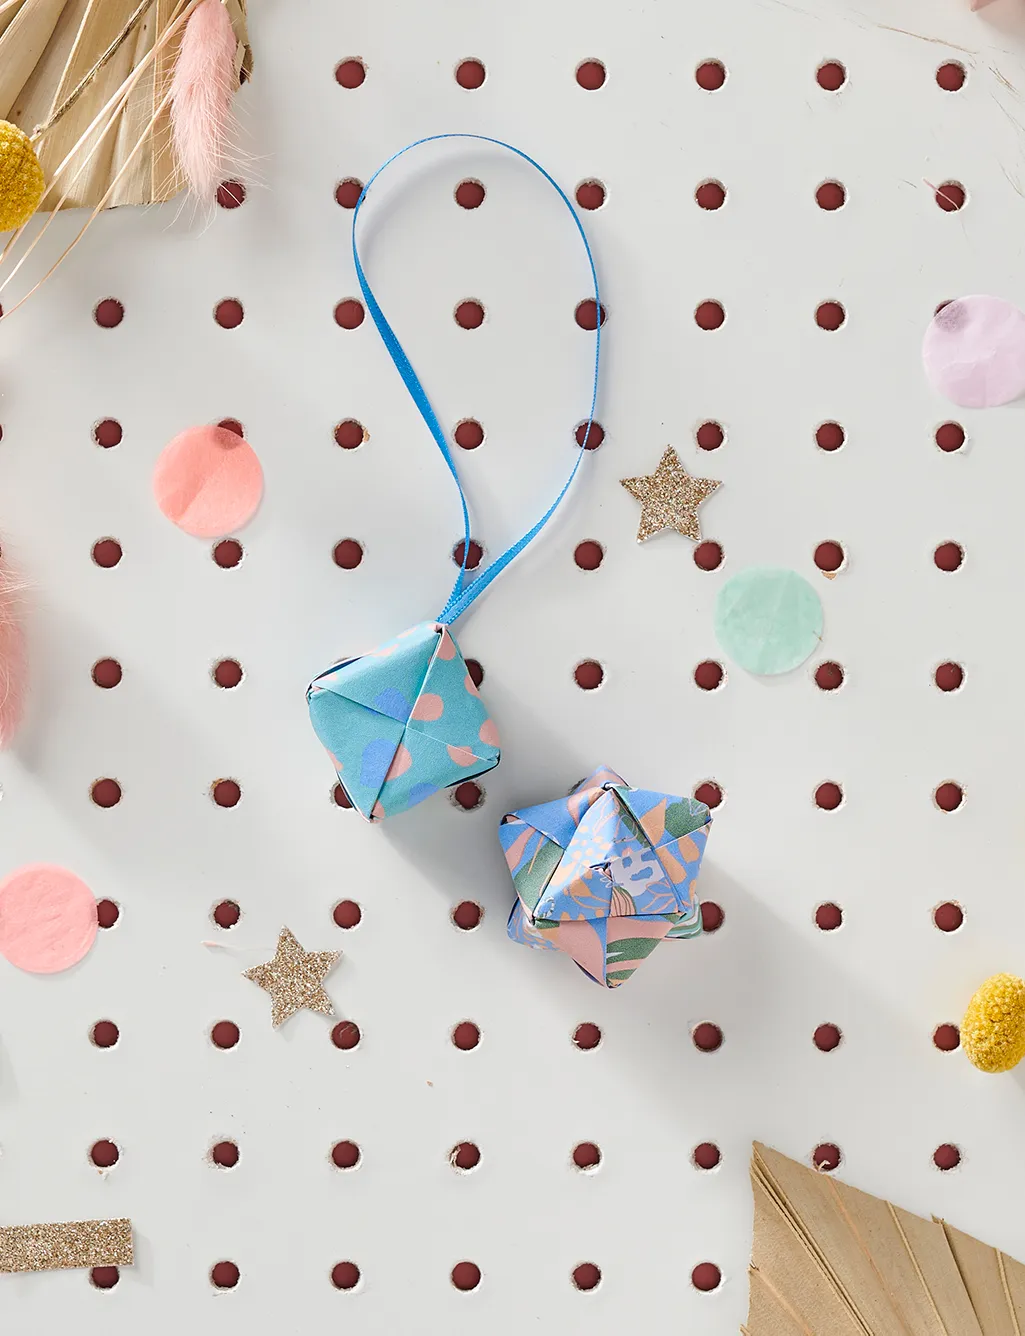
Push the tab in until the edges line up neatly. Repeat to add the remaining four units one at a time, using the square of the unit to construct every side of the cube, until all the tabs are tucked into one another. Create a loop with the length of ribbon, knot the bottom, then insert the knot into one corner of the cube for hanging.
For the mini pot
Step 1

Repeat Steps 1-5 with the remaining 24 smaller squares. Fold all the units in half along the centre, in the opposite direction to the folds that created the triangular tabs.
Step 2

Take three of the units and connect them together as per Step 6, this time interconnecting all three as shown. The triangular tab will insert into the centre of the neighbouring unit, creating a pyramid shape in the centre, and three tabs will stick out from each side of the pyramid.
Step 3

Repeat Step 9 twice more, creating three pyramid shapes with tabs. Line the pyramids up and connect them together, again using the tabs as before, creating the beginnings of new pyramids.
Step 4

Lift up the structure and curve the pyramids round to join one end of the row with the other. Turn the structure over, revealing three tabs close together, then connect these to form one last pyramid. This will be the base of the pot. Turn the pot back over and seal the open edges with a thin line of glue, then hold in place until secure.
For the origami wall art
Step 1

With the remaining 15 sonobe units, have a little fun. Form pyramids that keep connecting with one another and see where the links take you to create your own wall art, or make our design using this image as a guide to placement. Once you’re happy with the shape, glue the wall art to the sheet of plain paper. Hold in place until secure, then leave to dry.
Step 2

Once the origami shape is dry, display the finished artwork inside the box frame and hang.