Cutting Out
Step 1
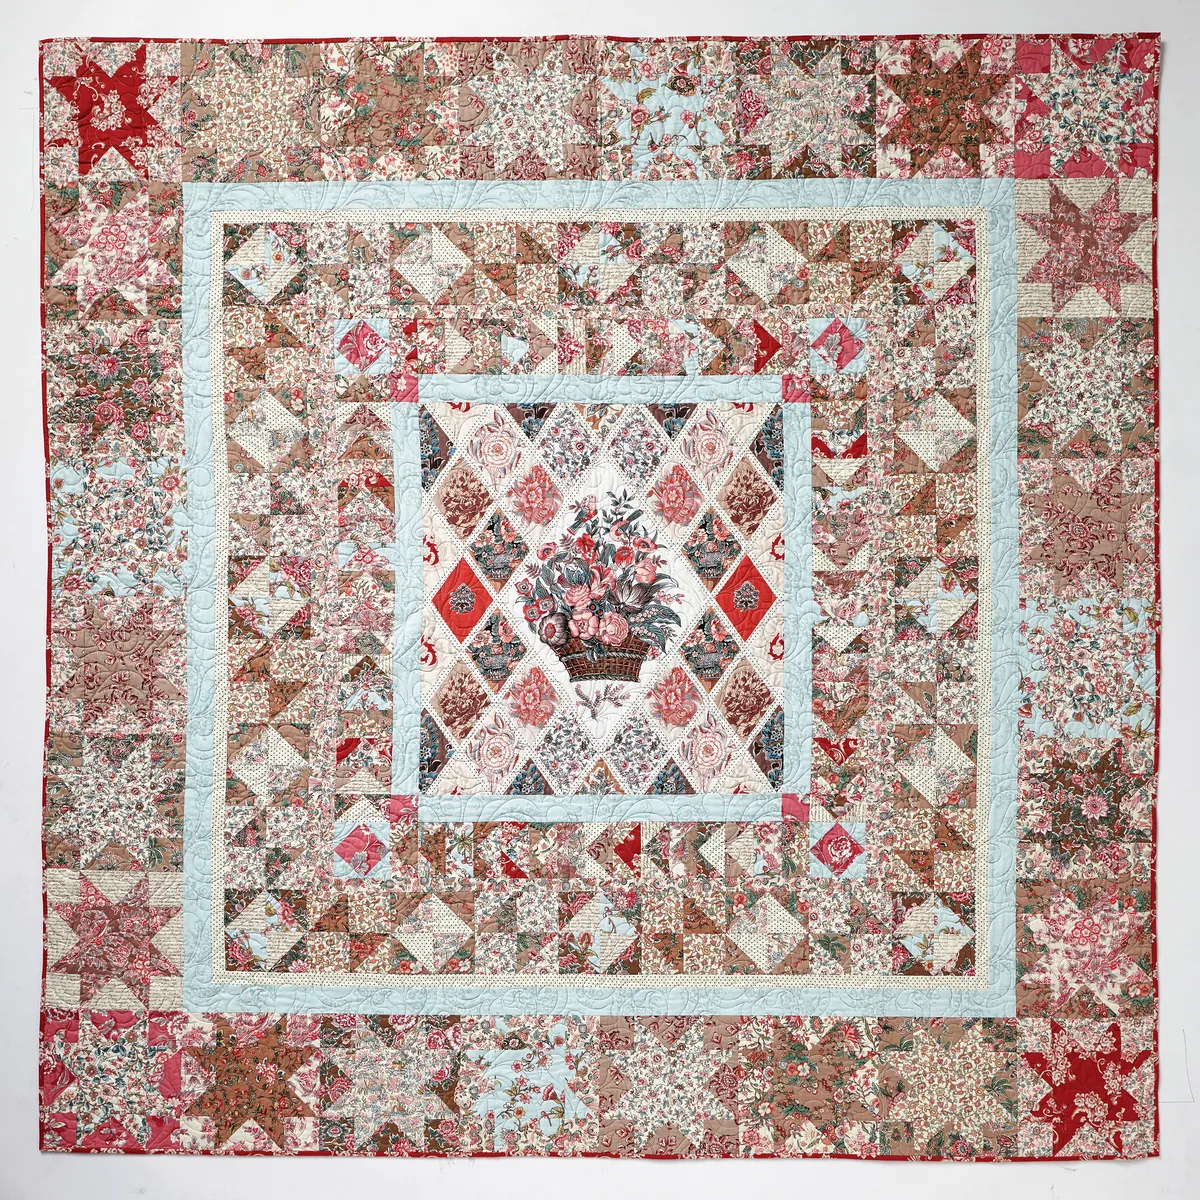
Cut the fabric panel for the centre down to 26½in x 28½in.
Step 2
For Border 1, cut as follows:
From Fabric R (Julia), cut two (2) 2½in x 26½in strips and two (2) 2½in x 28½in strips.
From Fabric M (Lady Catherine), cut four (4) 2½in squares for the cornerstones
Step 3
For Border 2, cut as follows:
From assorted prints, cut sixteen (16) 5¼in squares and sixty-two (62) 2⅞in squares – thirty (30) should be from light prints and thirty-two (32) from dark prints. Subcut each large square in half diagonally twice and each small square in half diagonally once.
From Fabric R (Julia), cut eight (8) 2⅞in squares, subcut in half diagonally once.
From Fabric M (Lady Catherine), cut four (4) 3⅜in squares.
Step 4
For Border 3, from a light print, cut two (2) 1½in x 40½in strips.
Step 5
For Border 4, from a fabric of your choice, cut two (2) 1½in x 40½in strips and two (2) 1½in x 42½in strips.
Step 6
For Border 5, cut as follows:
From dark fabrics, cut thirty-two (32) 4in squares.
From medium fabrics, cut thirty-two (32) 4in squares.
From light fabrics, cut thirty-two (32) 4in squares and thirty-two (32) 3½in squares.
Step 7
For Border 6, from a light fabric, cut two (2) 1½in x 54½in strips and two (2) 1½in x 56½in strips.
Step 8
For Border 7, from Fabric R (Julia), cut two (2) 2½in x 56½in strips and two (2) 2½in x 60½in strips.
Step 9
For Border 8, cut as follows:
From dark fabrics:
Fourteen (14) 5½in squares.
Fifty-six (56) 3in squares (in fourteen sets of four).
Fourteen (14) 6¼in squares. Cut each in half diagonally twice.
Fifty-six (56) 3⅜in squares (in fourteen sets of four). Cut each in half diagonally once.
From light fabrics:
Fourteen (14) 5½in squares.
Fifty-six (56) 3in squares (in fourteen sets of four).
Fourteen (14) 6¼in squares. Cut each in half diagonally twice.
Fifty-six (56) 3⅜in squares (in fourteen sets of four). Cut each in half diagonally once.
Adding border 1
Step 1
Take the trimmed centre panel and sew the two (2) 2½in x 28½in strips to either side. Add a Fabric M cornerstone to each end of the two (2) 2½in x 26½in strips then add these to the top and bottom. Press seams towards the borders.
Making the border 2 - Flying Geese
Step 1

Take one (1) 5¼in triangle of one fabric and two (2) 2⅞in triangles from a contrasting fabric. Stitch a small triangle to one (1) side, press and then repeat on the opposite side (Fig 1). Repeat to make sixty-two (62) in total – thirty (30) with light background fabrics and thirty-two (32) with dark background fabrics.
Step 2

- Side borders – Make 4 dark sets and 4 light sets
- Top & bottom – Make 4 dark sets and 2 light sets, plus 2 light sets with only 3 Flying Geese
Sew the Flying Geese units together into borders. For the sides, stitch into sets of four (4) – four (4) sets with dark background fabrics and four (4) sets with light background fabrics (Fig 2), then join into two (2) borders of sixteen (16) Flying Geese units. For the top and bottom, make six (6) sets of four (4) (four dark, two light) plus two (2) sets of three (3) light backgrounds (Fig 3).
Step 3

Take the 3⅜in squares of Fabric M and 2⅞in triangles of Fabric R. Lay out the fabric pieces for the block, as in Fig 4. Sew a small triangle to opposite sides of the square. Press back and then stitch the other two (2) triangles to the block. Sew a block to each end of the top and bottom borders.
Step 4
Now stitch the side borders to the quilt top, press seams towards the unpieced border, and then add the top and bottom borders.
Adding borders 3 and 4
Step 1

Stitch the border 3 strips to either side of the quilt top. Note that this border does not have top and bottom borders (Fig 5). These strips will make the quilt top square for subsequent borders.
Step 2
Add the two (2) 1½in x 40½in border 4 strips to the sides and the two (2) 1½in x 42½in strips to the top and bottom. Press seams towards these borders.
Making border 5
Step 1
This is made up of two (2) types of blocks, sixteen (16) of each.

The first block is made of three (3) different fabrics – dark, light and medium. For each block, pair up two (2) medium value squares with one (1) light and one (1) dark print. Draw a diagonal line on the back and stitch a ¼in from each side of the line. Cut, press and then trim each resulting half-square triangle to a 3½in square (Fig 6).
Step 2

Lay out your four (4) HSTs as shown in Fig 7, note that the medium print is on the outer edges with dark and light alternating in the centre. Stitch together in pairs, then join the pairs to make a 6½in block. Make sixteen (16) in different colourways.
Step 3
The second block is made from two (2) fabrics – dark and light. Repeat step 17, pairing up one (1) light with one (1) dark square to make two (2) HSTs.
Step 4

Take two (2) matching 3½in light squares and lay out into a four patch with the HSTs, as shown in Fig 8. Note the light print is on the outside. Stitch together as before. Make sixteen (16) in different colourways.
Step 5

Lay out the blocks, alternating, with block 1 in the corners (Fig 9). Stitch together the seven (7) side border blocks then sew these borders to each side of the quilt top. Then sew the nine (9) top and bottom border blocks together and stitch to the quilt.
Adding borders 6 and 7
Step 1
Stitch the two (2) 1½in x 54½in border 6 strips to either side of the quilt top and two (2) 1½in x 56½in strips to the top and bottom.
Step 2
Stitch the two (2) 2½in x 56½in border 7 strips to either side of the quilt top and two (2) 2½in x 60½in strips to the top and bottom.
Making border 8 - star blocks
Step 1
Take four (4) matching 6¼in light triangles and eight (8) 3⅜in dark triangles from a second fabric. Follow the Flying Geese instructions in step 11 to make four (4) matching Flying Geese.
Step 2

Stitch two (2) Flying Geese either side of a matching 5½in dark square with points facing out. Add 3in light squares to the ends of the remaining Flying Geese then add to the top and bottom to complete the block (Fig 10).
Step 3
Repeat steps 24 and 25 to make fourteen (14) dark stars with light backgrounds. Then repeat, reversing the fabric placements, to make fourteen (14) light stars with dark backgrounds.
Step 4

Lay out the star blocks around the edge of the quilt top, alternating. Place the four (4) boldest stars in the corners for balance. Join into two (2) side borders of six (6) blocks and add to the sides of the quilt top. Join eight (8) blocks into two (2) border strips and add to the top and bottom, as in Fig 11.
Quilting and finishing
Step 1
Make a quilt sandwich by placing the backing fabric right side down, the batting on top, then the quilt top centrally and right side up. Baste the layers together using your preferred method.
Step 2
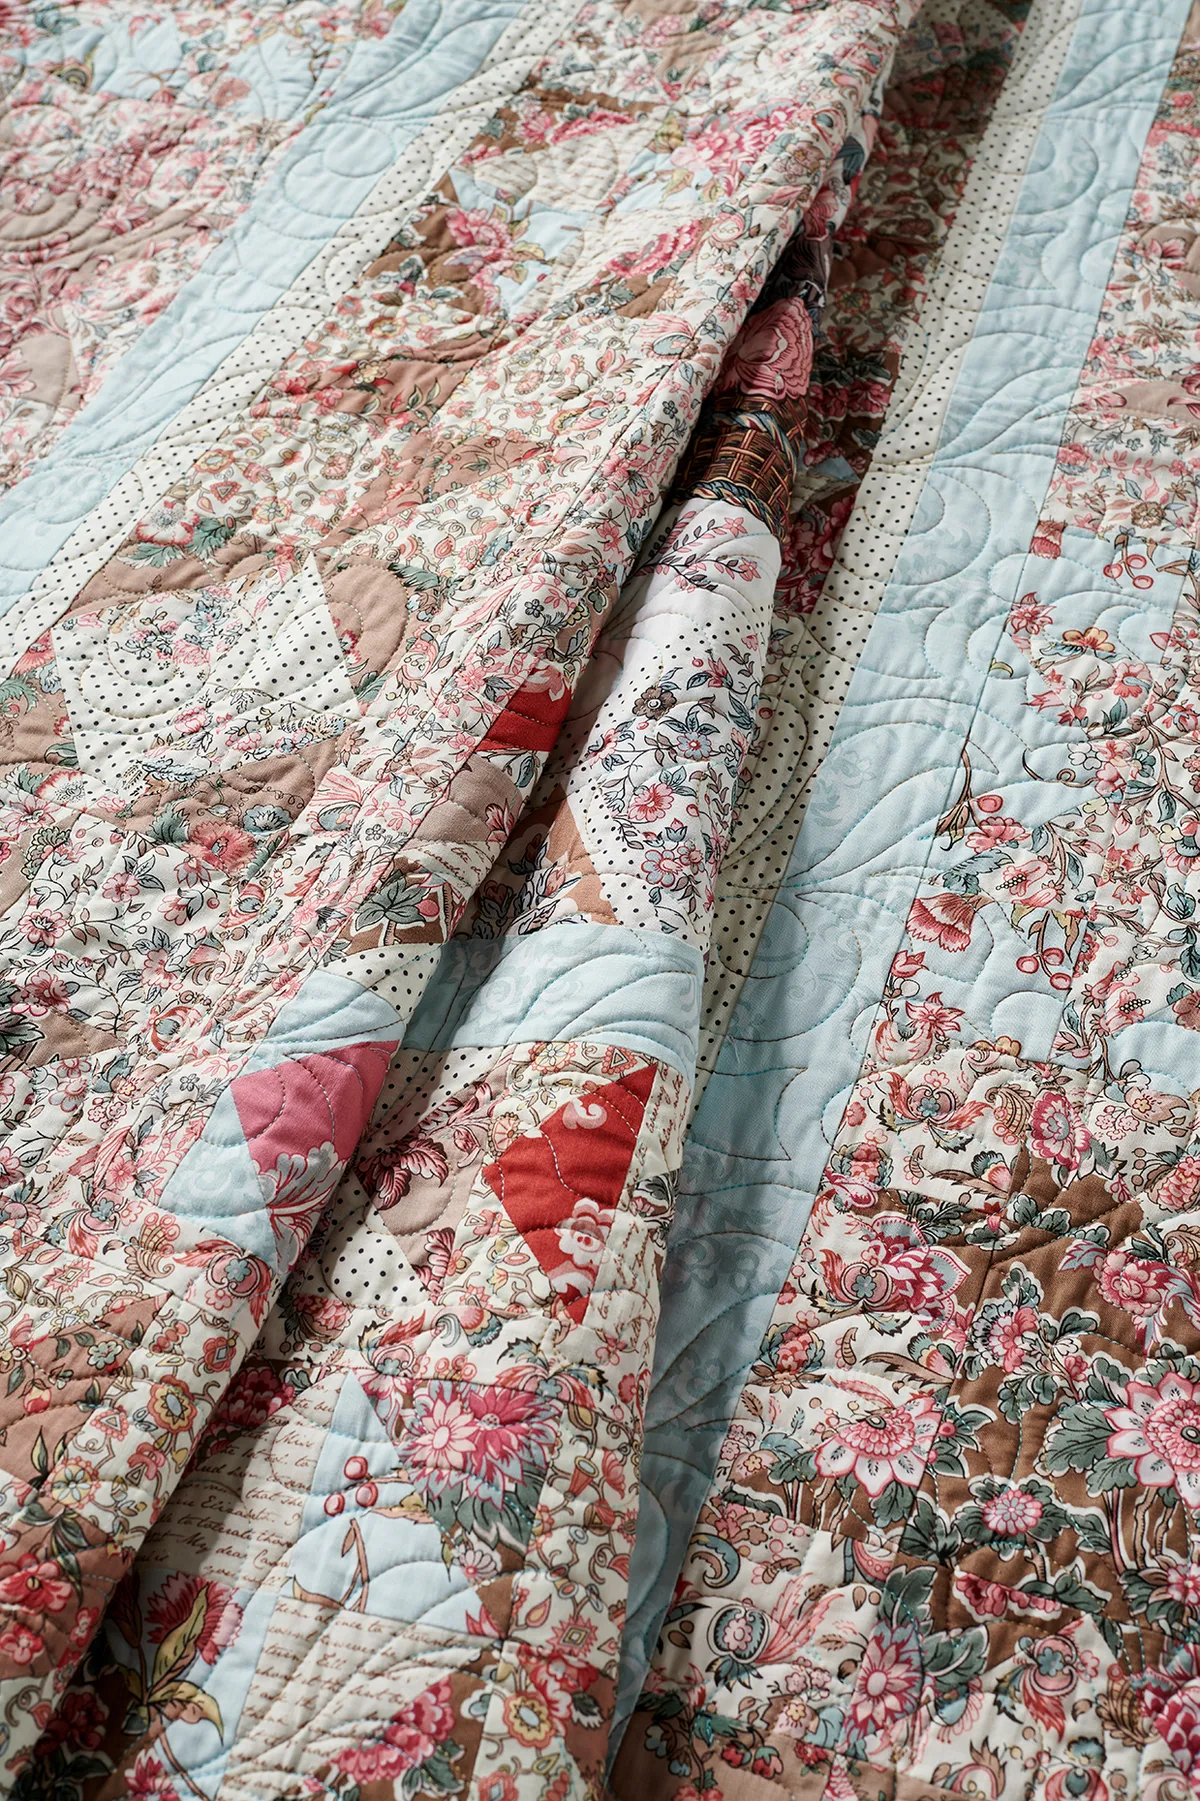
Quilt as desired, either by hand or machine.
Step 3
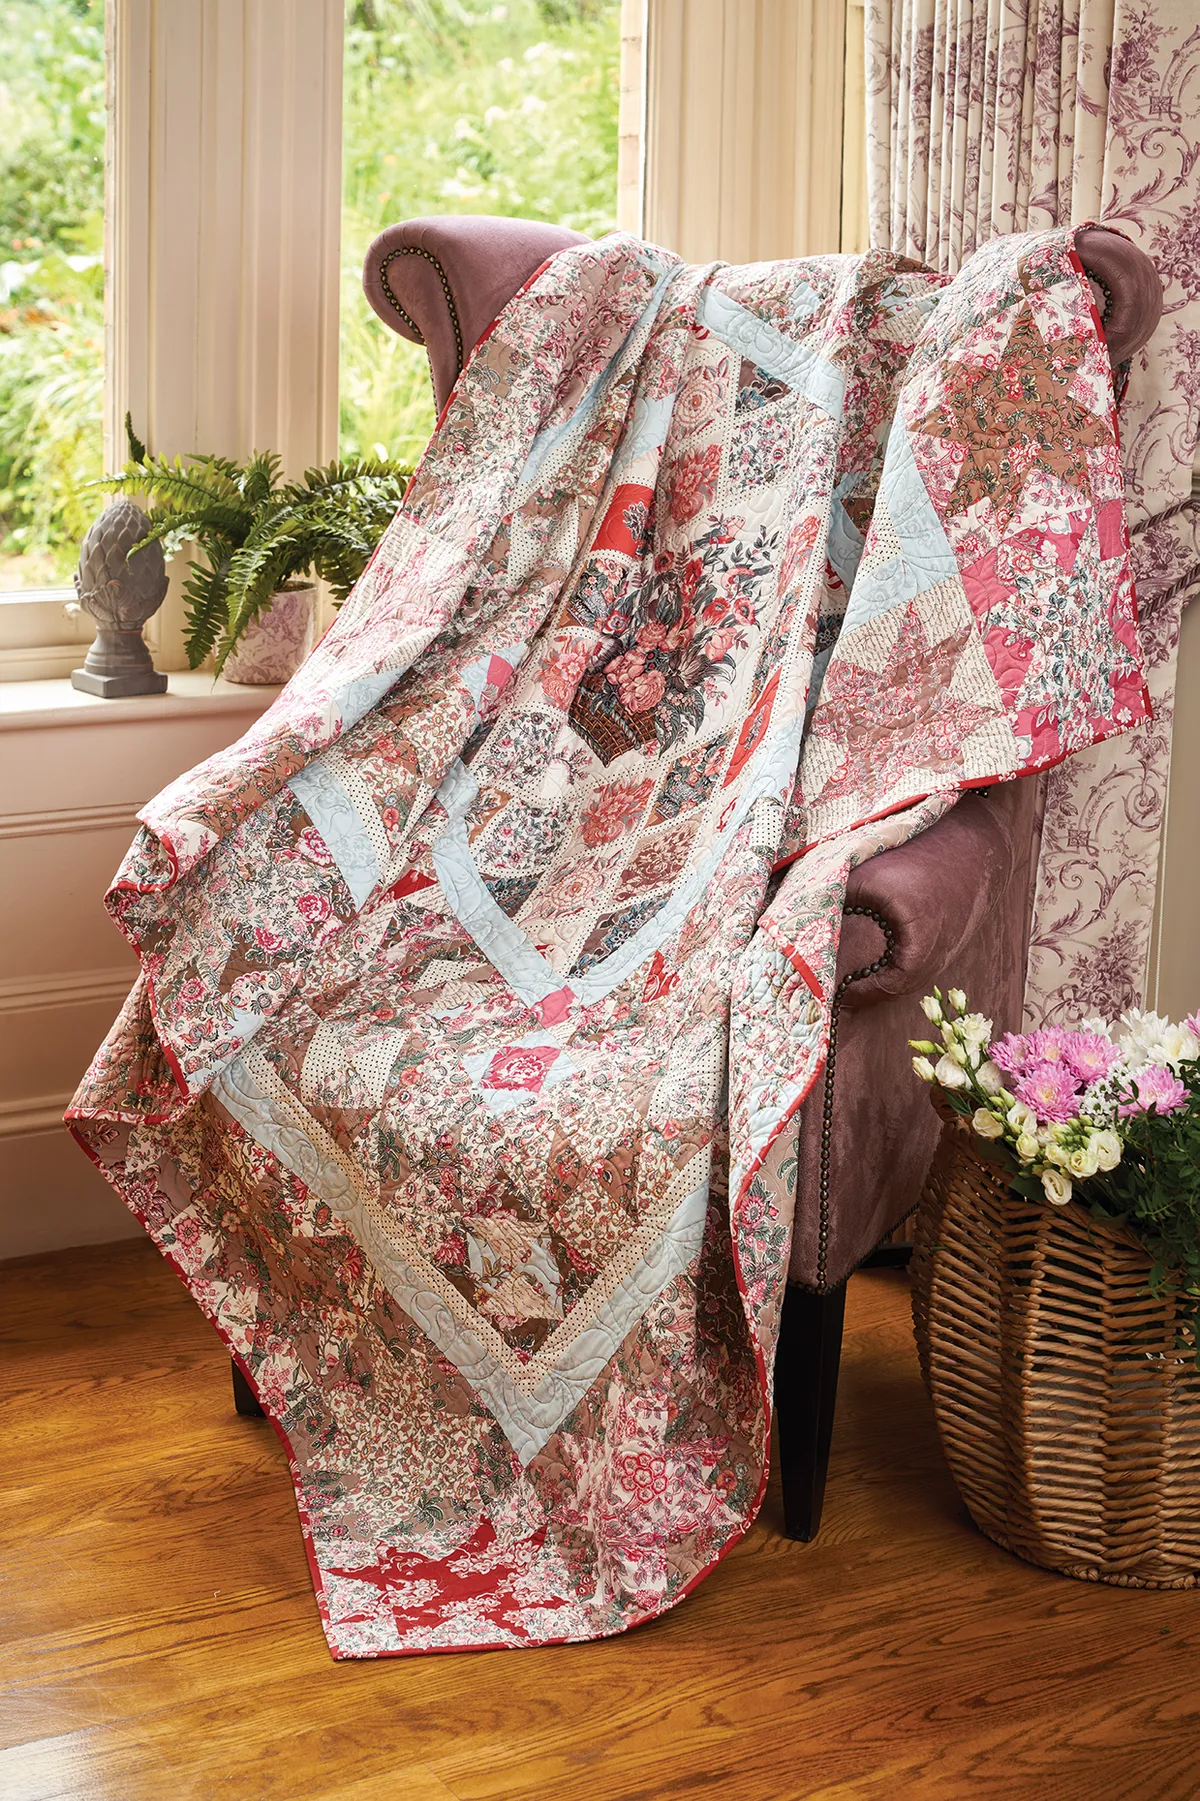
Trim the batting and backing in line with the quilt top and bind to finish. Sally used Fabric C (Emma) for her binding.