Giant pencil pillow pattern

Sewing school is now open! Sew these giant pencil pillows as a cuddly back-to-school gift.

Try 6 issues of Love Patchwork & Quilting magazine for £9.99| SAVE 76%

Published: September 11, 2022 at 10:03 am

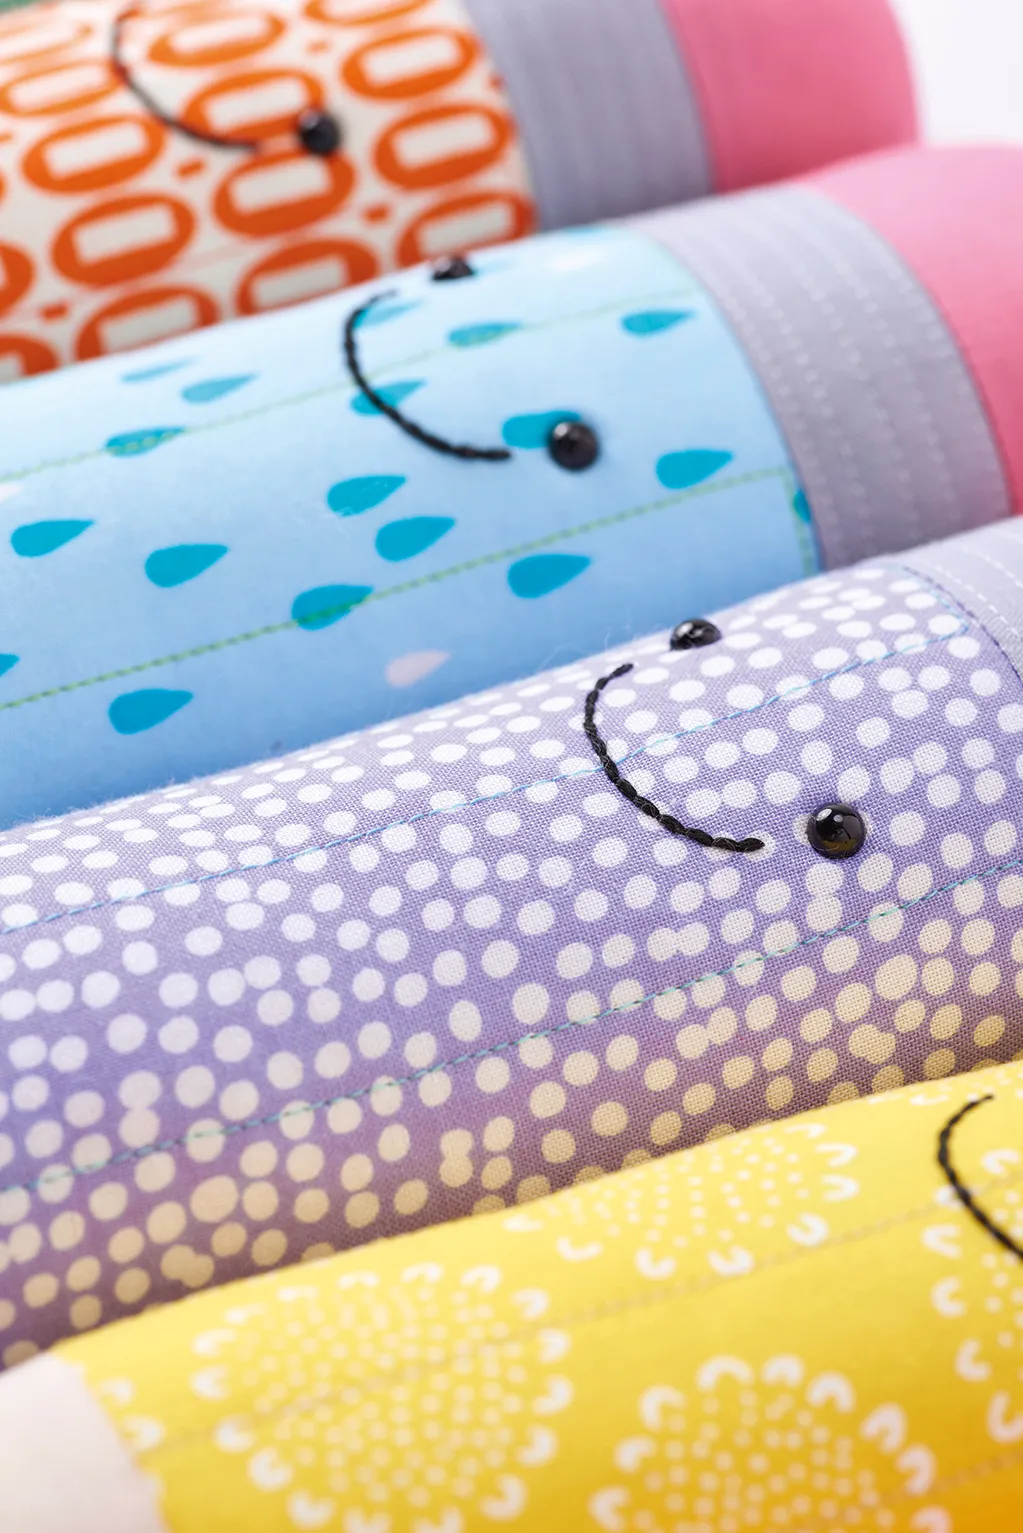
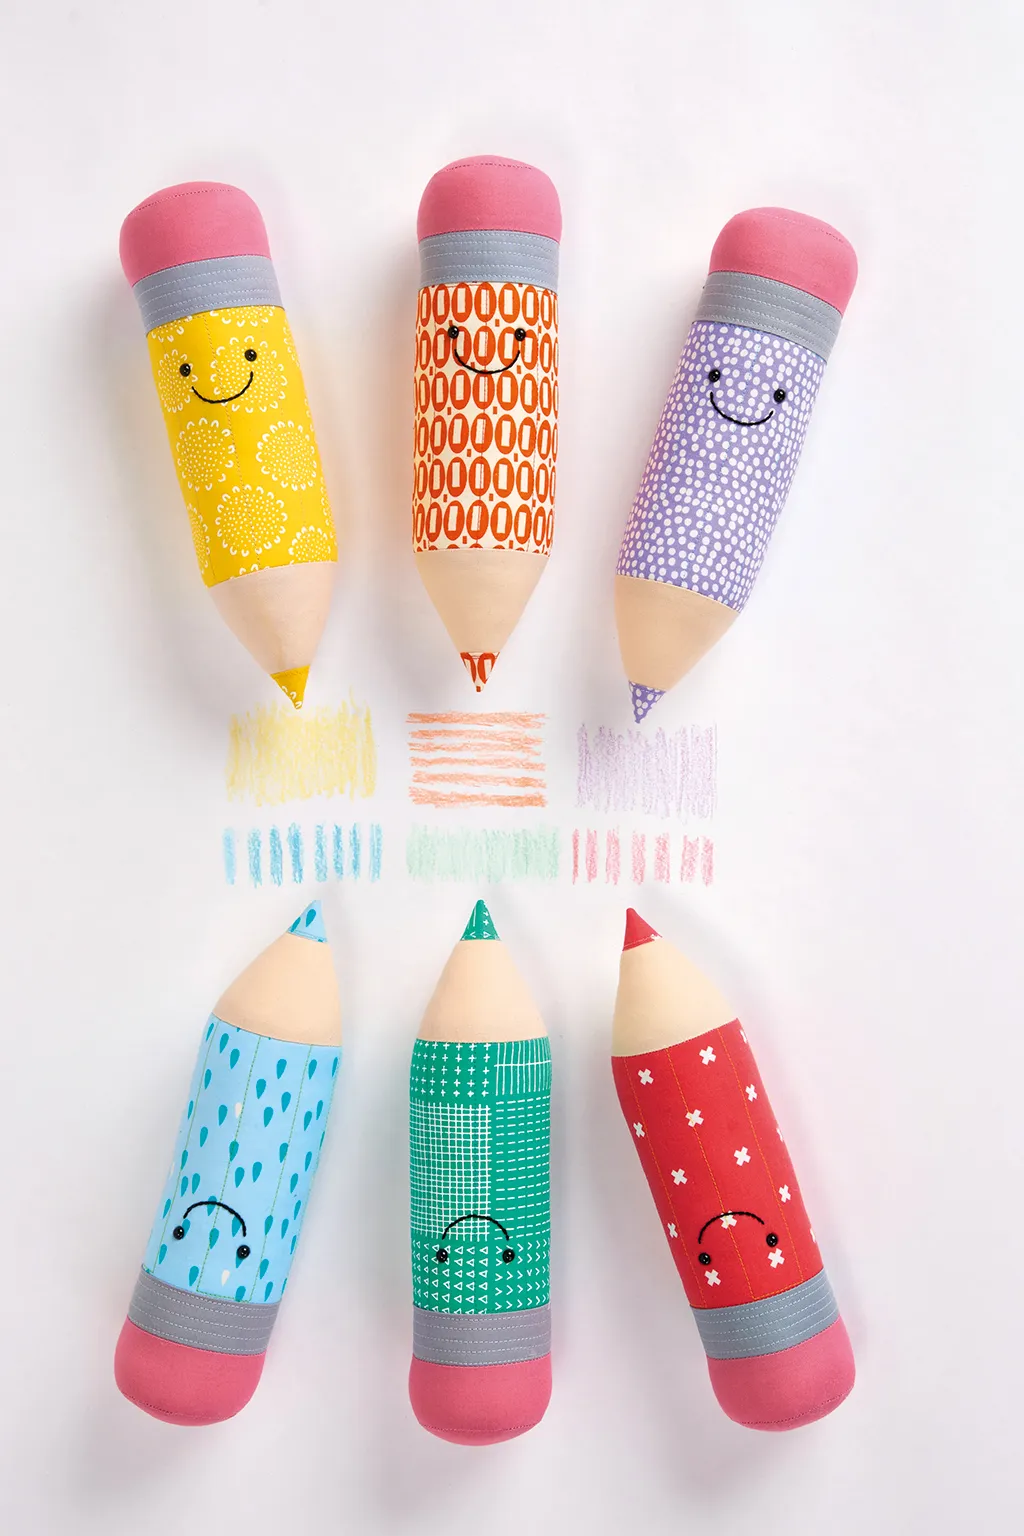
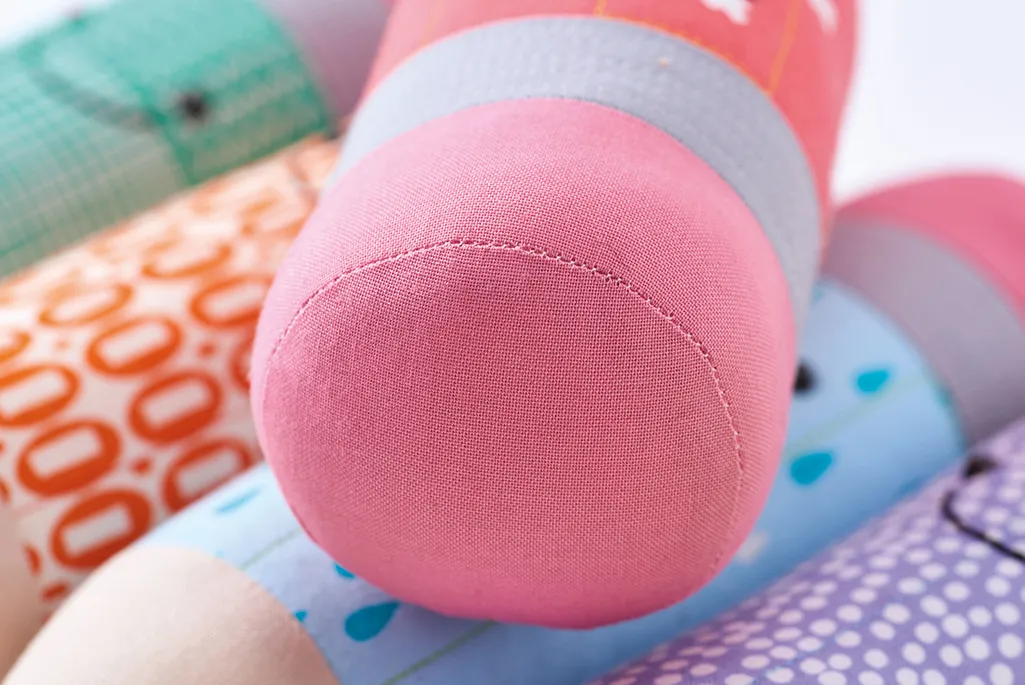
Stitch up your own set of cute colouring pencils in bright rainbow shades! Jo Carter shows you how to make these adorable giant pencils so you can gift them to all the studious little ones in your life. Make several of these cute softies in rainbow shades for an adorable matching set. Use a combo of quilting to create the different textures of a pencil and swap these super-cute prints for solids if you'd prefer!

Once you've sewn your giant pencils why not make some of our other cuddly toys? Learn how to make a unicorn toy and DIY penguin softie toy pattern.

You will need

  • Pink solid fabric (eraser): 12½in x 4in
  • Grey solid fabric (ferrule): 8½in x 1½in
  • Bright solid fabric (pencil body and lead tip): 11in x 5½in
  • Beige solid fabric (sharpened tip): 7in x 4in
  • Batting: 10in x 8in
  • Fusible webbing: 2½in x 2in
  • Polyester toy filling
  • Embroidery thread (black)
  • Pair of 6mm black plastic eyes

Finished size

10in x 10in approx

Notes

  • Seam allowances are ¼in, unless otherwise noted.
  • Jo recommends using safety eyes if giving these softies as a gift to children.
  • When clipping, always take care to avoid any stitching.
  • RST = right sides together.
  • Templates include seam allowances, where necessary.
  • Head to Love, Patchwork & Quilting's templates issue 46

If you're new to the world of quilting don't worry. We have a beginners guide to quilting as well as a how to use a sewing machine tutorial.

Fabrics Used

  • Iron and Sand from the Kona Cotton Solids collection by Robert Kaufman.
  • Allotment in Cypress and Dalmation in Citrus from the Blueberry Park collection by Karen Lewis for Robert Kaufman.
  • Happy Shower Sky from the L’s Modern Basics collection by Lecien.
  • XOXO in Pink Cheeks from the Basics collection by Cotton Steel.
  • Flurry in Lavender by Dashwood Studio.
  • Tonal Orange from the Pezzy Print collection by American Jane for Moda Fabrics.

Giant pencil pillow pattern

You will need:

  • Fabric
  • Batting
  • fusible webbing
  • Polyester toy filling
  • Embroidery Thread
  • Black plastic eyes

Cutting Out

Step 1

Trace the templates onto paper or card and cut out neatly on the traced lines.

Step 2

From the pink solid fabric cut one (1) eraser top and one (1) 8½in x 1¾in rectangle for the eraser side.

Step 3

From the silver grey solid fabric cut one (1) 8½in x 1½in rectangle for the ferrule.

Step 4

From the bright solid fabric cut one (1) 8½in x 5½in rectangle for the body of the pencil.

Step 5

From the beige solid fabric cut one (1) sharpened tip.

Making the tip

Step 1

Trace the lead tip template onto the paper side of the fusible webbing and cut out roughly. Fuse to the wrong side of a remaining piece of the bright solid fabric and then cut out neatly on the drawn line.

Step 2

Giant pencil pillow pattern figure 1

Place the sharpened tip shape right side up. Remove the backing paper from the lead tip shape and position it at the bottom of the sharpened tip. Fuse in place. Using coordinating thread, sew two lines of straight stitch around the curve of the lead tip, close to the edge, to secure (Fig 1).

Making the pencil body

Step 1

Join the 8½in x 1½in ferrule rectangle to the top edge of the 8½in x 5½in pencil body rectangle. Press the seam towards the ferrule.

Step 2

Take the batting rectangle and place the unit made in step 8 centrally and right side up on top. Quilt as desired. Jo quilted rectangles approx 1in wide on the pencil body to create an angled pencil edge effect. She also quilted horizontal lines approx 3/8in apart across the ferrule. Trim away any excess batting.

Step 3

Giant pencil pillow pattern figure 2

Join the 8½in x 1¾in eraser side rectangle to the top edge of the ferrule. Measure the horizontal centre of the pencil body and then measure 4¼in up from this point from the bottom edge. Measure and mark points ⅝in each side of this point (Fig 2). These are the eye marks, which should be 1¼in apart.

Step 4

At each eye mark, make a hole through which you can insert the eye, keeping it as small as possible. Fit the eyes in place according to the manufacturer’s instructions.

Step 5

Mark a smile below the eyes – Jo recommends using an erasable pen or pencil. Embroider over it using black thread.

Attaching the tip and end

Step 1

Giant pencil pillow pattern figure 3

Take the sharpened tip piece and place the curved edge RST with the bottom edge of the pencil body. Sew together and then clip V-shaped notches into the seam allowance (Fig 3).

Step 2

Giant pencil pillow pattern figure 4

Take the eraser top shape and place it RST with the top edge of the eraser side, bringing the top corners of the eraser side together to make a circle. Sew together and then clip V-shaped notches into the seam allowance (Fig 4).

Finishing the softie

Step 1

Giant pencil pillow pattern figure 5

RST, bring the sides edges of the pencil together. Sew together, sewing from the tip upwards and then from the eraser downwards, leaving an opening of approx 3in the pencil body piece. Clip the seam allowance at the lead tip to remove some of the bulk (Fig 5).

Step 2

Turn the pencil right side out through the opening in the pencil body. Stuff with polyester toy filling, making sure to get the filling down into the tip. Slipstitch the gap closed to finish.

Giant pencil pillow pattern close up

We hoped you’ve enjoyed making these giant pencil pillows! Head over to our free toy sewing patterns for babies and children which include everything from fox plushie toys, a sausage dog softie toy and a free robot toy sewing pattern.