Sew your own hedgehog cushion!

Get set for the cosy autumn months with a spiky, striking and oh so sweet FPP design that brings the wildlife inside!

Try 6 issues of Love Patchwork & Quilting magazine for £9.99| SAVE 76%

Published: October 18, 2021 at 7:09 am

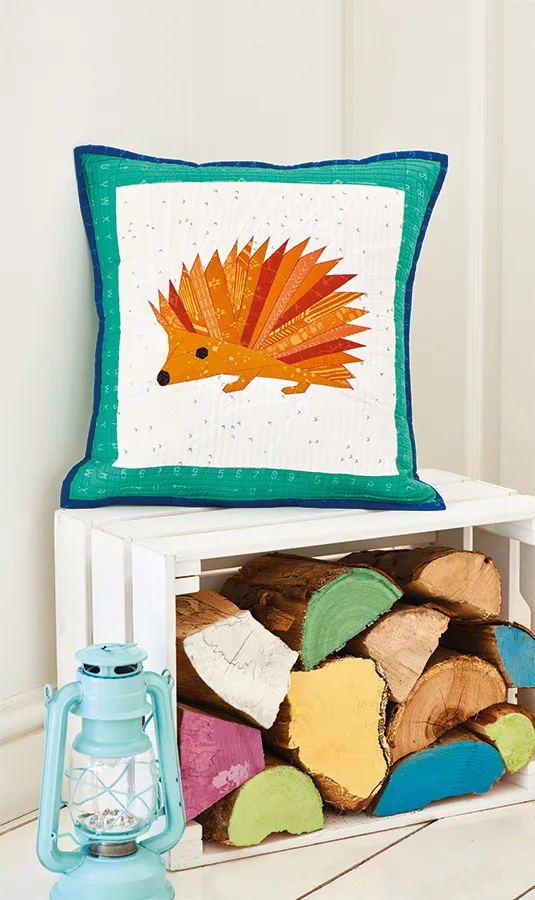
Autumn is here and we're loving all the seasonal quilt patterns on Instagram! There's everything from beautiful tonal patchwork to fun Halloween quilt patterns and we wanted to throw another adorable design into the mix for October. The lovely Juliet Van Der Heijden has designed this sweet hedgehog cushion for you to practice your FPP skills. The subtle patterned Batiks fabrics give the hedgehog's spikes the perfect texture. Stitch your own hedgehog friends and let them snuggly on the sofa with you during the chilly months. Juliet's hedgehog cushion was originally from issue 64 of Love Patchwork & Quilting. Pick up a copy of their latest issue for more amazing quilting projects.

If you're new to the world of quilting don't worry. Just head over to our quilting for beginners guide for more help with technique and also discover the best sewing machine for quilting in our round-up. Once you've finished your hedgehog cushion make sure you browse our other foundation paper piecing patterns to find your next project.

Hedgehog cushion

You will need:

  • Background fabric:38yd
  • Body fabric:18yd
  • Spikes fabric: approx. ¼yd total
  • Eye and nose fabric: two (2) 1½ in squares
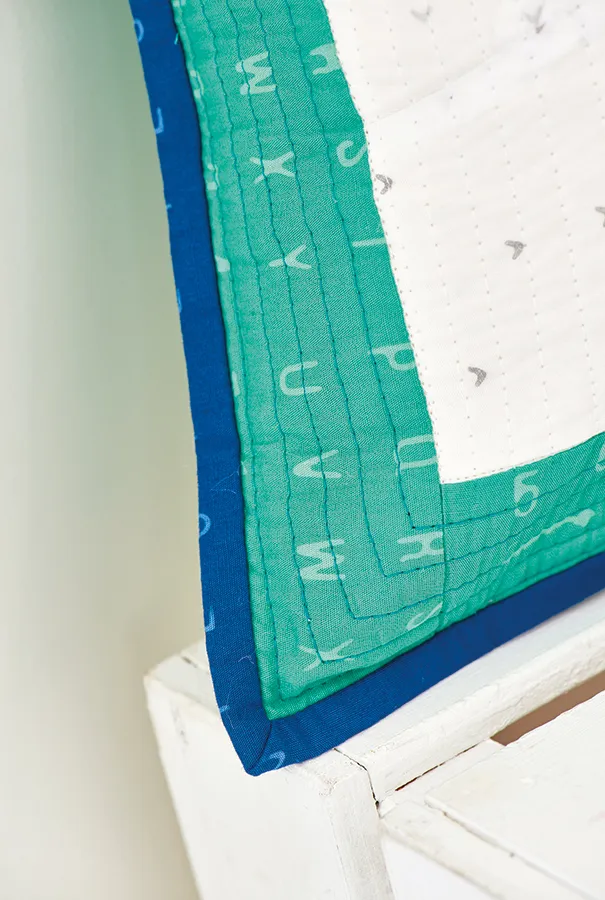
  • Border fabric: ¼yd
  • Batting: 18in square
  • Lining fabric: ½ yd
  • Cushion back fabric: ½ yd
  • Binding fabric: ¼yd
  • One (1) copy each of Hedgehog Template Sections A–G
Hedgehog cushion corner detail

Fabrics Used

All fabrics are from the Indah Batiks collection by Me You for Hoffman Fabrics.

Hedgehog cushion back

Hedgehog cushion front

Hedgehog cushion back

Hedgehog cushion front

Finished size

16in square

Notes

  • Seam allowances are ¼in, unless otherwise noted.
  • Press seams to one side unless otherwise instructed.
  • FPP templates include seam allowances around the outer edges only.
  • For templates head to our templates page (issue 64)
  • WST= wrong sides together.
  • WOF = width of fabric.
  • FPP = Foundation Paper Piecing.
  • Wash and press all fabrics well before cutting.
  • Reduce stitch length to 1.5 for Foundation Paper Piecing.

Juliet's Top Tip

When sewing paper foundations together, consider basting the seam first using large stitches. This will allow you to check whether everything lines up properly. When happy, sew the seam using a short stitch length.

Hedgehog cushion pattern

You will need:

  • Fabric
  • Batting
  • Binding fabric

Cutting out

Step 1

From the border fabric cut:

  •  Two (2) 2½in x 12½in strips.
  • Two (2) 2½in x 16½in strips.

Step 2

From the lining fabric cut one (1) 18in square.

Step 3

From the cushion back fabric cut two (2) 16½in x 11in pieces.

Step 4

From the binding fabric cut three (3) 2¼in x WOF strips.

Step 5

Hedgehog cushion Figure 1

Using the templates and referring to Fig 1, cut out fabric for each section of Templates A–G. Make sure each piece is at least ¼in larger than the section it covers, all the way around.

Piecing the hedgehog

Step 1

Take one Template A and one Section 1A fabric piece. Place the fabric right side up on the unprinted side of the template, against Section 1A. Make sure that it covers the whole section plus at least ¼in all the way around. Pin in place.

Step 2

Take a Section 2A fabric piece and place it right side down on top of the Section 1A fabric piece, matching up the raw edges on the side where Sections 1A and 2A will be joined, and making sure that when folded back along the seam line, Section 2A will be covered by the fabric plus at least ¼in all around. Pin in place.

Step 3

Turn the template over to the printed side and, using a short stitch length (we recommend 1.5mm), stitch along the marked line between Sections 1A and 2A. Fold the template away from the seam and trim to ¼in. Fold the template back, turn the work over to the fabric side, flip Section 2A open and press.

Step 4

Repeat steps 7–8 to continue piecing Template A, piecing the sections in numerical order. Press the completed block and trim along the dotted line.

Step 5

Repeat steps 6–9 to Foundation Paper Piece all the remaining templates, B–H.

Step 6

Hedgehog cushion Figure 2

Join Section A to Section B, then join Section C to the right of Section B. Join Section E to Section D, then join Section D/E to Section F. Join Section G to Section H (Fig 2).

Step 7

Hedgehog cushion Figure 3

Join the three sections together, carefully matching points and block ends (Fig 3). Remove the paper templates from the back of the block and press.

Assembling the cushion top

Step 1

Sew the two 2½in x 12½in border strips to the top and bottom of the block. Then sew the two 2½in x 16½in border strips to the sides.

Quilting and finishing

Step 1

Make a quilt sandwich using the 18in square of lining, the batting and cushion top. Baste using your preferred method.

Step 2

Quilt as desired. Juliet stitched in the ditch around the hedgehog outline and spikes. She then straight line quilted the background.

Step 3

Trim away the excess lining and batting, and square up to measure 16½in square.

Step 4

Take one of the 16in x 11½in cushion back pieces. Press under one long edge by ¼in and press. Fold again, enclosing the raw edges, and topstitch in place. Repeat on the remaining cushion back piece.

Step 5

Place the cushion top right side down. Lay one cushion back piece on top, WST, aligning raw edges with the bottom and sides of the cushion top. Pin in place.

Step 6

Repeat with the second cushion back piece, aligning the top edges. The two back pieces will overlap, with the hemmed edges in the centre. Baste around the edges with a 18in seam.

Step 7

Sew the binding strips together end-to-end using diagonal seams. Press the seams open and trim the dog ears. Fold in half lengthways, wrong sides together, and press.

Step 8

Sew the binding to the right side of the cushion, creating a mitre at each corner. Fold the binding over to the back of the cushion and neatly hand stitch in place to finish. Fill with a cushion pad and enjoy!

Hedgehog cushion close up

We hope you’ve enjoyed sewing your hedgehog cushion! For more patchwork projects check out our round-up of quilt kits for beginners and our free English paper piecing templates

This website is owned and published by Our Media Ltd. www.ourmedia.co.uk
© Our Media 2023