Cutting out
Step 1
From the white fabric cut:
- Two (2) 17in squares.
- Two (2) pieces using the Ear template.
- Two (2) pieces using the Ear template turned over to make mirror image pieces.
- Approximately three (3) 1¼ in wide strips cut along the bias. Sew together with diagonal seams along the short edges to make a strip approx 80in long.
Step 2
From your envelope back fabric cut:
- One (1) 17in x 14in piece.
- One (1) 17in x 8in piece.
Step 3
From the batting cut:
- One (1) 17in square.
- Four (4) 4½ in squares.
Preparing the applique pieces
Step 1
Trace one copy of the Muzzle, Nose, Mouth, and two Eye templates on the paper side of your fusible web. Also trace the inner curve of the ear, then flip the template over and trace a reverse inner ear on the fusible web. Cut out each piece roughly.
Step 2
Fuse the pieces to the wrong side of your fabrics. Fuse each inner ear and the muzzle to the grey fabric. Fuse the mouth to the hot pink fabric. Fuse the nose and two eyes to the green fabric. Jess carefully placed her eyepieces so the star print would give the appearance of the eye centres.
Step 3
Cut out each piece along the drawn lines and set aside for later.
Applique and ears
Step 1
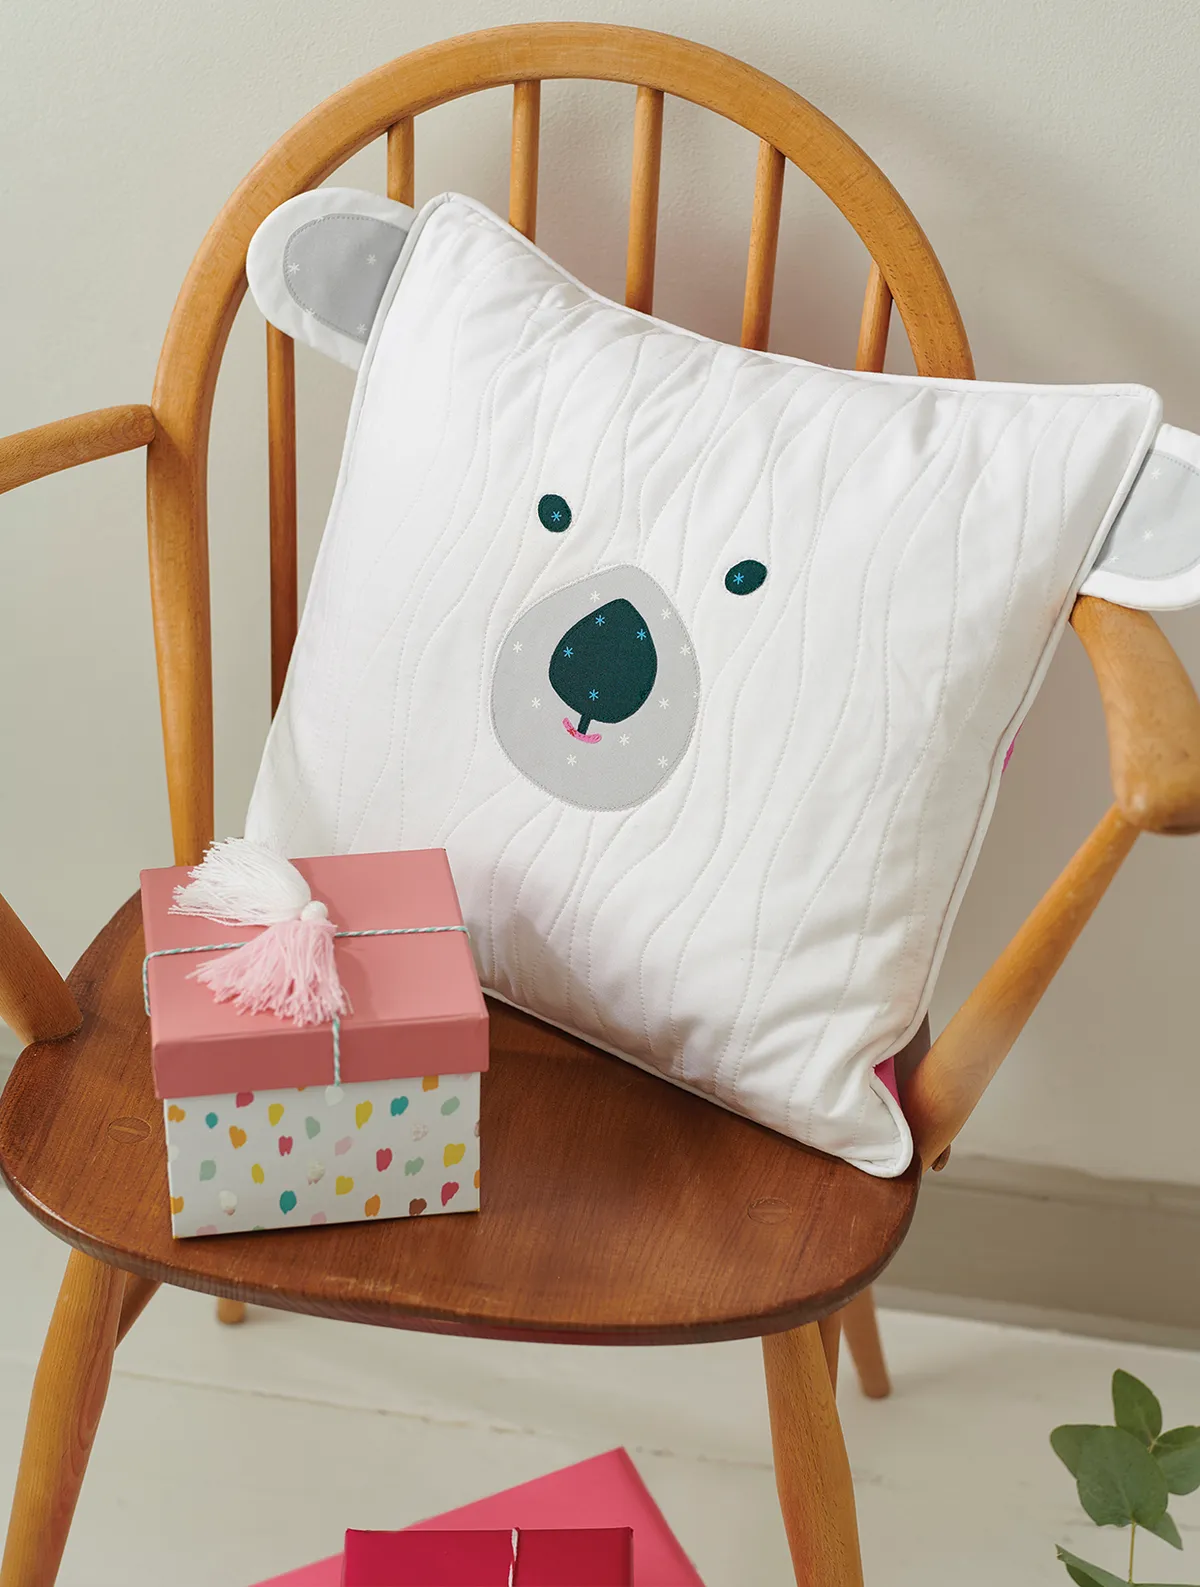
Take one of your 17in white fabric squares and transfer the appliqué placement guide to the centre, using a removable marker. Peel off the fusible web paper backing and press the facial features onto the fabric. Topstitch around your facial features in matching thread.
Step 2
Iron the two grey ear inners to right side of one regular and one reverse ear piece. Topstitch around the inner ear piece.
Step 3
Take one of the appliqué ear pieces and baste to a small batting square. Trim away the excess batting. Repeat, basting batting to each of the four ear pieces.
Step 4
Place one appliqué and one plain ear piece RST. Pin, then sew together all the way around the curved edge with a ¼ in seam allowance, leaving the bottom straight edges unsewn. Clip the seams and turn right sides out, carefully pushing out the curves. Press, then baste along the raw straight edges. Repeat with remaining ear.
Quilting and piping
Step 1
Make a quilt sandwich by placing the 17in square backing fabric right side down, the 17in batting on top then the cushion top right side up. Baste the layers together then quilt as desired. Jess quilted a free-motion wavy design to echo polar bear fur vertically (as for the quilt) and around the facial features. Trim all four corners of the quilted top, using a curved object. Jess used an egg cup.
Step 2
Place your piping cord inside the 1¼ in x 80in bias strip then fold the strip over WST and pin. Baste in place using a zipper foot.
Step 3
Baste the piping cord to the cushion front, clipping the binding within the seam allowance when easing the binding around the curved corners. Leave the first and last 6in of the fabric strip open at each end. Splice the cord by removing half the strands from each end and winding them together for a neat join. Trim and join the piping fabric ends by either sewing them together (as continuous binding as for a quilt) or lapping the ends. Baste in place.
Step 4
Place your ears RST with the cushion top at each side, approx 1in down from the top corners, with the raw edges even with the sides of the cushion top. Baste in place.
Adding the envelope back
Step 1
Take the 17in x 14in back piece and fold over one 17in raw edge to the back by approx 3/8in. Press, then fold over by another 3/8in again. Topstitch with a coordinating thread to close.
Step 2
Repeat the last step for the 17in x 8in piece, making sure that if your fabric is directional the backing pieces will fold over on top of each other with any print facing the correct direction.
Step 3
Clip or pin each envelope back RST on your cushion front, making sure that the larger backing piece is face down first. Sew all the way around, sewing as close as possible to the piping. Trim the excess backing fabric from the corners.
Step 4
Zigzag stitch across the seam allowance to stop fraying. Turn right sides out to finish.