Step 1
Cutting out the pattern
Trace six (6) kite templates and six (6) half-hexagon templates onto paper, then cut out neatly on the marked lines.
Step 2
Trace one (1) kite template and one (1) half-hexagon template onto card.
Add a ¼in seam allowance around all sides of the template and cut out on the outer line. These will be used to cut out your fabric.
Top Tip for making your card templates
The inner section allows you to view the finished patch, which makes it easy to fussy cut your fabric if that suits your project. The outer line is the cutting line for the English Paper Piecing template.
Step 3
From each of the dark and medium fabrics, cut three (3) kites using the card template.
Step 4

From each of the medium/light and light fabrics, cut three (3) half-hexagons using the card template.
Step 5
From the contrast fabric, cut one (1) 10in square for the backing and two (2) 1¼in x width of fabric strips for the binding.
Step 6
Piecing together your potholder
Place a paper kite template centrally against the wrong side of a fabric kite shape. You will have ¼in seam allowance all around.
Fold the seam allowance over onto the paper and tack in place.
Step 7
Repeat step 1 for the remaining kite templates and fabric shapes.
Step 8
Repeat steps 1-2 for the half-hexagon paper templates and fabric shapes.
Step 9

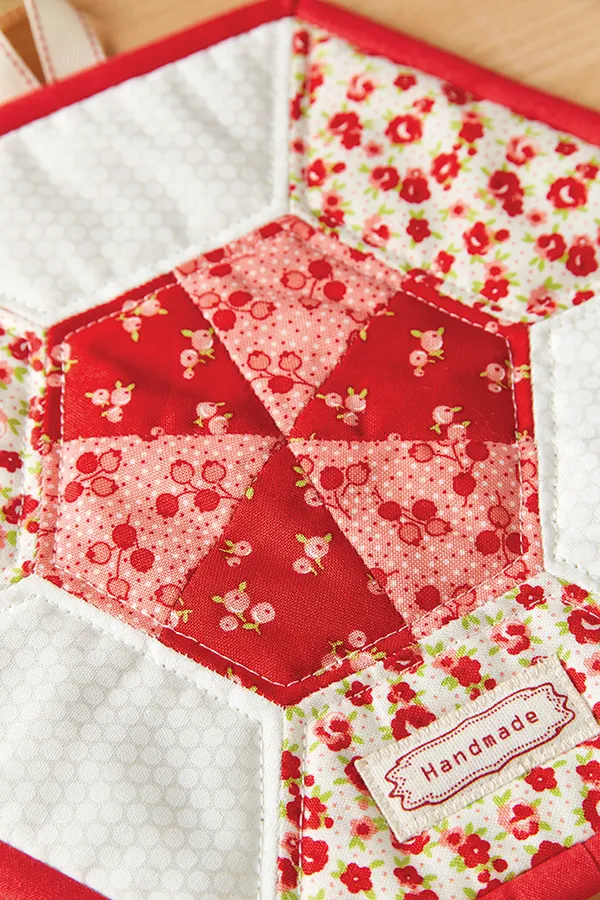
Alternating the dark and medium kites, use English Paper Piecing to join them on their long edges to create the centre hexagon.
Tips for English Paper Piecing your potholder
- Place the patches to be joined RST, taking care to match up accurately the edges to be joined.
- Use a fine needle and thread that matches the fabric shapes you are joining
- Knot the end of the thread and then, starting at one end of the seam, insert the needle through the folds of both edges, being careful not to stitch through the paper. Oversew with tiny stitches to the end of the seam.
- Make sure your stitches are small enough to not show on the right side.
- It’s a good idea not to have your thread too long, as it will get tangled.
- Only join a few patches with each length of thread as sewing through papers wears the thread; it could fray and snap if you do too many at once
Step 10

Alternating the light/medium and light half-hexagons, join them to the outer edges of the centre hexagon and then join the half-hexagons on their short edges to complete the potholder top.
Step 11
Press the outer edge seams open and the inner seams flat. Remove the templates.
Step 12
Finishing your potholder
Make a quilt sandwich by placing the backing fabric square right side down, the batting square on top, and then the potholder centrally and right side up.
Baste the layers together using your preferred method – with a small project like this, we recommend spray basting.

Step 13
Quilt as desired – Kristyne quilted around the outline of the central motif and outer half hexagons.
Trim the excess batting and backing so that they’re level with the potholder edges.
Step 14
Fold the ribbon in half, then, matching up all the raw edges, place the ribbon centrally along one edge on the back of the potholder and baste in position.
Step 15
Join the binding strips end-to-end with a diagonal seam.
Step 16
Working from the right side and starting approx halfway along one edge, match the raw edges of the binding to the raw edges of the potholder and sew in place, folding a mitre at each corner.
Step 17
Before completing your stitching, neaten the short raw end of the starting piece and insert the ending piece into it.
Step 18
Fold the binding over to the back of the quilt, turn under the long raw edges and then slip stitch in place by hand.