Taking your measurements
Step 1
Tie a length of ribbon around your waist and let it settle in the most comfortable position to determine your natural waistline.
Step 2
Write down the measurements for your bust, waist, hip, waist to hem and shoulder to waist. This is measured vertically over the bust, following the curves of your body.
Drafting the pattern
Step 1
Draw out your pattern in small scale on a sheet of A4 paper before making the full size pattern as shown. This makes the pattern drafting stage much easier.
Step 2
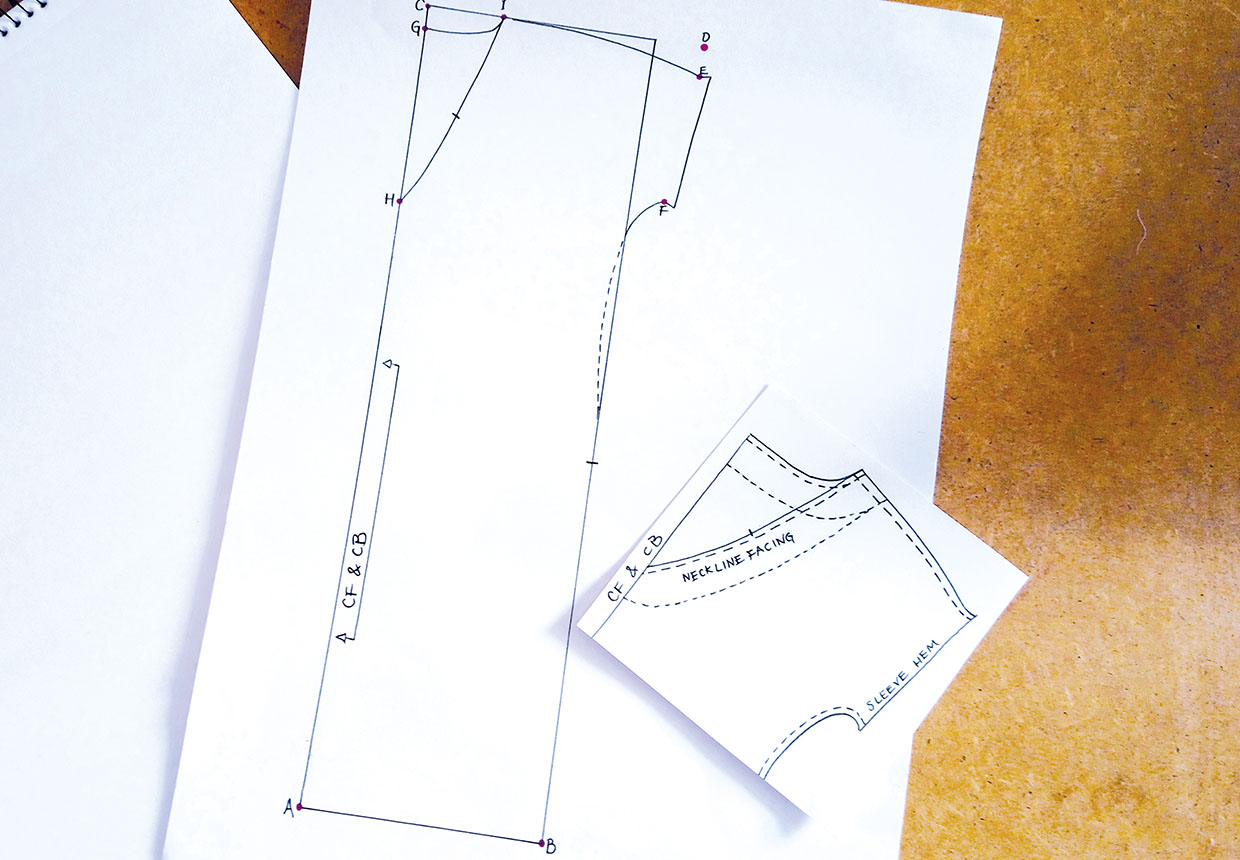
Plot a series of dots based on your measurements and the following guide and join these up. A-B: This is based on a quarter of your widest measurement, whether that be the bust or hip, plus 6cm (23⁄8in) for seam allowance and ease. A-C:
Shoulder to waist measured over the bust, plus waist to hem, plus 10cm (4in).
- C-D: A-B plus 5cm (2in).
- D-E: 5cm (2in).
- E-F: Half of your upper arm circumference (bicep area) plus 7cm (23/4in).
- C-G: 3cm (1¼in).
- C-H: 26cm (10¼in).
- C-I: 10cm (4in).
Step 3
When you’ve drawn out the measurements of the pattern in small scale, you can draw the full-size pattern on a large sheet of pattern paper.
Step 4
Begin by drawing the main rectangle. From there, add the neckline shaping for the front and back, curved shoulder seam and sleeve shaping.
Step 5
Add a subtle curve to the waist at the side seam shaping, if desired. Alternatively keep the side seam as a line that runs parallel with the CF and CB.
Step 6
Fold back the sleeve hem by 2cm (¾in) when you create the full size pattern. This will give you the correct shape when hemming.
Step 7
Mark a notch at the side seam in the hip area to make joining the side seam easier.
Making the facings
Step 1
It’s best to cut the pattern in a soft, neutral fabric to start with. Try it on and make any adjustments. These can then be transferred to the paper pattern.
Step 2
When you’re happy with the fit, draw a line 5cm (2in) from the edge of both the front and back neck to create a neck facing pattern guideline. Curve this line at the CF.
Step 3
Step three Add a notch about half way along the V-front neckline. This will make sewing the facing to the neckline much easier.
Step 4
Trace off the front facing, including the notch marking. Trace off the back facing to create a neck facing pattern piece.
Cutting out
Step 1
Using your drawn pattern, calculate how much fabric you need.
Step 2
From the main fabric cut:
- Back dress: cut one on the folded fabric.
- Front dress: cut one on the folded fabric. Transfer the front V-neck cutting line and notch.
- Back neck facing: cut one on the folded fabric, marking the CB position.
- Front neck facing: cut one on the folded fabric, marking the notch position.
Step 3
From the interfacing cut:
- Back neck facing: cut one on the folded fabric, marking the CB position.
- Front neck facing: cut one on the folded fabric, marking the notch position.
Joining the front and back
Step 1
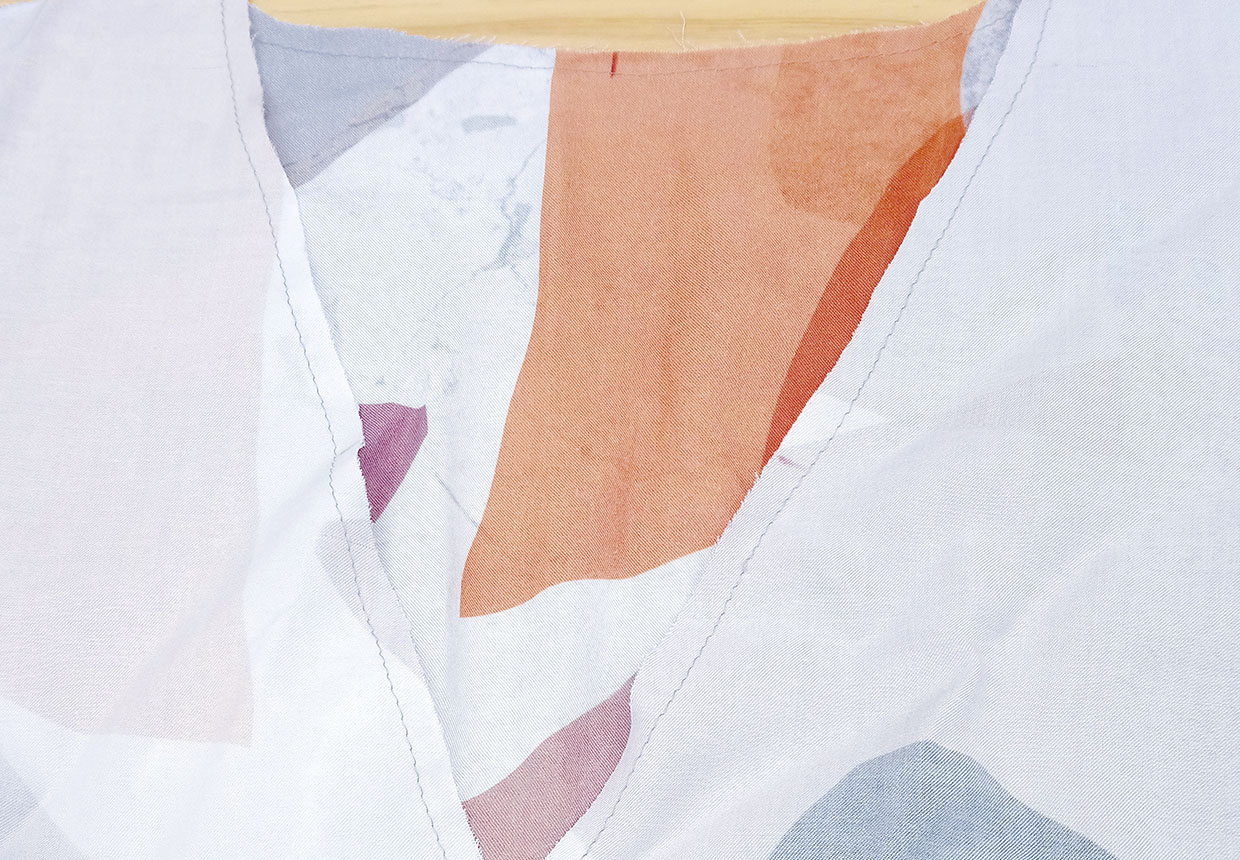
Staystitch the back neck and front neck, 7mm (5⁄16in) from the cut edge.
Step 2
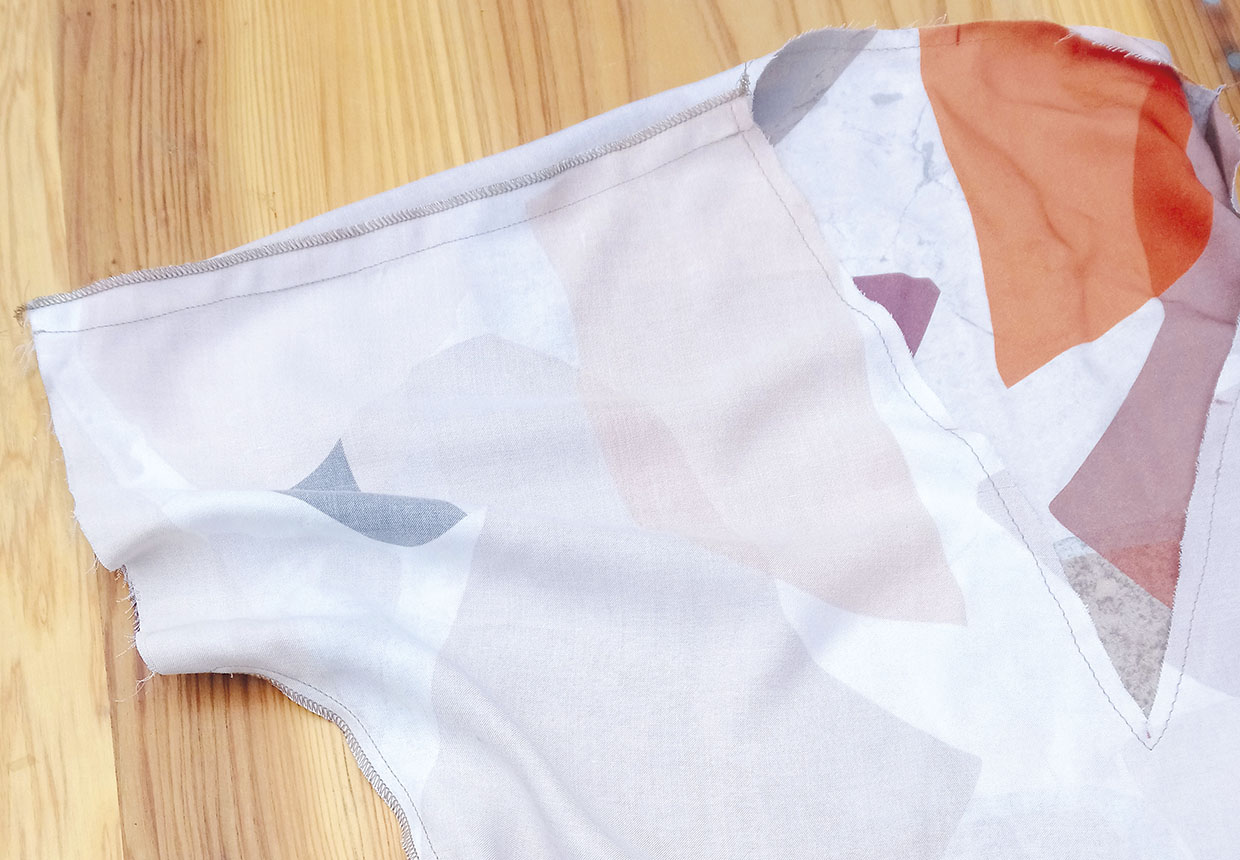
Place the front dress and back dress right sides (RS) facing and stitch together along the shoulder seams and side seams.
Step 3
Trim the seam allowance down to 1cm (3⁄8in) in the curved underarm area.
Step 4
Neaten the raw edges and press the seams towards the back.
Attaching the neck facing
Step 1
Press the interfacing pieces to the wrong side (WS) of the fabric facing pieces.
Step 2
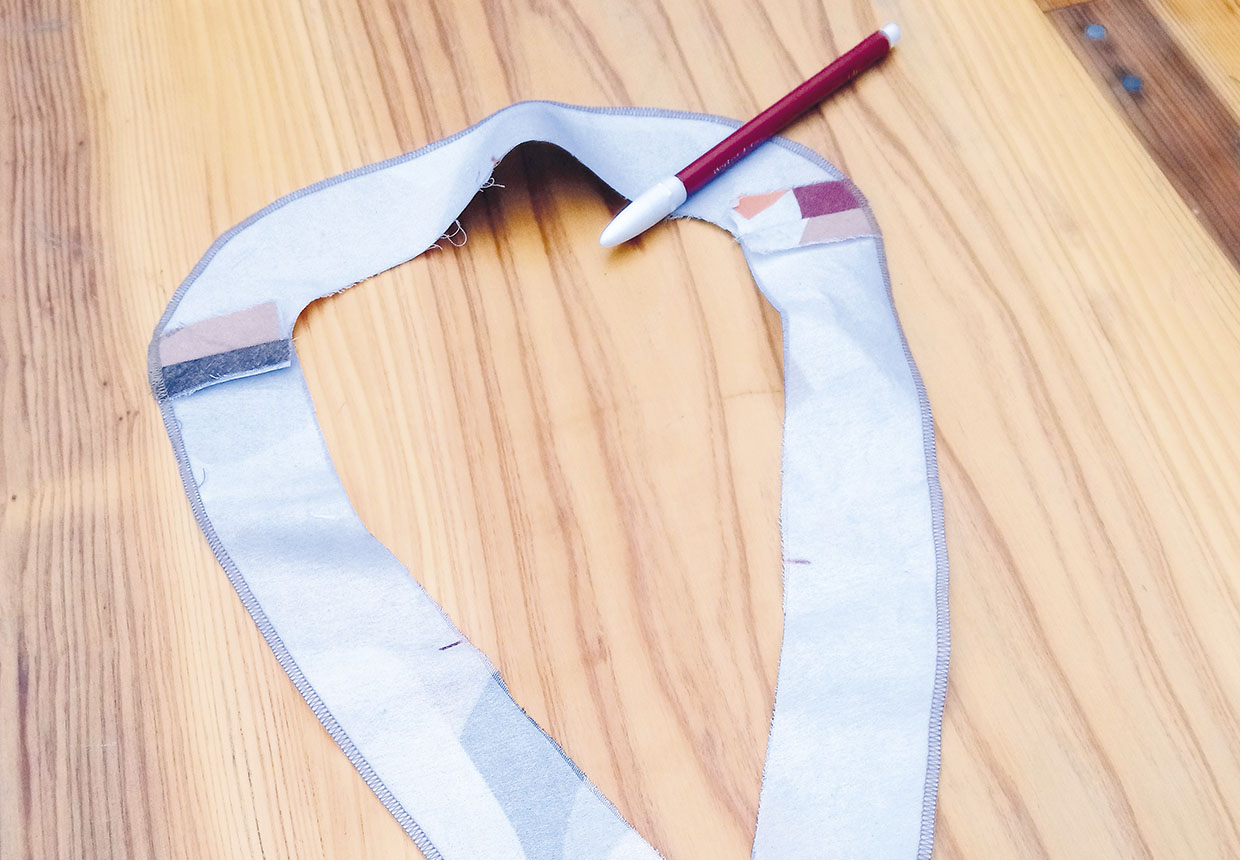
Sew the front neck facing to back neck facing RS together at the shoulder seams.
Step 3
Press the seam allowances open and neaten the outer edge.
Step 4
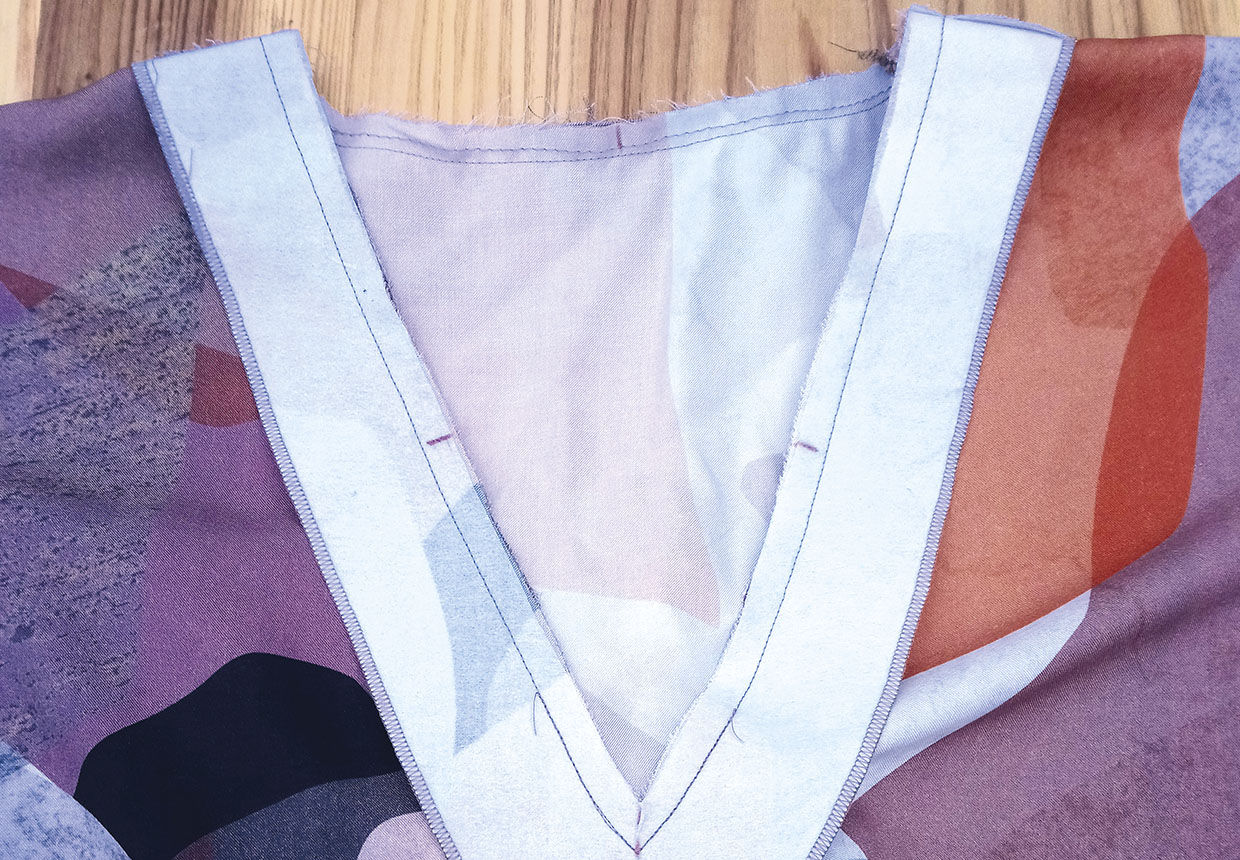
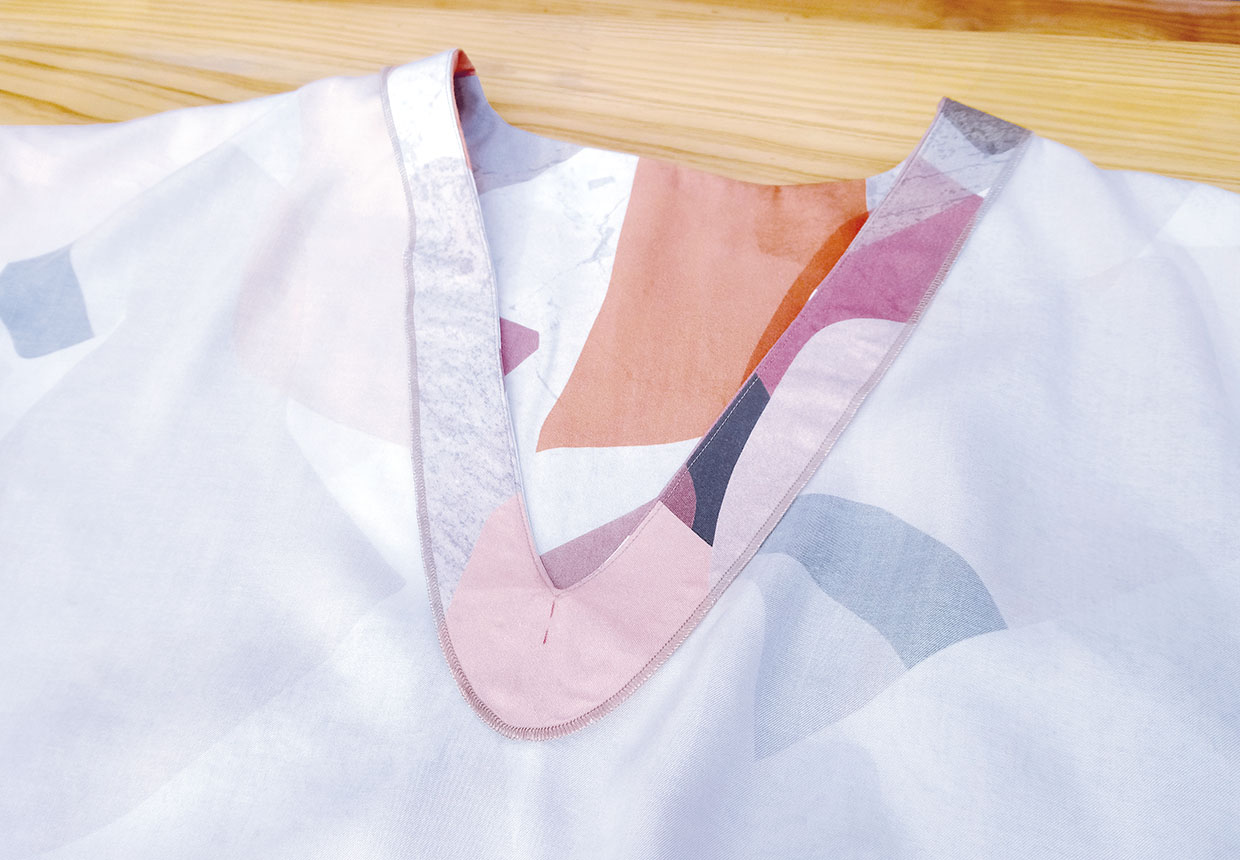
Sew the neck facing to the dress neck edge RS together using a 1cm (3⁄8in) seam allowance and matching shoulder seams, CB and CF.
Step 5
Reduce the stitch length and sew again in the V front area to add strength.
Step 6
Grade the seam allowances and clip the curves of the neckline facing. Clip into CF, close to the CF pivot point.
Step 7
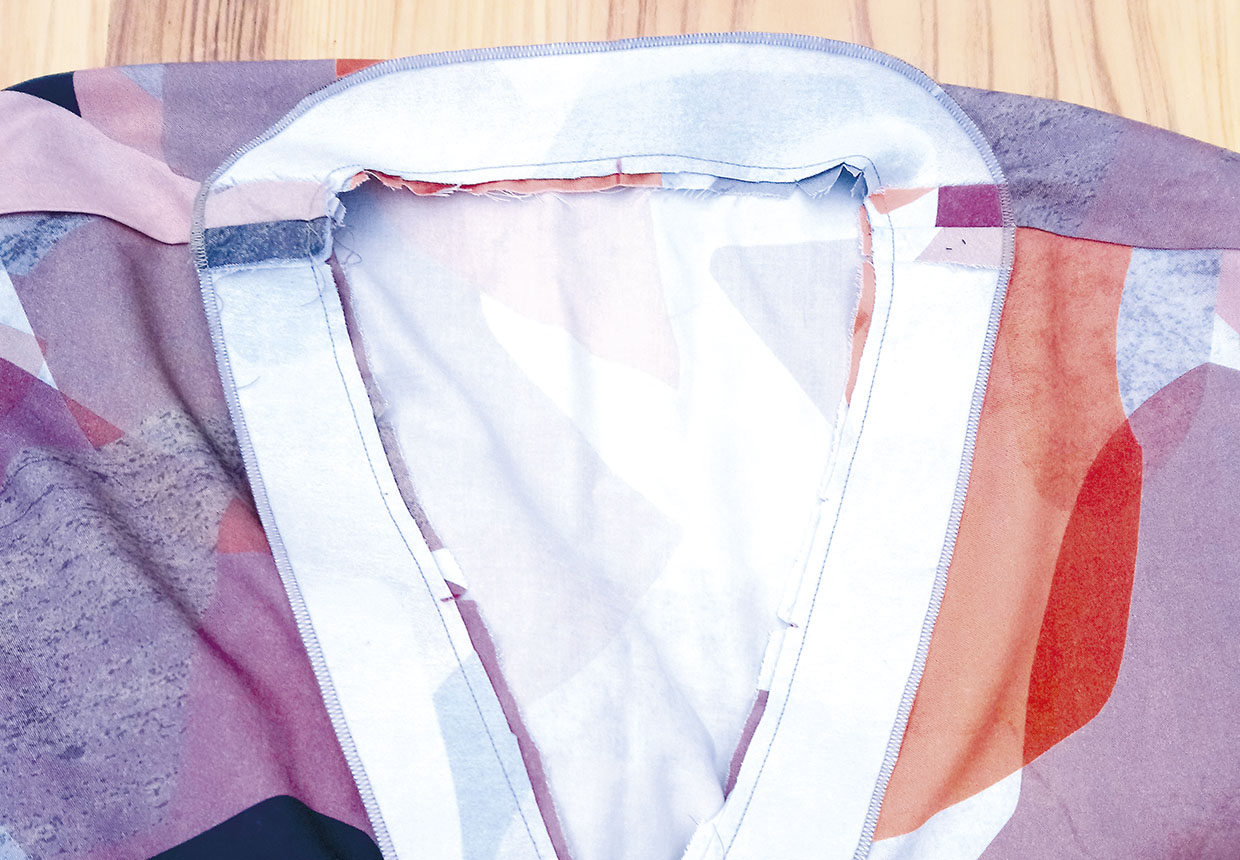
Press the seam allowance towards the neck facing and understitch 3mm (1⁄8in) from the seam line, on the facing side. Pivot at the centre front, using your CF mark as a guide.
Hemming the dress and sleeves
Step 1
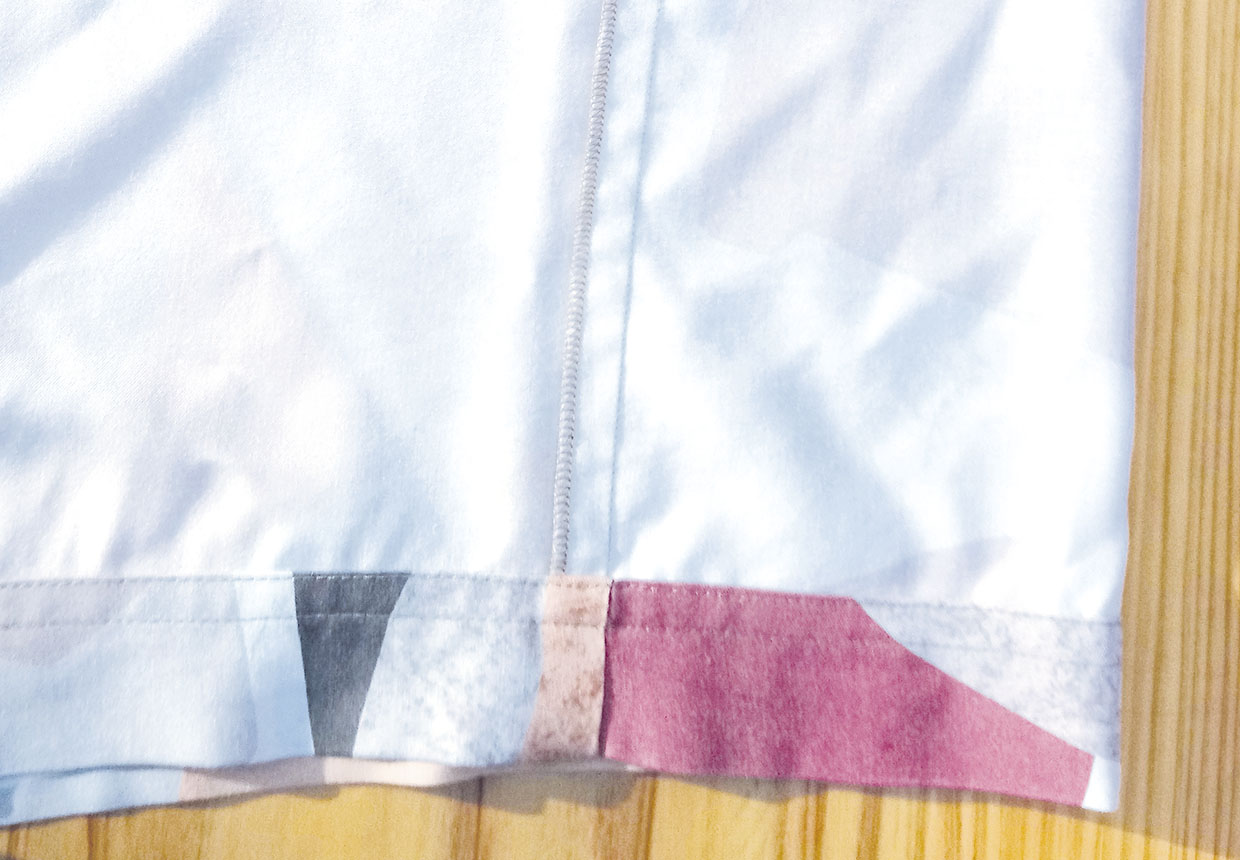
Turn the dress lower edge under by 1cm (3⁄8in) to the WS then a further 4cm (15⁄8in) and press, creating a wide hem.
Step 2
With the WS of the hem facing you, sew close to the edge. Sew another line of stitching to create a double stitched hem.
Step 3
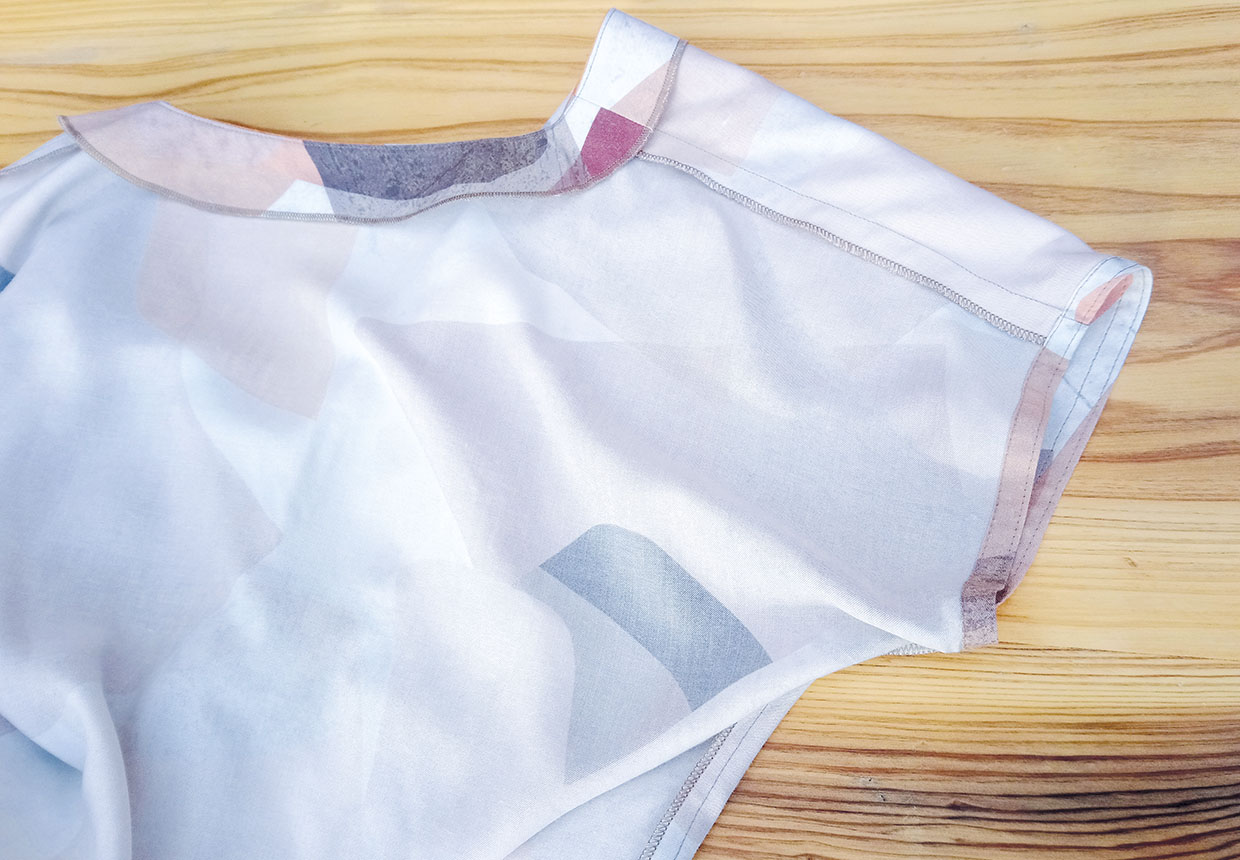
Turn the sleeve edges under by 1cm (3⁄8in) to the WS then a further 1cm (3⁄8in) and press then stitch into place as before.
Step 4
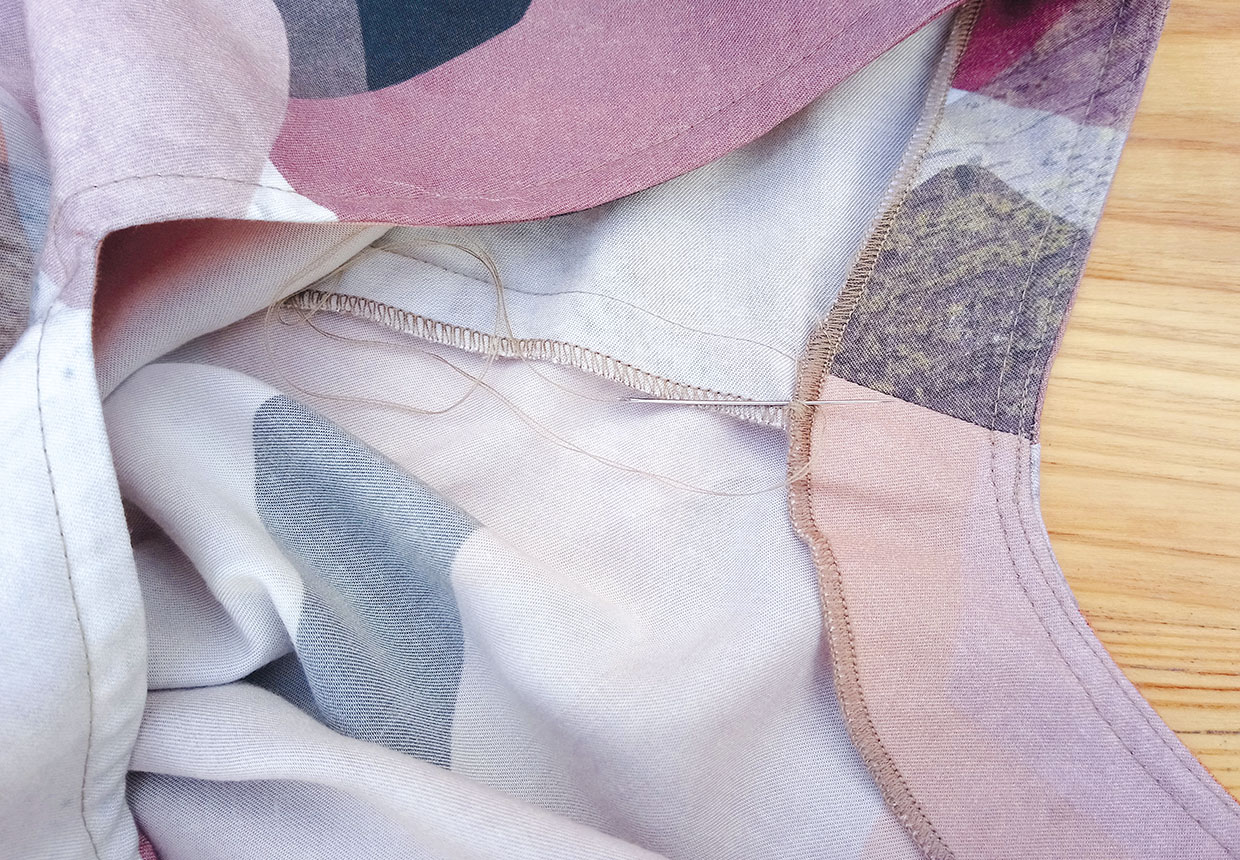
Hand-sew the neck facing to the shoulder seams with a few small stitches to keep them in place.
Making a narrow belt
Step 1
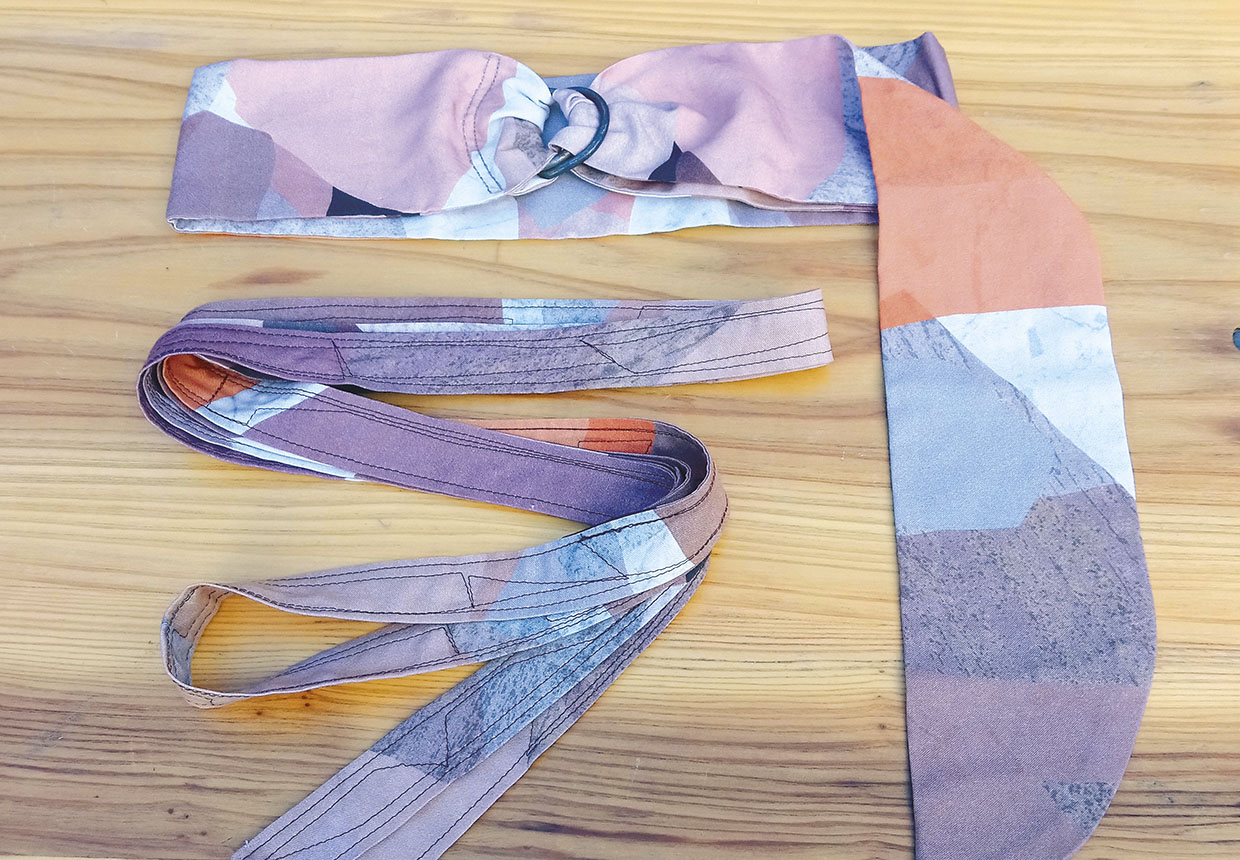
For a narrow belt that wraps around the waist more than once, cut two strips of fabric 8cm (31⁄8in) wide and the full width of the fabric from selvedge to selvedge.
Step 2
Sew the strips RS together along one short edge, creating a long strip. Press the seam allowance open.
Step 3
Fold in half lengthways with RS facing and stitch together diagonally across the short edges and down the length, leaving a 5cm (2in) turning gap in the centre of the long edge.
Step 4
Turn RS out and press then topstitch all the way around to neaten and close the turning gap. Multiple lines of a contrast colour add a really nice touch.
Making a wider belt
Step 1
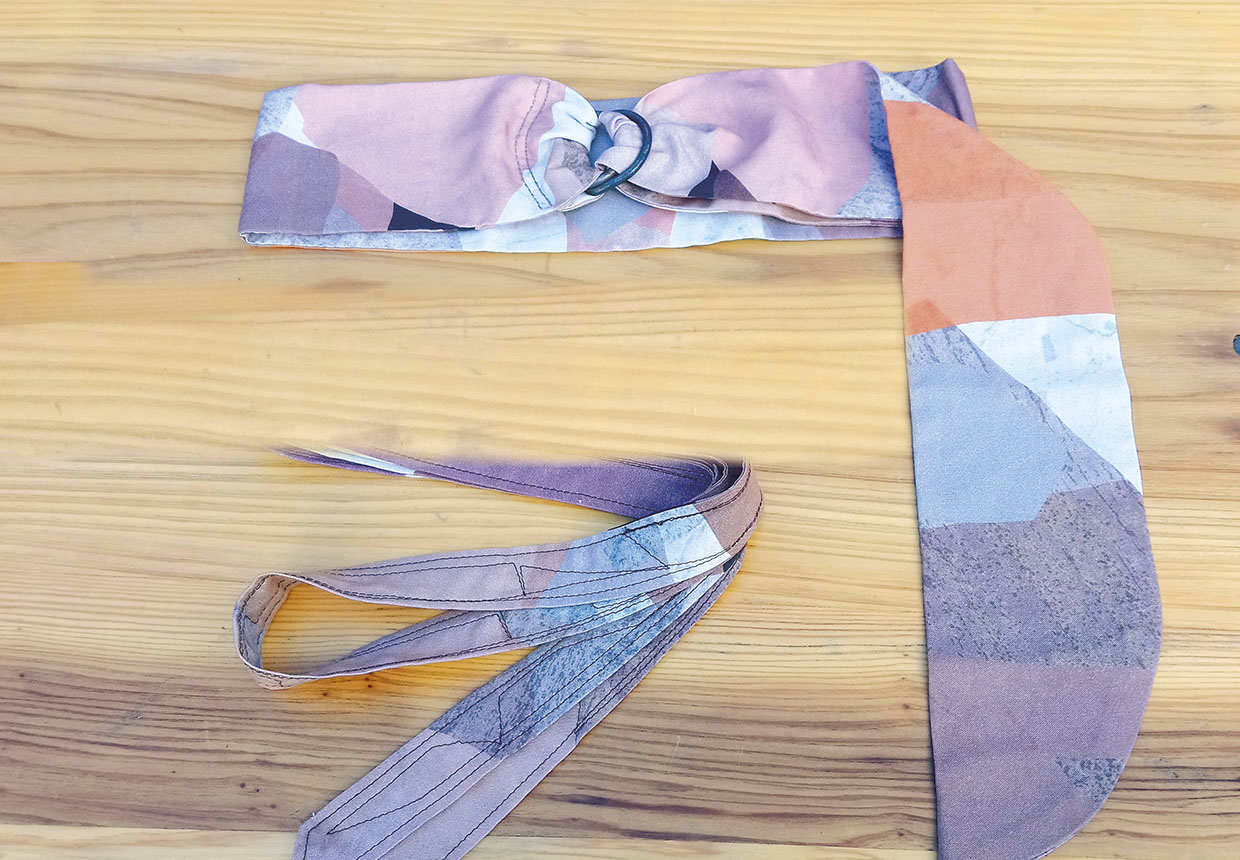
If you prefer a soft belt with D-rings, cut a 15cm (6in) strip of fabric to the length of your waist circumference plus 40cm (16in). The fabric is cut wider than the D ring in order to create a ruched effect.
Step 2
Fold and stitch together in the same way as the narrow belt but making one short end curved.
Step 3
Turn RS out, press and then topstitch around all sides.
Step 4
Pass the straight end through two D-rings then fold over and sew in place. It helps to mark a straight line first.
