Beginner’s Guide to Encaustic Art
Dive into the wonderful world of wax painting and take our crash course for beginners in this easy to follow, step-by-step tutorial.

Published:
Transform coloured wax into melted masterpieces using this easy guide to encaustic art. Each result is unique, and with just a little know-how, it’s easy to transform flowing wax into beautiful abstract images.
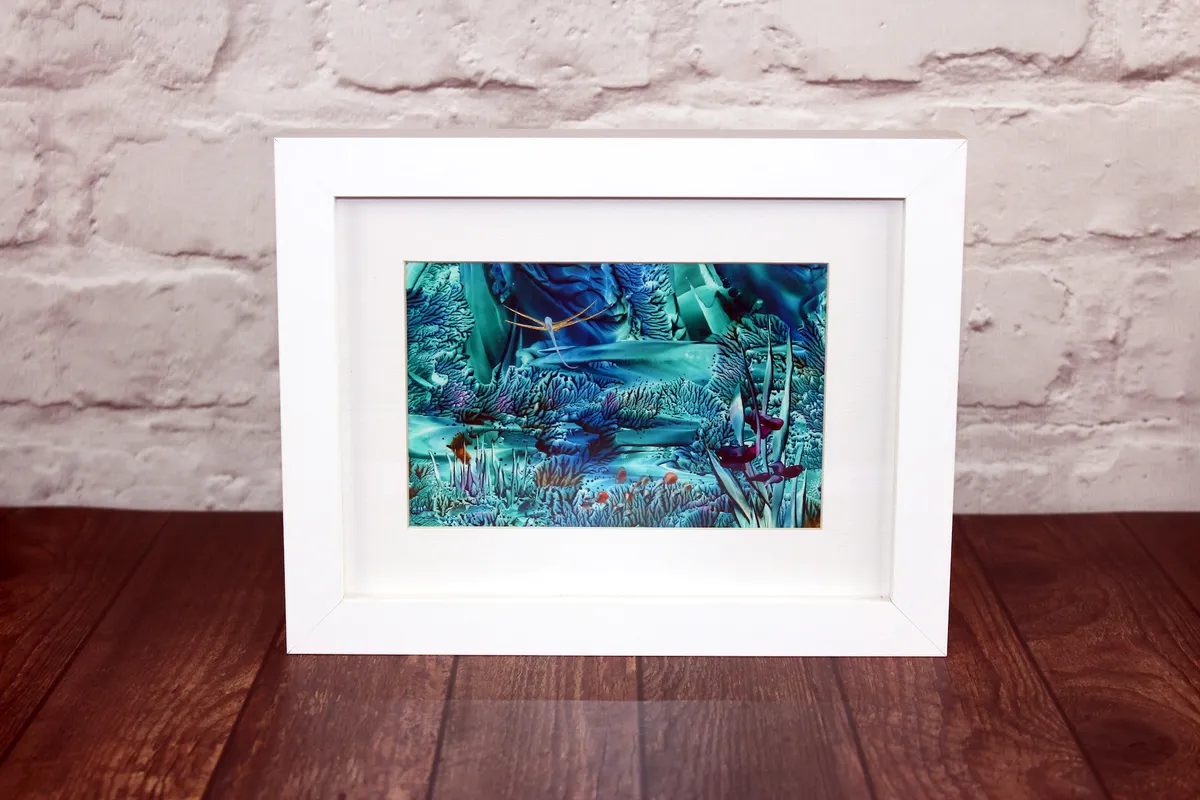
Have fun playing around with different colour combinations, and as each design only takes a few moments to set (as the wax solidifies), encaustic art is ideal for creating bespoke scrapbook pages, card toppers, or pieces of artwork in their own right.

If you like this beginner’s guide to encaustic art, why not check out some of our other beginner’s guides, right here on Gathered. In our beginner’s guide to sgraffito, we walk you through a collection of easy zentangle designs, or why not try your hand at paint pouring with our beginner’s guide to acrylic paint pouring? You could learn how to paint a watercolour galaxy or, if you love melted wax as much as we do, be sure to check out our beginner’s guide to batik art, this guide to making your own beeswax candles and how to make wax melts with essential oils.
We love seeing what you make, so don’t forget to share your craft projects with us on Instagram, Facebook, or Twitter, too!
What is encaustic art?
Encaustic art is a way of transferring melted wax onto a variety of surfaces, where it cools to create unique works of art. You’re essentially painting with wax, and because – by its very nature – wax melts, you can remelt it and change your artwork, simply by reapplying heat.

This, combined with the vibrance of the wax colours, inspires creative confidence and exploration. It’s also a very satisfying technique that produces great results, regardless of artistic ability.
The technique was developed by the ancient Greeks, more that 2,000 years ago. The word ‘encaustic’ derives from the Greek word ‘encaustikos’, which translates as ‘to heat’ or ‘burn in’. Encaustic paints don’t contain oils, so the colours won’t fade or deteriorate over time, and the wax will stay as fresh as the day you apply it.
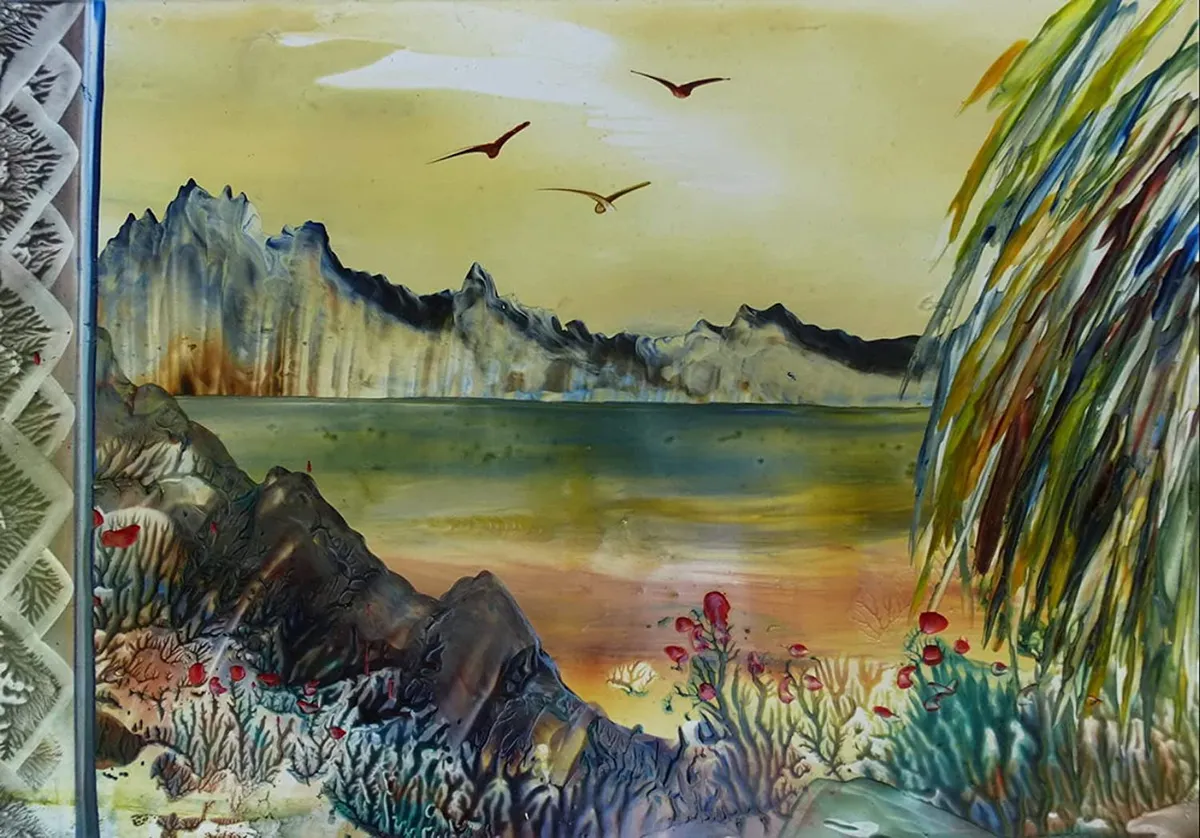
Encaustic art creates beautiful unplanned artwork, but the basic effects can be controlled. All it takes is a little practise, and we show you how in this tutorial.
Buy an encaustic art starter set!

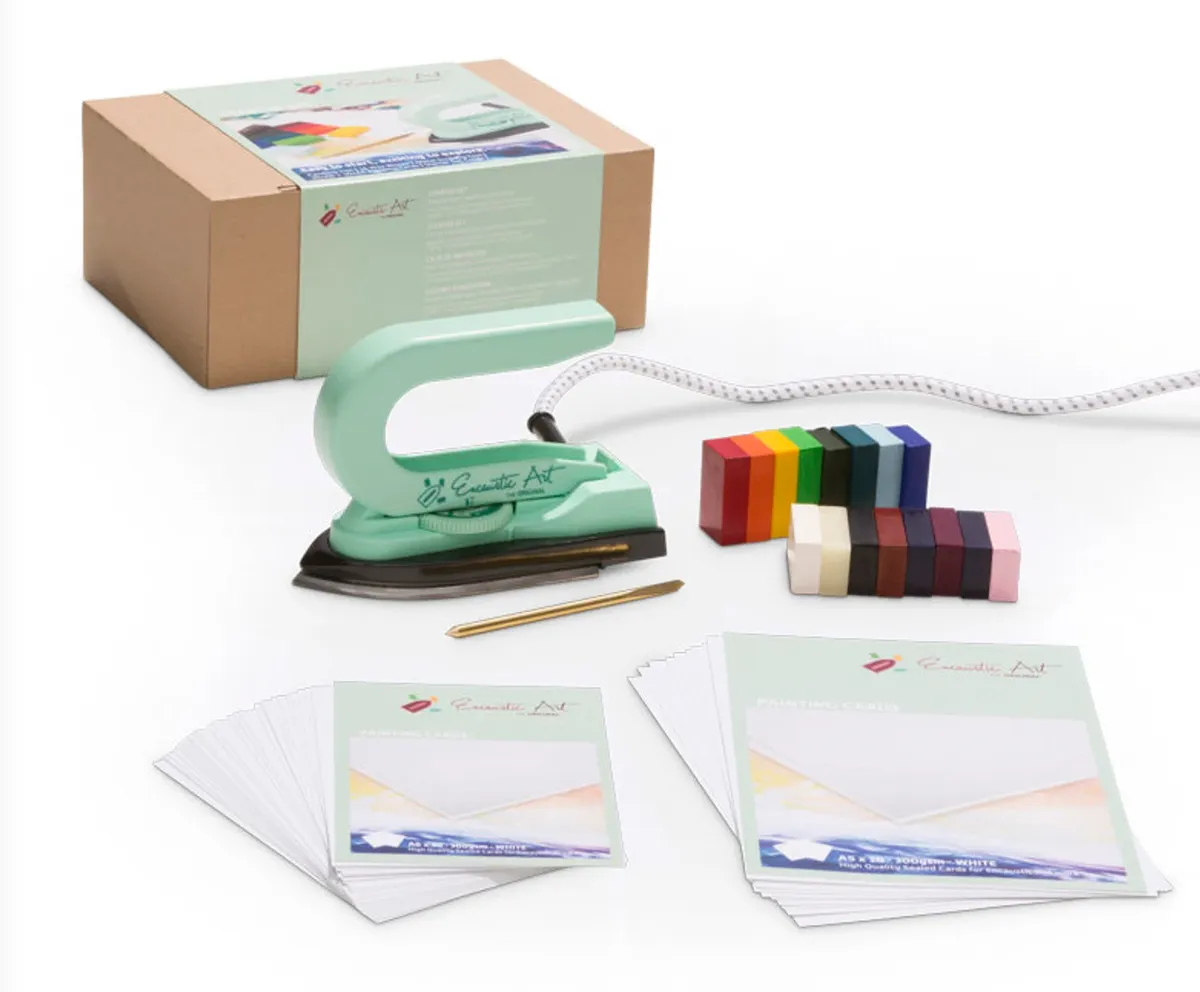
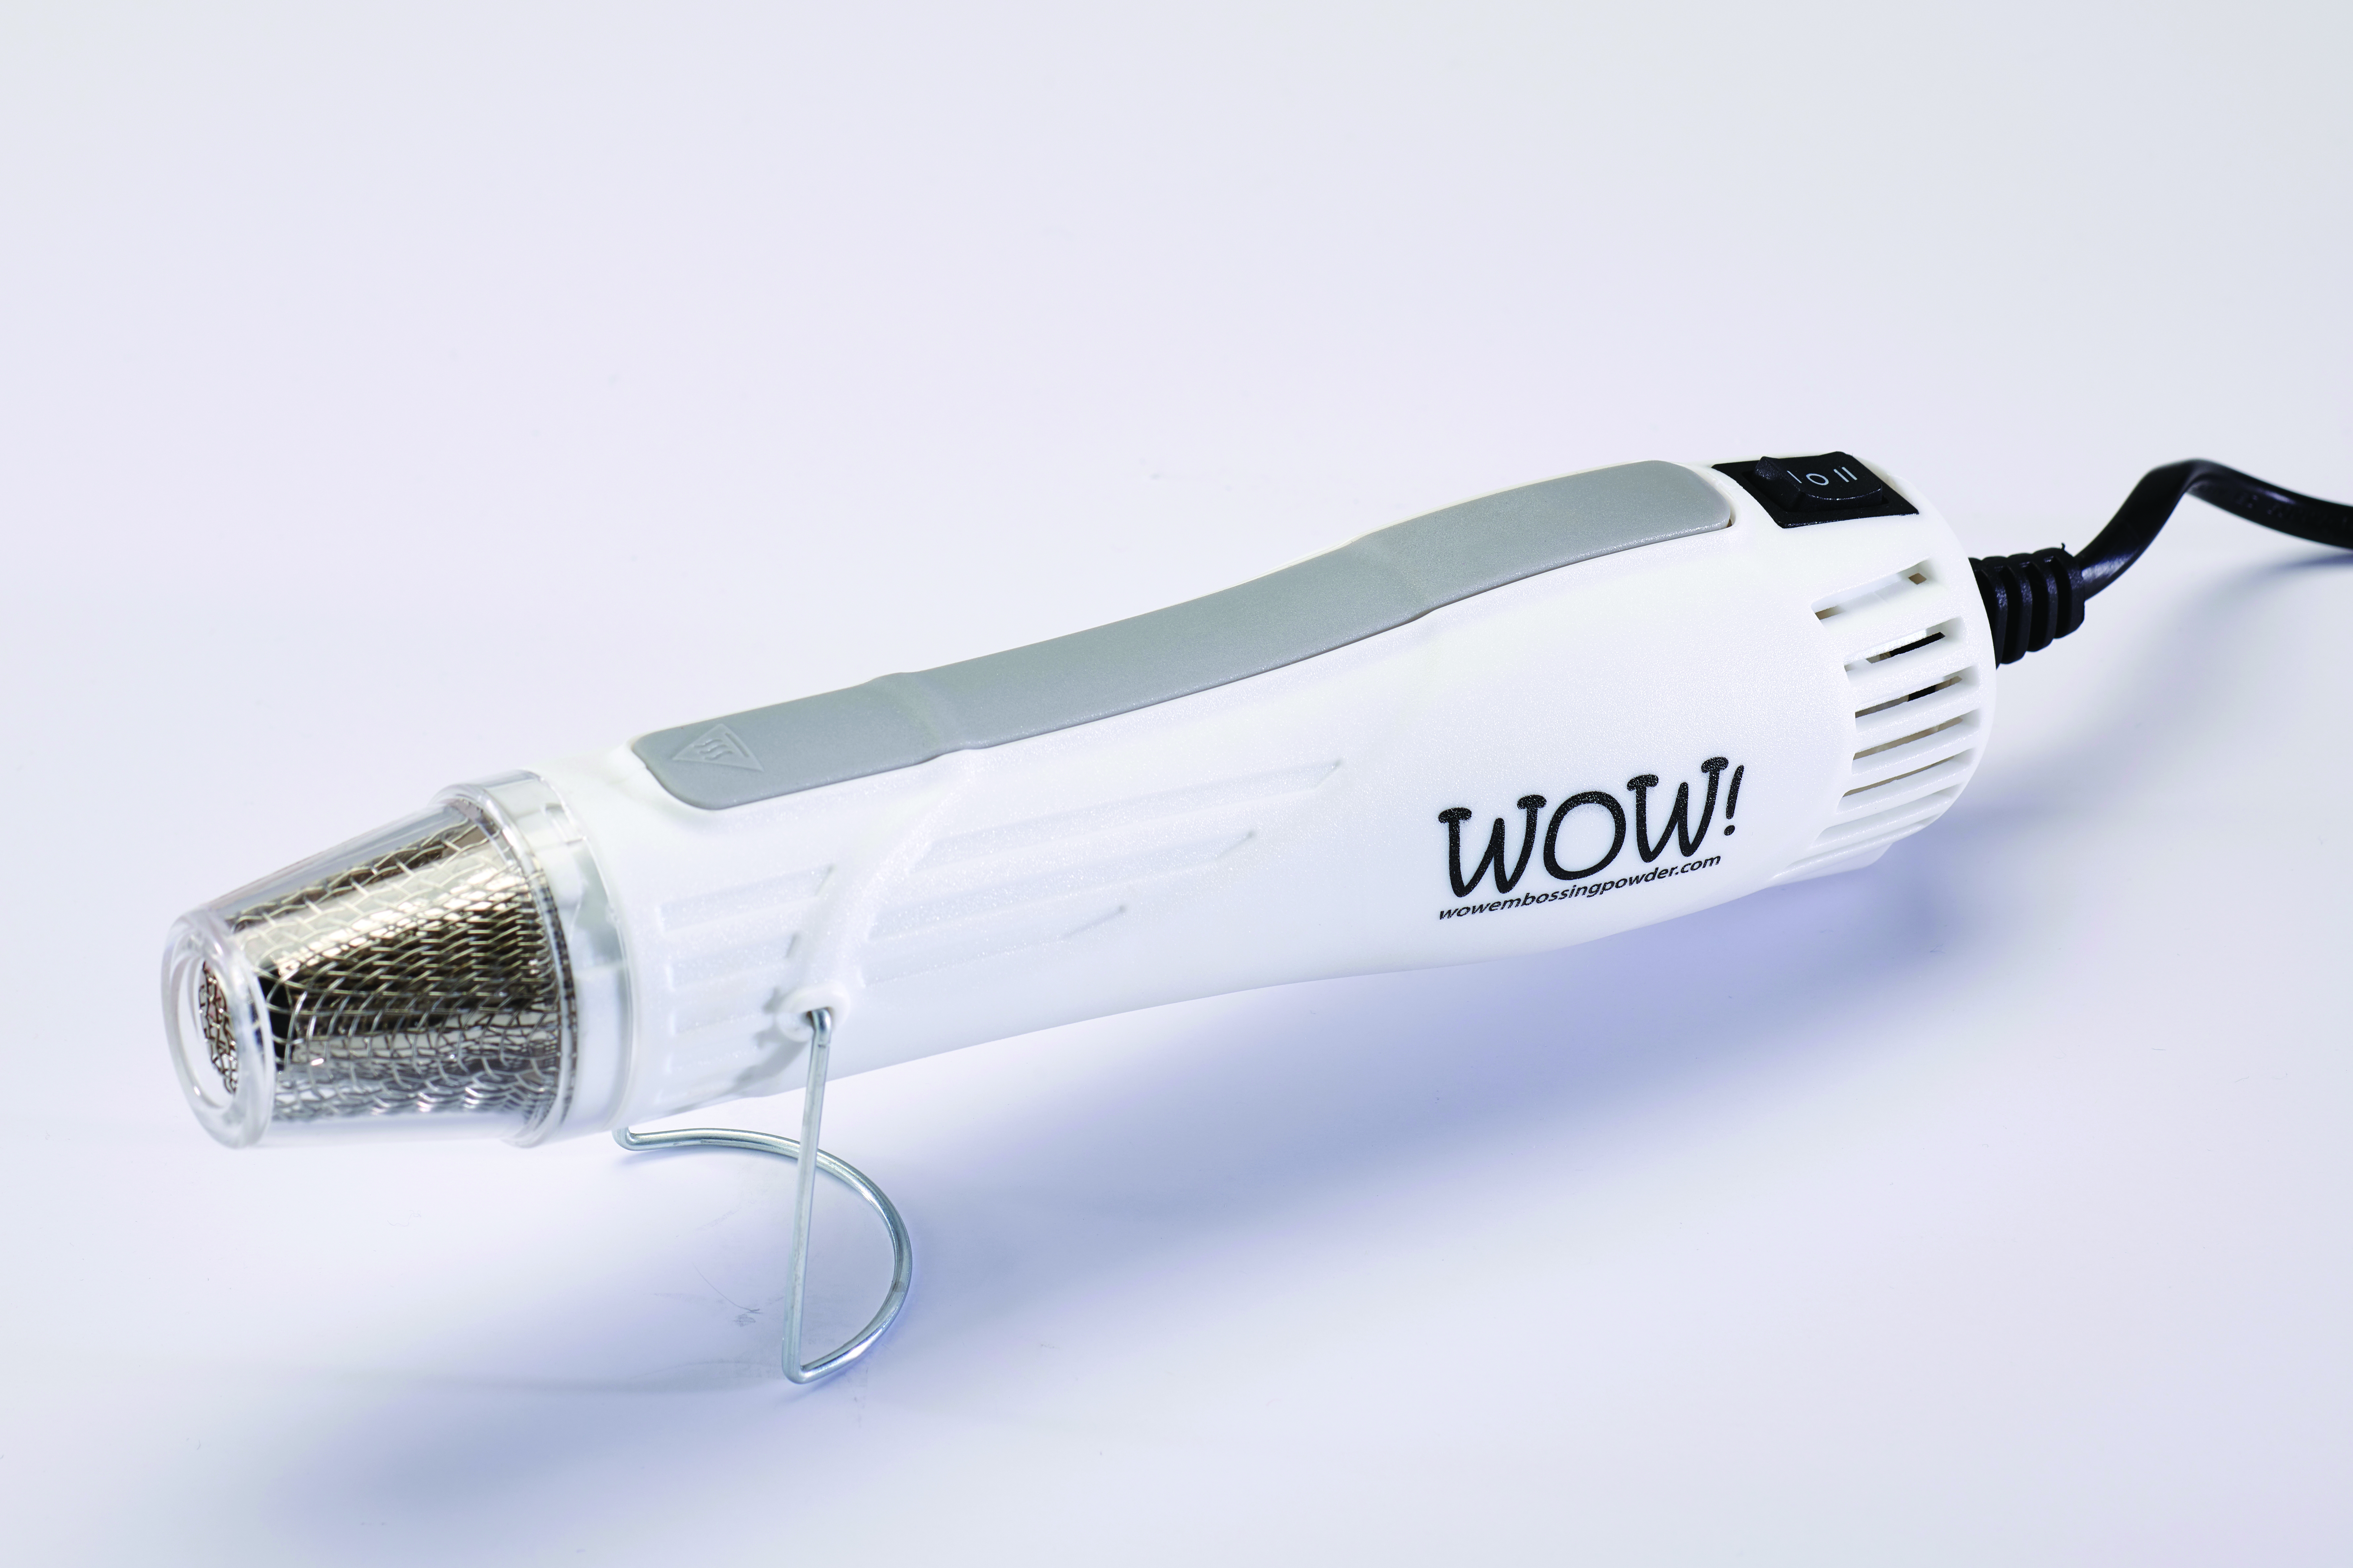
The main things you’ll need to get started are a craft iron, coloured wax blocks and some impermeable card. With the right tools, you’ll be pleasantly surprised at how quickly and easily you can master this craft, so an encaustic set like this one is a useful place to start.
This set includes 16 colours: crimson, orange, leaf green, blue-green, ultramarine blue, red-violet, rust-brown, black, white, olive green, pink, clear, pastel blue, mid yellow, cyan and purple. It also comes with 30 sheets of A6 painting card, 10 sheets of A5, and a metal scribing tool for scratching into the wax.
Top tips for creating encaustic art
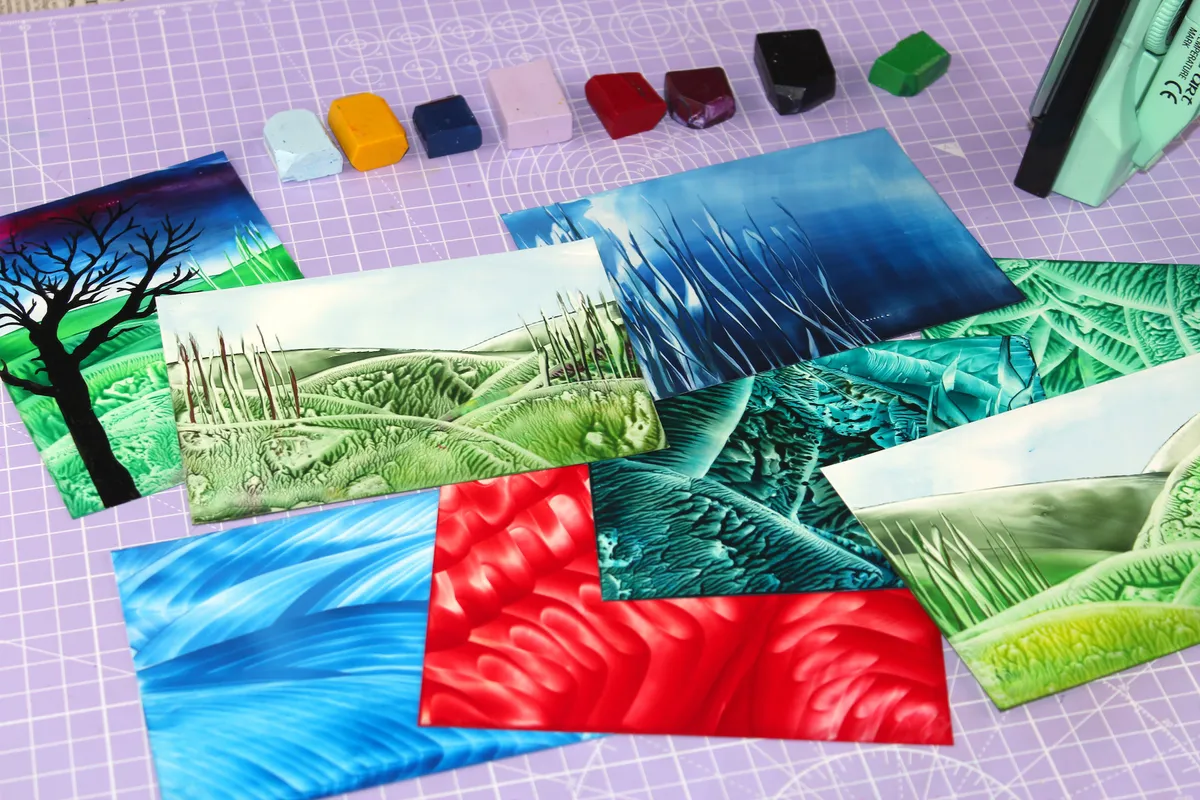
- Play around with different surfaces like coloured sealed card, absorbent card, rough watercolour paper, tissue paper and even fabrics for interesting effects.
- Like acrylic paint, different colours of encaustic wax can be mixed to create new colours, and the standard colour wheel applies (i.e., red and yellow will mix to create orange etc).
- Use monochromatic tones to emphasise style and contrast, like an old-fashioned sepia photograph.
- Patterns can be created by simply making repeated or ordered marks. Use motions like dabbing, shuffling and wriggling with the iron to create a library of effects!
- Details can be added by using a stylus, or by using a permanent marker pen to draw over the top. This is particularly effective if you want to create sunsets!
- Clean your iron with tissue between each use as this keeps each layer of colours looking fresh.
- Switch out the newspaper and scrap paper underneath regularly, as wax build-up on the paper can transfer to the iron and from there, onto your work.

How to do encaustic art
We take you through the basic techniques needed in encaustic art: smoothing, shuffling, wriggling and dabbing, as well as guiding you through the steps needed to make your own simple landscape.
You will need
- Craft iron
- Coated card
- Coloured wax
- Microfibre cloth (for buffing the wax)
- Kitchen roll (for cleaning the iron)
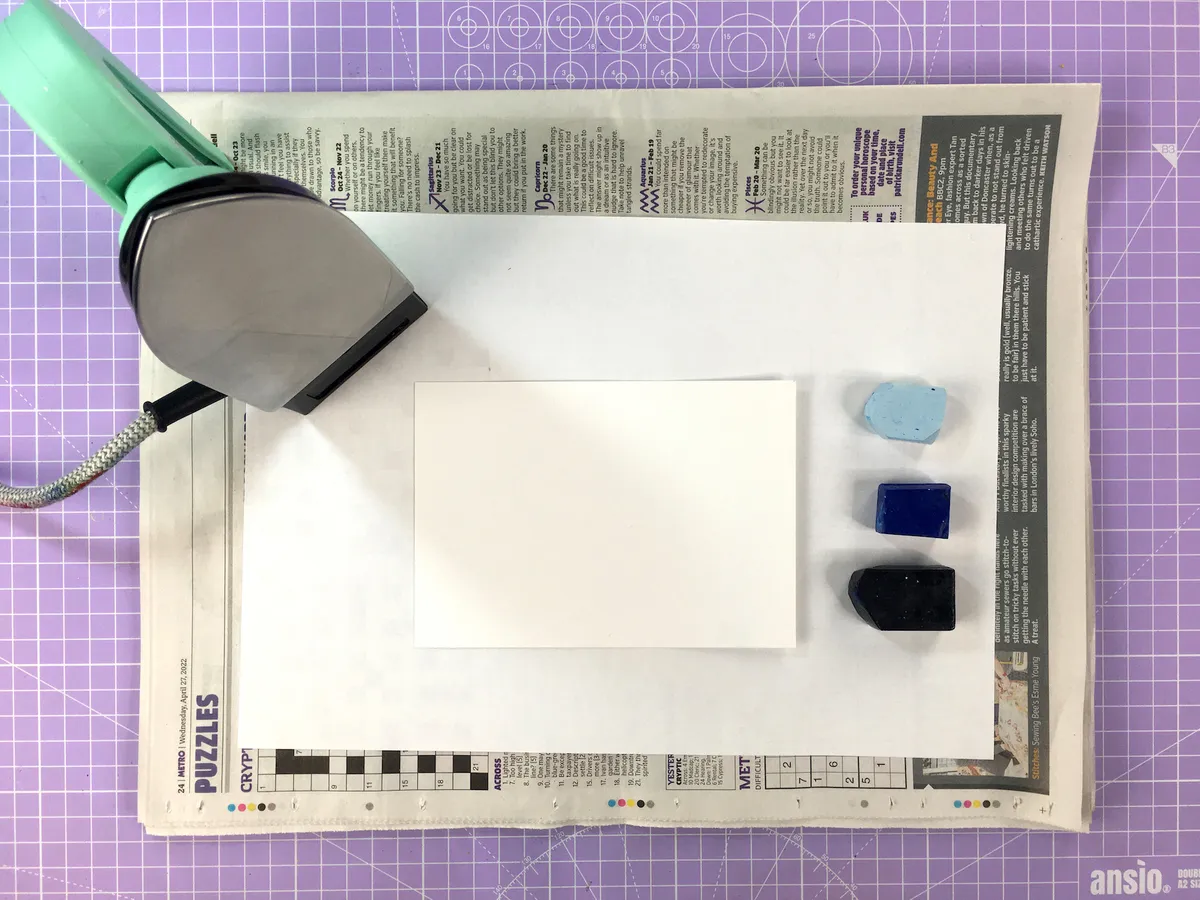
Set up your work area
Protect your work surface with some newspaper. The padding will also help when smoothing the iron over your chosen surface. Place a piece of scrap paper on top of the newspaper, this will absorb the excess wax.
Change this scrap paper regularly, as the hot iron will pick up the wax again, and it may transfer to your work. Grab your iron, and some wax, and let’s get started!

Basic techniques: Smoothing
Step 1
Set your iron to just above low heat, and let it warm up for a couple of minutes. Load the iron with your colours by dragging them across the heated surface of the iron. It’s fun to try different combinations of colours, here we’re using light blue, blue and navy.

Step 2
Place the iron down on your coated (shiny) card, then gently pull the iron across the surface to spread out the melted wax. Lightly hold the iron, and glide it smoothly across the card. Go slowly, keeping your speed constant.

Step 3
Once the iron is clear of the card, lift it off.

Step 4
Be sure to keep the iron clean of wax, especially when moving on to a different colour as residual wax can transfer. The encaustic iron is a low heat tool, so a kitchen towel can be used to quickly remove the wax.

Step 5
Buffing the wax once complete will brightens the colours and give the wax a polished appearance. It removes fingerprints and gives your work a professional finish. Use a clean, lint-free cloth.

Step 6
Smoothing is a useful technique for creating skies, hills or expanses of water. It’s also a useful starting point for when you’re thinking about creating your own design. This one sort of looks like an underwater scene, with sunlight streaming through the surface.

Basic techniques: Lifting
Step 1
Load up your iron with wax.

Step 2
Like before, lay down some wax onto your card by lightly gliding it across the card. Then, place the iron down onto the card, and simply lift it off again to create a dendritic (tree-like) effect.

Step 3
Repeat all over the card! The pressure and speed with which you lift up the iron will determine the pattern.

Step 4
Buff the wax to give it a lovely sheen.

Step 5
This abstract encaustic technique is useful for creating foliage, underwater scenes, or just an interesting effect. You’ll find this technique is easy, and the results very satisfying.

Step 6
Be sure to experiment with different colours and pressures. If you lift the iron off the card quicker, then you get a finer result, like this.

Step 7
Notice how the dendrites are much smaller when you lift the iron quickly.

Basic techniques: Edge marking
Step 1
Start with a full, smoothed page. You’ll find the different colours of encaustic wax behave differently, for example, light colours tend to be runnier than dark colours. I really like working with blue and green waxes, but you’ll develop your own tastes.

Step 2
Using the edge of the iron, glide it over the wax. Experiment with adding wiggles into your lines, and you can create thicker lines if you tilt the iron at an angle when gliding.

Step 3
This technique is useful for creating grass, reeds or smoke lines.

Basic techniques: Starburst
Step 1
This is similar to the edge marking technique, except this time – add an extra line of colour on the edge of the iron. We’re using silver! Drag the iron through the wax you already laid down, and the new colour will mingle with the old, creating a starburst effect.

Step 2
Here’s the starburst effect close up.

Basic techniques: Crosshatching
Step 1
Like cross-hatching used in ink or pencil drawings, crosshatching can also be used in encaustic art to create some useful effects.

Step 2
This would make a fun background for a card!

Basic techniques: Shuffling
Step 1
Load the iron with wax, and working from one side of your card to the other, shuffle the iron back and forth in small steps.

Step 2
Shuffling can create some very nice rhythmic designs.

Step 3
They could be hills or rolling waves!

Basic techniques: Wriggling
Step 1
Wriggling is a fun technique to try. Load up your iron with wax, we’ve gone for yellow and red this time. Using a similar amount of pressure as when you were doing the smoothing technique, gently wriggle your iron back and forth as you transfer the wax down onto the card.

Step 2
Wriggling creates a fantastic 3D effect, it reminds me of fabric – or a Tudor ruff!

Step 3
Buff your work to brighten your wriggled design.

Basic techniques: Graduated dabbing
Step 1
Let’s try graduating colours from one to another, we’ve gone from yellow to green. You can, of course, load up your iron with multiple colours at once, but if you want something a little more measured, here is how you do it.
Add some yellow onto your iron, and using the dabbing technique, lay down the colour.

Step 2
Next, using light green, extend the dabbing further down the card. I had intended to stop halfway, but as you’ll find out – it’s very difficult to stop!

Step 3
Next, load your iron with a darker green and finish off by dabbing at the bottom of your card.

Step 4
And there you have it!

Basic techniques: Mix it up
Step 1
You can get some fun effects by mixing up the techniques. Here, we’ve used dabbing and edge marking to create an abstract piece.

Step 2
I love this colour! This one is definitely going into my card topper collection for last-minute card making.