
The complete guide to shading techniques
Shading is a crucial technique to learn if you want to produce impressive pencil drawings. Smooth shading can make your pictures shine and look as realistic as a photograph.
Everyone can benefit from taking the time to improve their artistic practice, whether you’re a beginner or a more experienced artist looking to hone your skills.
In this guide, we’ll look at how to approach shading in your drawings from basic art principles to more advanced techniques. Keeping these ideas in mind as you work will help you to focus on the finished result, making your completed drawing look more professional.
We’ll cover a variety of different shading techniques to explore, practical exercises to try at home and recommended art supplies to stock up on.
Ready to learn how to shade like an expert? Read on to discover everything you need to know about shading techniques with our in-depth lesson.
- What is shading and drawing in art?
- The difference between values, tone and contrast
- How to shade: a quick exercise
- 10 shading techniques to advance your drawing skills
- How to shade drawings
- What pencils should you use for shading?
What is shading in drawing and art?
Shading, in drawing, refers to building layers of pencil to create different tones and contrasts. Pencil marks are blended together to produce darker and lighter areas of a sketch.
Shading is widely used to refer to pencil drawings, but you can use the term with other mediums too. For example, if you’re working with a fineliner pen, you can use techniques such as hatching and cross hatching to create a shaded look.
Why is shading important in drawing?
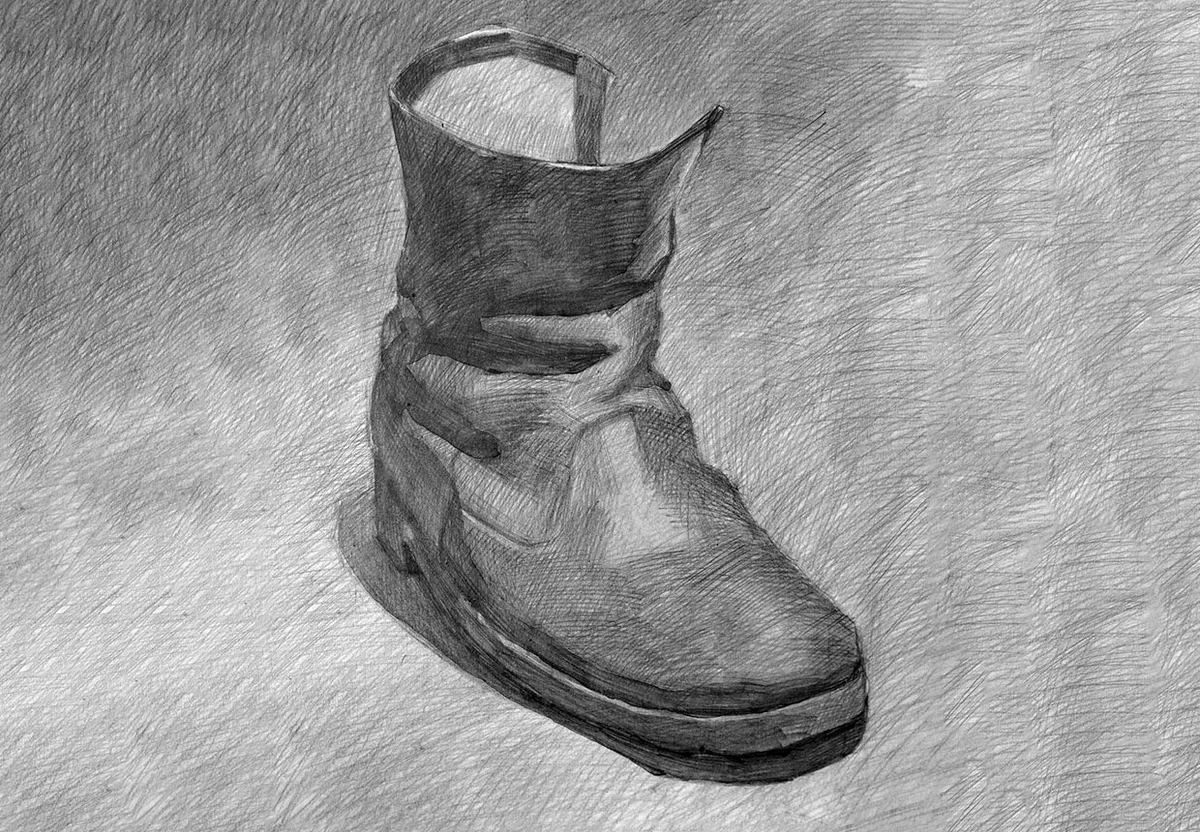
When it’s done well, shading can make drawings look three-dimensional with a variety of textures. Shading can also be used to mimic light and shadow within a picture, which will make your subject leap from the page.
Expert shading techniques also create hyper-realistic, photographic quality drawings. However you need to be careful! Poor shading can make your work look untidy and flat.
Learning shading techniques can be frustrating at first, but the good news is that you’ll improve rapidly once you understand a few simple techniques, and the subtle differences between values, tone and contrast.
The difference between values, tone and contrast
If you’re new to art, you’ve probably come across terms such as values, tone and contrast, but what do they actually mean? And what’s the difference between them?
Here are some quick definitions to help you understand these essential art terms:
Value
Value refers to how light or dark a specific colour can be. A good way to think of this is to imagine a blob of blue paint. If you added white or black paint to it, you would be able to make a whole gradient of different blues, ranging from light to dark. It’s exactly the same with pencil shading – you should be able to create both light and dark values with your pencil. The lightest tone is the highest value and the darkest tone is the lowest.
Tone
Tone is similar in meaning to value. It simply describes how light or dark a colour is. Easy to remember!
Contrast
Contrast is when two opposite values are positioned next to each other within a drawing. For example, if you put a colour with a dark tone next to a light one then you’ve created contrast. Contrast is an important concept to understand when it comes to shading. If there is not enough contrast in your drawing then it won’t stand out.
In short, getting your shading right can mean the difference between a flat image and a picture that pops.
How to shade: A quick exercise
Shading involves building up layers of pencil markings to create a drawing with multiple dimensions.
The easiest way to shade is to begin by choosing a soft drawing pencil. These super blendable pencils can be found in most drawing pencil sets – just select one marked with a B for this exercise.
Start shading
When you begin shading, always start with the lightest areas first and work from light to dark. Go back over the shading with your pencil to gradually develop a smooth gradient. It will take practice to get the hang of gradients, so don’t rush this bit.
A quick way to improve your shading technique is to make sure that you shade in one direction. This will help you to shade evenly while you’re learning.
Vary pencil strokes
Another shading hack is to vary the length of your pencil strokes. Your drawing can end up looking blocky if all of your lines are the same length. Overlap your lines in an irregular way to make your shading look more professional.
Choose your perfect pencil
Familiarise yourself with the pencils in your set to get used to how easily they blend. Draw some test strips and practice shading your way from light to dark. Some artists prefer firmer drawing pencils, while others favour ones with a softer lead. This comes down to personal taste and in time you’ll find your own preference.
10 shading techniques to advance your drawing skills
1. Blending
Blending is one of the most important shading techniques to learn – and probably the one you’ll use the most.
It’s a drawing method that’s used to smooth away lines, creating soft gradients and a professional finish.
So, where do you begin? We’d recommend starting with a gradient drawing exercise.
Gradient drawing exercise
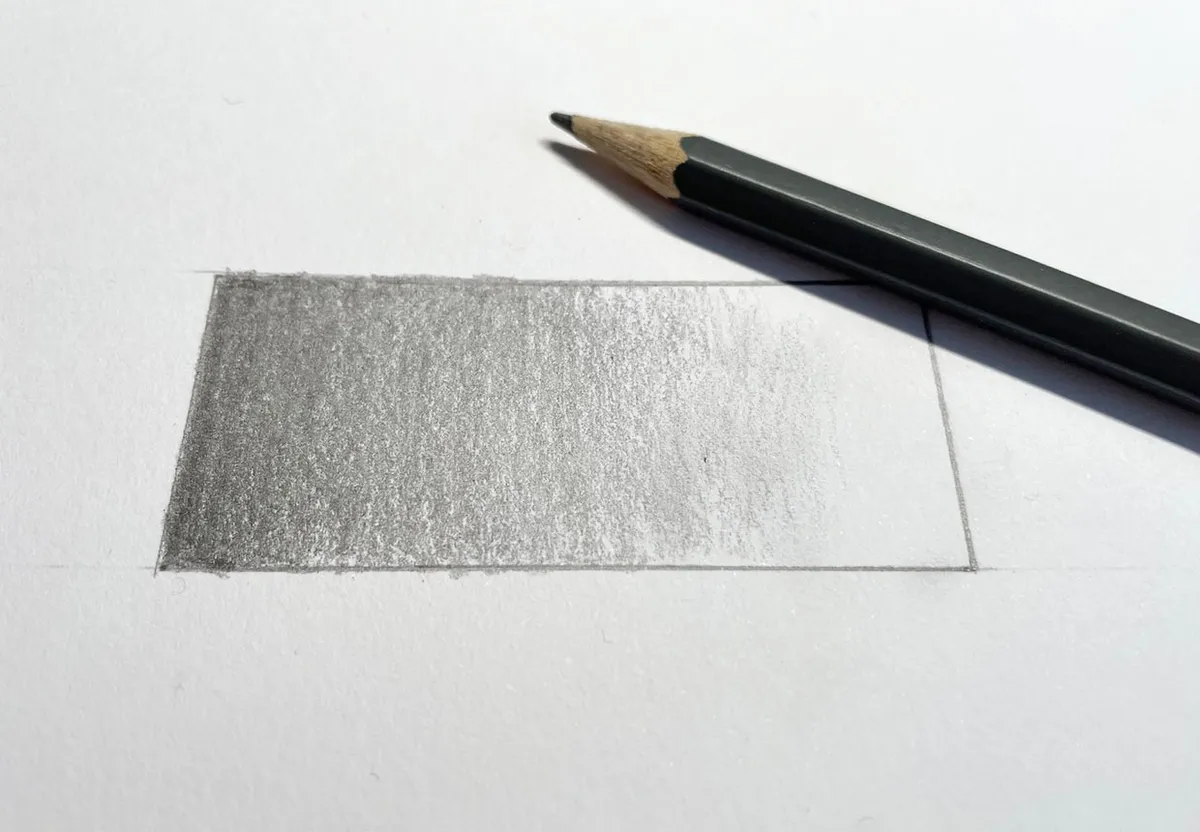
Choose a soft drawing pencil (these are marked with a B in most pencil sets) and fill up a shape with pencil marks ranging from light to dark. A rectangle or a sphere would work well for this.
Use small, side-to-side movements with your pencil to shade your shape and go back over the areas which you would like to be darker.
Vary the length of your pencil strokes so that they don’t look too uniform and make sure that your lines are following the same direction to ensure that your shading looks even. You can shade in different directions if you’d like to add texture to a drawing, but that’s not the purpose of this exercise.
At this point, you may find that your shading looks rough and uneven. Don’t worry, there are a few things that you can try to get a smoother gradient.
How to use a blending stump
Firstly, you can use a blending stump to even out pencil marks. A blending stump or tortillon is made of paper with two pointed ends. Blending stumps can be rubbed over your drawings to soften shading, concealing pencil marks in the process.
Blending stumps can be used to smudge small areas of a drawing using the tip or larger areas using the side of the point. If your blending stump starts to look grubby, you can clean and sharpen the tip using sandpaper. A kneaded eraser or putty rubber will also lift off some of the pencil lead to refresh your blending stump.
If you’re using graphite pencils, then you don’t necessarily need to use a blending stump. You can also blend with tissues, cotton buds or even a paintbrush. Find out how with Kirstie Partridge Art’s fantastic video tutorial:
How to blend coloured pencils
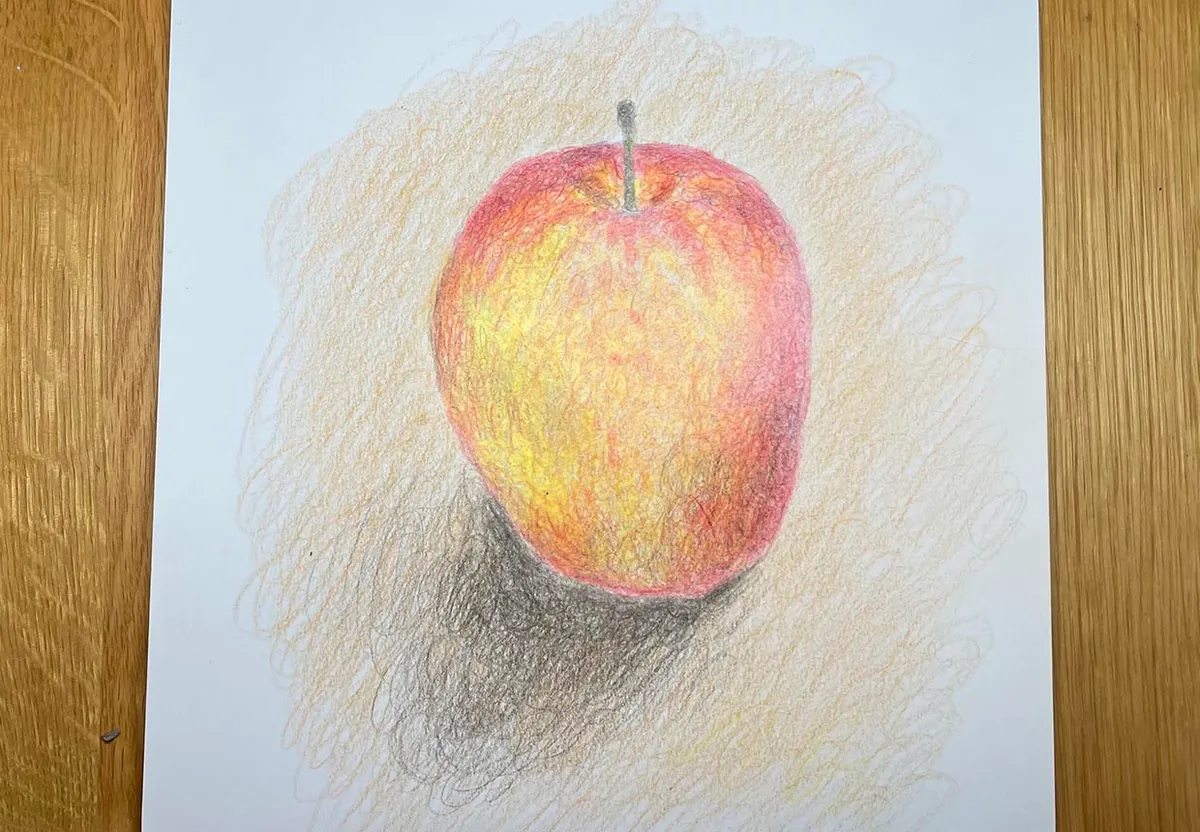
Coloured pencils feature cores made from coloured pigments bonded together with wax or oils, unlike drawing pencils which are made with graphite. As a result, they have a different consistency. It’s important to remember: you have to change your blending style to suit the medium.
Coloured pencils can be blended together in a similar way to drawing pencils. Layer colours over one another to create an array of vibrant shades or overlap your shading to produce gradients. Start with light shading and keep going back over it until you have the tone that you want.
Other ways to blend coloured pencils
Blending stumps will smooth your shading, but did you know there are other ways to blend coloured pencils? For example, a colourless blending pencil or blender pen can be layered over your shading to gently merge colours together. Blender pens can also be used with graphite pencils.
Another popular artist’s trick is to use baby oil to blend coloured pencils together. This can be applied with a brush or a cotton bud – just be careful not to use too much in one go, or you risk ruining the paper!
2. Contour hatching
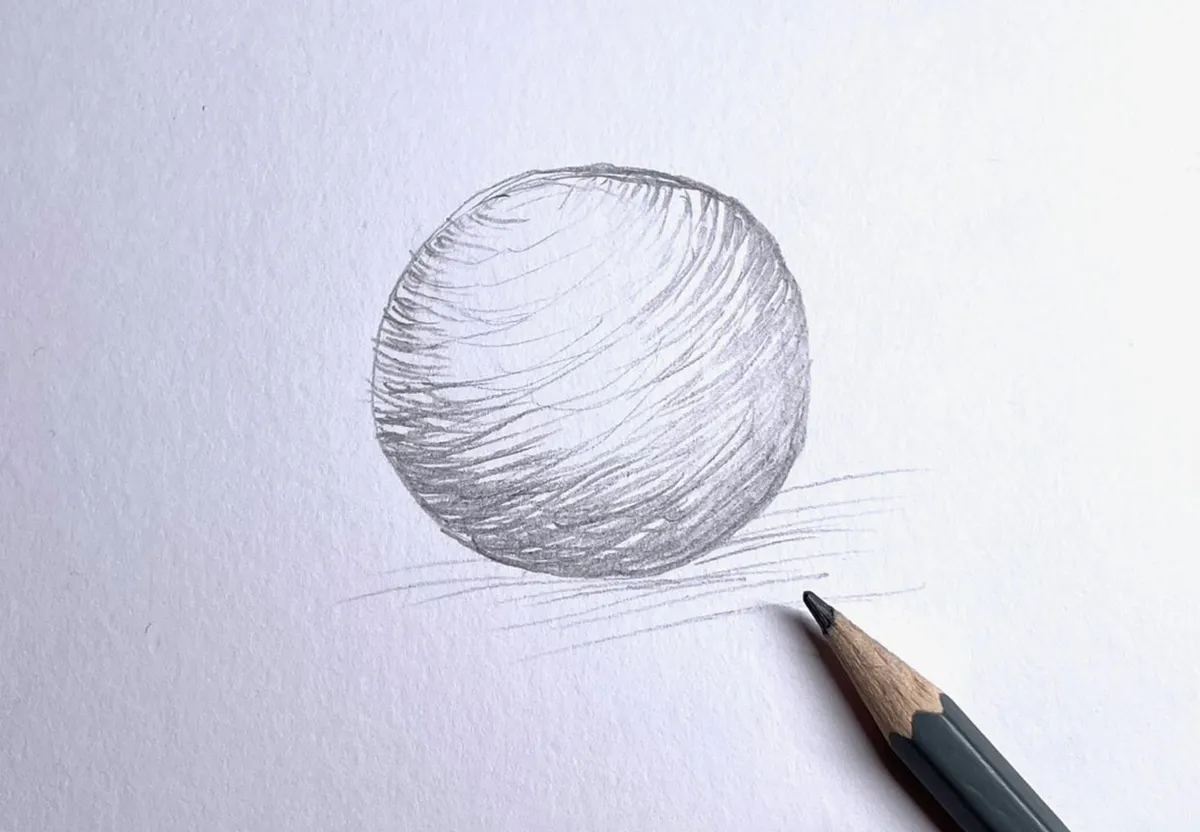
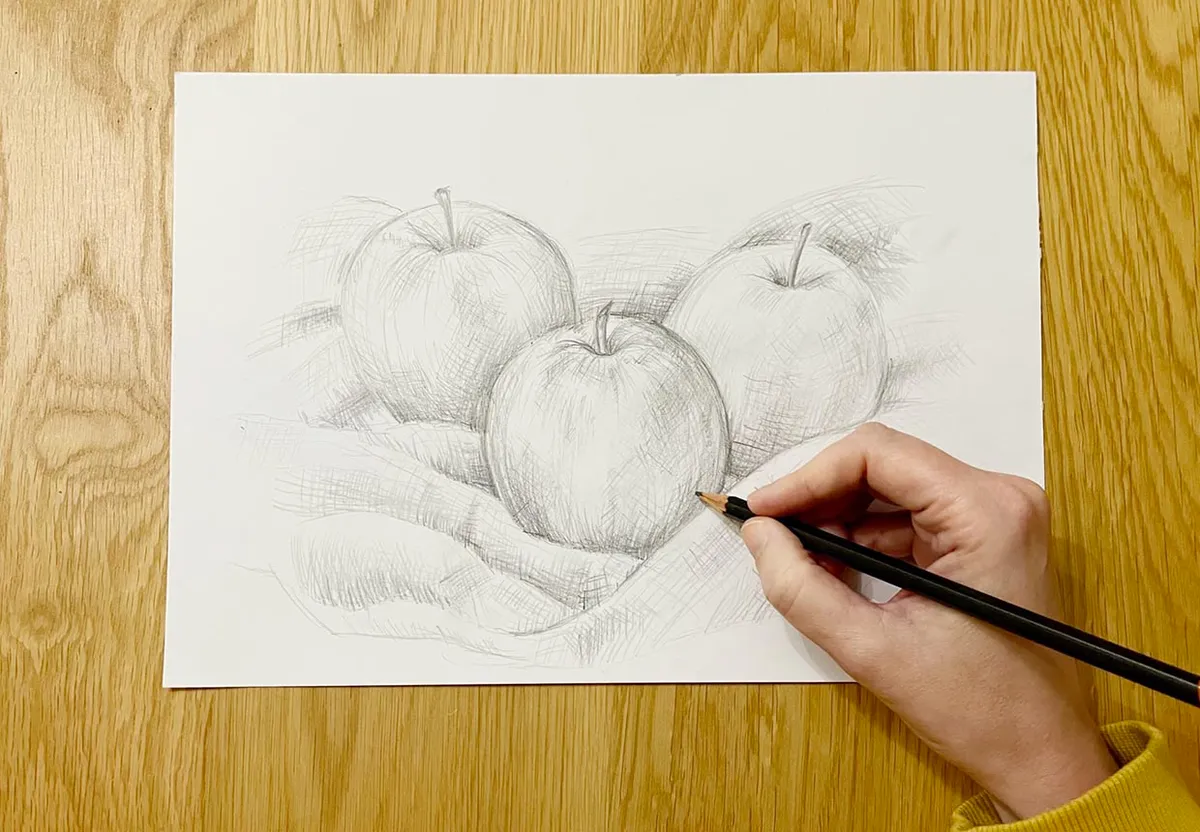
Contour hatching is a clever pencil shading technique which uses lines to create shadows on an object. Like the name suggests, contour hatching is used to follow the shape of your drawing just like the contours on a map.
A good way to try this for yourself is to draw a round object such as a sphere or an apple. Sketch an outline first, then use light pencil lines to curve around the shape of the object.
Experiment with different line thicknesses to see how it changes the appearance of your object. You can create shadows by drawing lines closer together or spacing them out for lighter areas.
This is a really simple shading technique to try and it’s extremely effective when you combine it with other forms of hatching, such as cross hatching.
3. Cross hatching
Cross hatching uses criss-crossing lines to create areas of light and shade on a drawing. This technique often has a woven look due to the way that the pencil marks overlap.
This shading technique has been popular with artists throughout history, including Vincent Van Gogh and Leonardo Da Vinci.
While cross hatching is often used by pencil artists, you’ll also notice it in ink drawings, engravings and even lino prints. The 20th Century artist Eric Ravilious used cross hatching incredibly effectively in his wartime watercolour paintings.
It’s a brilliant shading technique to use if you want to produce a drawing that’s textured with a rustic feel, rather than achieving a more polished and blended look.
When you’re cross-hatching, it’s best to work from light to dark. Begin by lightly cross hatching your drawing (firmer H pencils are perfect for this), then gradually add further cross-hatched layers over the top. Softer pencils can be better for the darker parts of your drawing.
It’s important to remember that your lines don’t need to be rigidly straight – you can curve them to suit the shape of whatever you choose to draw. Create patches of cross hatching in various sizes to fill the space, tilt them at different angles and later them on top of each other.
You can draw lines far apart on the lighter parts of your drawing or pull them closer together for the darker tones.
Cross hatching is a versatile technique and it can be adapted to most topics, from landscapes to portraits.
If you want to learn more about this pencil shading technique, check out our cross hatching guide and have a go at our still life tutorial.
4. Hatching
The techniques of hatching and cross hatching go hand in hand. Hatching is when lines are drawn in one direction, unlike cross hatching where lines cross one another like a net.
It is rarely used by itself – it’s almost always used in combination with cross hatching and the two shading techniques complement each other perfectly.
Your hatched lines don’t need to be uniform, but they should follow the same direction for best results.
5. Rendering
Rendering is a shading technique where you apply graphite to the paper, then gently lift it off the page in any areas you want to highlight. The end result is a soft, smudgy drawing that can look a little blurry.
For this, you’ll need a mouldable eraser, which is sometimes known as a putty rubber. These soft erasers can be shaped into a point to rub away small areas of your drawing. You can use your eraser to pick out highlights or dab over your shading for a dappled look.
Even if you don’t want to try rendering, it’s worth getting your hands on a mouldable eraser. Sometimes you can end up going overboard with your shading and making your artwork much darker than you’d intended. A mouldable eraser can save the day and bring your drawing back from the brink, as they’re much more effective than basic rubber erasers.
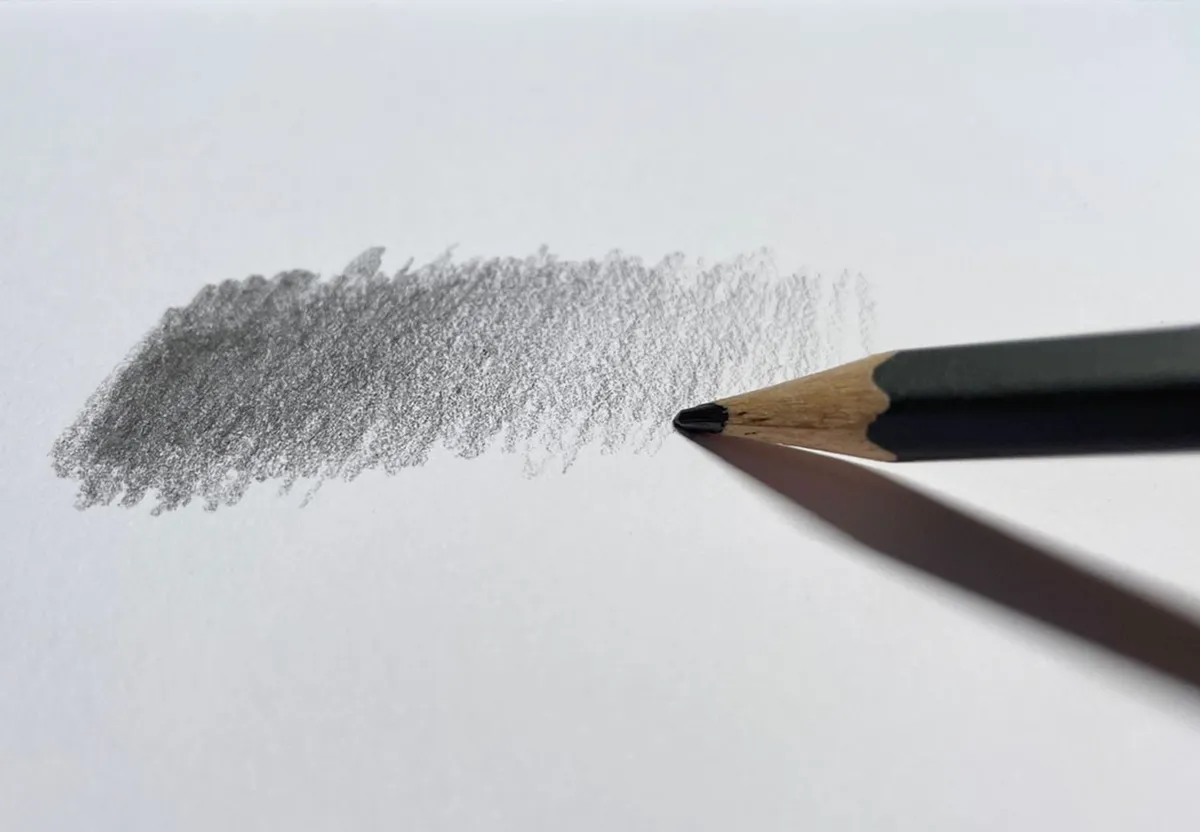
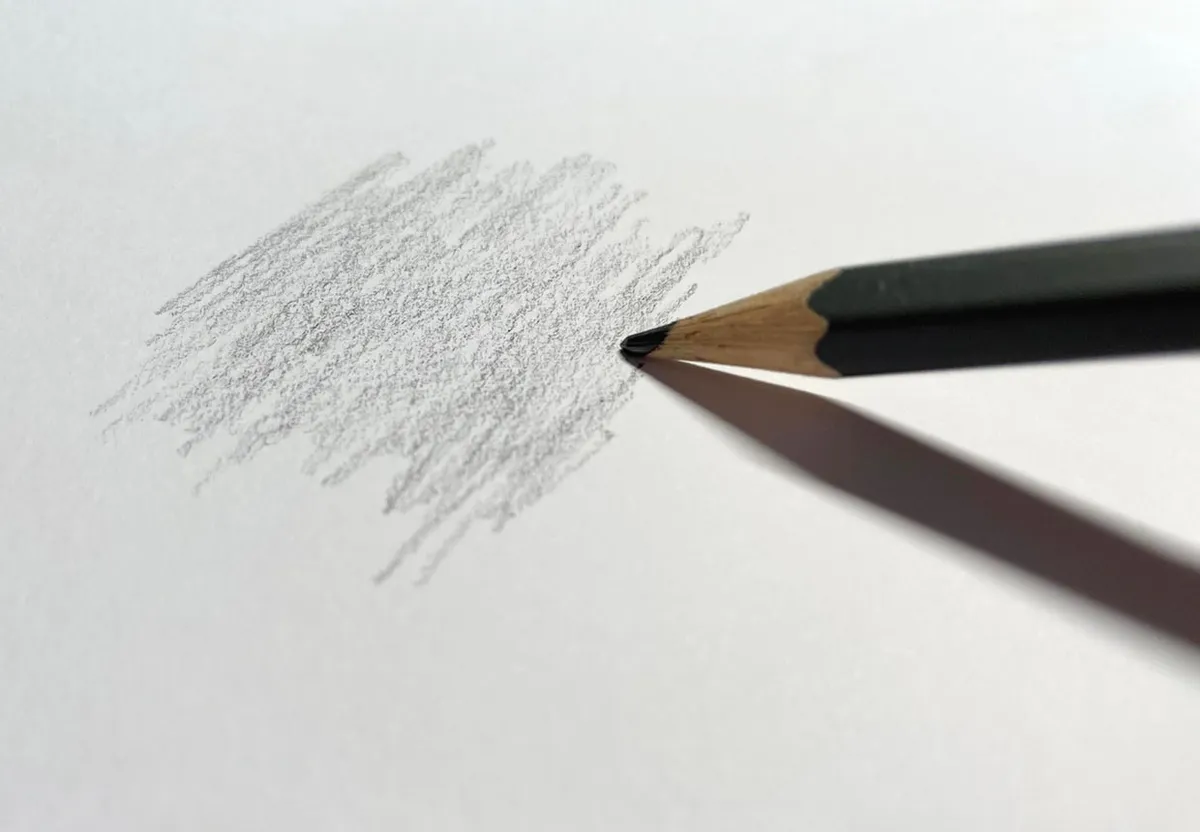
6. Scribbling
Get in touch with your inner child and go wild with this experimental shading technique. Scribbling is much looser than other forms of shading and feels much more contemporary.
Scribbling can bring lively textures into your art, whether you’re using it as shading or as a backdrop for a sketch.
The key to scribbling is to move your pencil freely to make loose pencil marks, which you build up gradually to shade your drawing. This is a good warm-up exercise when you’re settling down for a drawing session, because it’s impossible to be a perfectionist while scribbling away!
7. Scumbling
Scumbling is a term you’ll often see used in reference to painting, but it’s a great shading technique to explore too. Scumbling in drawing is very different to scumbling in painting.
In drawing, scumbling is used to describe swirling pencil marks on a page, while in painting it refers to colour being dragged across an existing layer of paint using a dry brush. The results are very different too.
Scumbling is a fun drawing technique to try if you want to break out of a creative rut. You can still produce a drawing with light and dark values by gradually drawing over your first pencil lines.
You can make small, neat, circular marks to achieve even shading or relax your hand and sketch loose swirls and circles.
Try both methods and see which suits your shading style! If you’d like to try scumbling for yourself, you can find out more in our detailed scumbling drawing guide.
8. Stippling
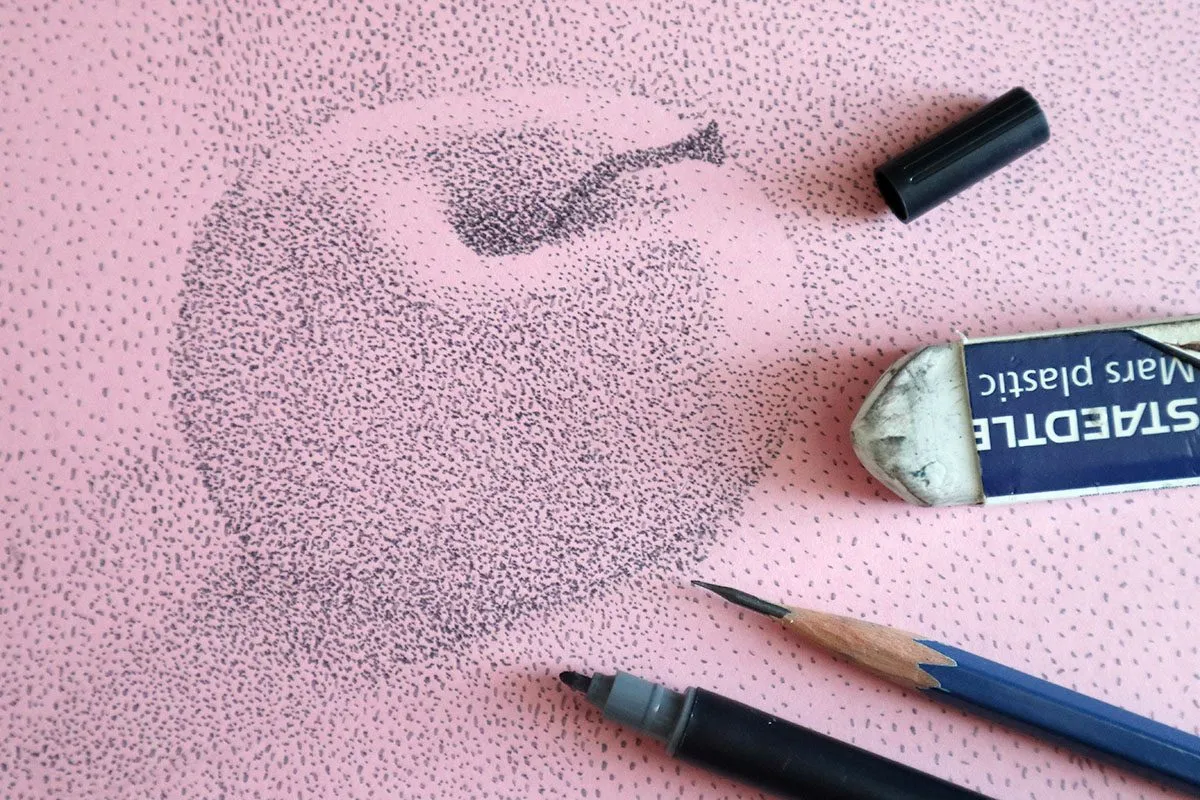
Stippling is a technique which makes use of tiny pencil dots to create light and shadows in a drawing. This one takes a bit of practice to get right, but will look very impressive when finished!
The difference between stippling and pointillism
Both stippling and pointillism use dots to form a picture. However, the difference is colour: stippling uses hue, while pointillism can feature a whole array of colours to build a vivid picture.
When you’re stippling, begin by lightly pencilling in an outline on your paper as a starting point. If you’re a more experienced artist, have a go at drawing the outline using pencil dots – this will make the outline less noticeable when you complete your drawing.
Bring your pencil dots close together to produce shadows or space them out to represent lighter tones. You can leave the brightest areas of your piece completely blank for the highlights.
Stippling requires a bit of patience, because making hundreds of dots takes time, but the effect is well worth the effort! Make sure you keep glancing back at your source photo or whatever you’re drawing to check where the highest and lowest values should be.
As you’re not using any lines, it can help to use contrast to make parts of your drawing stand out. Be aware of the sections where light and dark meet and get the contrast right to ensure that your work is balanced.
9. Tick hatching
Tick hatching is an alternative form of shading which uses short lines to create different tones in a drawing. If you’re already a fan of hatching, it’s a great idea to add this technique to your repertoire!
This shading technique falls somewhere between stippling and hatching, as it uses very short pencil strokes which can look similar to dots. Have a go at combining tick hatching with stippling or with other techniques in the guide to see what interesting effects you can create.
Like other forms of hatching, you don’t have to hatch in one fixed direction, so you can follow the shape of an object to add dimension or overlap your tick marks for a textured look.
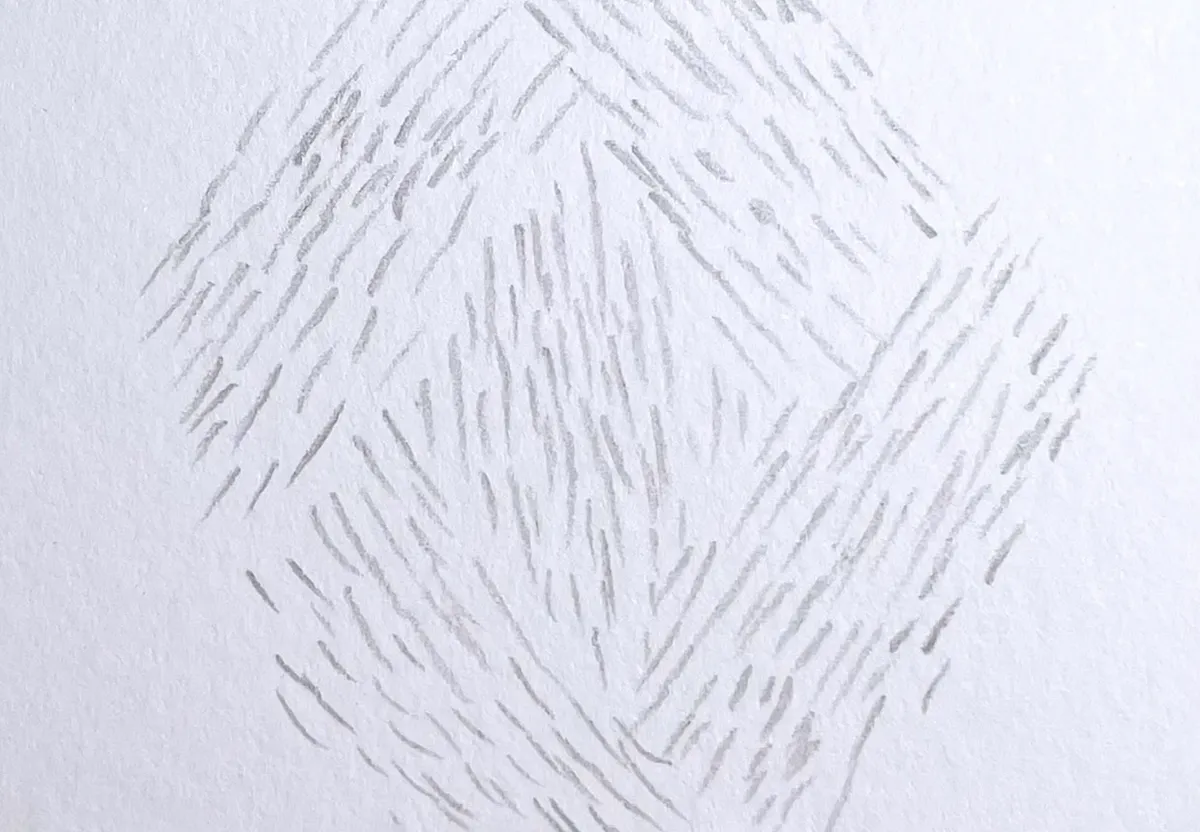
10. Woven hatching
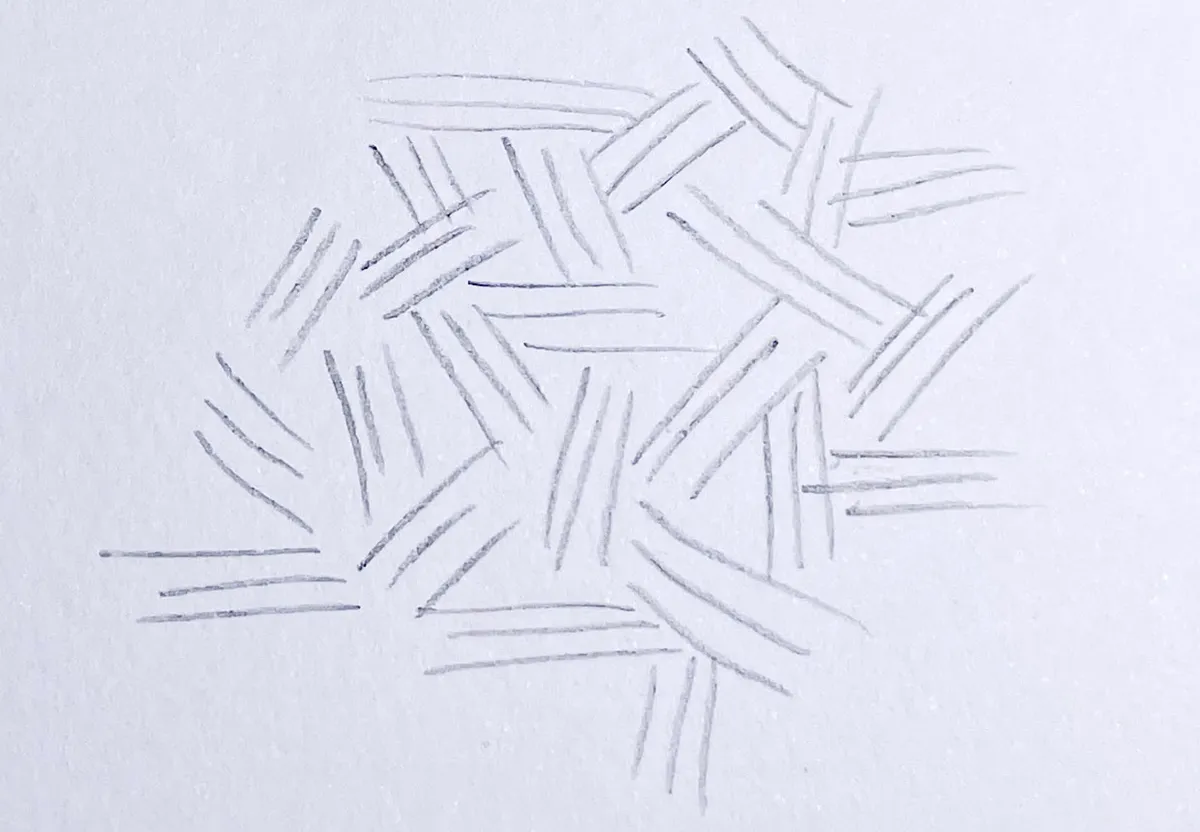
Woven hatching is a hatching technique which combines small groups of lines angled in different directions. Unlike cross hatching, these groups of lines shouldn’t overlap one another, but should be tilted so that it looks as though one set of lines is going over or under another set.
As the name suggests, the finished shading should resemble a woven basket. You can use woven hatching to fill up a shape or as a doodling exercise.
Create lighter and darker shades by positioning your pencil strokes further apart or closer together. Woven hatching can be challenging, so think carefully about where each bundle of lines is positioned and how it will impact your composition.
Take your shading to the next level
Take five minutes to improve your artistic skills with our pick of the best drawing tips and tricks.
How to shade drawings
Now you’ve learned some effective shading techniques, we’re going to study some art principles which will help you to become a better artist.
We’ve briefly mentioned the importance of understanding values in your artwork, so we’ll apply that principle to give you a detailed look at how it works in practice.
It’s also important to understand the role of light and shade in art and how that can influence your work. This will help you to craft more realistic pictures and bring your drawings to life.
Understanding value in your drawings
Value is an art term that describes the difference between the lightest and darkest tones of your drawing. The lightest tone has the highest value and the darkest tone is the lowest. The value of a colour refers to how light or dark that specific hue can be.
Understanding the values shown in your drawing is crucial, because it allows you to identify the lightest and darkest areas of your drawing and make sure that your shading is consistent.
Some artists like to sketch a value strip when they begin a drawing to determine the range of values that they intend to use. This is optional, but can be handy when you’re evaluating your own work.
Tips and tricks for assessing value in drawings
When you’re shading a drawing, getting the levels of shading right can make your piece look harmonious and give you a much better finish. It can be easy to lose track of the overall appearance of the work if you’re too close to it.
Pausing to check your values forces you to take a step back and think about the whole composition.
Ask yourself whether you’ve added enough shading where it’s needed and are the dark and light areas the right value. If you’ve gone too dark, you may be able to take the shading back a notch using a mouldable eraser and correct the value if needed.
Whichever shading technique you choose, it’s worth keeping your values in mind as you scribble away.
Bringing contrast into your work
Contrast is essentially the juxtaposition of two opposite values. When you’re talking about pencil shading, that means putting dark and light tones next to one another.
Why is contrast important?
Contrast helps to distinguish between lighter or darker zones of a drawing. It can be used to highlight important details, create depth in your work and add dimension.
Without contrast, your shading can end up looking two-dimensional and dull. No one wants that!
Always think about the places where dark and light tones meet and whether you’ve captured that contrast successfully. There will be parts of your shading where similar tones sit alongside one another and areas where you need to sharpen the contrast.
Pay attention to the darkest shades in particular. Are they darker than you first thought? Are there tiny places where the shading should be even darker? This is something to bear in mind in the final stages of a drawing when you’re happy with the rest of the values you’ve depicted. It’ll make the contrast between light and dark even more dramatic.
Contrast and colour
Consider putting contrasting colours together when you’re using coloured pencils. Contrasting or complementary shades are those found on opposite sides of a colour wheel. For example, red and green are complementary colours, as are yellow and purple.
Putting contrasting colours side by side is visually striking, even if you only use a small amount of the contrasting colour to balance your drawing.
Light and shade explained
We’ve looked at the importance of contrast, values and tones in your shading, but it’s equally essential to think about what those terms represent: light and shadows.
Understanding how light and shade work is key when you’re working with any medium, whether you favour paints, pastels or pencils. When it comes to pencil shading, light can dictate where you position the deepest shadows and where you want the light to fall.
Know where your light is coming from
Whatever you draw or paint, you should always know where your light source is in relation to the subject of your sketch. Your light source might be natural sunlight, a lamp or even a candle – and its position matters.
For example, if your light source is a bulb high above the object that you’re drawing, you’ll notice that the shadows are close to the object and directly below the light source.
If your light source is lower down and positioned to the left or right of the object that you're drawing, then there will be longer shadows stretching out in the opposite direction. If you’re struggling to picture this, imagine the low winter sun shining through the trees and creating drawn-out shadows. It’s just like that.
The light source will also illuminate the texture of the object of your drawing. It’ll pick up any ridges or bumps, so you will need to think about the kind of shadows these might generate.
Understand how light behaves
Waves of light move in straight lines and those lines can be blocked if something gets in the way. Lightly pencil in an arrow on your drawing if you need a reminder to think about the angle of the light source.
Don’t forget that light can bend when it comes into contact with a surface like glass or water, so the straight line rule doesn’t always apply.
Working with multiple light sources
Bear in mind when you’re drawing from life that there may be more than one light source to consider. What if you’re sitting in a room with two lamps? Or if there’s a fire burning in the corner? You’ll need to incorporate these light sources as well and bring the shadows that they introduce into your masterpiece.
Light can also reflect off other surfaces, such as walls or sheets of paper. These can add unexpected highlights!
If you’re drawing outdoors, the light can shift rapidly depending on the weather or the time of day. This can be challenging to cope with, even for experienced artists. If you’re worried about the light changing, take a quick photo to freeze the scene so you can refer back to it later.
Practice drawing an object with one or more light sources to develop your shading skills.
Top shading drawing tips and tricks
Here are some quick drawing tips to transform your shading and take your art to the next level – and how to protect your finished creation.
- Shade with the side of your pencil nib: Shading with the side of your tip means that more of the lead is in contact with the paper, so your pencil marks will be wider.
- Go woodless: Woodless pencils are brilliant for shading, because you can shade larger areas of your drawing with them using the side of the nib. You can keep the tip sharp for more detailed sections too!
- Blunt nibs are better for blending: A freshly sharpened pencil isn’t always desirable. If you want smoother blending, a blunt pencil will give you more even results than a sharp one.
- Alter your angle: Shading in one direction can look even, but shading over the top in a different direction can make the tone darker. This is not the same as hatching, because you’re shading rather than drawing separate lines.
- Know your tools: Take the time to familiarise yourself with the pencils you’ll be using and practice shading on a separate piece of paper before you begin your drawing. Alternatively, keep a scrap of paper to hand to test each pencil before you use it.
- Create texture using a mouldable eraser: Mouldable erasers are soft and can be shaped into a point. The point of the eraser can be used to lift the pencil marks to create highlights or to draw into your shading, creating new tones and textures.
- Switch your paper choice: Your paper choice can affect how well your shading turns out. If the surface of the paper is too smooth, your shading will smear and look terrible. A paper with more tooth (a rougher surface) may suit your shading style and improve the appearance of your drawing. Try different kinds of paper until you find one you like.
- Try a new medium: Shading covers more than the use of pencils. Graphite powder, applied with your fingertips, a cloth or a paintbrush, can also be used shade your drawings. It’s especially useful for covering a large area of a picture.
- Vary your pressure: Lots of beginners apply too much pressure when they begin shading. If you apply more pressure, your pencil strokes will appear darker and heavier. Practice shading with even pressure and try not to press down on your pencil nib.
- Relax your hand: If you hold your pencil too tightly, you won’t be able to shade evenly and you’re likely to give yourself sore fingers or an aching wrist! Loosen that death grip and your shading will improve.
- Take your time: There’s no need to rush. Getting shading right takes time and you’ll notice a big improvement in your shading if you allow yourself the space to get it right.
- Choose the right shading style: Not every drawing calls for sleek blending techniques and it’s worth trying out other styles such as stippling and cross hatching too.
- Work from a photo: Choosing a good source photo is an excellent way to practise your shading and it’s often easier than drawing from real life.
- Keep parchment paper to hand: Stop your drawings from getting damaged in a sketchpad by slipping sheets of parchment paper or scrap paper between the pages. This will keep the pages of your sketchpad clean too.
- Protect your drawing: When you’re working with softer drawing pencils, it can be easy to smudge your work by resting your hand on the paper. You can clean up the paper with a mouldable eraser, or put a piece of paper under your drawing hand to stop this from happening in the first place.
- Seal your drawing with fixative: Fixative spray is used to protect pencil drawings and stop them from becoming smudged once you’ve completed your art.
What pencils should you use for shading?
How to choose pencils for shading
Every artist wants to choose the right pencils for the job. Drawing pencils don’t have to be expensive and there are lots of affordable options available for beginners and art students. More advanced artists should invest in higher quality materials for their drawings.
When you’re choosing pencils for shading, the best option is to pick a drawing pencil set that will meet all of your needs. Most drawing sets will include pencils with a variety of cores, suitable for both blending and more intricately detailed work, but some sets are specifically designed for shading and blending.
Graphite pencils can have soft or hard nibs. The way to check this is to look at the side of the pencil to look at its grade. Harder pencils will be marked with an H with a number next to it to show how firm it is. The higher the number the firmer the tip will be.
Soft pencils are perfect for blending. They’re always marked with a B and the accompanying number indicates the softness of the nib, with higher numbers being softer. An HB pencil sits in the middle of the range between hard and soft.
Which are the best pencil brands for shading?
When choosing shading pencils, look out for brands which have a reputation for quality such as Derwent, Faber-Castell and Caran d’Ache. Most of these brands have pencil sets aimed at artists of all levels, from cheaper sets for students to more advanced ones for professionals. You’ll find that less expensive sets from these ranges are excellent value for money when you’re starting out.
If you’re looking for coloured pencils, avoid collections aimed at children. They’re rarely good quality and you’ll find it difficult to blend the colours together successfully. Opt for brands that are intended for artists and art students and you won’t go wrong. Professional standard colouring pencil sets tend to have richer colours as they’re more heavily pigmented.
Here are some pencil sets Gathered recommends for next level shading…
Faber Castell 9000 art set
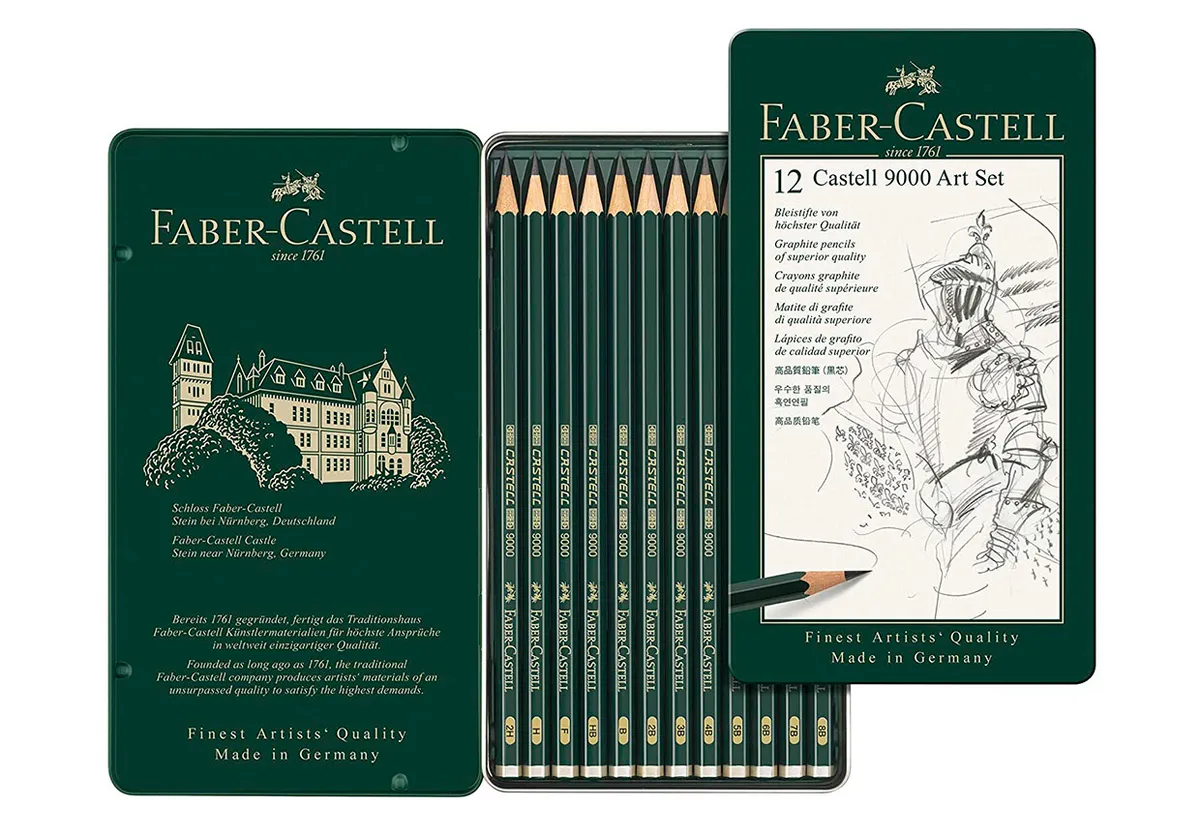
SQUIRREL_13209742
This Faber Castell pencil set is ideal for shading as it includes a good range of pencils from 9B to 2H. 9B pencils are super soft and perfect for blending and shading, so this set will suit most of your artistic needs.
As an added bonus, this set comes in a sturdy tin to protect your pencils.
Derwent soft graphite drawing pencils
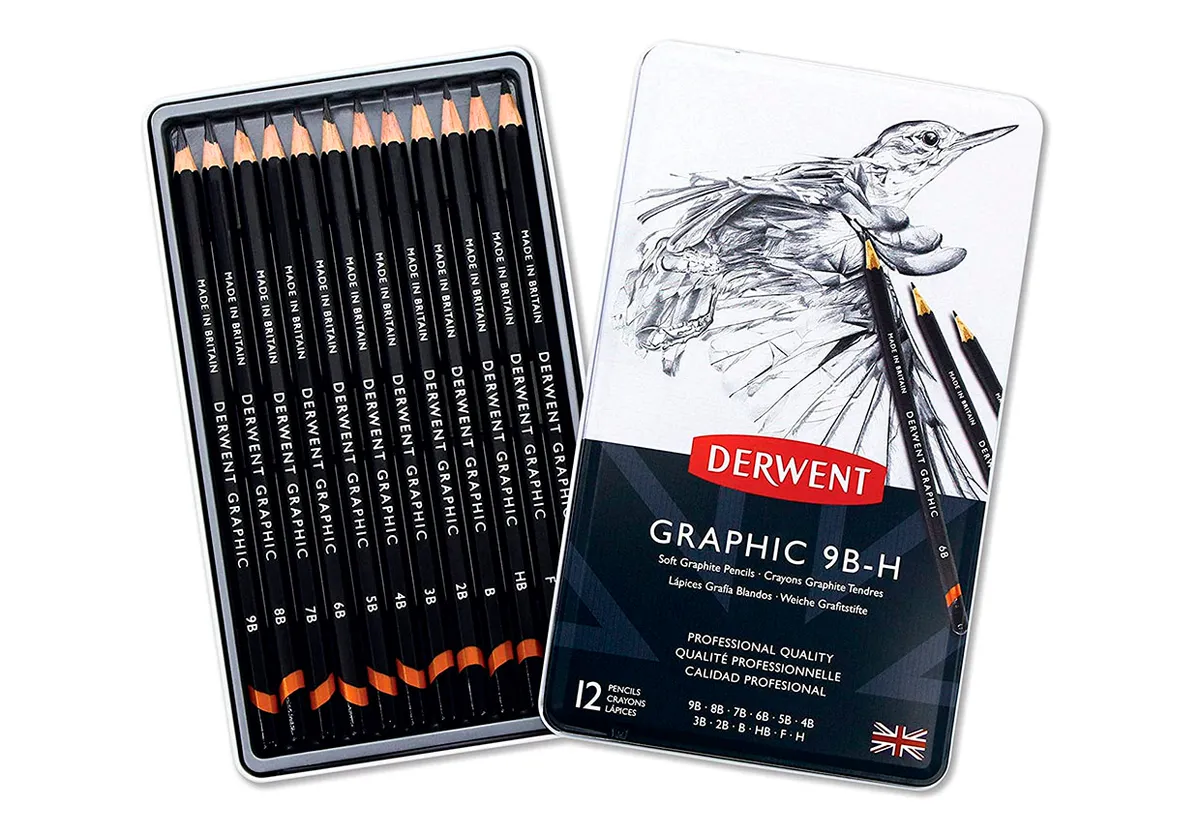
SQUIRREL_13077986
This high quality set from Derwent features a selection of pencils with soft graphite cores, suitable for a variety of blending techniques. There are also a couple of firm pencils in the set for when you need to draw fine details.
Cretacolor woodless pencil sets
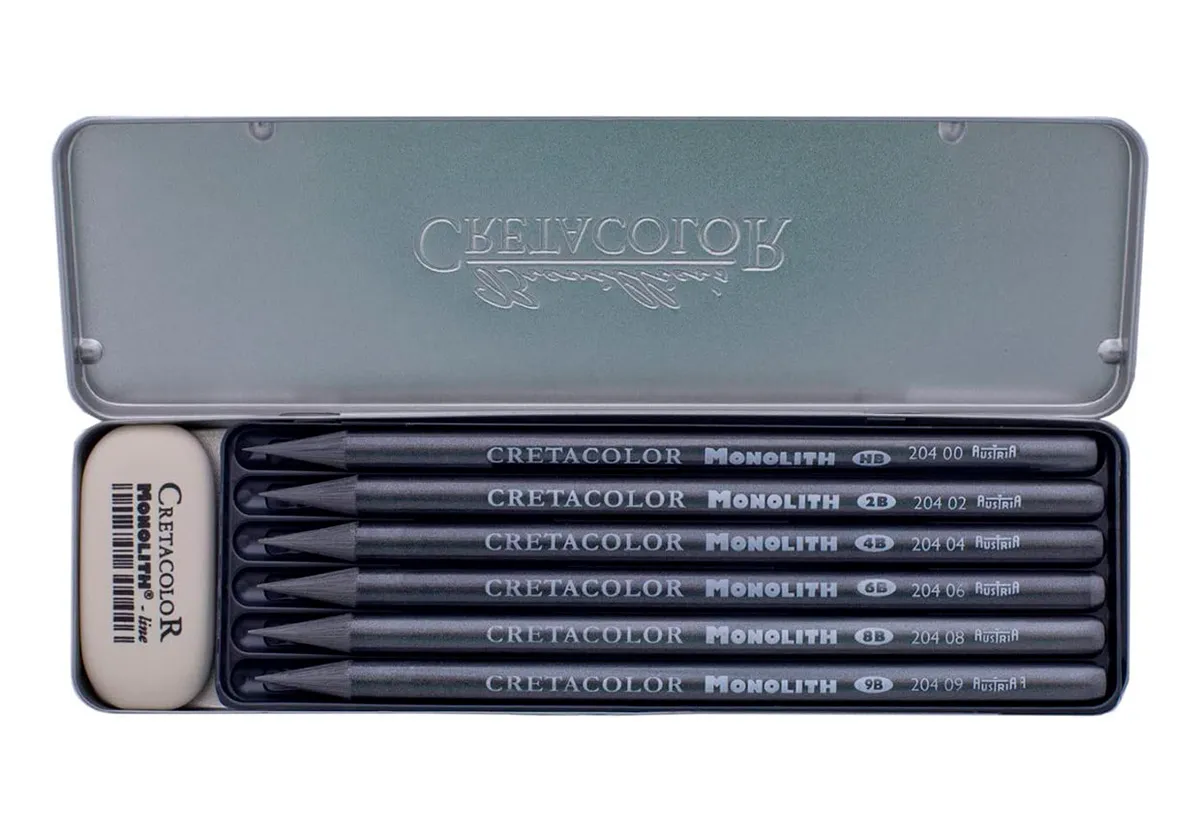
SQUIRREL_13079502
Woodless pencils are fantastic for shading! The absence of a wooden shell means that you can shade with broad strokes, while maintaining a sharp tip for drawing fine lines.
Cretacolor’s pocket set has pencils graded from HB to 9B and it’s a handy size to take out and about with you.
Faber Castell Polychromos pencils
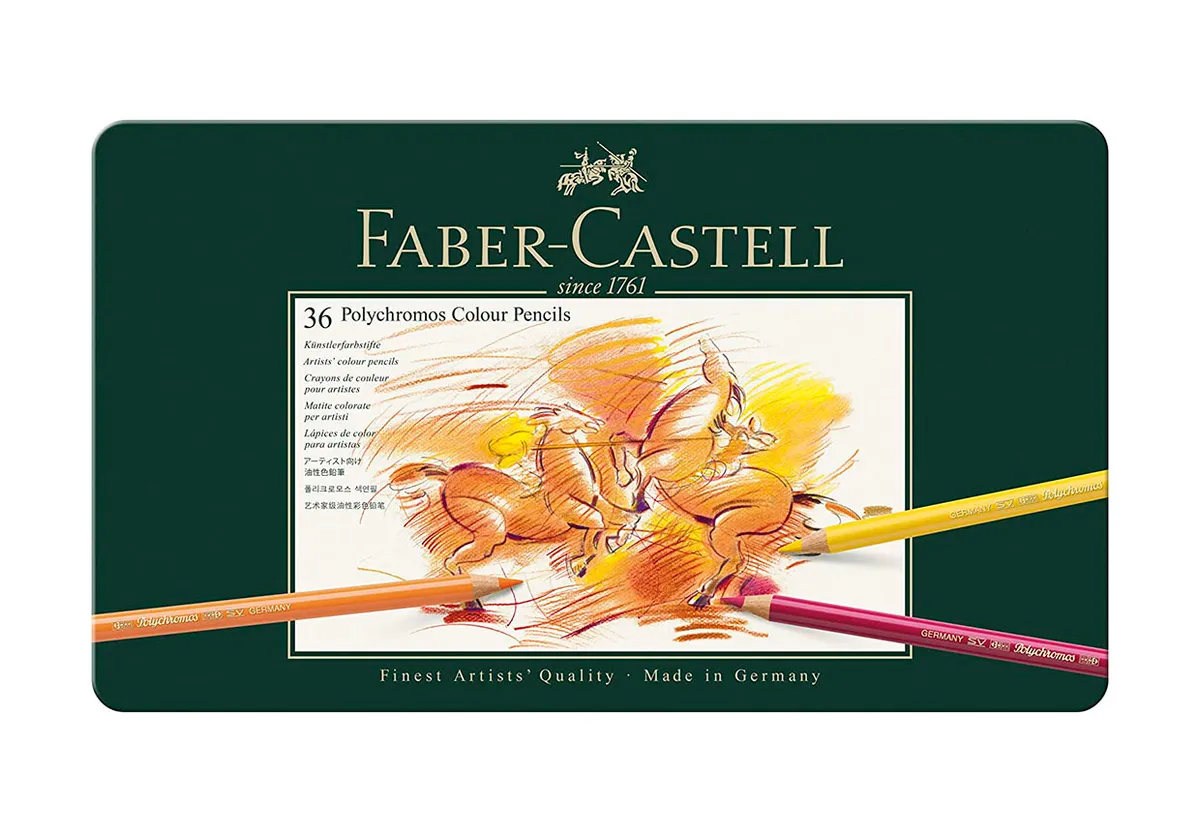
SQUIRREL_13079501
If you love colour then these Faber Castell Polychromos pencils are an absolute dream to shade with. The cores are highly pigmented and blend wonderfully. The set includes so many vibrant hues to choose from – you won’t be able to stop using them!
Derwent Coloursoft collection box set
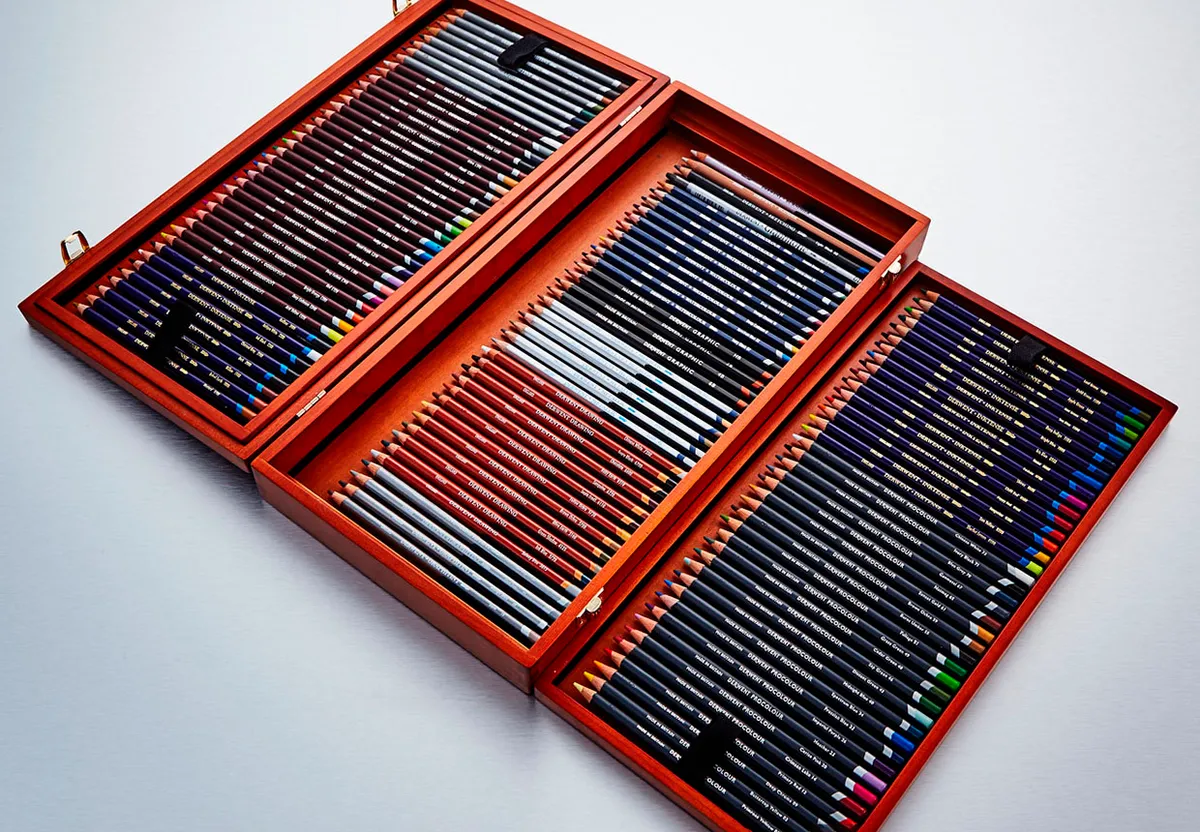
The Derwent Coloursoft Wooden Box Set contains 72 strong and vibrant colours. The velvety softness of the core of these pencils releases rich, dense colour at a stroke and is perfect for mixing and blending.
- Buy the Derwent Coloursoft collection box set from Cass Art
Faber Castell art and graphic limited edition cassette set
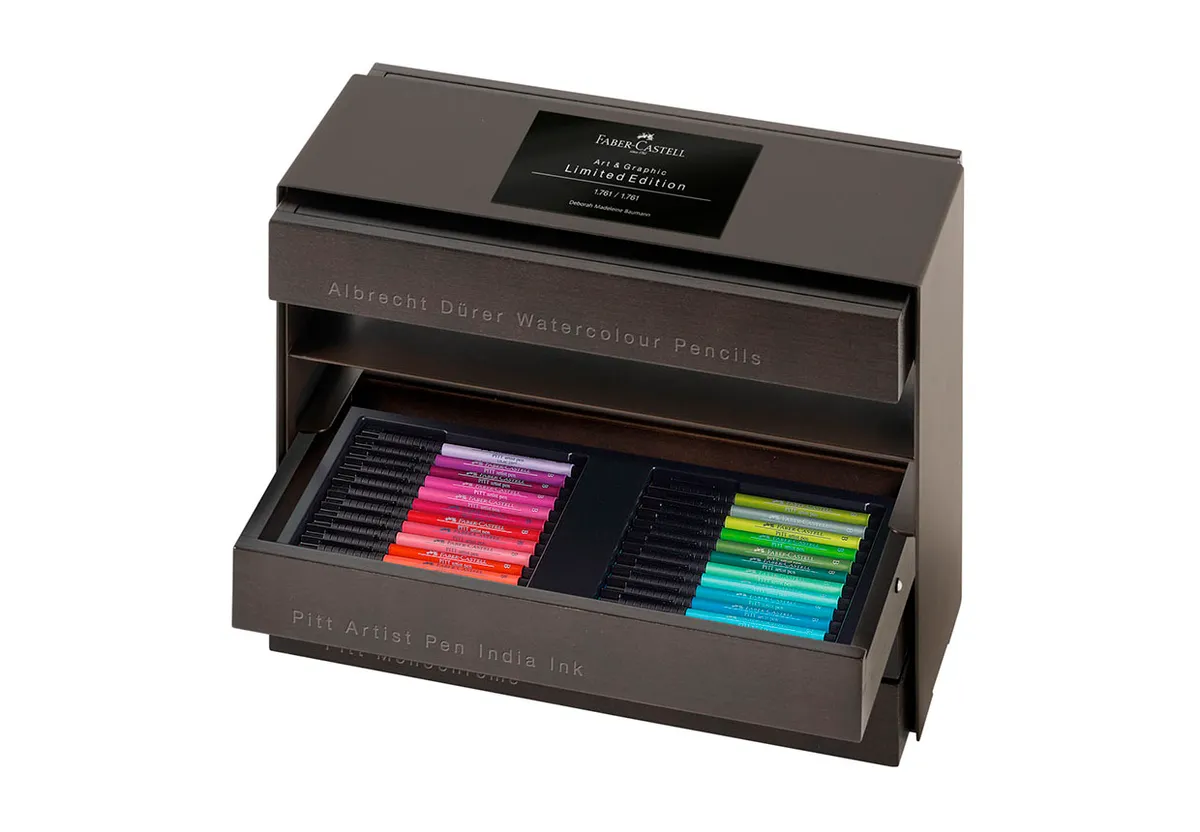
The luxurious Faber Castell art and graphic limited edition cassette set is perfect for seasoned artists. This stunning art set includes everything you need to create professional-looking drawings, from Polychromos coloured pencils to Indian ink pens.
All of the materials are beautifully presented in a smart black box with labelled drawers.
- Buy the Faber Castell art and graphic limited edition cassette set from Cass Art
Shading techniques to make your drawings pop
Shading in drawing is the quickest way to elevate your artwork and transform them into something truly special.
Whether you’re a beginner or an advanced artist, studying to improve your shading skills can breathe life into your drawings and turn them into show-stopping art.
The best way to learn is to have a go at a variety of shading techniques from cross-hatching to stippling. As your skills develop, you will benefit from a deeper understanding of artistic principles and discover your own unique shading style.
Even choosing appropriate drawing materials can have a real impact on the quality of your shading, so take the time to perfect every detail!
Sharpen your drawing skills
Now you’ve mastered shading, you’re ready to enhance your skills with some expert drawing advice. Take a look at our top drawing tips to make you a better artist.


