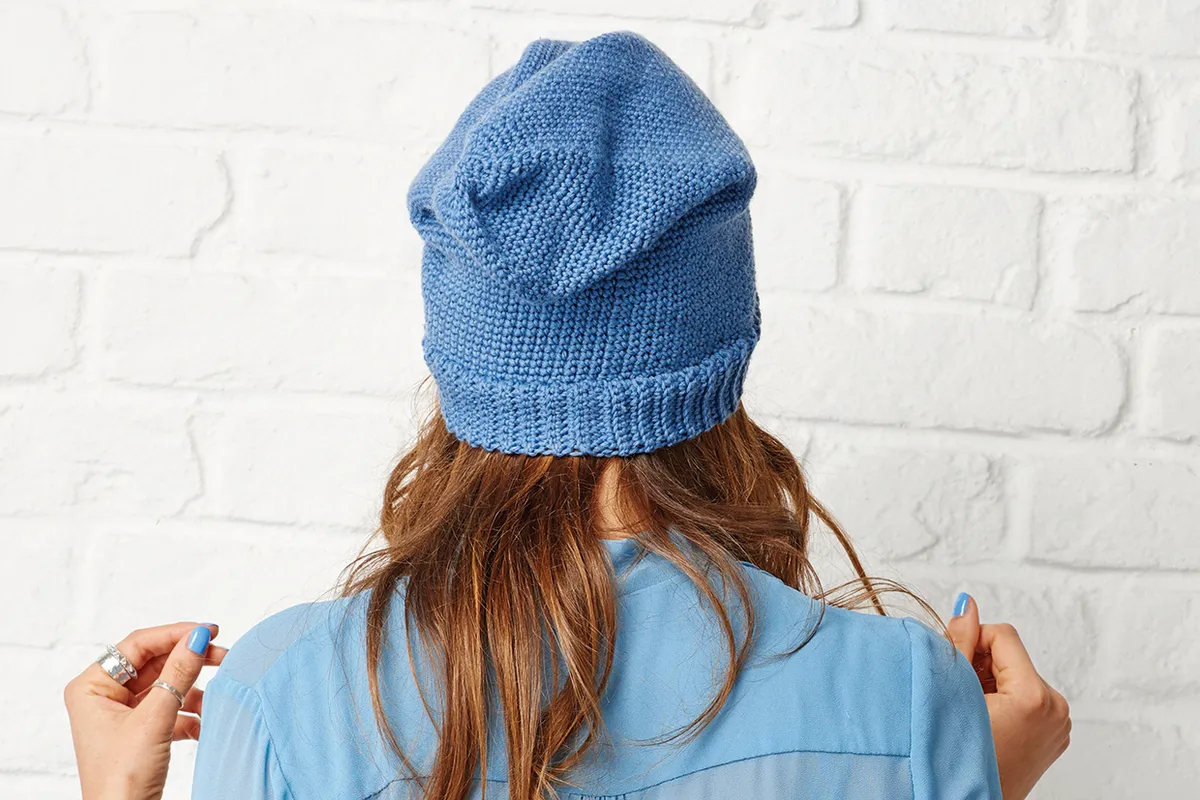
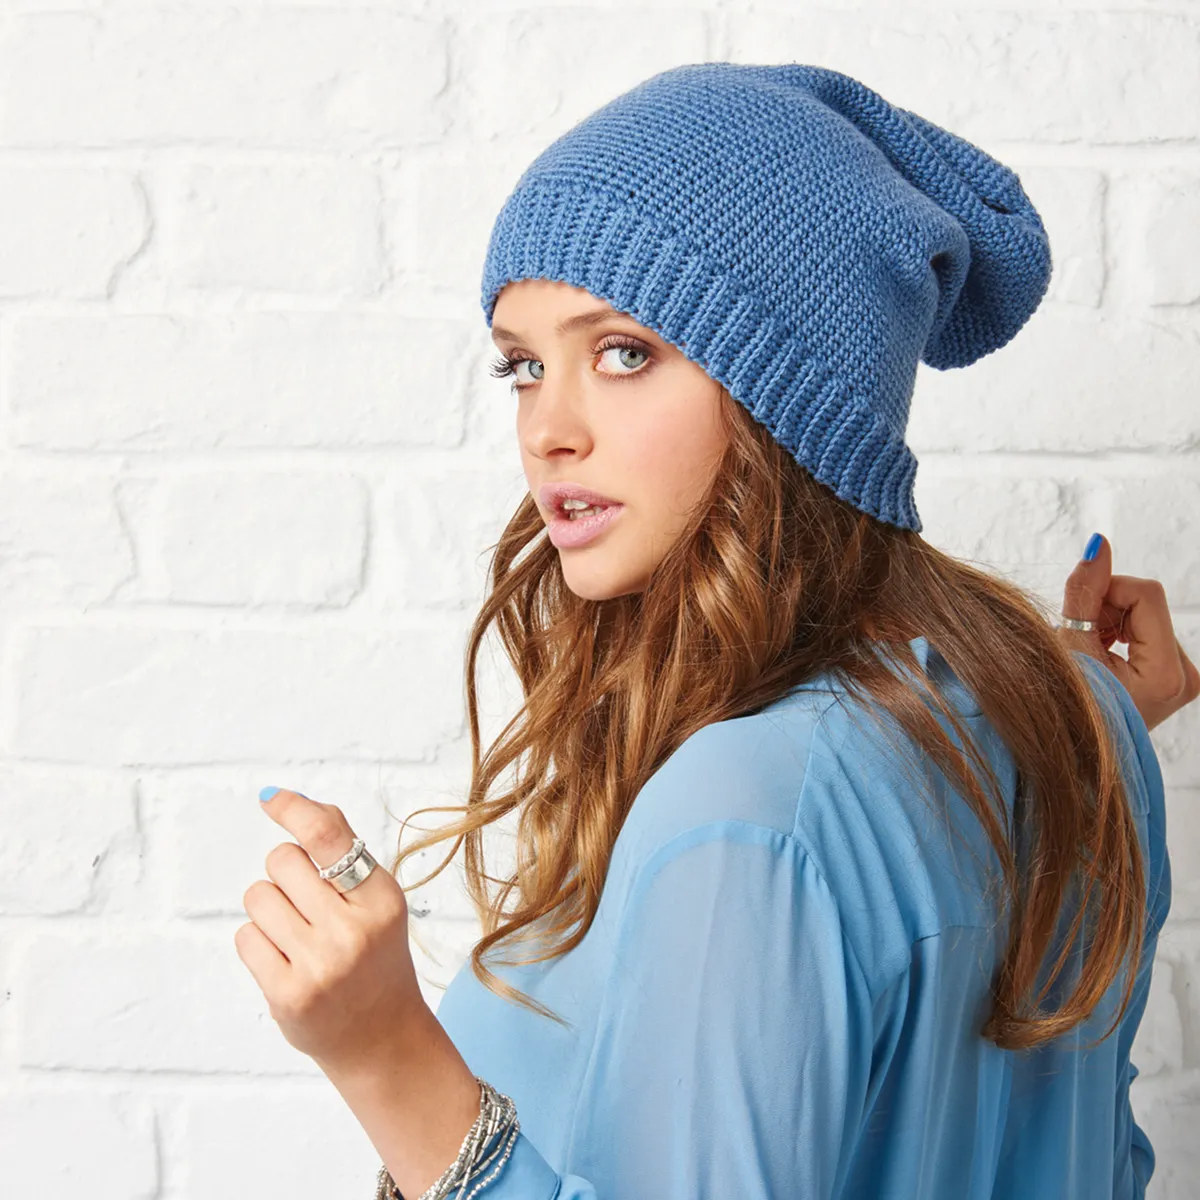
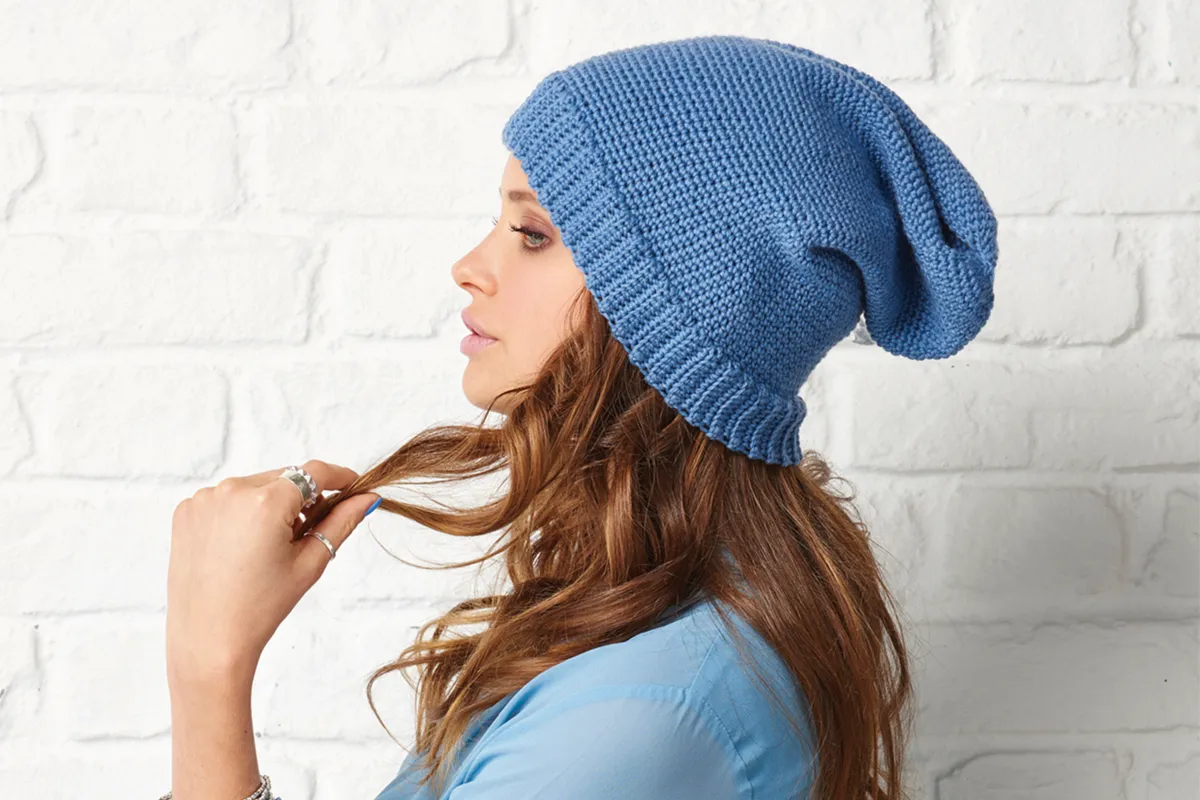
This free crochet beanie pattern by Louise McCarney is a great unisex pattern that you can hook up quickly. It’s the perfect accessory for those bad hair days!
It's got an interesting construction, where you make the ribbing in rows first and then change to working in the round. Hooked up in solid colours, this slouchy crochet beanie really shows off your neat crochet stitches, and even uses clever invisible decreases to achieve crochet perfection!
How to crochet a beanie hat
Most crochet beanie hats start from the top and work downwards using increasing stitches to produce the semi-sphere shape. However, this slouchy crochet beanie pattern turns things upside down, starting from the bottom and working upwards.
If you’re completely new to crochet you may find it easier to start with our how to crochet a hat tutorial before moving onto this fun and interesting project which is suitable for intermediate crocheters
You can also find more inspiring patterns in a wide range of styles in our pick of the best crochet hat patterns.
What do you need to make this crochet beanie
King Cole Luxury Merino DK (100% Wool, 50g/140m), 3 balls of Cobalt (2635) - or alternative dk yarn
Please note - this pattern was originally designed in Louisa Harding Cassia (75% wool, 25% nylon, 50g/133m) yarn, which has since been discontinued. We have substituted it for a suitable alternative yarn, but you should still check your tension to ensure your sizing is correct and the colours available may differ from those pictured.
Important information about this beanie crochet pattern
This crochet beanie pattern measures 27.5cm (10¾in) deep (with rib folded up) and 52cm (20½in) circumference.
To ensure you are working to the same scale, check your tension by working 18 sts and 22 rows of double crochet (dc) stitches. These should measure 10x10cm (4x4in) using a 4mm hook. If your tension square comes out smaller, try increasing your hook size (and vice versa if it’s too large)
Stitch information used in this crochet beanie pattern
This pattern is formed in two parts.
First you make a rib section which is worked back and forth in rows before being joined into a loop.
Next you crochet in the round along the edge of your ribbing loop, joining each round with a slip stitch. In this particular pattern, always work the first double crochet (dc) stitch into the same stitch at the base of the chain 1.
Before learning how to crochet a beanie using this pattern, you will need to know how to crochet in the front and back loops, as well as how to make an invisible decrease.
Invisible Decrease (inv dec): Insert hook in front loop only (FLO) of each of next 2 stitches, yarn round hook (yrh), draw yarn through 2 FL loops, yrh, draw through 2 loops on hook. You can find more information in our how to do the crochet invisible decrease tutorial.
You can find a full list of all abbreviations we use in our abbreviations and conversions guide. This crochet beanie pattern is written in UK terminology but you can easily convert it to US terms using the guide.
Free crochet beanie pattern
Begin by making the ribbing in rows
With 3.5mm hook, chain (ch) 10.
Row 1 Working in back loop only (BLO): Ch1 (does not count as stitch throughout), double crochet in second ch from hook and in each ch to end, turn. [9 dc]
Row 2 BLO Ch1, dc in each stitch (st) to end, turn.
Repeat Row 2 another 88 times.
With yarn and hook still attached, bring the first row up to meet the last row and hold the edges together. Join the edges together with a slip stitch (ss) seam to form a tube. Remember to have the right side of your work facing outwards.
Making the hat section in rounds
Change to a 4mm hook. Rotate your work and continue working the next round along the side edge of your ribbing, working with the right side facing you.
Round 1 (RS) Ch1, dc in the side edge of the ribbing (so you’ll be inserting your hook into the last stitch of each row of your ribbing), working 90 dc in total, ss to the first dc to join. [90 dc]
Round 2 Ch1, dc in each st to end, ss to first dc.
Rounds 3-27 As Round 2.
Round 28 Ch1, dc in each of next 10 sts, inv dec, dc in each of next 21 sts, inv dec, dc in each of next 20 sts, inv dec, dc in each of next 21 sts, inv dec, dc in each of next 10 sts, ss to first dc. [86 dc]
Rounds 29-31 Ch1, dc in each st to end, ss to first dc.
Round 32 Ch1, dc in each of next 10 sts, inv dec, dc in each of next 20 sts, inv dec, dc in each of next 19 sts, inv dec, dc in each of next 20 sts, inv dec, dc in each of next 9 sts, ss to first dc. [82 dc]
Rounds 33-35 Ch1, dc in each st to end, ss to first dc.
Round 36 Ch1, dc in each of next 10 sts, inv dec, dc in each of next 19 sts, inv dec, dc in each of next 18 sts, inv dec, dc in each of next 19 sts, inv dec, dc in each of next 8 sts, ss to first dc. [78 dc]
Rounds 37-39 Ch1, dc in each st to end, ss to first dc.
Round 40 Ch1, dc in each of next 10 sts, inv dec, dc in each of next 18 sts, inv dec, dc in each of next 17 sts, inv dec, dc in each of next 18 sts, inv dec, dc in each of next 7 sts, ss to first dc. [74 dc]
Rounds 41-43 Ch1, dc in each st to end, ss to first dc.
Round 44 Ch1, dc in each of next 10 sts, inv dec, dc in each of next 17 sts, inv dec, dc in each of next 16 sts, inv dec, dc in each of next 17 sts, inv dec, dc in each of next 6 sts, ss to first dc. [70 dc]
Rounds 45-46 Ch1, dc in each st to end, ss to first dc.
Round 47 Ch1, dc in each of next 10 sts, inv dec, dc in each of next 16 sts, inv dec, dc in each of next 15 sts, inv dec, dc in each of next 16 sts, inv dec, dc in each of next 5 sts, ss to first dc. [66 dc]
Rounds 48-49 Ch1, dc in each st to end, ss to first dc.
Round 50 Ch1, dc in each of next 10 sts, inv dec, dc in each of next 15 sts, inv dec, dc in each of next 14 sts, inv dec, dc in each of next 15 sts, inv dec, dc in each of next 4 sts, ss to first dc. [62 dc]
Rounds 51-52 Ch1, dc in each st to end, ss to first dc.
Round 53 Ch1, dc in each of next 10 sts, inv dec, dc in each of next 14 sts, inv dec, dc in each of next 13 sts, inv dec, dc in each of next 14 sts, inv dec, dc in each of next 3 sts, ss to first dc. [58 dc]
Round 54 Ch1, dc in each st to end, ss to first dc.
Round 55 Ch1, dc in each of next 10 sts, inv dec, dc in each of next 13 sts, inv dec, dc in each of next 12 sts, inv dec, dc in each of next 13 sts, inv dec, dc in each of next 2 sts, ss to first dc. [54 dc]
Round 56 Ch1, dc in each st to end, ss to first dc.
Round 57 Ch1, dc in each of next 10 sts, inv dec, dc in each of next 12 sts, inv dec, dc in each of next 11 sts, inv dec, dc in each of next 12 sts, inv dec, dc next st, ss to first dc. [50 dc]
Round 58 Ch1, dc in each st to end, ss to first dc.
Round 59 Ch1, dc in each of next 10 sts, inv dec, dc in each of next 11 sts, inv dec, dc in each of next 10 sts, inv dec, dc in each of next 11 sts, inv dec, ss to first dc. [46 dc]
Round 60 Ch1, dc in each st to end, ss to first dc.
Round 61 Ch1, (inv dec) to end, ss to first dc. [23 sts]
Round 62 Ch1, dc in next st, (inv dec) to end, ss to first dc. [12 sts]
Round 63 Ch1, (inv dec) to end, ss to first dc. [6 sts]
Fasten off, leaving a long tail and thread tail through the remaining 6 sts. Pull tight and weave in all ends.
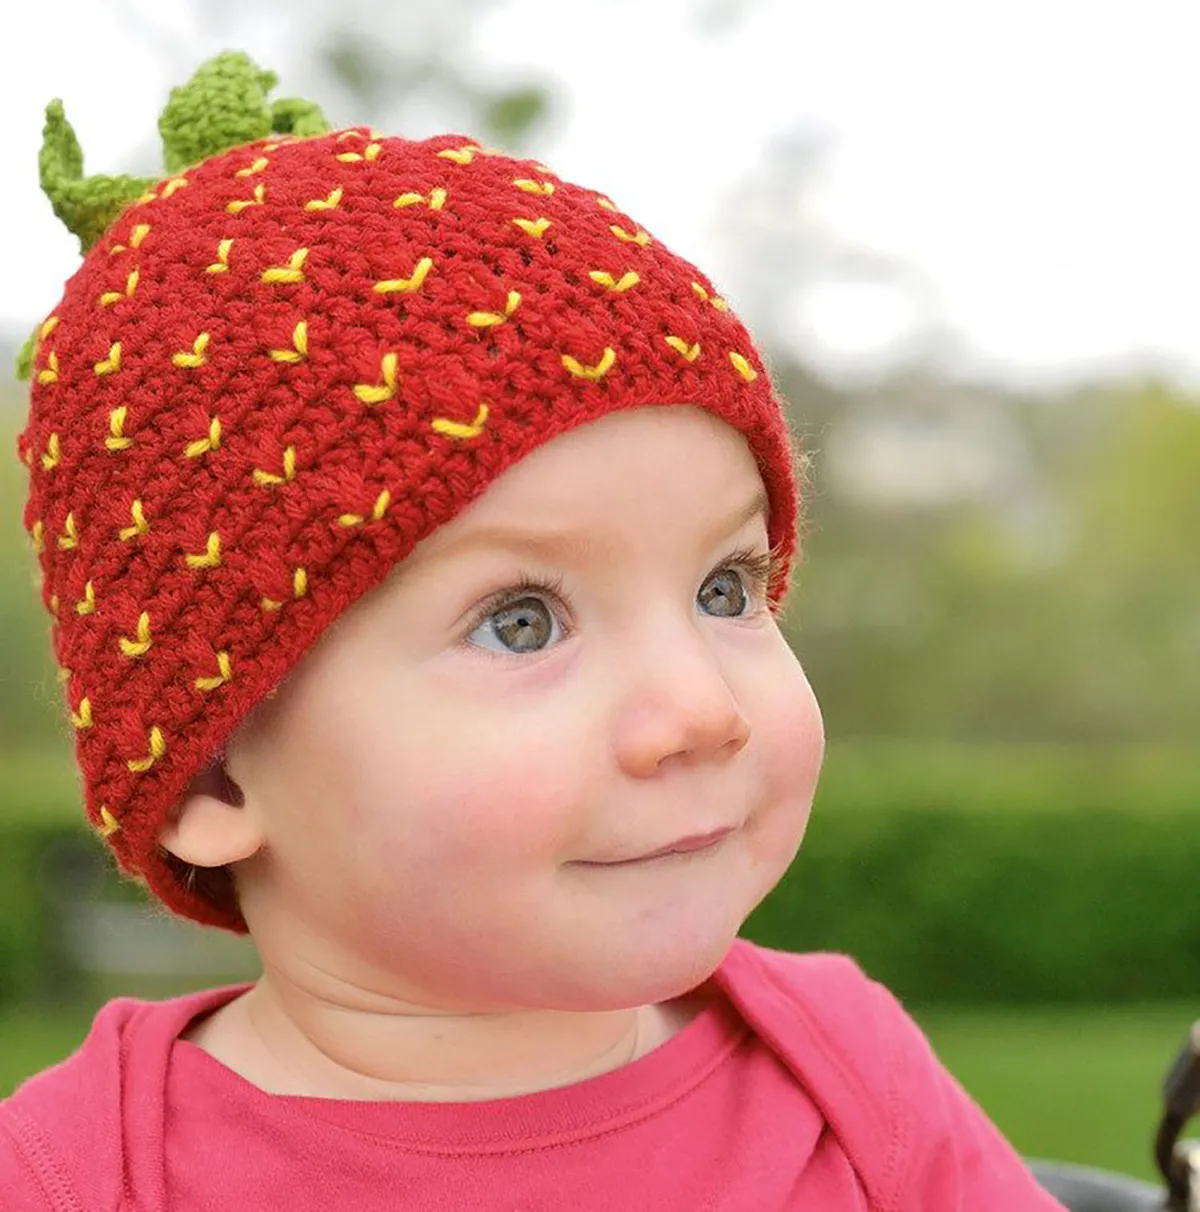
Make a baby beanie
Fancy making your little one a hat that is just as sweet as they are? Babies will look adorable in our free baby strawberry crochet hat pattern.
Make your slouchy beanie extra luxurious
We’ve made our slouchy crochet beanie in gorgeous 100% merino yarn, but you can switch it up with any different DK yarn (just remember to check your tension first).
Try using a hand-dyed self-striping merino yarn or even try a yarn with a hint of cashmere for that extra level of luxury!
Keep it cool with a crochet bucket hat
Fancy making more cool crochet hats? We’ve got you covered (quite literally) with two totally on-trend free bucket hat crochet patterns from Gathered.