Start by making the fox’s legs, body and head in one piece!
Step 1
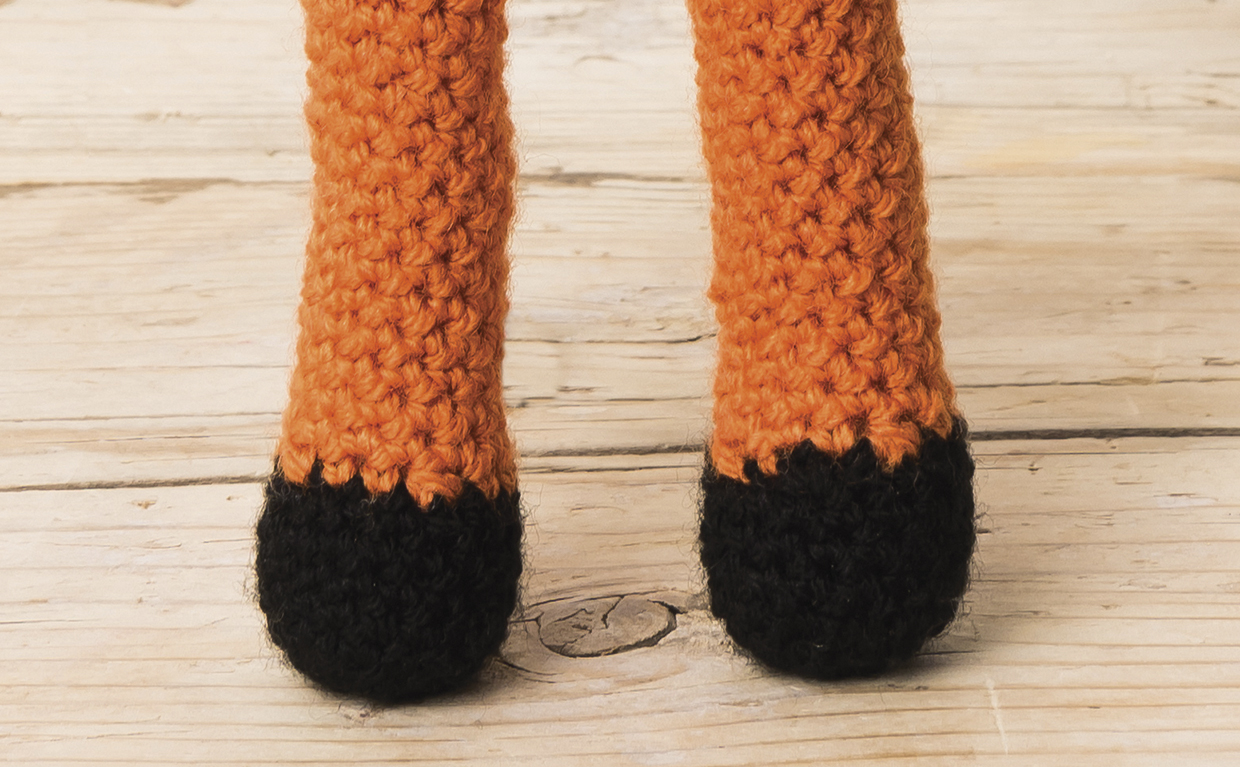
First, you’ll need to make the fox’s two feet and legs, which are then joined so that you can keep moving up to create the body and head using primarily double crochet (dc) in a specified stitch (st).
Using Black yarn, make a crochet magic loop.
Round 1 6dc in loop. [6 sts]
Round 2 2dc in each st around [12 sts]
Round 3 (Dc in next st, 2dc in next st) four times. [16 sts]
Rounds 4-7 Dc in each stitch around [12 sts]
Step 2
Now that we’ve made the black foot, we’re going to bring the work inwards slightly before making the rest of the leg. This is done with double crochet 2 together (dc2tog) stitches. If you’re new to these you can find more in our how to make a crochet decrease tutorial.
Change to Spice yarn.
Round 8 (Dc in next 2 sts, dc2tog) four times. [12 sts]
Start inserting stuffing now, and continue adding more as your work progresses
Rounds 9-38 Dc in each stitch around [12 sts]
Fasten off on the first leg only.
Step 3
Repeat rounds 1-38 from steps 1 & 2 to make the second leg.
This time, don’t fasten off at the end. In the next step you will join the second leg with the first leg and go on to start making the body. Now is a good time to stop and make sure you’re happy with the amount of stuffing in the legs – you want them to hold their shape but not be too firm.
Step 4
With the next round we’re going to connect the 2 legs together with a chain (ch) to form a gusset. This will allow us to join the 2 legs together but also transform them into a single round. Then we can start making our fox’s stripy body – so get ready for some fun colour changes!
Round 39: On second leg, ch4, slip stitch (ss) to the first leg, dc in each st around the first leg, dc in each of the chain stitches, dc in in each st around the second leg, dc in unworked loop of each chain stitch. [32 sts]
Now that your legs are joined you can continue and make the body:
Rounds 40-45 Dc in each stitch around. [32 sts]
Change to Cream yarn.
Rounds 46-47 Dc in each stitch around. [32 sts]
Change to Spice yarn.
Rounds 48-49 Dc in each stitch around. [32 sts]
Change to Cream yarn.
Rounds 50-51 Dc in each stitch around. [32 sts]
Change to Spice yarn.
Rounds 52-53 Dc in each stitch around. [32 sts]
Change to Cream yarn.
Rounds 54-55 Dc in each stitch around. [32 sts]
Change to Spice yarn.
Rounds 56-57 Dc in each stitch around. [32 sts]
Change to Cream yarn.
Round 58 Dc in each stitch around. [32 sts]
Don’t forget to keep adding stuffing as you go – it’s far easier to add it gradually than trying to put it all in at the end!
Step 5
We’re now going to start decreasing our stitches to bring the body inwards to form the neck area.
Round 59 Dc2tog, 28dc, dc2tog. [30 sts]
Change to Spice yarn.
Round 60 (Dc in next 3 sts, dc2tog) six times. [24 sts]
Round 61 Dc in each stitch around. [24 sts]
Stuff here and change to Cream yarn.
Round 62 (Dc in next 2 sts, dc2tog) six times. [18 sts]
Round 63 Dc in each stitch around. [18 sts]
Change to Spice yarn.
Round 64 (Dc in next st, dc2tog) six times. [12 sts]
Round 65 Dc in each stitch around. [12 sts]
Step 6
In this step, we will now start making the fox’s head.
Change to Cream yarn.
Round 66 2dc in each stitch around. [24 sts]
Round 67 (Dc in next 3 sts, 2dc in next st) six times. [30 sts]
Round 68 (Dc in next 4 sts, 2dc in next st) six times. [36 sts]
Round 69 (Dc in next 5 sts, 2dc in next st) six times. [42 sts]
Round 70 (Dc in next 6 sts, 2dc in next st) six times. [48 sts]
Round 71 (Dc in next 7 sts, 2dc in next st) six times. [54 sts]
Rounds 72-73 Dc in each stitch around. [54 sts]
Change to Spice.
Rounds 74-79 Dc in each stitch around. [54 sts]
Step 7
Giving your fox amigurumi those iconic eyes
Now comes the fun part! Bring your amigurumi fox to life with those iconic beady eyes. Here’s how you do it:
Insert eyes between rounds 76 and 77, approximately 8 sts apart.
Step 8
Now that you’ve added the eyes, we’ll continue with the pattern to complete your fox’s head!
Round 80 (Dc in next 7 sts, dc2tog) six times. [48 sts]
Round 81 (Dc in next 6 sts, dc2tog) six times. [42 sts]
Round 82 (Dc in next 5 sts, dc2tog) six times [36 sts]
Round 83 (Dc in next 4 sts, dc2tog) six times. [30 sts]
Round 84 (Dc in next 3 sts, dc2tog) six times. [24 sts] Stuff here.
Round 85 (Dc in next 2 sts, dc2tog) six times. [18 sts]
Round 86 (Dc in next st, dc2tog) six times. [12 sts]
Round 87 (Dc2tog) six times. [6 sts]
Round 88 (Dc2tog) three times. [3 sts]
Ss and fasten off, leaving a long yarn tail.
Hopefully you’ve remembered to keep adding stuffing as you’ve progressed, but if you need to add a little more to the head and are struggling to get it through the remaining hole, you can use the end of your hook or a pencil to help you insert a little extra stuffing.
Weave the yarn tail through your remaining stitches and pull tight to close hole.
Now that you’re done with the legs, body and head, it’s time to tackle that all-important nose.
Making the nose for an amigurumi crochet fox
Step 1
Every fox needs a sniffer, as they communicate with each other through scent! Our amigurumi fox has a simple long nose that is sewn on in the final assembly step.
Using Black yarn, make a crochet magic loop.
Round 1 4dc in loop. [4 sts]
Step 2
Change to Spice yarn.
Round 2 (Dc in next st, 2dc in next st) twice. [6 sts]
Round 3 Dc in each st around. [6 sts]
Round 4 (Dc in next 2 sts, 2dc in next st) twice. [8 sts]
Round 5 Dc around. [8 sts]
Round 6 (Dc in next 2 sts, 2dc in next st) twice. [10 sts]
Ss and fasten off, leaving a long yarn tail. Lightly stuff, adding enough to form your shape but without stretching your stitches.
Stitching eyebrows to give cunning character
Step 1
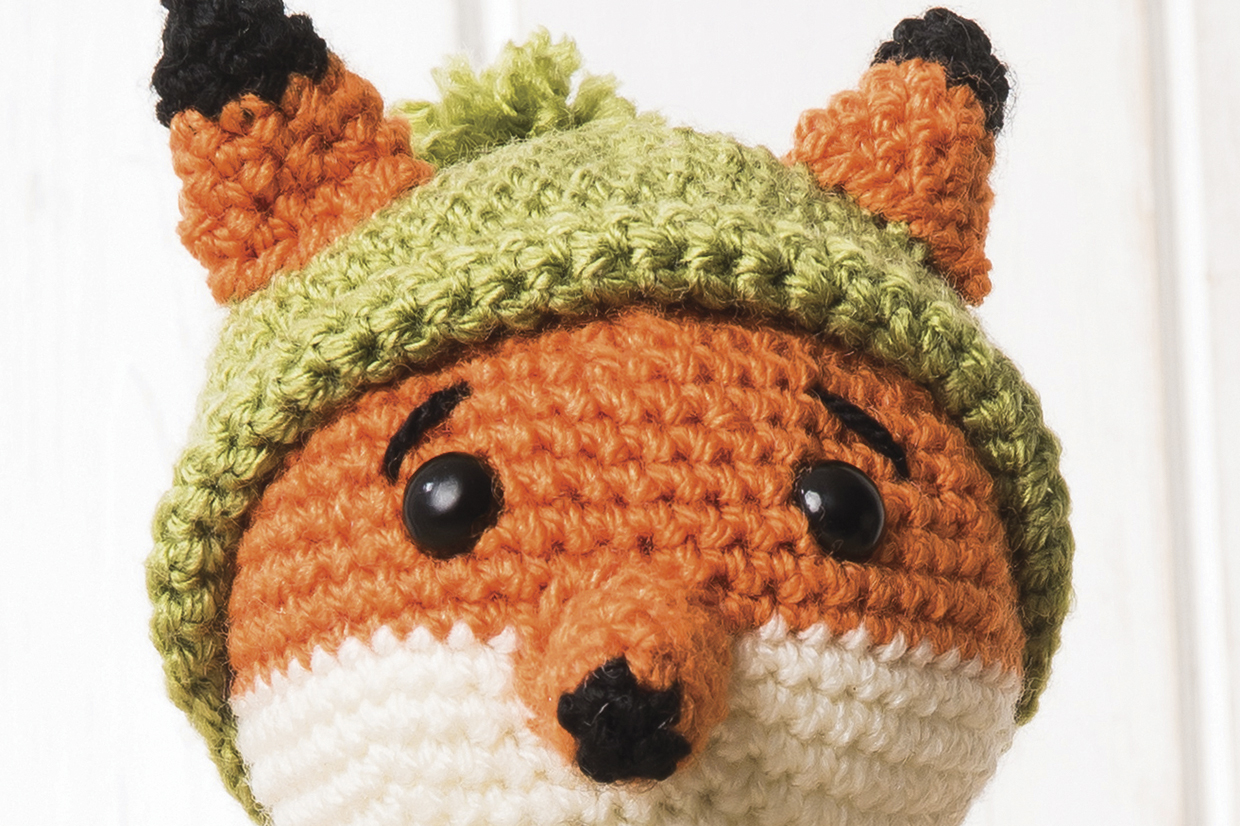
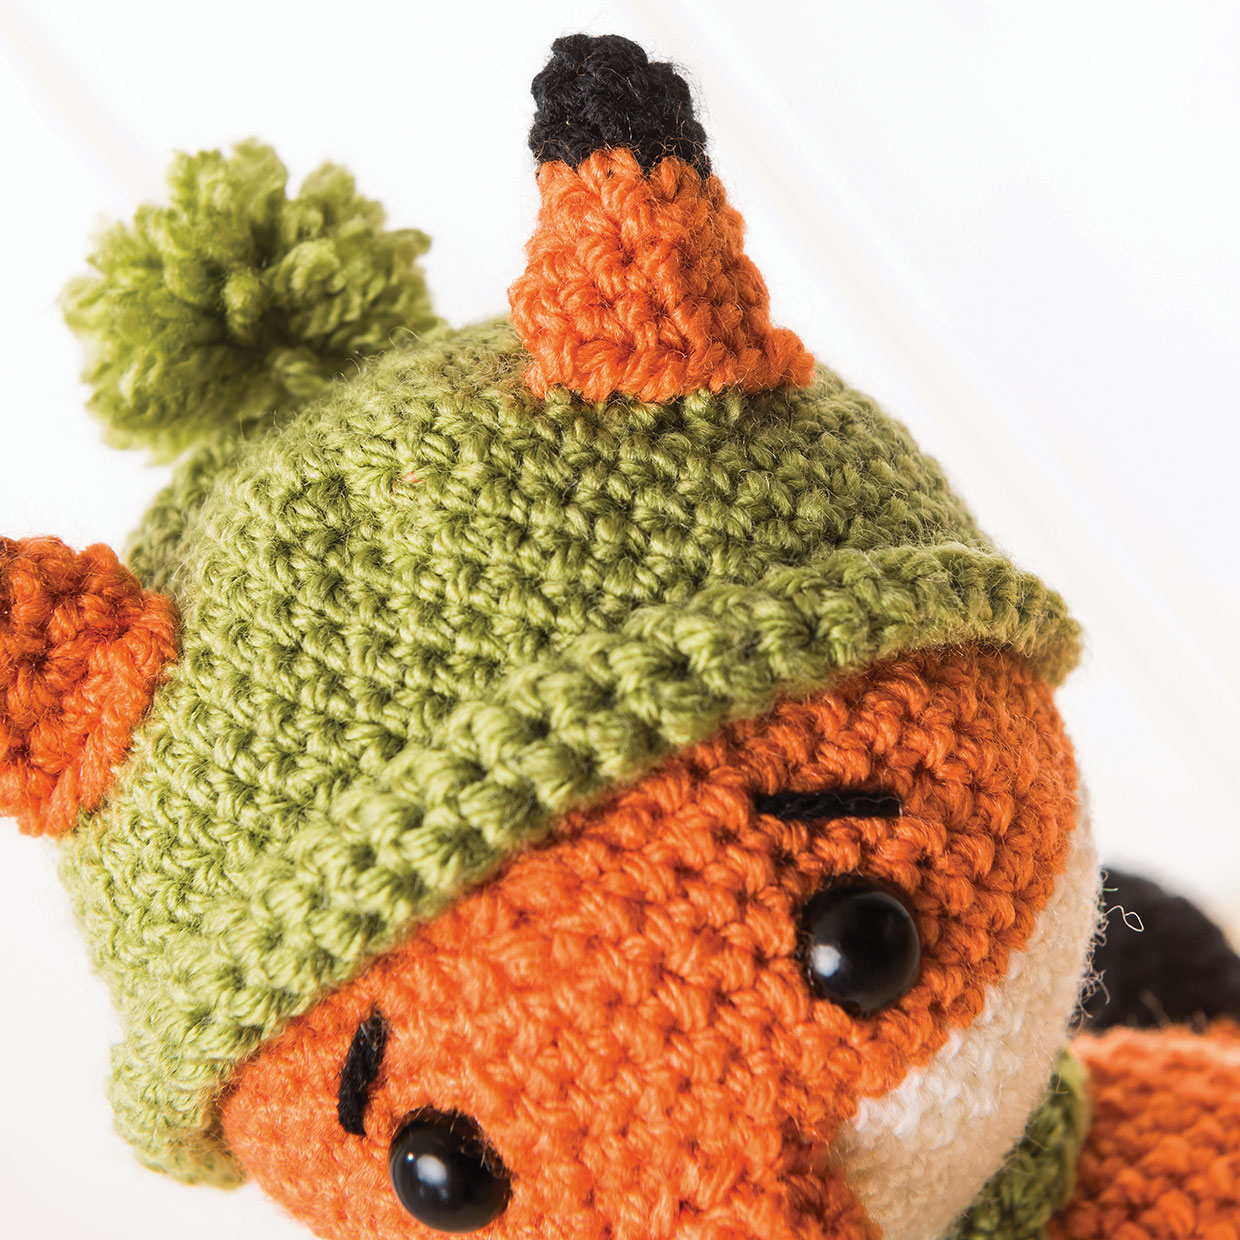
For some added character, eyebrows are essential. Use Black yarn to sew eyebrows above the safety eyes you fastened on earlier. You can hide the yarn end at the top of the head, as you’ll be covering it up anyway with the hat.
Keep them warm with a crochet hat
Step 1
Foxes don’t hibernate, so keep your amigurumi fox warm during winter with a stylish bobble hat!
Using Meadow yarn, make a crochet magic loop.
Round 1 6dc in loop. [6 sts]
Round 2 2dc in each stitch around [12 sts]
Round 3 (Dc in next st, 2dc in next st) six times. [18 sts]
Round 4 (Dc in next 2 sts, 2dc in next st) six times. [24 sts]
Round 5 (Dc in next 3 sts, 2dc in next st) six times. [30 sts]
Round 6 (Dc in next 4 sts, 2dc in next st) six times. [36 sts]
Round 7 (Dc in next 5 sts, 2dc in next st) six times. [42 sts]
Round 8 (Dc in next 6 sts, 2dc in next st) six times. [48 sts]
Round 9 (Dc in next 15 sts, 2dc in next st) three times. [51 sts]
Rounds 10-19 Dc in each stitch around. [51 sts]
Ss and fasten off, leaving a long yarn tail.
You don’t want your hat to hide the eyebrows you’ve stitched, so make sure to fold the front of the hat up onto itself to keep them in sight.
Step 2
Let’s have a bit of fun - add a pom pom to his hat!
Using Meadow yarn, wrap around two fingers 20 times. Cut the yarn. Carefully pull off the yarn from your fingers and thread a long piece of the same yarn through the middle of the loops.
Tie it tightly around the loops and secure well with a few knots. Cut the loops to make the pom pom, trim it into a spherical shape and sew it to the top of the hat.
Giving your fox his arms
Step 1
We’re starting to see that foxy form now, so next we’re going to make his arms
Using Black yarn, make a crochet magic loop.
Round 1 6dc in loop. [6 sts]
Round 2 2dc in each stitch around [12 sts]
Rounds 3-6 Dc in each stitch around. [12 sts]
Step 2
Change to Spice yarn.
Round 7 (Dc in next 4 sts, dc2tog) twice. [10 sts]
Insert a small amount of stuffing into the hand at this point, but leave the rest of the arm unstuffed so that it remains floppy.
Rounds 8-29 Dc in each stitch around. [10 sts]
Ss and fasten off, leaving a long yarn tail.
Now just repeat steps 1 and 2 to make your second arm!
How the amigurumi fox got his tail
Step 1
A black-tipped tail is an iconic feature of the classic red fox, here’s how to make yours!
Using Black yarn, make a crochet magic loop.
Round 1 4dc in loop. [4 sts]
Round 2 2dc in each st around. [8 sts]
Round 3 (Dc in next st, 2dc in next st) four times. [12 sts]
Round 4 Dc in each stitch around. [12 sts]
Round 5 (Dc in next 2 sts, 2dc in next st) four times. [16 sts]
Round 6 Dc in each stitch around. [16 sts]
Step 2
Change to Spice yarn.
Rounds 7-12 Dc in each stitch around. [16 sts]
Round 13 (Dc in next 2 sts, dc2tog) four times. [12 sts]
Rounds 14-15 Dc in each stitch around. [12 sts]
Round 16 (Dc in next st, dc2tog) four times. [8 sts]
Rounds 17-20 Dc in each stitch around. [8 sts]
Insert your stuffing now, again you want to add enough to hold its shape, but only lightly stuff near the end of the tail so that you can position it more easily.
Ss and fasten off, leaving a long yarn tail.
What did the fox say? Making a pair of ears
Step 1
As well as having a great sense of smell, foxes also have amazing hearing - it’s how they find their food! We’ll now make 2 little ears, which will appear to poke out of the hat, but they are actually sewn on top in the final assembly stage.
Using Black yarn, make a crochet magic loop.
Round 1 4dc in loop. [4 sts]
Round 2 (Dc in next st, 2dc in next st) twice. [6 sts]
Round 3 Dc in each stitch around. [6 sts]
Step 2
Change to Spice yarn.
Round 4 (Dc in next 2 sts, 2dc in next st) twice. [8 sts]
Round 5 Dc in each stitch around. [8 sts]
Round 6 (Dc in next 3 sts, 2dc in next st) twice. [10 sts]
Round 7 Dc in each stitch around. [10 sts]
Ss and fasten off, leaving a long yarn tail.
Give your fox a sense of style with a simple scarf
Step 1
We’re now going to change things up to give our fox a simple scarf. It’s really easy to make as it’s just two rows, but instead of working in the round we’ll now switch to working in rows.
Using Meadow yarn, ch81.
Row 1 Dc in second ch from hook and each ch across, turn. [80 sts]
Row 2 Ch1, dc in each st across. [80 sts]
Fasten off and cut yarn.
Step 2
Why not add some pompoms to your scarf!
We’ve already learnt how to make a pompom for our fox’s hat, so let’s complete the look and add some to his scarf too. Simply make 2 pompoms in the same way as you did for the hat and sew a pom pom to each end of the scarf.
Assembling your amigurumi fox
Step 1
You’re on the home stretch!
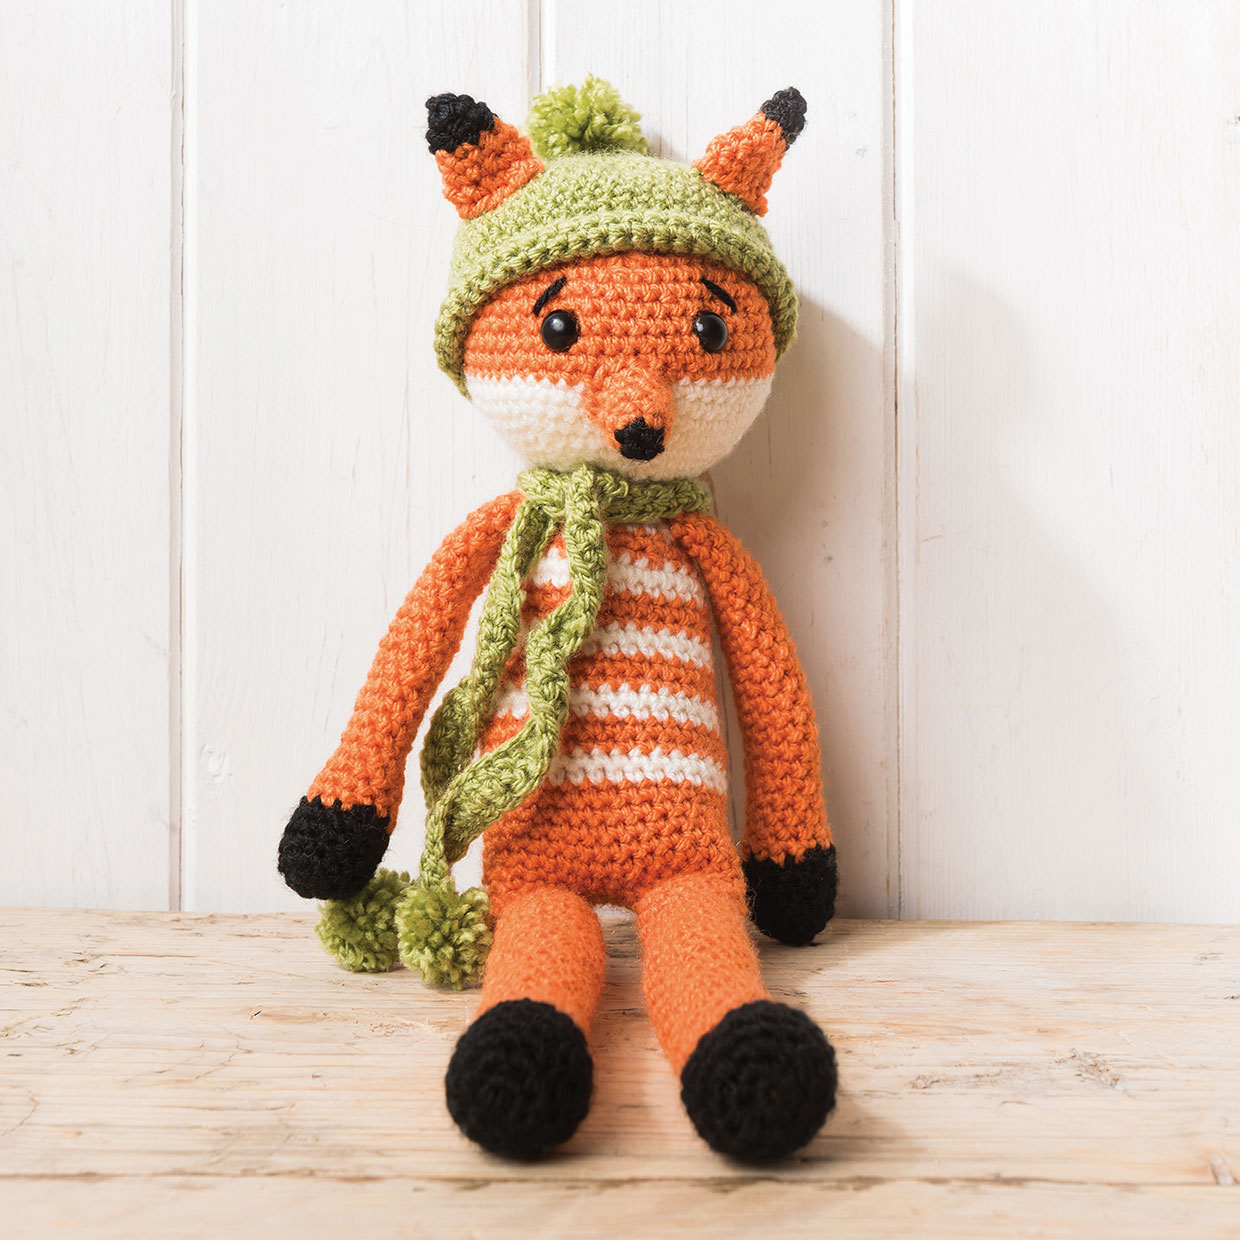
Sew the nose to the fox's face, making sure the top part of the nose only covers one round of the Spice colour, so most of the nose is covering the Cream yarn.
Step 2
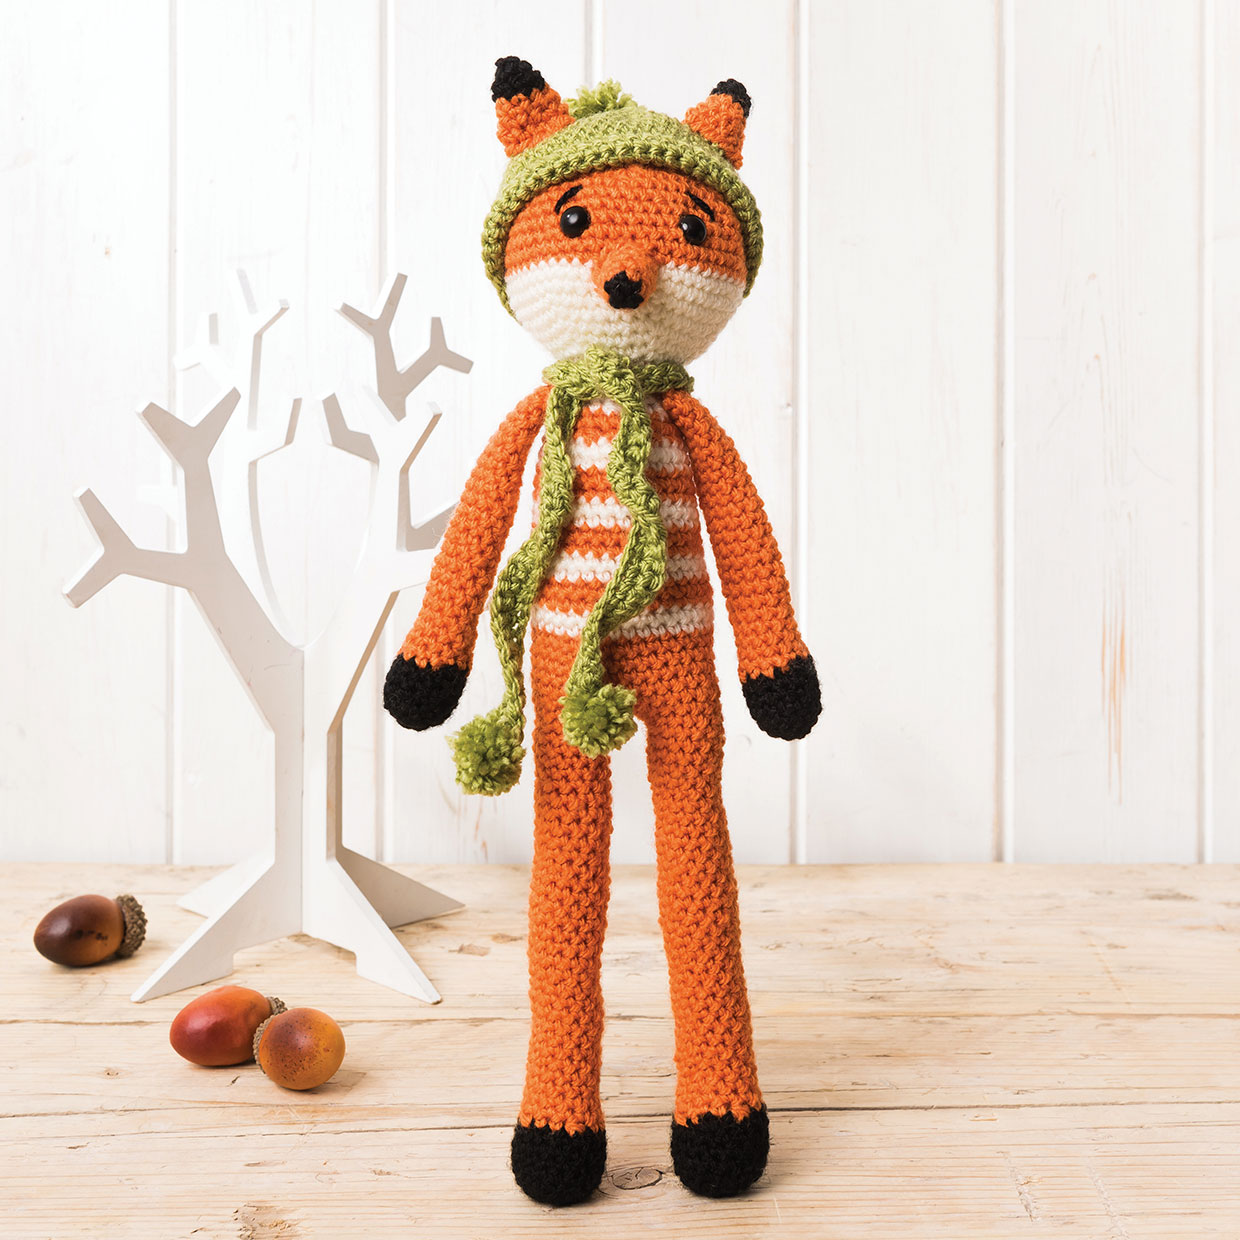
Sew the hat to the head, remembering to keep the flap at the front loose. Then sew the ears onto the hat, so it looks like they are poking out. Check the image provided for a visual guide.
Step 3
Sew the arms to the side of the body.
Step 4
Now comes the fun part. You can either tie the scarf to the neck or you can sew it in place with a few stitches to hold it securely. If you’re making this fox for a child then remember that they’ll probably enjoy taking off the scarf, so it’s probably better to just tie it on.
Step 5
Finally, attach the tail to the back of the fox. If it doesn't stay upright, you can always sew a few more stitches higher up in the tail through to the body to keep it more secure.
Don’t forget to sew in any loose yarn tails to get a perfectly neat finish

