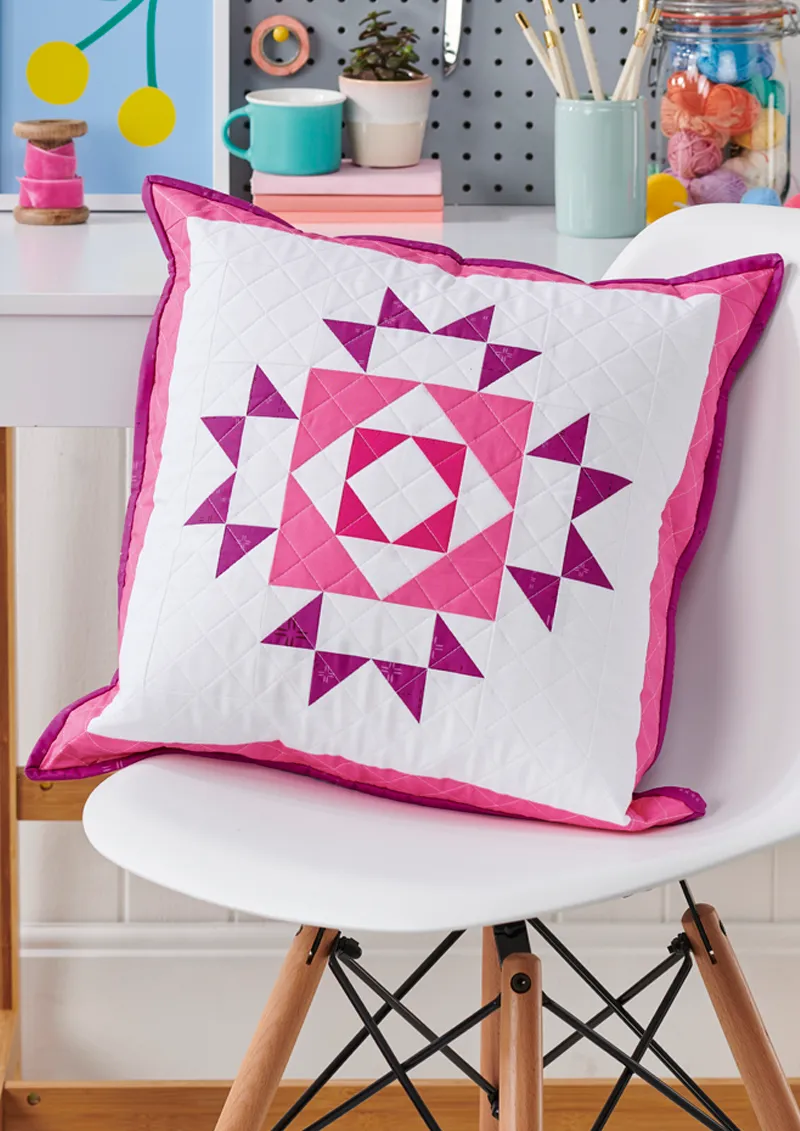
If you’ve fallen in love with our dazzling Flight of Fancy quilt by Mariana Diaz in issue 99 of Love Patchwork & Quilting magazine, you’ll want to make this matching cushion! Bright and bold, in supersized HSTs and Flying Geese blocks on a crisp white background, this bright, modern cushion is the ideal weekend patchwork project!
Piece together one supersized patchwork block to make a cushion that will add instant style to your home! This cute patchwork cushion sewing pattern is a bonus project from the team behind Love Patchwork & Quilting magazine to accompany the Flight of Fancy quilt by Mariana Diaz in issue 99.
Scroll down to find Mariana’s step-by-step guide to how to make this one-block patchwork cushion cover below. Pretty in ombré pinks, why not switch it up and choose any of the other dazzling colourways from the quilt pattern in issue 99 to match your own home décor?
Colour fabrics are PURE Solids by Art Gallery Fabrics. Background fabric is PURE Solids Snow PE-433 and backing and binding fabric is Decostitch in Orchidberry DSE-707. All by Art Gallery Fabrics.
Cutting out
From the purple fabric cut:
Two (2) 10¾ in x 181/2in for backing.
One (1) 5¼in square (A).
Eight (8) 2¼in squares (B).
Three (3) 2½ x WOF strips for binding.
From the dark pink fabric cut:
Four (4) 2in squares (C)
From the pink fabric cut:
Two (2) 4¼in squares (D).
Two (2) 2in x 15½in vertical borders.
Two (2) 2in x 18½in horizontal borders.
From the white fabric cut:
One (1) 5¼in square (E).
Seven (7) 3½in squares (F).
Four (4) 3½in x 2in rectangles (G).
Four (4) 2¼in 3¾in rectangles (I).
Eight (8) 2 in squares (H).
Two (2) 2in x 12½in vertical borders.
Two (2) 2in x 15½in horizontal borders.
How to make a Flying Geese cushion
You will need:
Purple fabric
Dark pink fabric
Pink fabric
White fabric
Lining fabric
Zip
Batting
Piecing the cushion
Step 1
Make the quilt block as outlined below, referring to Fig 1 for placement.
Fig 1
Step 2
Draw two diagonal lines on the wrong side of an E square. Place an A square and an E square RST. Stitch ¼ in away from each side of the drawn lines. Cut in half horizontally and vertically. Then cut along the drawn lines to make eight units. Press each completed HST unit open and trim to 2in square
Step 3
Join an H square to the top of each HST. Make four units with the darker triangle pointing up to the right, and four units with the darker triangle pointing up to the left to make the side units.
Step 4
With RST, layer a B square on one end of an I rectangle. Stitch on the drawn line, trim ¼ in away from the seam and press. Repeat with a second B square on the opposite end of the I rectangle. Trim to 3½ in x 2in, leaving ¼ in above the point of the triangle. Repeat to make four Flying Geese.
Step 5
With the large triangle pointing upwards, add a G rectangle to the top of each Flying Geese unit. Join the side units to either side of the Flying Geese units.
Step 6
Draw a diagonal line on the wrong side of four C square. Align two C squares in opposite corners of an F square RST. Stitch on the drawn lines, trim ¼ in from the seam and press open. Repeat with the other two squares on the remaining corners.
Step 7
Take two F squares and cut in half on the diagonal to make four triangles. Fold each triangle in half and finger press to mark the centre along the long diagonal edge. Sew two of the triangles to opposite sides of the unit from the last step, using the crease marks to centre the triangles. Press away from the centre and trim away the dog ears. Sew the other two F triangles to the remaining sides of the unit, as in the last step. Trim the unit to 4¾ in square, carefully centring so that ¼ in remains above each outer point.
Step 8
Repeat the process in the last step using two D squares to form the outer triangles. Trim to 6½ in square to finish the centre unit.
Step 9
Arrange the units, referring to the photo. Sew the units in rows, then sew the rows together to complete the block.
Step 10
Add the two (2) vertical white borders and then the two (2) horizontal white borders. Press towards the borders.
Step 11
Add the two (2) vertical pink borders and then the two (2) horizontal pink borders to the top and bottom. Press towards the borders. (Fig. A) The cushion top should measure 18½ in square.
Quilting your Flying Geese cushion
Step 1
Make a quilt sandwich by placing the lining fabric right side down, the batting on top, then the cushion top centrally and right side up. Baste the layers together using your preferred method.
Step 2
Quilt as desired and trim away excess batting and lining fabric.
Making the Flying Geese cushion back
Step 1
Take one 10¾ in x 18½ in rectangle and press one long edge under 1in twice. This is the top half of the backing.
Step 2
Take the other 10¾ in x 18½ in rectangle and press one long edge under ½ in twice. This is the bottom half of the backing.
Step 3
Place the zip right side up with the opening to the left. Place the bottom part of the backing, right side up, with the folded edge just under the zip teeth. Pin in place and sew with a zipper foot ⅛ in below the teeth.
Step 4
Take the top part of the backing, unfold the hem once, and place it RST matching the folded edge with the top edge of the zip. Pin in place and sew with a zipper foot ⅛ in above the teeth.
Step 5
Flip back the top part of the backing, using the crease as a guide, covering the zip and creating a flap. Pin in place and sew approx ⅛ in above the zip teeth. Open the zip about 2in and trim the zip tape even with the fabric on both sides.
Finishing your Flying Geese cushion
Step 1
With the zip still open, place the cushion back and front WST. Baste around the outer edge.
Step 2
Sew the binding strips together end-to-end using diagonal seams. Press seams open and trim away the dog ears. Fold in half lengthwise, WST, and press.
Step 3
Sew the binding to the right side of the cushion, folding a mitre at each corner, then fold the binding to the back of the cushion and stitch in place to finish.
And you’ve finished your Flying Geese cushion! Remember to check out issue 99 of Love Patchwork for even more beautiful projects. If you’re in the market for a new machine then head over to our best sewing machine for quilting round up and for more fun projects then browse through our quilt kits for beginners.
Also known as Sew Mariana, Graphic designer Mariana's love of colour, craft and photography inspires her to create fun and beginner-friendly quilt patterns. She’s a prolific quilt designer whose work has been featured in Love Patchwork & Quilting and Quilts & More magazines. Her modern quilt patterns really are a joy to behold, and she has her own pattern shop on her website www.sewmariana.com
This website is owned and published by Our Media Ltd. www.ourmedia.co.uk