How to use a digital cutting machine

We show you three nifty things you can do with your digital cutting machine!

Try our magazines – get 6 issues from just £9.99!

Published: September 29, 2021 at 6:00 am

Thinking about buying a digital cutting machine? Or perhaps you already have one, still tucked away neatly in its box? A digital cutting machine, such as the Silhouette, ScanNCut or one of the Cricut models, can take your papercrafts to the next level, especially if you're into batch-making projects (looking at you, Christmas cards), or cutting your own designs - particularly if they're detailed. If it's traditional die-cutting machines you're after - check out our round-up of the best die-cutting machines! Do you have an opinion on which is best? Let us know in the comments below!

Butterfly toppers for gift tags

In this article, we show you three easy projects that you can do to get started with your digital cutting machine: how to make gift tags, how to make fussy cutting easy and hassle-free, and how to make an easy birthday card.

If you like this project, how to use a digital cutting machine, why not have a look at some of our other ScanNCut projects? Learn how to make foil cards, or why not download your free DIY envelope templates or bullet journal printables! We also show you how to make stencils, this gorgeous realistic paper rose, a gorgeous daffodil wreath, an easy paper lantern or these flowers in a jam jar!

If you’re in a crafty mood, why not check out the best glue gun? Wondering what the best printer is for crafting? Check out our review of the best printer for card making.

We love seeing what you make, so don’t forget to share your craft projects with us on Instagram, Facebook, or Twitter, too!

How to use a digital cutting machine

There is so much you can do with your digital cutting machine. If you're looking for quick and easy projects to ease you in and get you started, we've got you covered. Quickly cut toppers from your favourite paper pad, whip up a birthday card or make tags - we show you all three.

Watch our video tutorial!

How to make toppers

Easily fussy cut toppers from patterned paper by using the Direct Cut feature of your ScanNCut!

How to make fussy cut toppers with the ScanNCut

You will need

  • Brother Scan N Cut
  • Brother adhesive mat - low tack
  • Patterned paper/ images to cut out

Step 1

How to make toppers - step 1

First, choose the patterned paper you want to make toppers from. One with good contrast and clear outlines around the images will be the easiest to start off with if you are new to ScanNCut Direct Cutting.

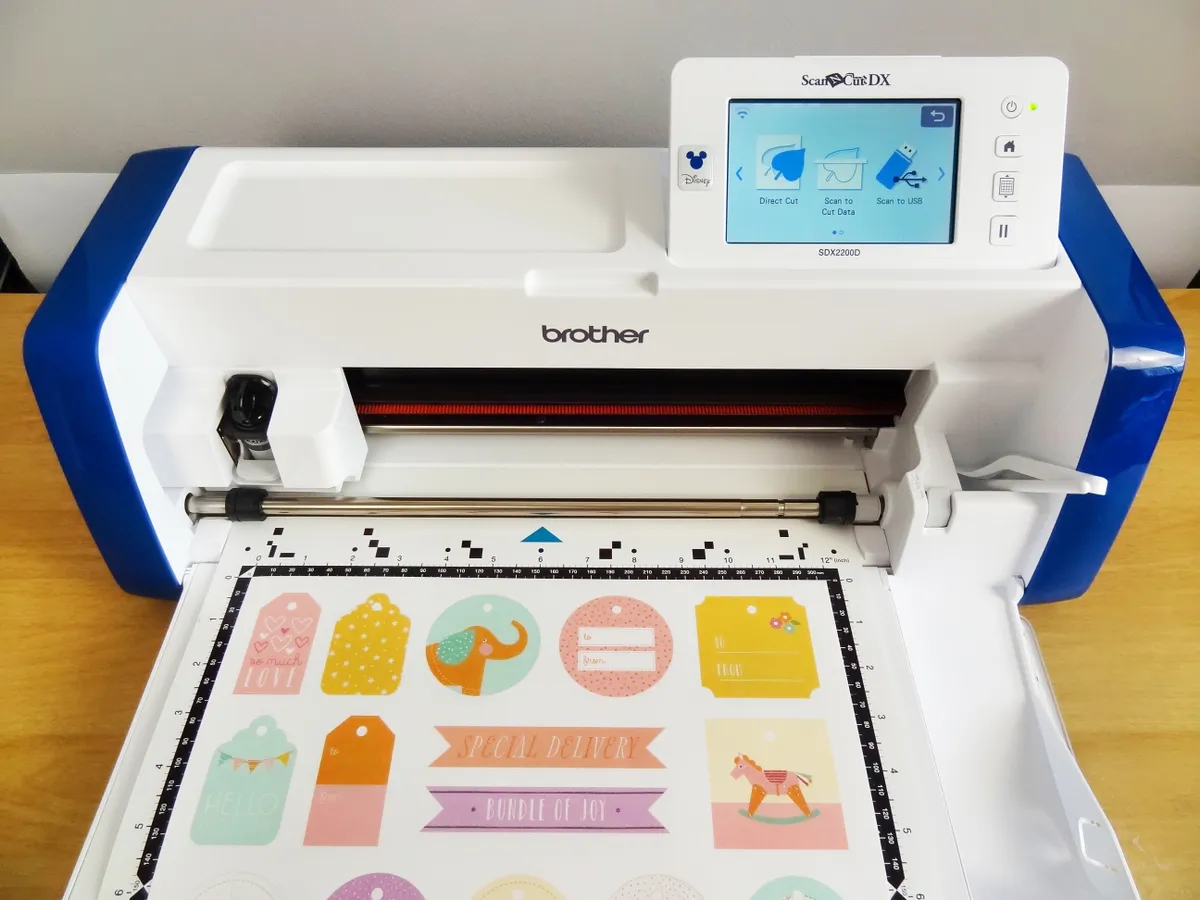
Smooth down onto the adhesive mat and load into the machine. Select ‘Scan’ and then ‘Direct Cut’. For the device, choose the image of the ScanNCut machine.

Step 2

How to make toppers - step 2

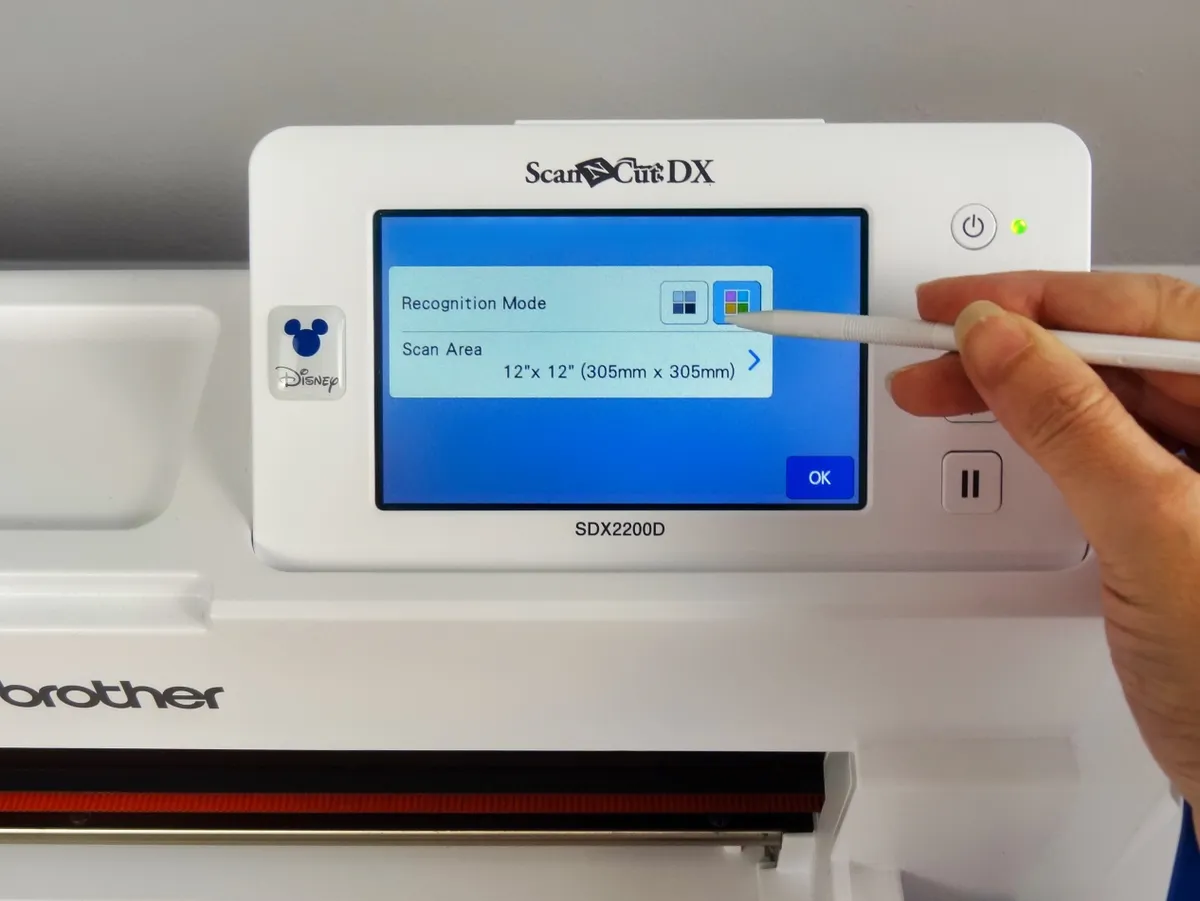
Click to edit, the paper size should be 12 x 12". Next, check the recognition mode, and select the colour icon if using coloured pattern paper (or the black and white icon if your images are in black and white).

Step 3

How to make toppers - step 3

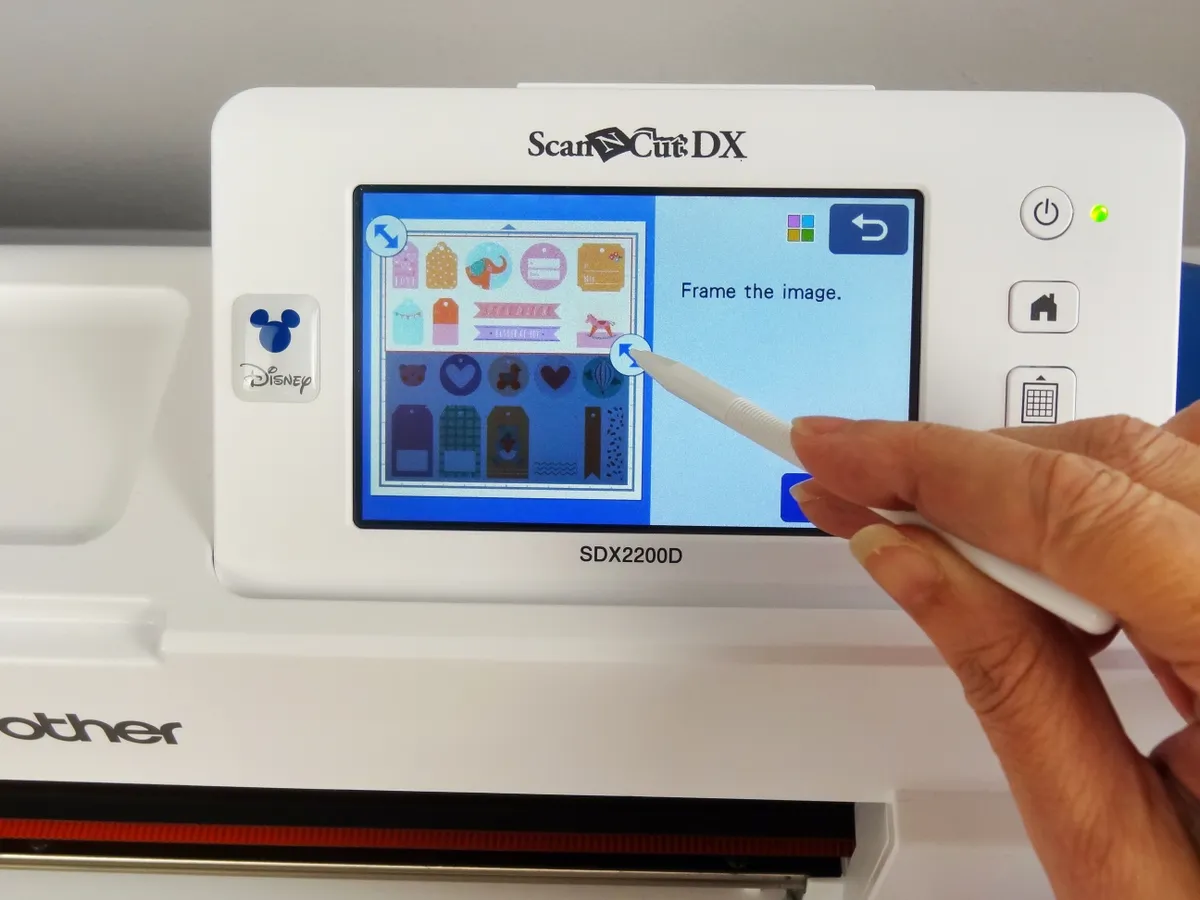
Press ‘start’ and the mat will load, scan and present the scanned image on the screen.

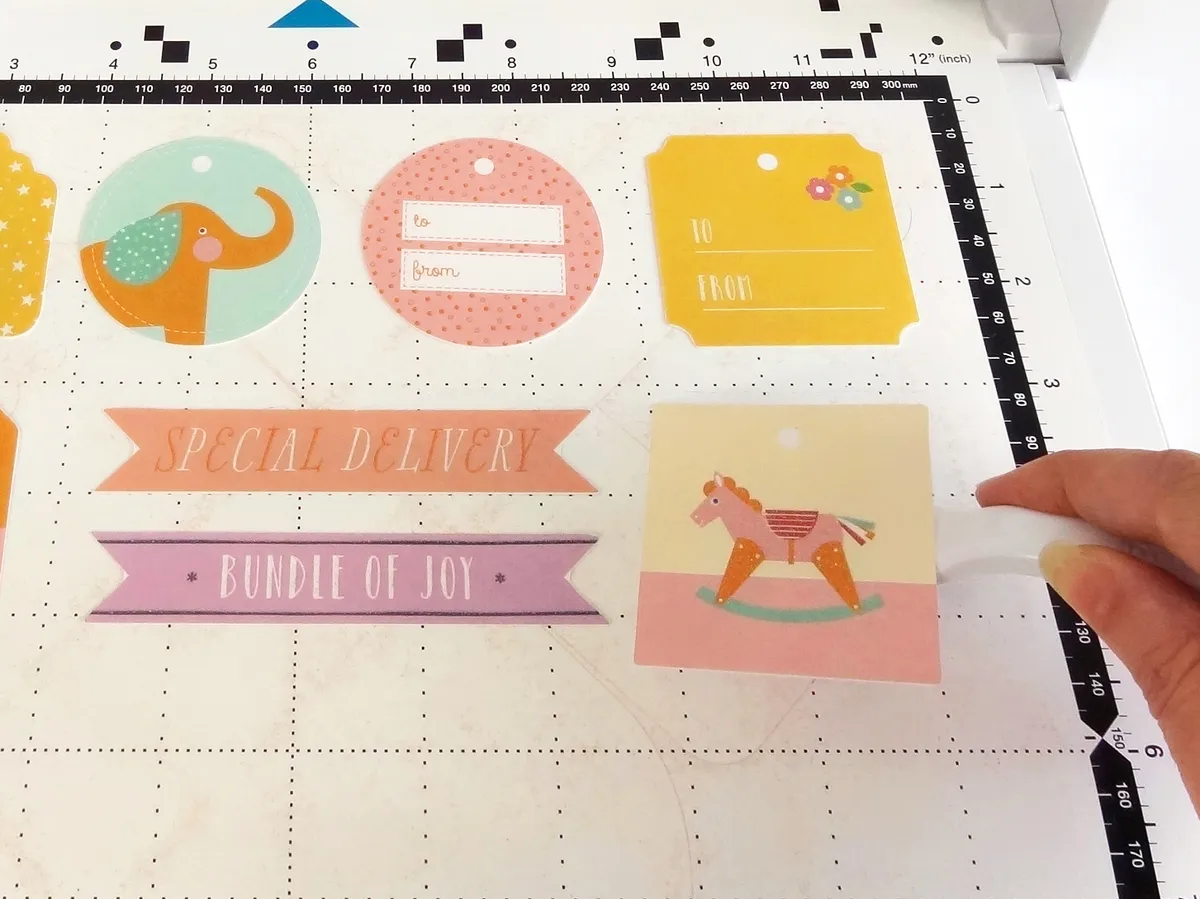
Use the adjuster arrows to select the area of the scanned paper you wish to cut, as you may wish to only cut a portion of the paper rather than the whole sheet.

Zoom in using the magnifying glass icon and arrow keys to navigate, it helps to just check the areas to cut have been picked up correctly. Select ‘OK’.

Step 4

How to make toppers - step 4

You will now see your selected cutting area on the preview screen, showing the cut outlines, check and if happy click ‘ok’. (if you need to reselect simply use the back key and reselect area or simply unload and rescan your paper)

Step 5

How to make toppers - step 5

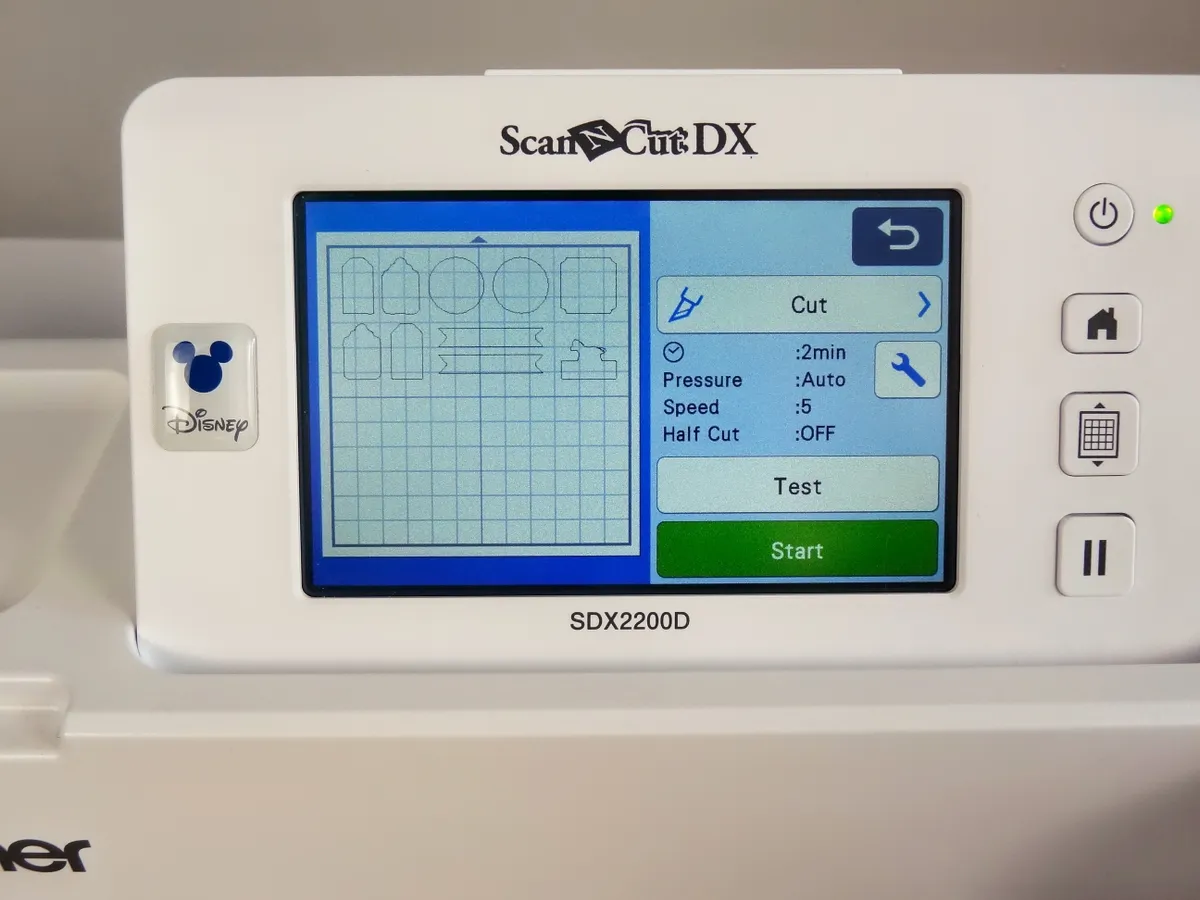
Tap ‘OK’, then ‘Cut’, then ‘start’. You will be prompted to load the mat if you have not already done so. The mat will load and the screen will display the estimated cutting time.

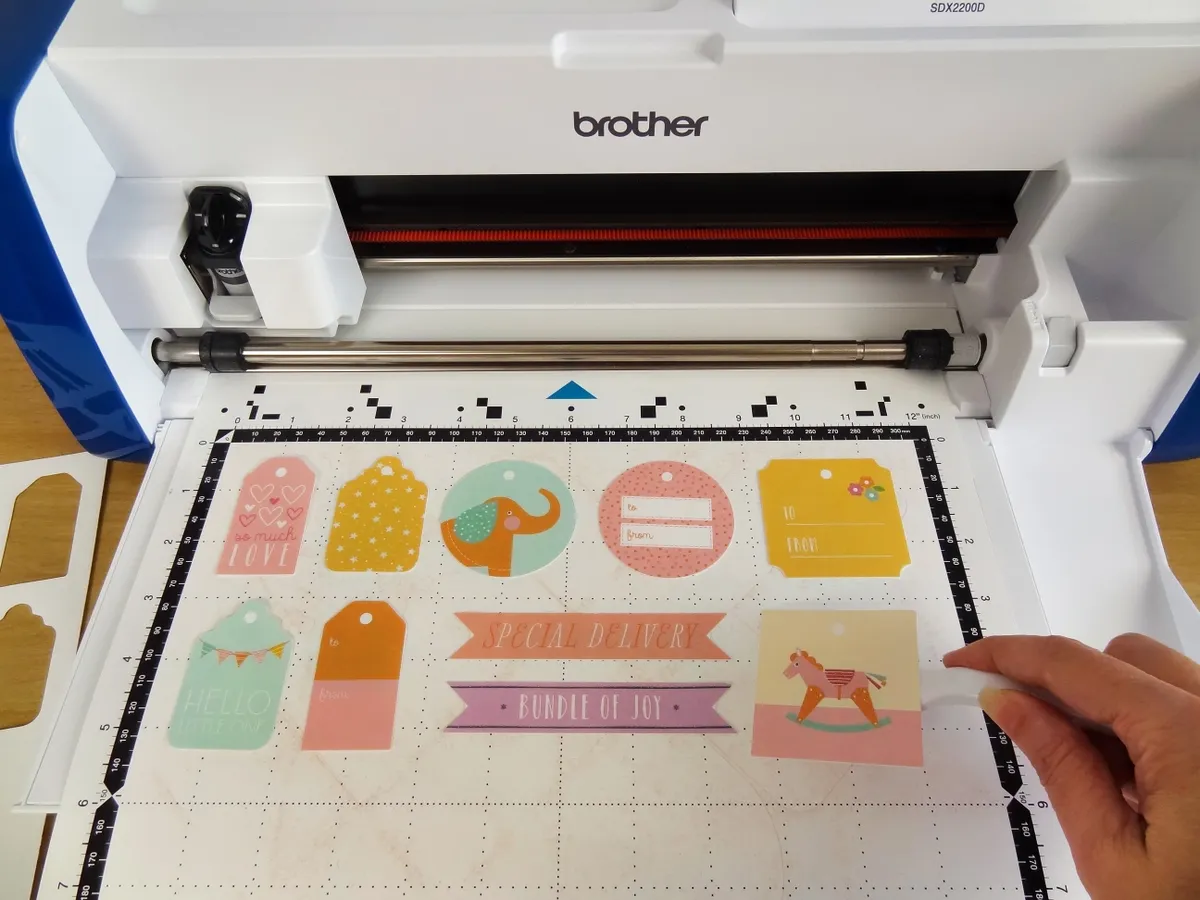
When done, tap ‘OK’ to finish, then unload the mat. Lift the waste paper to reveal perfectly cut toppers!

Carefully remove them from the mat using the Brother spatula.

You now have a selection of fussy cut motifs for your projects - stash them away or use straight away!
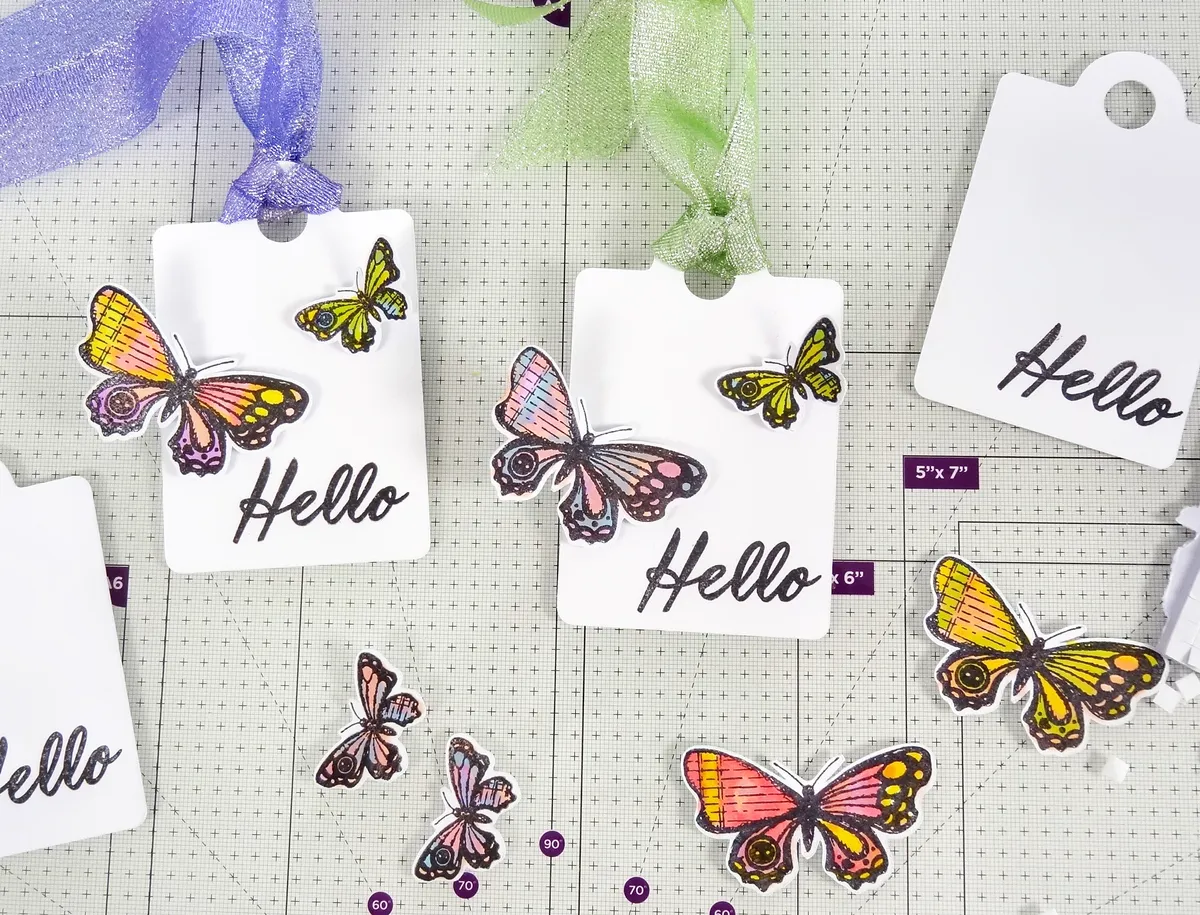
Easy DIY gift tags

Adding a handmade gift tag to a wrapped gift is the perfect way to finish it off. It's a good idea to batch make gift tags, and keep a stash ready to go when you need one. In this tutorial, we share an easy way to make DIY gift tags, made even easier using the ScanNCut!

How to make gift tags

You will need

  • Brother ScanNCut
  • Brother adhesive mat - low tack
  • Card
  • Stamps (I'm using the Angela Poole Nature's Textures set)
  • Inkpad (I’m using Memento Tuxedo Black)
  • Alcohol markers
  • Adhesive
  • Foam pads
  • Ribbon

Step 1

How to make DIY gift tags – step 1

Stamp your chosen images onto some white card using black ink, I’m stamping large and small butterflies. If you’re using a ScanNCut to cut out your butterflies, stick your card to the adhesive mat and load it into the ScanNCut machine.

Step 2

How to make DIY gift tags – step 2

Select ‘Scan’, then ‘Direct Cut’, then the machine icon. Adjust scan area if desired, and select the black & white recognition mode if your stamps are uncoloured like mine are.

Step 3

How to make DIY gift tags – step 3

Press ‘Start’ and the machine will load the mat, scan and present a preview image on the screen. Simply drag the arrows to select the area you wish the machine to cut. Click preview and zoom in to check the area is selected correctly.

Step 4

How to make DIY gift tags – step 4

For these images you can add a small outline border around the cutouts so they resemble a die-cut image, this is especially useful for images such as the butterfly where the small thin antenna cut easily be lost.

To add the outline border, select ‘Preview’ and click the first box (looks like a circle)

Step 5

How to make DIY gift tags – step 5

Using the + and – keys, adjust the size of the outline border as desired, I recommend the smallest setting which is 0.04”, then press ‘OK’.

Step 6

How to make DIY gift tags – step 6

Select ‘Cut’, then ‘Start’ and you will be prompted to load your mat if you have not already done so. The mat will load and the machine will cut around stamped images, leaving a small white border around each image.

Step 7

How to make DIY gift tags – step 7

Peel away the waste card and carefully remove your cutouts using the Brother spatula.

Step 8

How to make DIY gift tags – step 8

Now let’s cut some tag topper shapes for our cutouts! Select ‘Pattern’ on screen, then tap pattern selection (that shows the Eiffel tower motif). Scroll and find the icon set that shows a tag shape, this opens up another set of patterns. Select the tag shape – design number AR-K004.

Step 9

How to make DIY gift tags – step 9

You can adjust the size if required, but I’m using it at the default setting of 2.55” wide x 3.94 high. Press ‘OK’ and tap on the shape again so we can edit the number of tags we need, in this case, select ‘4’, then press ‘Set’ to bring the 4 shapes onto your mat screen.

Step 10

How to make DIY gift tags – step 10

Press ‘OK’, then select ‘Cut’, load mat with white card and press Start’. The mat will load and the machine will cut out four tag shapes.  Carefully remove shapes from the mat using the spatula.

Step 11

How to make DIY gift tags - step 11

Next, decorate your tags. Using black ink, stamp a sentiment onto each tag shape, I’m using a ‘Hello’ sentiment as it can be used year-round.

Step 12

How to make DIY gift tags - step 12

Colour the previously cut out butterfly shapes using your preferred method - I've gone for alcohol markers.

Step 13

How to make DIY gift tags - step 13

Using small 3D foam pads, attach butterflies to your tags, bending the wings slightly.

Thread each tag with a pretty ribbon to finish!

These tags can be used on gifts, bags or as pretty toppers for your greetings cards, perfect for batch making too!

How to make an easy birthday card

Most digital die-cutting machines come with a library of images that you can browse and use to create your own cards or other papercrafts. Here, we’re using the inbuilt ScanNCut library to create this super easy birthday card! If you’re looking to get started with your ScanNCut, follow along with this tutorial.

How to make a birthday card

You will need

  • Brother ScanNCut
  • Brother adhesive mat – low tack
  • Card
  • Adhesive
  • Foam pads

Step 1

How to make a birthday card with the ScanNCut – step 1

On the ScanNCut machine’s screen, select ‘Pattern’ then the word pattern set (icon shows Smile / Create), then tap ‘Bon Voyage’ to open up a further pattern set. Scroll and select the ‘Happy Birthday’ logo (LO-AH03).

Step 2

How to make a birthday card with the ScanNCut – step 2

Adjust the width to 4” (height adjusts to 2.96”) tap ‘Set’ to bring it onto your mat screen, tap ‘OK’, select ‘Cut’ and load your adhesive mat to cut the logo from your choice of coloured card – I’ve gone for lilac.

Step 3

How to make a birthday card with the ScanNCut – step 3

Press ‘Home’ to return to the home screen and delete the previous pattern. Now select ‘Pattern’, then the pattern set showing the Rocking Horse & Heart, this opens up a further pattern selection.

Scroll and select the Balloon image AR-1032, resize to 1.50” wide (height adjusts to 2.49”) tap ‘OK’ and ‘Set’ to bring it onto your mat screen.

Step 4

How to make a birthday card with the ScanNCut – step 4

Next tap ‘Add’ and select the balloon string (this is a two-part image set) tap ‘OK’ and ‘Set’, you should now have both the balloon and string on the screen. Select ‘Cut’ and cut your two shapes, using different coloured card, if desired.

Step 5

How to make a birthday card with the ScanNCut – step 5

Back to the screen, tap ‘Finish’ then select the balloon shape already on your mat screen, then tap ‘Edit’ then ‘Object Edit’.

Step 6

How to make a birthday card with the ScanNCut – step 6

Now let’s edit the size by clicking the first icon image (shows a square & arrow). Adjust the size to 1” wide (gives a height of 1.32”) then tap ‘OK’.

Step 7

How to make a birthday card with the ScanNCut – step 7

Next, select the balloon on the screen again and ‘Edit’, ‘Object Edit’. This time, select the second icon image (shows two squares & + sign). Here, you can adjust the number of shapes to three and tap ‘OK’

Step 8

How to make a birthday card with the ScanNCut – step 8

Now repeat the ‘Edit’, ‘Object Edit’ steps using the balloon string, this time, increase the number to five and tap ‘OK’. Drag the balloons and strings on-screen to where you wish them to cut.

Step 9

How to make a birthday card with the ScanNCut – step 9

Tip: If you are using different colours, then arrange where you will place your colours if you wish to cut all in one pass (I like to place my card in the top left, top right and middle).

Cut and carefully remove from the mat.

Step 10

How to make a birthday card with the ScanNCut – step 10

Now, let’s cut a card base. Press the ‘Home’ button and ‘OK’ to delete all previous patterns.

Select ‘Pattern’, then the Shapes icon to open up a shapes pattern set.

Scroll and select the rounded corner rectangle BA-A023.  Adjust the size to 11” wide (height should adjust to 5.5”) and tap ‘Set’.

Cut out from some white card, and carefully remove from mat.

Step 11

How to make a birthday card with the ScanNCut – step 11

Now, let’s assemble the card! Score and fold the white card base in half to give a 5.5” square card base.

Glue the Happy Birthday sentiment along the lower left and add the balloon shapes using small 3D foam pads, then add balloon strings as streamers to finish.

Step 12

How to make a birthday card with the ScanNCut

Why not cut a batch of sentiments, shapes and card bases in different colours so you have a ready supply that you can use to easily rustle up a quick card that will work for all ages?

You could even add an age number to the large balloon!


We hope you’ve enjoyed our whistlestop tour on how to get started with your digital die-cutting machine! If you’re after more papercraft inspiration – check out these fab bullet journaling spreads (with free printables) or why not browse the best washi tape crafts!