
How to make roman blinds for your home – DIY guide to making roman shades
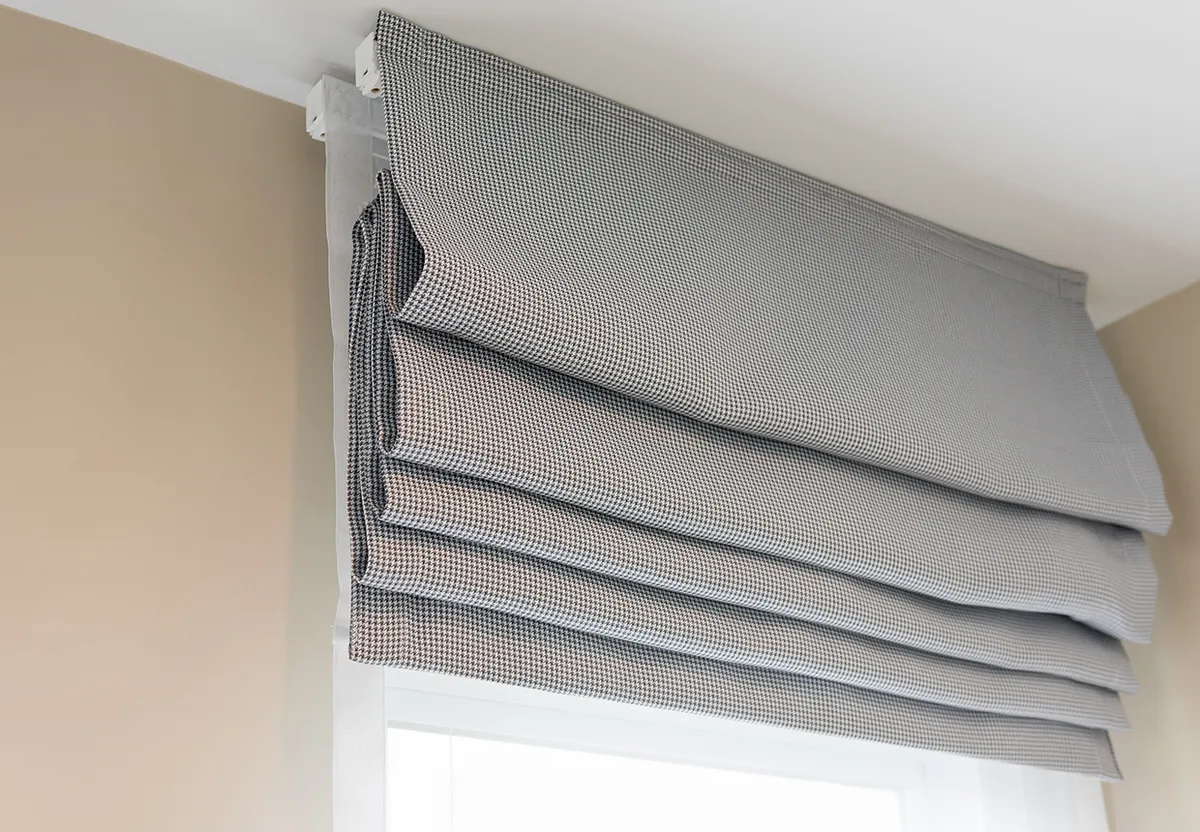
Making Roman blinds is a surprisingly easy way to put your personal stamp on any room of your home. Roman blinds (like the ones pictured above) can be used to create a light but cosy atmosphere in a sunny room.
In this guide, we'll talk you through how to choose the right fabric for your blinds and where to buy all these mechanisms. These are often available as kits, which include everything you need for your blind rods, tape, bar, Velcro – except for the fabric. They come in a variety of sizes, and you just cut them down to fit.
If you are brand new to sewing, head to our guide on how to use a sewing machine before you begin.
This guide to how to make Roman Shades includes:
Before you begin making Roman blinds
When you're making blinds, it's important to consider safety – both homemade and shop-bought blinds must comply with child safety guidelines. This affects the cord mechanism and aims to ensure that no blinds are an accidental risk to children. You can see the full Child Safety Guidelines here.
How to make Roman shades
Top tip: It's a good idea to practise making Roman shades. Make a dummy shade for a small window in your house – for example, your downstairs loo or landing window.
Step 1
Prepare your lining fabric for your DIY roman blind. Fold the top and sides to the wrong side (WS) by 5cm, press. Using your spacing calculations, draw horizontal lines across your lining at these distances from the folded-over top.
Fold one short end of the Roman blind tape to the WS by 1cm twice, then pin at one side of the right side (RS) of your lining, ensuring the top of the tape is along the drawn line.
Cut the other end of the tape 2cm longer than the folded-over lining width. Repeat with the other drawn lines and lengths of tape. stitch into place, close to the top edge of the tape. There’s usually a coloured line woven into the tape – use it as a guide to stitch along.

Step 2
Take the sew-on Velcro that will be included in your blind kit and pin the softer, loop part at the top of the right side of your lining, as shown above. This will be used to stick the blind to your blind rail when the blind is complete.
Stitch it into place all the way along the top and along the bottom of the Velcro strip.
All the machine stitching for your blind is now complete; the rest of it will be made by hand.

Step 3
Fold the top and sides of your main fabric to the wrong side by 5cm and press, leaving the bottom for now. Place the fabric right side down on your table, then place the interlining on top and tuck it under your pressed folds.
Stitch the interlining into place by hand, using herringbone stitch and making sure you only stitch through the folded-over edges and the interlining – check that your stitches don’t go through to the front.

Step 4
Measure down from the folded-over top of your interlined fabric, and mark your spacing measurements with a pin at the edge of both sides. Place lining fabric with Velcro and tapes attached RS up on top of the interlining and main fabric (WS together).
Line up the top of each tape with the pins on each side of the main blind fabric, and pin the lining into place along the top and down each side. Ensure the Velcro top sits below the top of the main fabric (by approx 3mm) so it doesn’t show at the front.
Stitch the lining to the WS of your main fabric all the way around, using small slip stitches, making sure your stitches can’t be seen from the front.

Step 5
Join the lining and the interlined main fabric together at each tape position. Work tiny stab stitches through the top of the tape to the front of the blind, then back to the tape again. It’s important to make these stitches in exactly the right place on the blind front so that it hangs neatly – to do this, turn your blind over so that the main fabric faces upwards.
Using the pins down the side (which mark the calculated space measurements), stick a strip of masking tape across the fabric, lining up the pins. Now you can easily see where to position your stab stitches. You can now remove the pins.

Step 6
The stab stitches need to be placed about 10cm apart, and the first and last stab stitches should be at the very edge of the tape. To start, turn your blind to the lining side and secure your thread by working a few stitches at the top of the tape, just up to the woven line.
Now push your needle through the woven line on the tape to the front of the blind, but don’t pull it all the way through.

Step 7
Holding the needle still, turn the blind over and make sure that the needle is right at the edge of the masking tape. If it isn’t, then pull it out slightly and reposition it, then pull it all the way through to the front. This is a little bit fiddly, but it gets easier with practice.
Make a tiny stitch (just 2-3mm) and push the needle back into the fabric, making sure it comes out on the tape, next to where the stitch started. Work a few stitches over and over to secure.
Cut the thread, then move on to work the next stab stitch in exactly the same way. Work stab stitches in this way along all your lengths of tape.

Step 8
Now you can hem your blind. Fold the main fabric over by 3cm (to where the lower edge of the interlining comes), then fold it over by another 5cm and press. The interlining will be in the second fold only, which gives the blind a slightly padded edge without too much bulk. The lining should lie beneath the hem so that you have a neat finish from the window side of the blind.
Using small, neat slip stitches, hem your blind by stitching from the fold through the lining, making sure your stitches don’t come through to the front of the blind. Hem all the way across the fold and down one open side, but leave the other one open for now.

Step 9
Your blind is now ready for you to insert the rods. Push a rod into the open end of each length of Roman blind tape, trimming the ends of the rods if necessary, so they are 1cm shorter than the finished width of the blind. Fold over the ends of the tape twice to hold the rods in place, then slip stitch these turns together to secure.
Push the bottom bar through the open end of the hem, cutting it to fit if necessary. Stitch the open end of the hem down to hold the bar in place.

Step 10
Now attach the side-winder head rail to the top of your blind and thread the cords through the tapes. The kits for this all work in slightly different ways, so follow the instructions supplied with them carefully to complete this stage.
Finally, attach the rail fixings to your window frame or above your window as desired, and clip your blind to them, following the instructions supplied. Enjoy your blinds!

What are Roman blinds?
Roman blinds are basically a large piece of fabric, hemmed, layered and sewn in a series of clever ways to create a stylish cover for your windows. You can add a lining and interlining and make them blackout or thermal.
They require careful measuring and a little patience to ensure your blind fits perfectly in your window and is straight! But if you take your time, measure accurately and keep checking as you are going, then you can make your own.
There are also different ways to hang your blind – you can use a wooden batten and screw eyes to thread your cord through, then wind it around a cleat mounted on the wall.
However, since we discovered the side-winder mechanism, we have never looked back! The blind is lowered and raised by pulling the chain (just like on a roller blind), and you don’t have all those strings in the way, plus the blind pulls up more neatly, too.
There are several different methods you can use when making Roman shades, and most people start off by making them on a sewing machine (check out the best sewing machines for beginners). However, for a really professional-looking finish, you shouldn’t be able to see any machine stitches on the front at all, and nearly the whole blind is made by hand.
We have tried many, many different ways of making Roman shades over the years and perfected our techniques, and we have found that this is the most accurate way, with the neatest finish.
We’re here to show you how easy it is to make roman shades, one step at a time.
What materials do I need to make Roman blinds?
Main fabric
How to choose the right fabric, lining and interlining for your Roman blinds can feel a bit daunting at first, but it’s actually pretty straightforward once you get the hang of it. You can use any fabric when making a Roman blind, but a curtain-weight fabric is the best to give your blind some weight, which will make it hang better. To start shopping for curtain fabrics, see our guide to the best upholstery fabrics
- We like John Lewis haberdashery for a good range of fabrics
- If you’re shopping on a budget, Ikea do some great curtain-weight fabrics at affordable prices
- For modern designs and eye-catching prints, try the Spoonflower Upholstery Fabric range
If your finished blind is wider than the fabric width, then you’ll need to join it together before you make your blind. When this happens, you’ll need to buy extra fabric to allow for the pattern repeat.
Be sure to match the pattern carefully, and instead of having the seam running down the middle, join pieces on either side of the full width because this works better visually. For a really individual blind, you could make it in patchwork, appliqué a motif or embroider words on the fabric.
Lining fabric
It’s best to line your blind, so that you can hide your Roman blind tapes and make them invisible from the front.
Lining can also add extra weight to your blind, improving the shape of the drape, and choosing the right lining for your needs can also boost the amount of light your shades block or improve their thermal qualities.
Cotton sateen lining fabric works well, and this can be bought in a variety of colours
Blackout lining is handy if you want to block out more light.
Interlining fabric
We also interline when we are making roman shades, as the finished blind always hangs better with it placed between the main fabric and the lining, plus it gives the finished blind a slightly padded, more professional look.
- We use a lightweight 160g/m2 dommett interlining that doesn’t add too much bulk (Merrick and Day, £3.63 + VAT a metre)

How to measure for Roman shades
Fabric and interlining amounts will depend on the size of your window, so before you get shopping for fabric, you’ll need a tape measure and a bit of time to carefully calculate the space that your blind needs to fill.
First, you need to decide whether your Roman blind is going to sit on the inside or outside of the window recess. Think about what suits your window best, marking the wall if necessary to give you an idea. If it’s going to sit inside, then measure the width and drop of the inside of your window frame.
Your blind rail will be attached to the top of the window frame, and the blind will touch the windowsill, so it’s really important to measure accurately. It does need to move freely up and down, though, so measure 1cm less than the width to allow for this. If your blind is going to sit outside the recess, then add 5-10cm on both sides of the window width so that it overlaps the walls, and add the same to the bottom. Add 10-20cm above the window.
Still not sure how to size your Roman blinds? Use the diagram below as a guide.

How to calculate the amount of fabric that you’ll need to make your Roman blinds
Now you have the measurements, you need to work out the fabric sizes you need and then cut it all out, using the following guide:
From your main curtain fabric, you will need:
- Width – measured width, plus 5cm on both sides for turnings (so width plus 10cm).
- Drop – measured drop, plus 5cm at the top and 8cm at the bottom (so drop plus 13cm).
From your lining fabric, you will need:
- Width – measured width, plus 5cm on both sides for turnings (so width plus 10cm).
- Drop – measured drop, plus 5cm at the top, no extra at the bottom.
From your interlining fabric, you will need:
- Width – same as the measured width.
- Drop – measured drop, plus 5cm at the bottom.

Working out the tape spacing
Calculate where the tape will be sewn because this is where the rods will be inserted. The tapes should be spaced 20-30cm apart. Using the measured drop, take 5cm off this measurement to allow for the blind rail. Now with the measurement left, you need to work out the spaces between each tape.
The bottom space should be half the width of the other spaces, and the top space will have the 5cm added to it to allow for the blind rail. For example, your measured drop is 122cm, minus 5cm, so this is 117cm. Four rods are about right for a blind of this drop, so divide 117 by 4.5 (the half space is for the bottom space) and you get 26cm. So that makes your top space 31cm (26cm plus 5cm), then you’ll have three spaces of 26cm, and the bottom space will be 13cm.
It’s a good idea to draw yourself a diagram and then check against it that your measurements add up. As long as each space is between 20-30cm, it will look fine, and you can add a couple of extra cm to the top space if you need to.
You’re now ready to start making Roman blinds. Read on to discover how to make Roman blinds with step-by-step pictures.
Personalise your home with Roman blinds
One of the best things about making your own DIY Roman blinds is that you can completely personalise them to your style.
Choose a fabric which suits your style. Adjust our Roman blind tutorial so it snuggly fits your window. Add thermal lining to keep your home insulated.
You can customise these Roman blinds however you choose. Be creative, have fun with it and sit back and marvel at your beautiful new creation!
Spruce up your home
We hope you enjoyed making DIY Roman blinds using our step-by-step guide!
Looking for more home décor projects? Learn how to make a duvet cover.


