All products were chosen independently by our editorial team. This review contains affiliate links and we may receive a commission for purchases made. Please read our affiliates FAQ page to find out more.

How to make positive embroidered badges

Spread optimism wherever you go with these feel-good floral embroidered badges made using cheerful shades by Clare Albans.

Try 6 issues of Love Embroidery magazine for just £9.99| SAVE 77%

Published: June 11, 2022 at 9:00 am

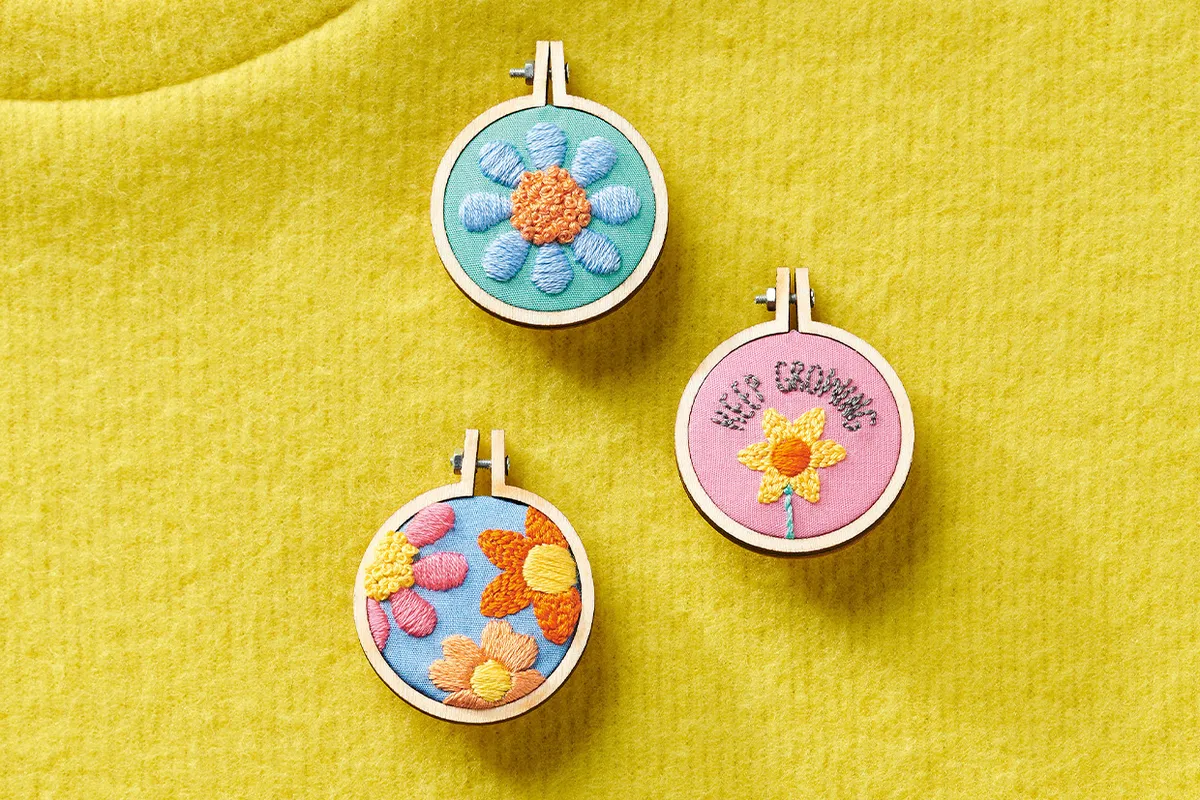
Brighten up your day with these beautiful, beginner-friendly makes. Discover a trio of lively designs by Clare Albans, each created in a miniature hoop, the perfect size for a pin badge. You'll find a blue daisy, a positive message with a daffodil and a selection of brightly coloured flowers. The patterns use only a couple of stitch types on each design so it will give you a chance to practice each stitch in more detail.

In this tutorial, you'll find out which materials you will need and follow a step-by-step guide with pictures to make up all three hoops. Once you have finished your stitching you will need to mount them in the smaller hoop. The final step will be making them into a badge to wear on jumpers, backpacks or hats. Alternatively, you could add a necklace chain to create some summery jewellery.

This is a great project for beginners, as it is quick and easy to complete, and we're sure it'll give you the stitching bug. If you need some advice on embroidery or any of the stitches listed below please visit our embroidery guide for beginners.

The embroidered badges were designed by Clare Albans and first appeared in Love Embroidery issue 13. Looking for similar projects? Sign up for our newsletter to get weekly inspiration and free patterns!

Stitches key:

For other stitching help, try our embroidery stitch library.

What you will need:

  • Cotton fabric: 18x18cm, aqua, blue and pink
  • Stranded cotton: 1 skein each of blue, grey, orange, pale orange, pink, teal and yellow
  • Embroidery hoop: 10cm diameter
  • Mini embroidery hoop: 4cm diameter x3
  • Brooch fastening: 2.5cm x3
  • Strong craft glue
  • Basic embroidery kit

Free template:

You’ll also need the free embroidered badges template.
You will need:

  • Cotton fabric
  • Stranded cotton
  • Embroidery hoop
  • Mini embroidery hoop
  • Brooch fastening
  • Strong craft glue
  • Basic embroidery kit

Step 1

Transfer the designs from the templates onto the respective fabrics using your preferred method. We placed design 1 on the aqua fabric, design 2 on the pink fabric and design 3 on the blue fabric. The outer circles on the templates are a guide only and should not be transferred. Insert your first fabric into a 10cm hoop ready to stitch.
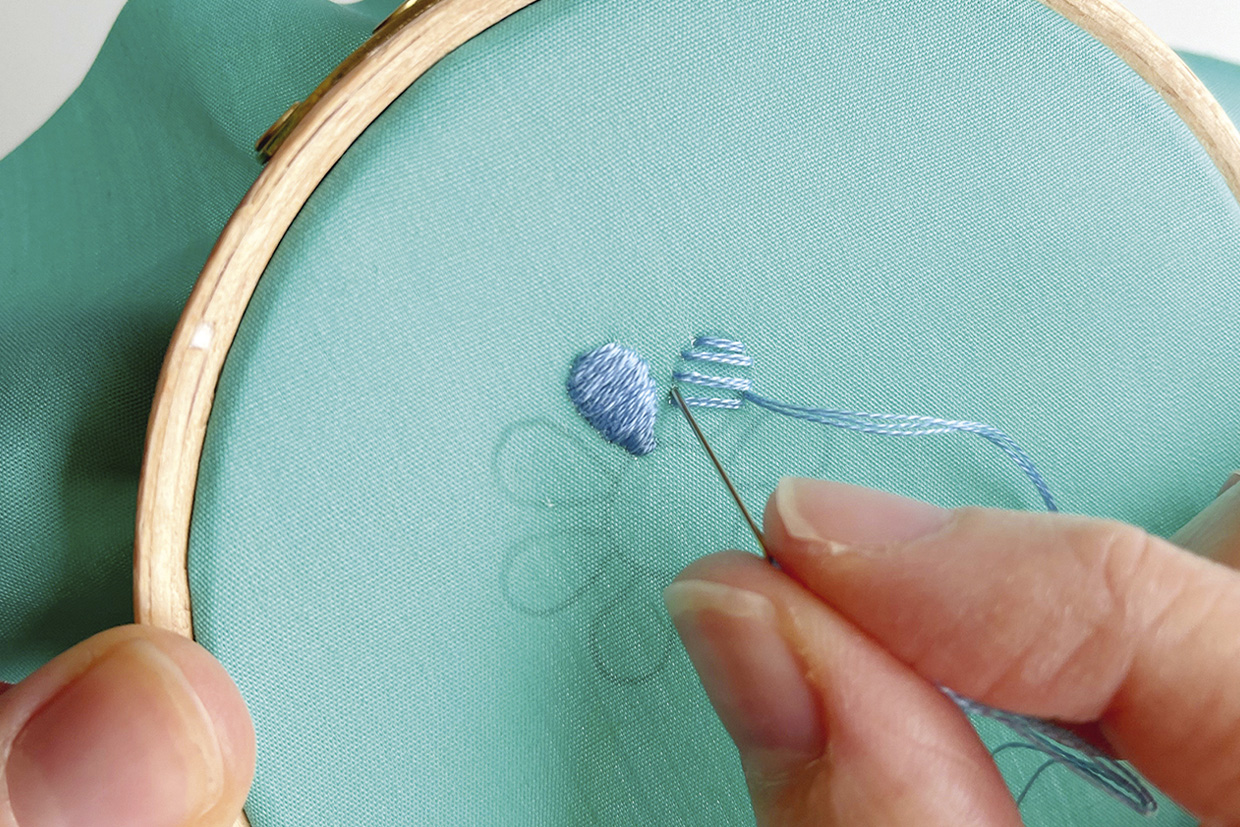
For design 1, begin by stitching the petals in Satin Stitch using blue. Work your stitches so they are stitched horizontally across the petal, adjusting the angle as needed.
embroidered badge step 1

Step 2

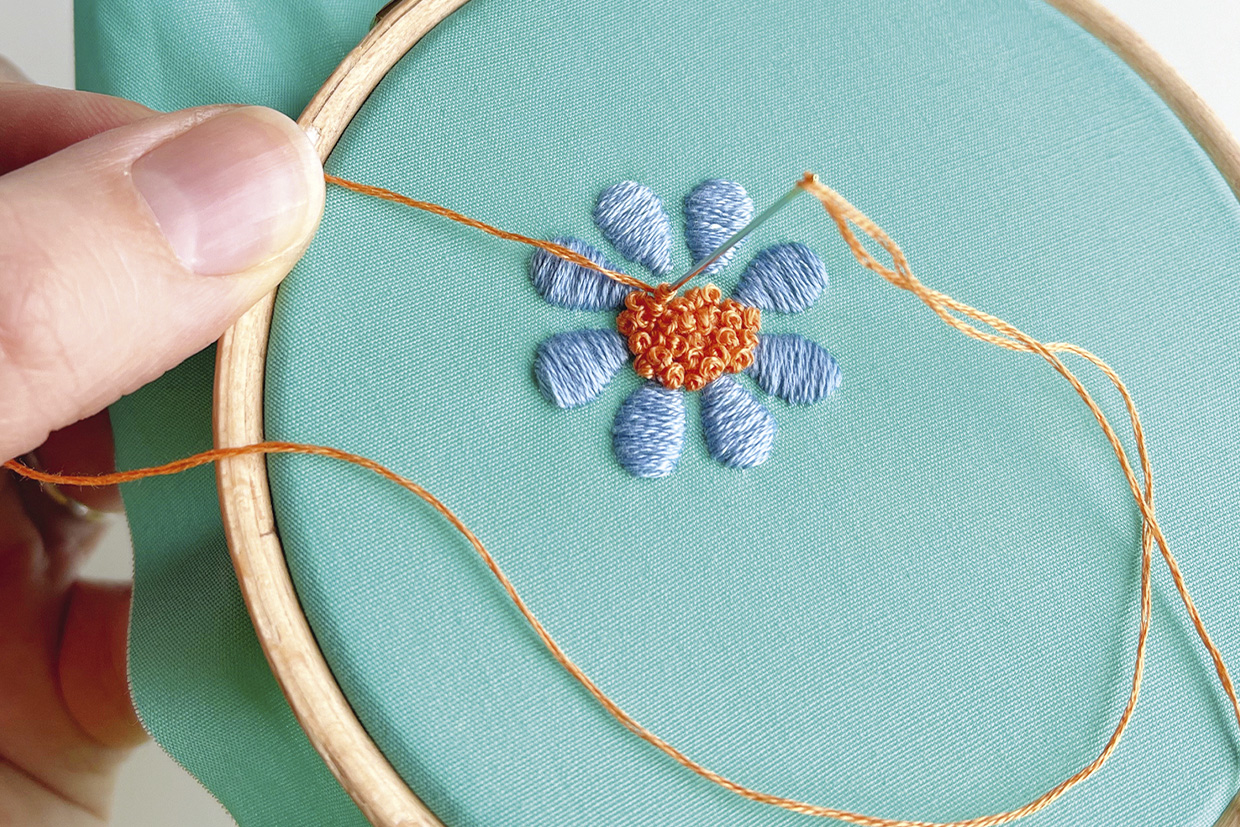
Using the pale orange, stitch a dense cluster of French Knots to fill in the centre of the flower.
embroidered badge step 2

Step 3

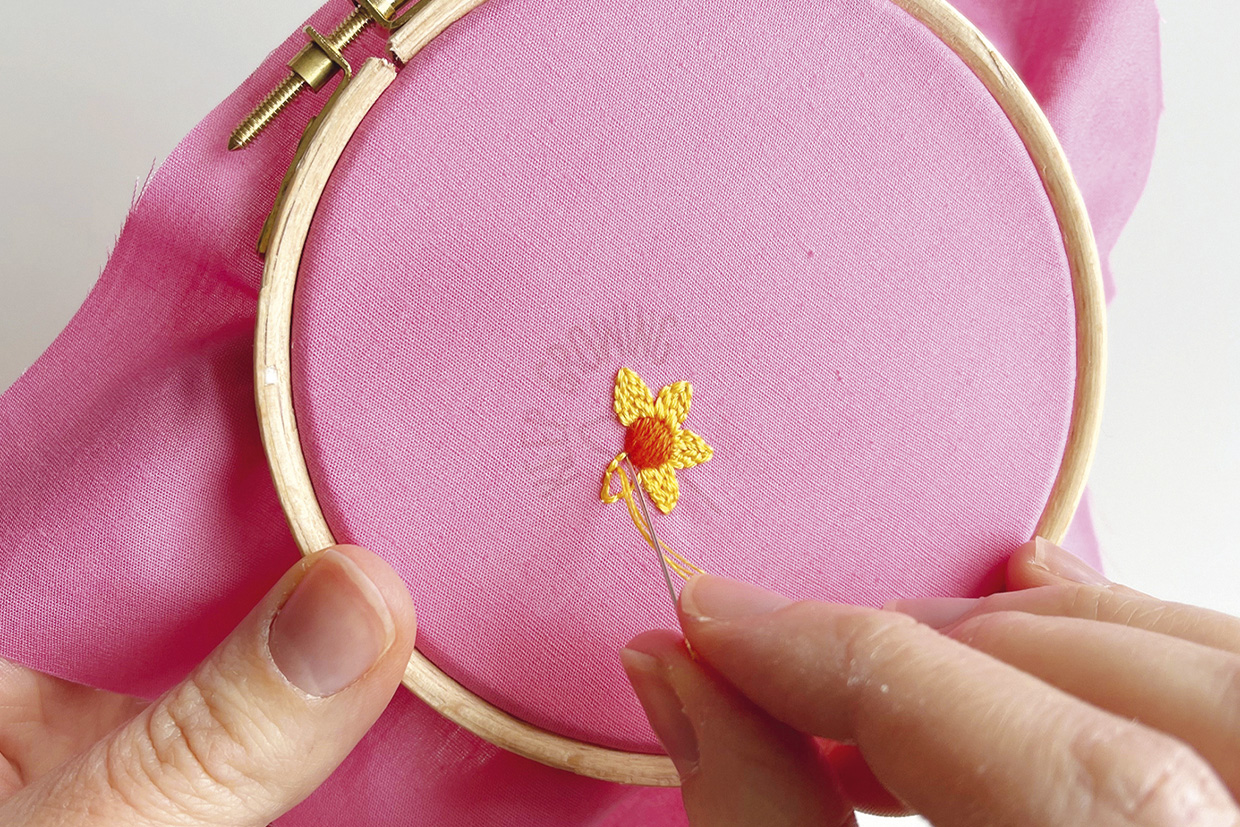
Swapping design 2 into your hoop, start by working the centre of the flower with Satin Stitch in orange. The petals are filled in rows of Backstitch using yellow. Start by outlining the petal shape and then fill in the rest of the space with rows of Backstitch. Alternate your stitches to prevent gaps.

embroidered badge step 3

Step 4

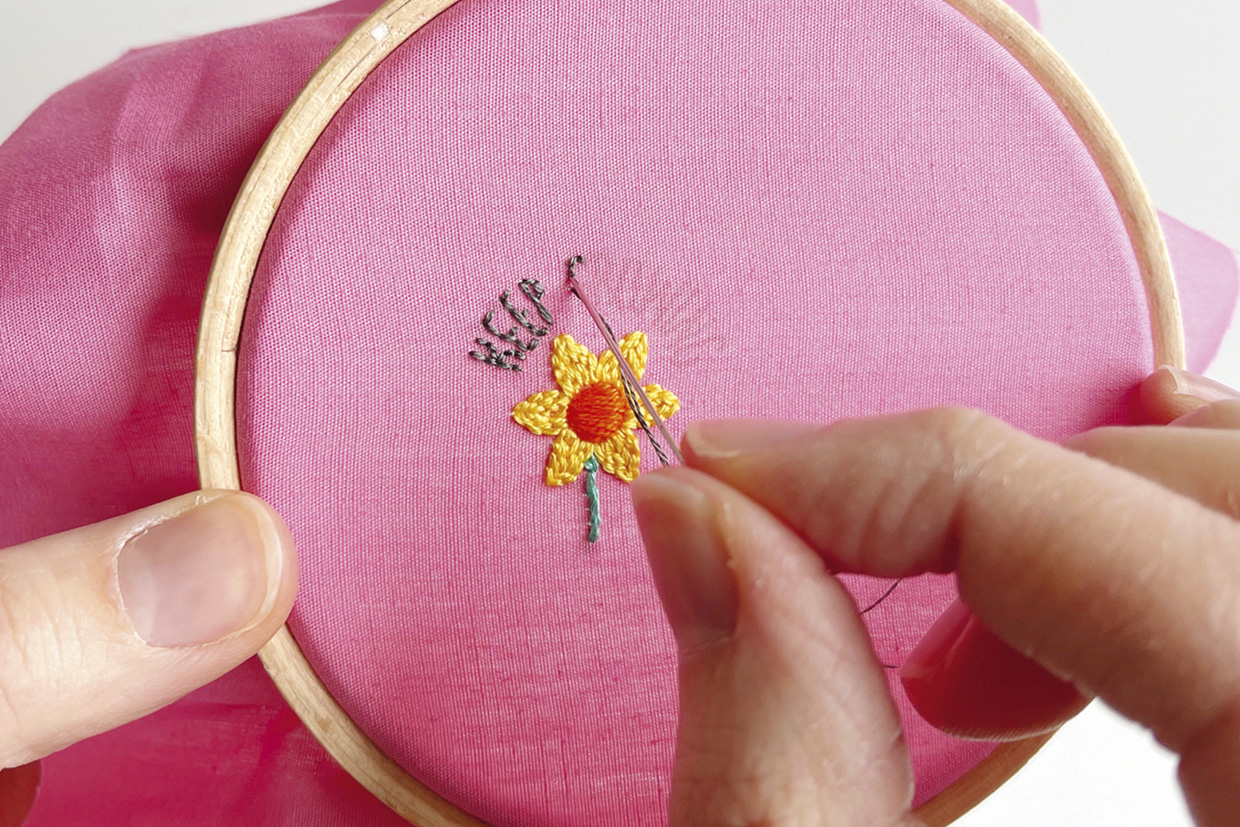
Add the stem in Stem Stitch using teal. To stitch the text, use two strands of grey and very small Backstitches.

embroidered badge step 4

Step 5

Now, swap design 3 into your hoop and stitch the centre of the small, complete flower with Satin Stitch in yellow. Work the petals in Satin Stitch with pale orange, stitching from the outside towards the middle.
embroidered badge step 5

Step 6

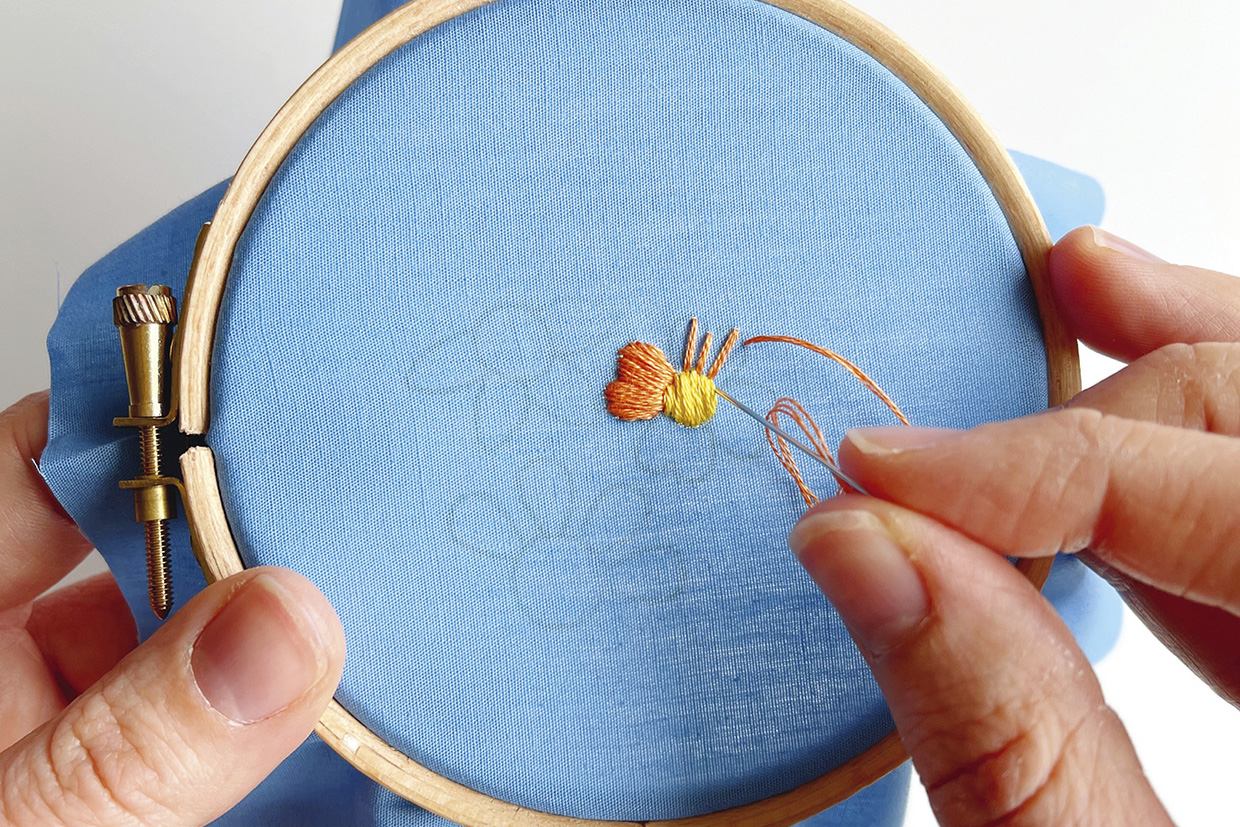
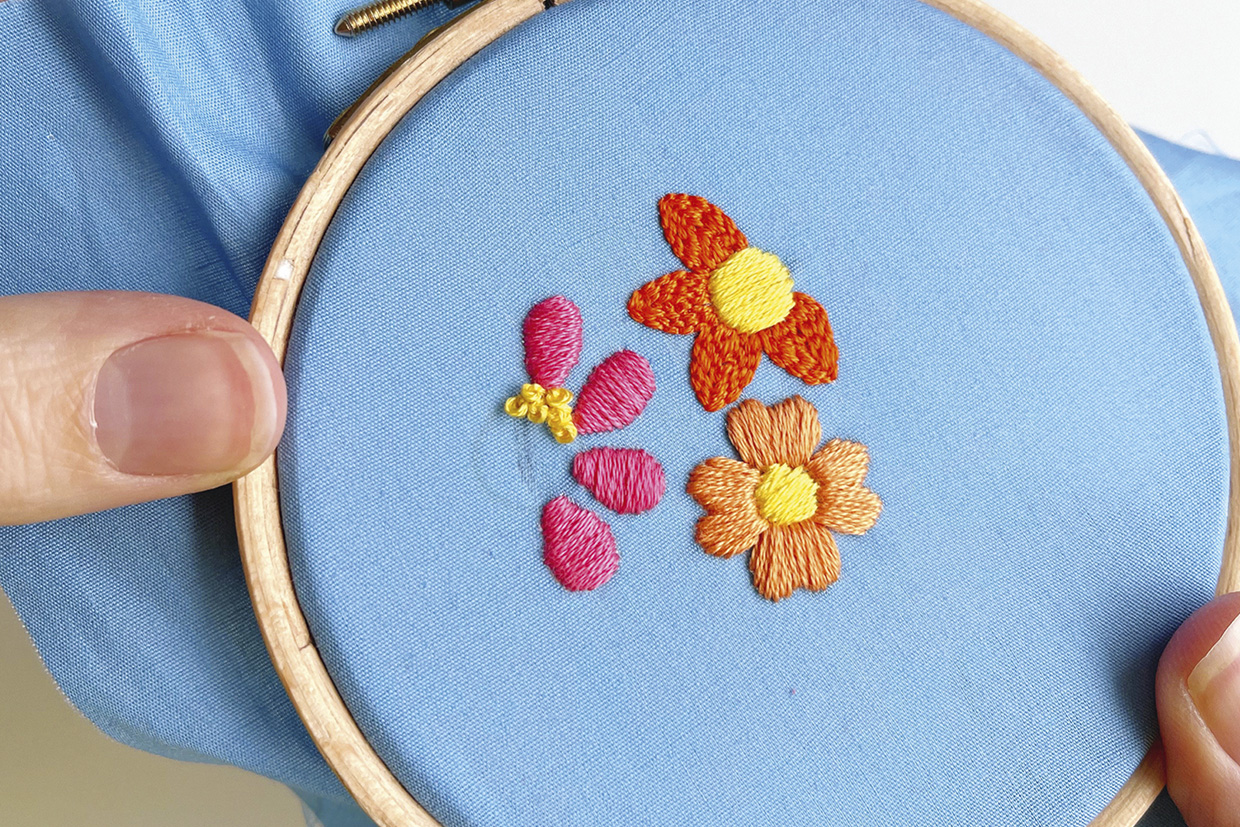
Work the petals of the orange flower using small Backstitches, as in step 3, and fill the centre using Satin Stitch in yellow. Sew the pink flower petals using Satin Stitch in pink, then fill the centre with French Knots in yellow. You only need to stitch the visible French Knots, so use your mini hoop as a guide to work out where to stitch up to. Mount the designs in the mini hoops. Finish by glueing a brooch fastening to the back of each hoop. Once dry, they’re ready to wear!

embroidered badge step 6

Mounting your hoop

once you have completed your stitching you may want to mount them in a smaller hoop. We suggest taking a look at Pumora’s helpful guide to mounting your embroidery in a mini hoop. They helpfully take you through using the mini hoops we suggested at the top of this article, you can either finish them as a necklace or as a brooch.

More like the embroidered badges hoop

We hope you loved this colourful embroidery hoop. Are you looking for similar projects? Don’t miss our free embroidered buttons pattern, which is an equally satisfying quick make! We also have lots more nature-inspired patterns available, try the cactus embroidery, the deer embroidery, the mushroom embroidery pattern, the bee embroidery or this lovely embroidered wall hanging. Looking for a relaxing project, try this beautiful yet easy wildflower design or the plant embroidery. If you’re also looking to delve into machine embroidery or would like to find out more about it take a look at our guide to the best embroidery machine.