How to make a fabric envelope for Valentines

Keep treasured trinkets safe in this cute fabric envelope - or use it to surprise that special someone with a gift.

Try 6 issues of Love Embroidery magazine for just £9.99| SAVE 77%

Published: January 18, 2022 at 10:00 am

Whether you hide a love note inside or a cute gift this fabric envelope will add that beautiful handmade vibe to your gesture, and it's something that can be kept and treasured for years to come. How romantic! This sweet fabric envelope has been designed by the talented Mollie Johanson for Love Embroidery and is now available as one of our free embroidery patterns on Gathered! You'll find the step-by-step guide and free pattern below you'll need to create this lovely fabric envelope.

This sweet fabric envelope would be the perfect vessel for a delicate piece of jewellery (ahem... did someone hear wedding bells?), making it the extra special touch to a thoughtful gift. Or you could simply write your loved one some romantic words, we're afraid we can't help with this one though! Time to dust off the old poetry book.

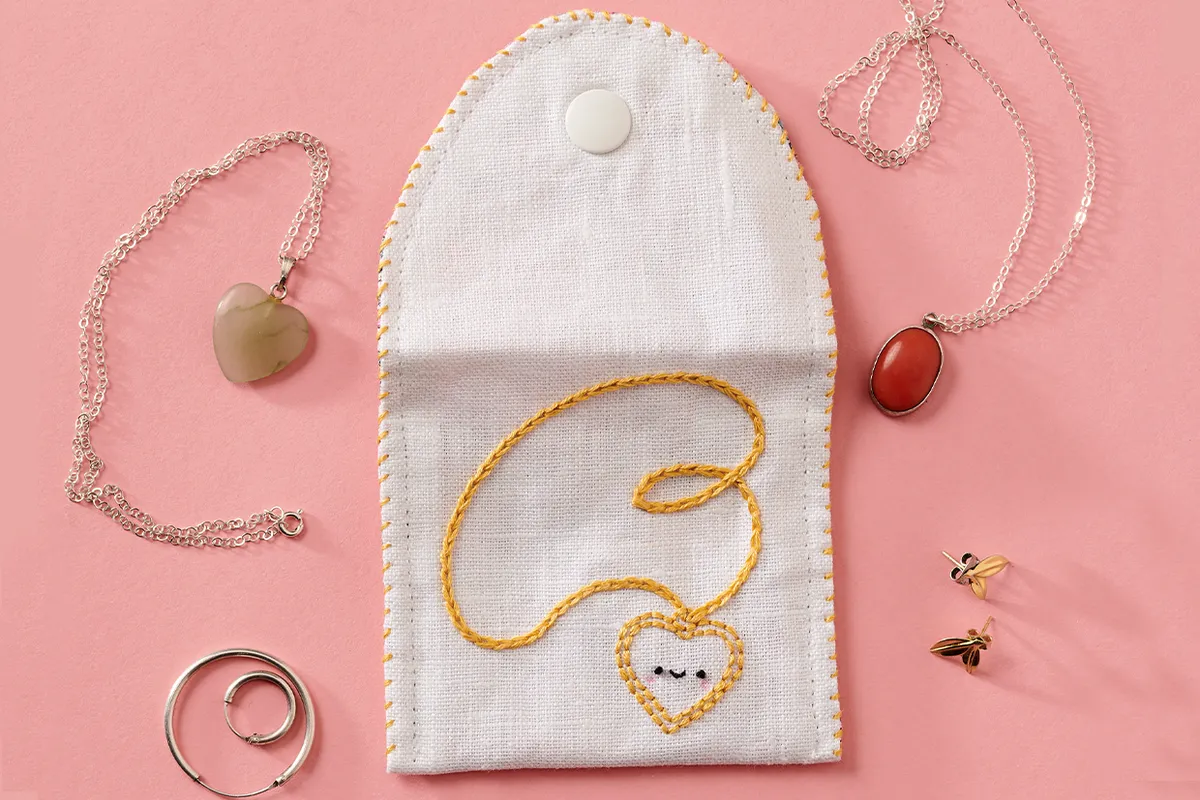
The design features white linen and brightly patterned inner lining which we think compliments each other very well, of course, you are able to choose your own colours and patterns to suit your loved one's style. On the front of the linen, you'll find a seriously cute kawaii-style embroidered locket with blushing cheeks and a cute smile.

The cute fabric envelope is suitable for beginners to embroidery and sewing (you don't need a machine it can be done by hand). If you are new to embroidery or simply need a little refresh, take a look at our embroidery for beginners guide which contains everything you need to get started on this adorable fabric envelope.

The fabric envelope was designed by Mollie Johanson and first appeared in Love Embroidery issue 10.

Stitches key for the fabric envelope

Fabric envelope materials:

  • Linen fabric: 30x30cm, white
  • Stranded cotton: 1 skein each of black and yellow
  • Lightweight linen fabric: 15x27cm, patterned
  • Iron-on interfacing: 15x27cm
  • Felt: 1.5cm squares x2, white
  • Pink crayon
  • Fabric glue
  • Press stud<
  • Sewing machine (optional)
  • Basic embroidery kit

Free fabric envelope template

You’ll also need the free fabric envelope template.

You will need:

  • Linen fabric
  • Stranded cotton
  • Lightweight linen fabric
  • Iron on interfacing
  • Felt
  • Fabric glue
  • press stud
  • Sewing machine (optional)
  • Basic embroidery kit
  • pink pencil crayon

Step 1

To begin, apply the iron-on interfacing to the back of the white linen. Then, transfer the pouch and the locket templates onto the front of the white linen, so it’s lined up with the interfacing. Position the locket pattern centrally within the pouch outline and 7cm up from the bottom. Use four strands of yellow to stitch the chain in Chain Stitch and the locket in Backstitch. Stitch half of the locket loop first, then stitch the chain over it. Finish the loop by stitching over the chain.
fabric envelope step 1

Step 2

Use two strands of black to stitch French Knots for the eyes, then add the smile using Scallop Stitch. Add some rosy cheeks to the locket using a pink crayon.

fabric envelope step 2

Step 3

Cut out both the embroidered piece and the patterned lining piece for the envelope using the template outline.

fabric envelope step 3

Step 4

Pin the embroidered linen and patterned lining pieces with RS together. Sew around the sides with a 1cm seam allowance, leaving an opening on the straight edge. Snip darts in the seam on the curved edge and clip the corners. Glue the two felt squares onto the linen side, centering them about 1cm from the curved end and 2cm from the flat end.

fabric envelope step 4

Step 5

Turn the envelope right-side out. Press and then topstitch along the edge to close the opening. Fold the flat end up so the envelope is folded in thirds. Topstitch along the sides about 5mm from the edge.

fabric envelope step 5

Step 6

Attach the two parts of the press stud to the fabric on the areas reinforced with felt. You could also use hook and loop tape as a substitute for the press stud in this project. Use four strands of yellow to whip stitch around the edges for a final finishing touch. To customise this design, swap out the face and stitch your initials or a design that reminds you of a favourite locket instead.

fabric envelope step 6

More like the fabric envelope

We hope you loved this gorgeous fabric envelope. Are you looking for more romantic projects? Try the heart embroidery or the valentines embroidery for some sweet inspiration. We also have lots of other free projects like this lovely free embroidered buttons pattern, which will liven up your coat! If you can’t get enough of the moon and stars, take a look at the constellation embroidery or the star embroidery (we adore this one). If you’re a nature lover check out the embroidered wall hanging, the mushroom embroidery pattern or the bee embroidery. Want to relax in the evening, try this beautiful wildflower design. If you’re also looking to delve into machine embroidery or would like to find out more about it take a look at our guide to the best embroidery machine.

About the designer:

Mollie Johanson

Mollie has loved creating and crafting cute things for as long as she can remember. She is the author of Stitch Love: Sweet Creatures Big & Small and a regular contributor to Simply Sewing magazine. Mollie lives near Chicago and is happiest with a cup of coffee, stitching, and her family close at hand.

Check out Mollie’s website and Instagram: @molliejohanson