Free teacup embroidery

Decorate your reading nook, stitch yourself a quick bookmark or brighten a friend’s day with these trinkets designed by Anne Oliver.

Try 6 issues of Love Embroidery magazine for just £9.99| SAVE 77%

Published: June 28, 2022 at 9:00 am

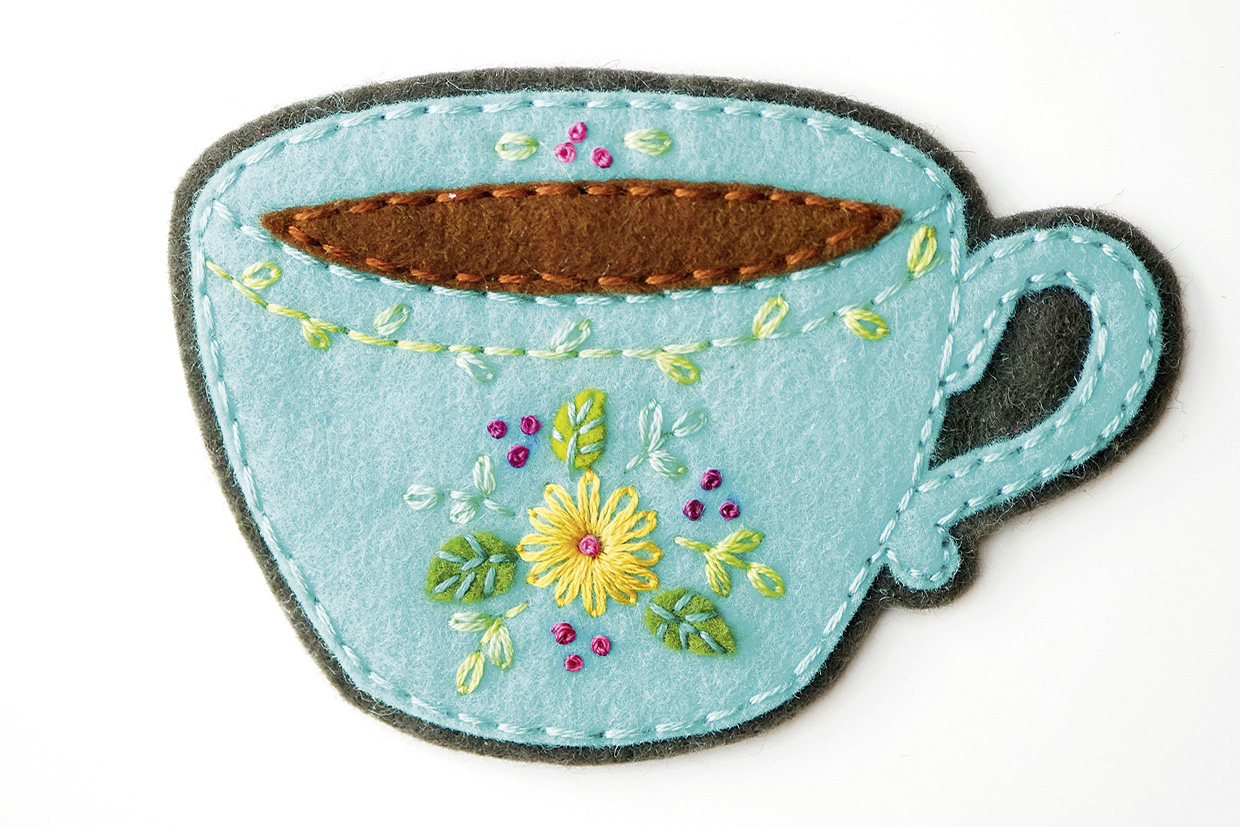
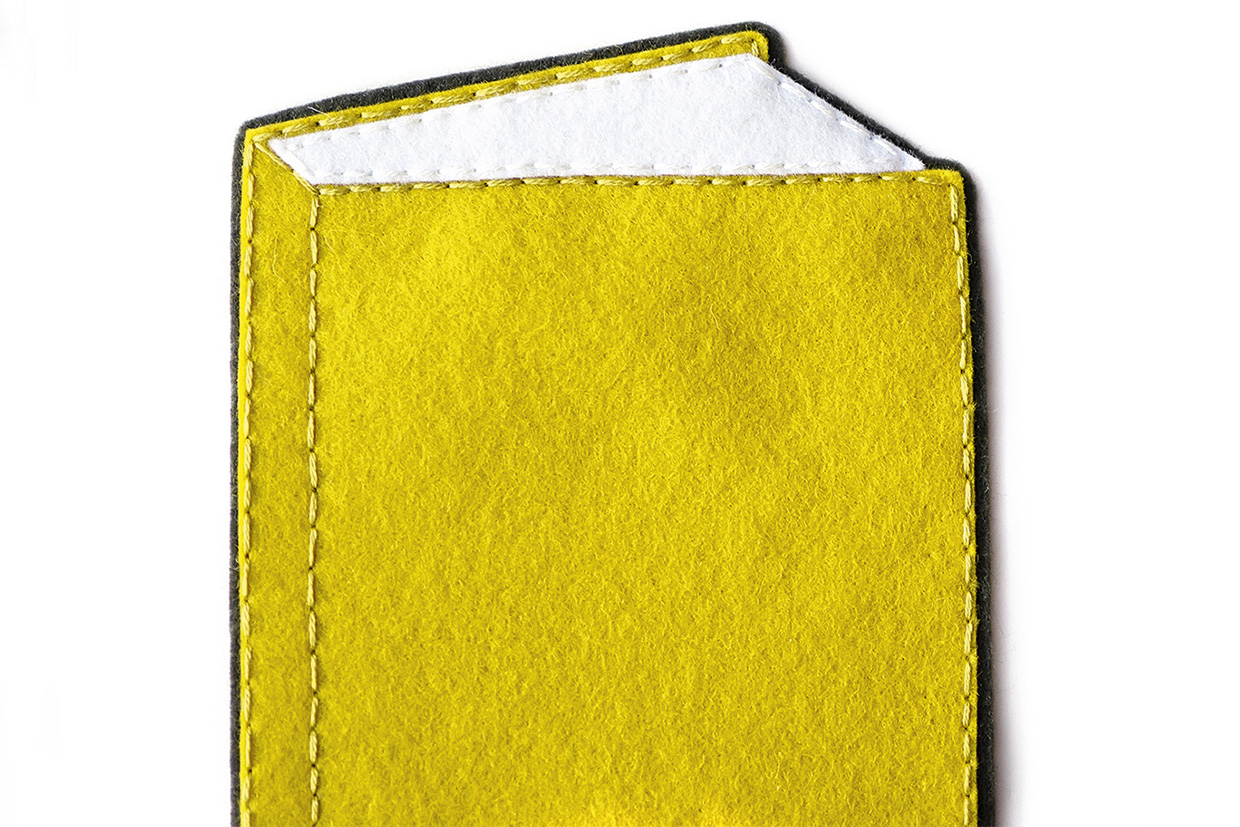
Get comfy in your cosiest armchair and stitch these beautiful trinkets designed by Anne Oliver. These cute little decorations make wonderful bookmarks, trinkets or displayed as a decoration in your book nook. The first design is a mustard yellow book made of felt and embroidered with a bright pink flower. The second is a blue tea cup with a pretty yellow floral design.

These pretty bookmarks also make wonderful gifts for friends and family, if you want to give something special and homemade! In this guide you'll find everything you need to create these trinkets, we'll show you step-by-step how to make them, plus you'll find a stitch guide and a list of all the tools and materials that you'll need below.

This is a great project for beginners, as it is quick and easy to complete, and we’re sure it’ll give you a cosy feeling. Please visit our embroidery guide for beginners if you need some advice on embroidery or any of the stitches listed below.

The teacup embroidery was designed by Anne Oliver and first appeared in Love Embroidery issue 11. Looking for similar projects? Sign up for our newsletter to get weekly inspiration and free patterns!

Stitches key:

For other stitching help, try our embroidery stitch library.

What you will need:

  • Wool felt: 23x30cm, aqua, brown, charcoal, dark green, light green, magenta, mustard and white
  • Stranded cotton: 1 skein each of aqua, brown, charcoal, teal, white and yellow
  • DMC Colour Variations stranded cotton: 4050 (aqua) and 4210 (pink)
  • PVA glue (optional)
  • Basic embroidery kit

(Please note: Work in two strands of thread throughout the design, unless otherwise stated.)

You’ll also need the free teacup embroidery template.

Tips & Tricks

  • To hold a felt shape in place while you stitch it, you can either tack the two pieces together or glue them with a few small dots of white tacky glue. Tacking stitches are long, easily visible, and temporary stitches that are removed after your pieces are stitched in place.
  • If you use glue to attach your pieces before stitching, make sure you only use tiny dots of glue (so it won’t soak through the felt) and don’t put glue anywhere you will be stitching later, as dried glue is difficult to get your needle and thread through.
You will need:

  • Wool felt
  • Stranded cotton
  • DMC stranded cotton
  • PVA glue
  • Basic embroidery kit

Step 1

Teacup design

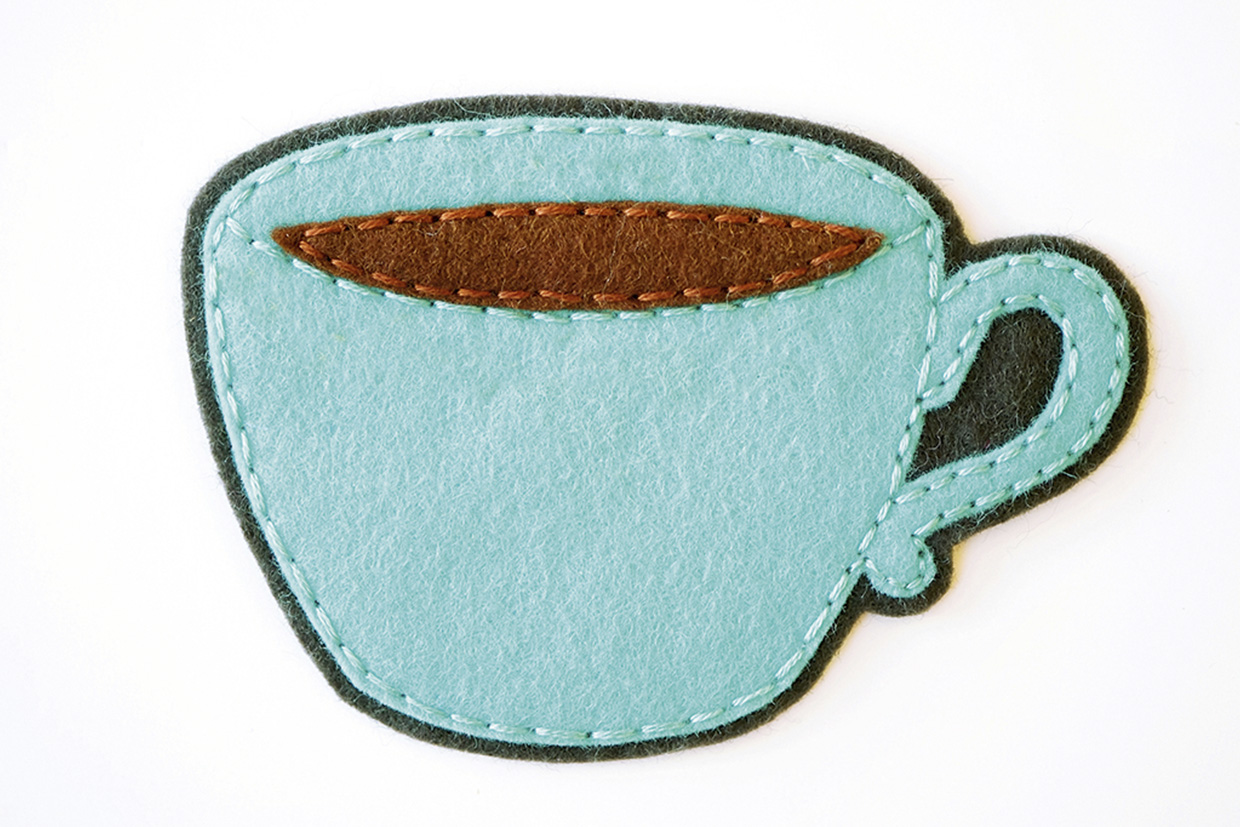
Use the templates to cut out all of the felt pieces for the teacup and book designs and place them into separate piles. Refer to the templates on p73-75 for colours and amounts. Transfer the design from the embroidery template onto the teacup shape, or stitch freehand using the template as a guide. Tack together the teacup shape with one of the teacup base shapes. Use Backstitch in a shade of aqua that closely matches the felt colour and sew around the edge of the teacup and the handle, then add the stitched rim. Next, place the tea shape above the rim and Backstitch around the edge in a matching shade of brown. Remove the tacking stitches.
teacup embroidery step 1

Step 2

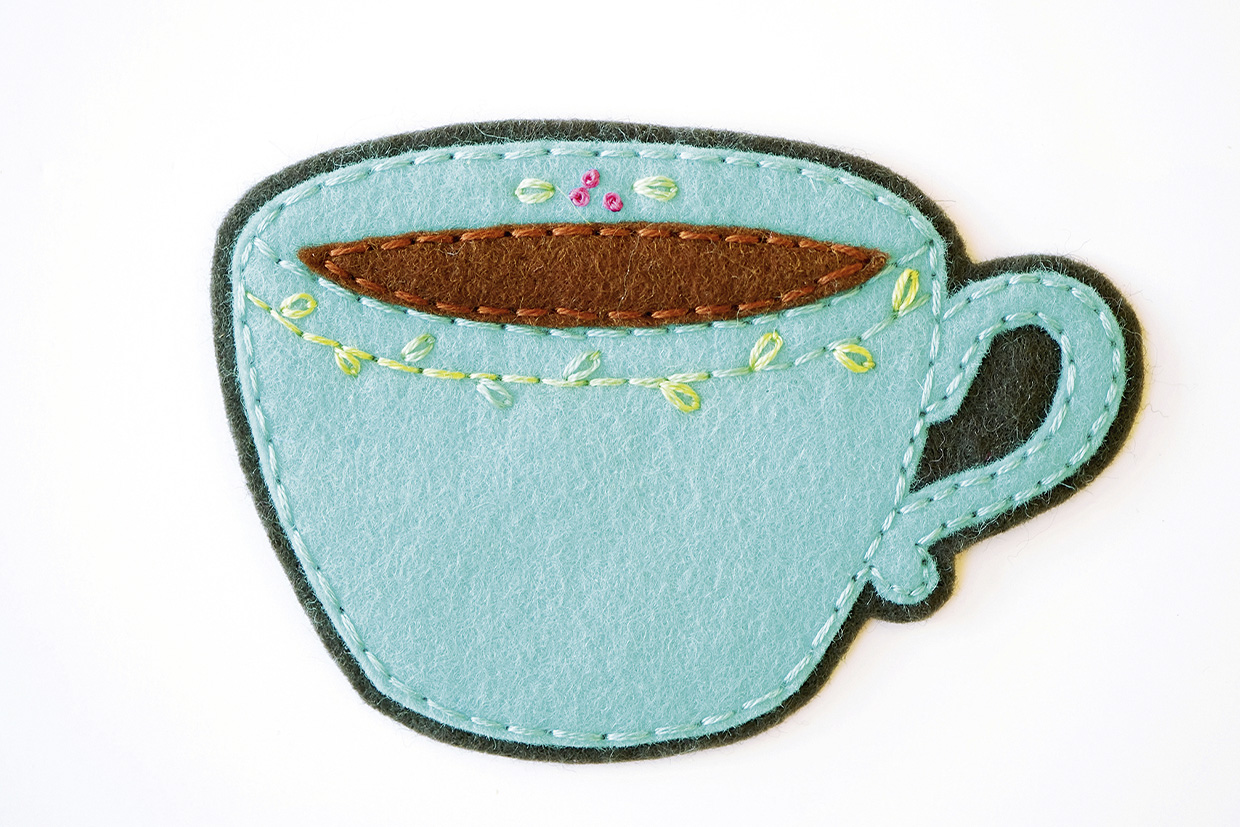
Stitch the vine running under the rim of the teacup using variegated aqua. Use Backstitch for the stem and Lazy Daisy Stitch for the leaves. At the top of the teacup rim, above the tea, stitch three French Knots to make berries using variegated pink. For the leaves on either side of the berries, work Lazy Daisy Stitches using variegated aqua.
teacup embroidery step 2

Step 3

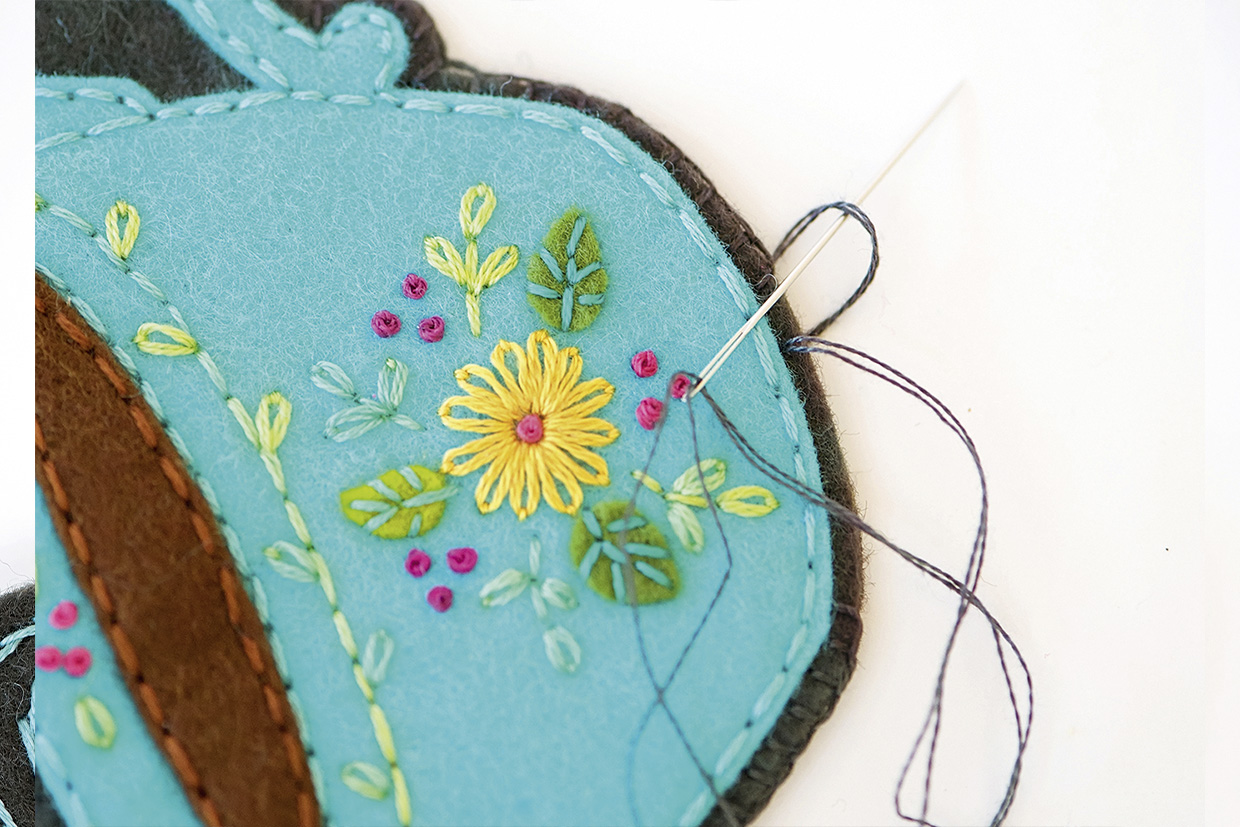
Stitch a French Knot in the centre of the flower using variegated pink, wrapping the thread around the needle three times to create a larger knot. Then, make a circle of Lazy Daisy Stitches around the knot in yellow. Use Straight Stitch in teal to attach the three felt leaves. Stitch the tiny leaf sprigs with either teal or variegated aqua, using Backstitch for the stems and Lazy Daisy Stitches for the leaves. Work each little trio of French Knot berries using variegated pink.
teacup embroidery step 3

Step 4

Book design

Transfer the design from the embroidery template onto the book shape, or stitch freehand using the template as a guide. Tack together the book shape with one of the book base shapes. Use Backstitch in a shade of yellow that closely matches the colour of your felt and sew around the edge of the book, the spine, and across the top of the book cover. Remove your tacking stitches. Then, place the white pages shape on top and Backstitch around the edges in white.
teacup embroidery step 4

Step 5

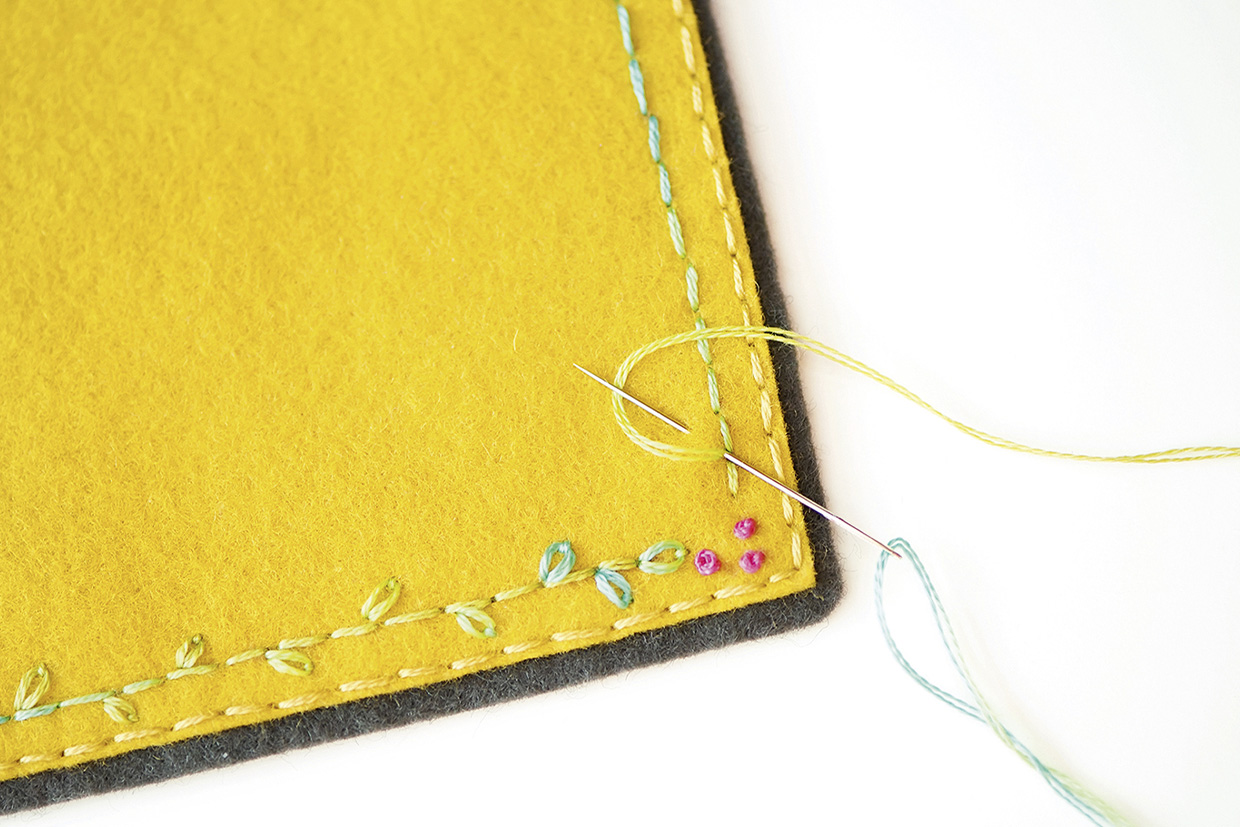
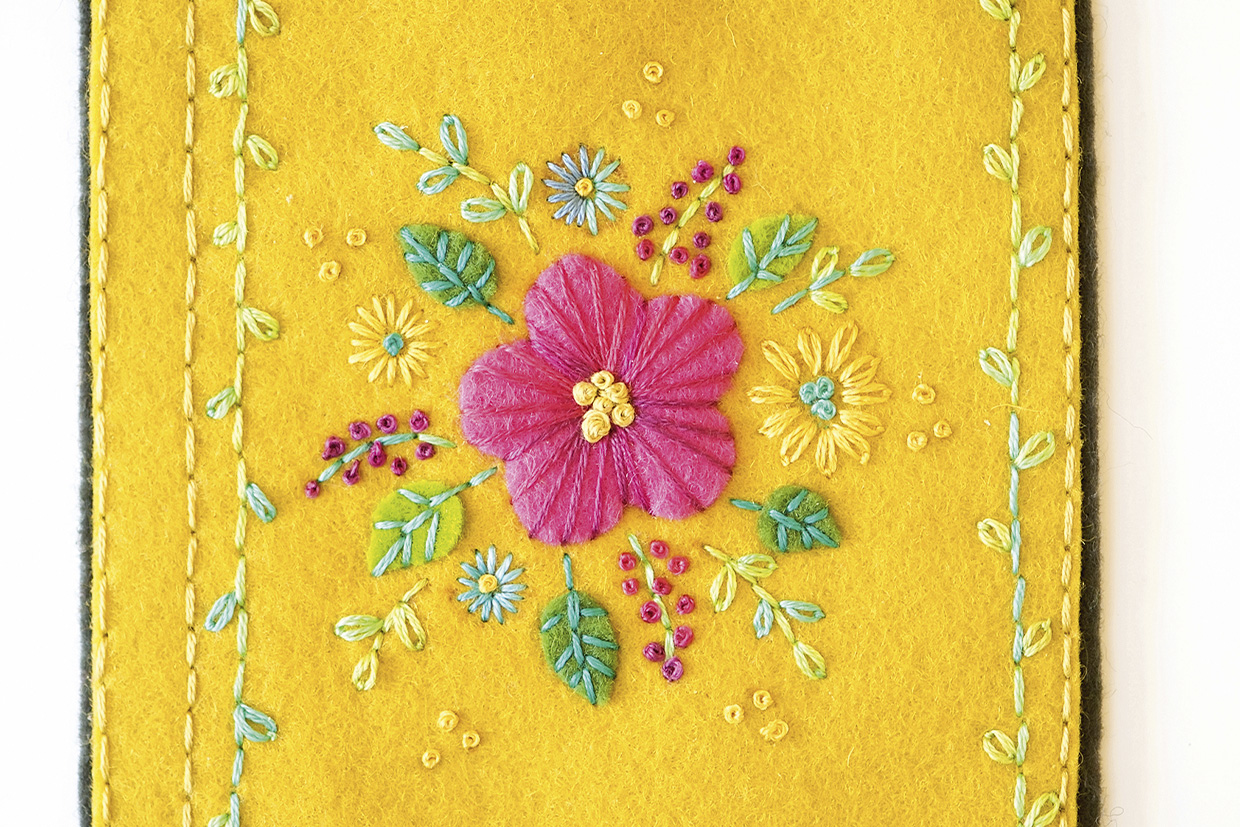
Stitch three French Knots in each corner using variegated pink. Backstitch a line about 6mm away from each edge of the cover with variegated aqua. Then, make small Lazy Daisy Stitches alternating on either side of the stitched line in the same colour to make a vine.
teacup embroidery step 5

Step 6

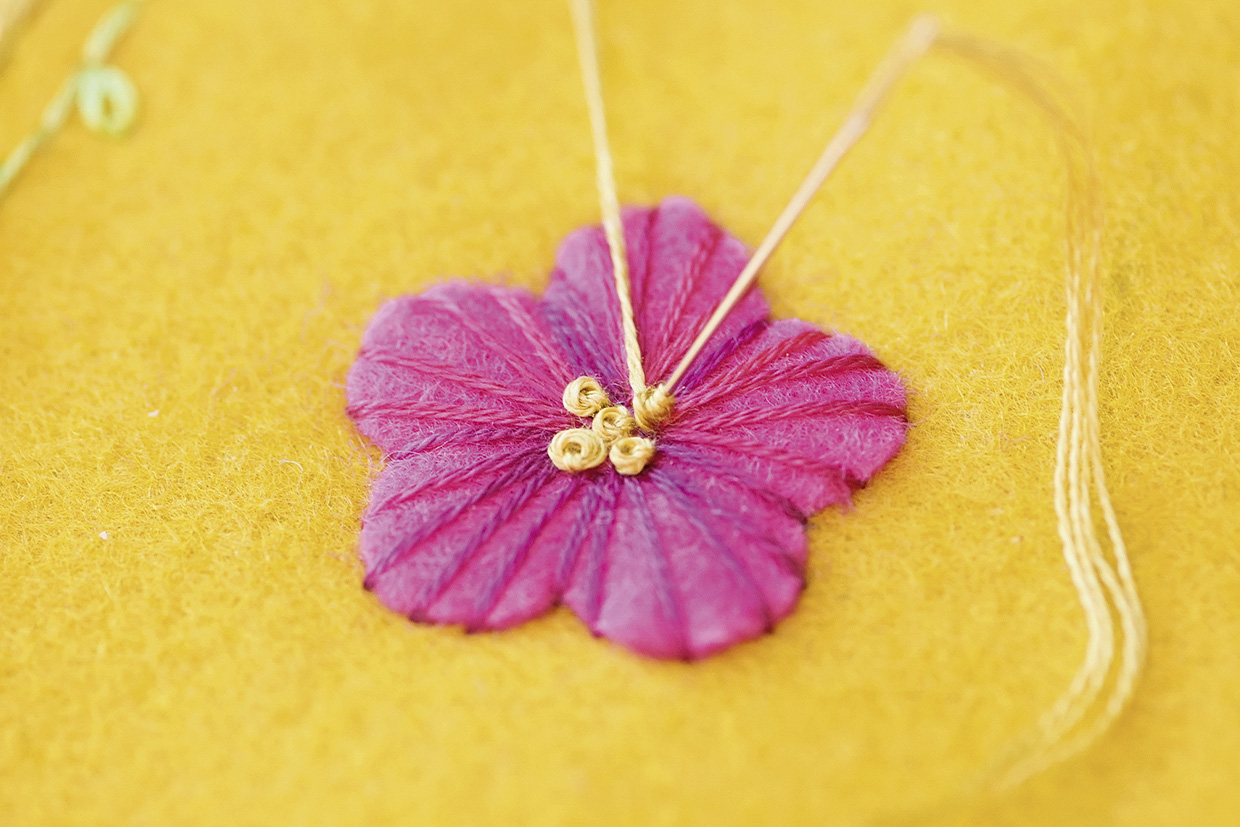
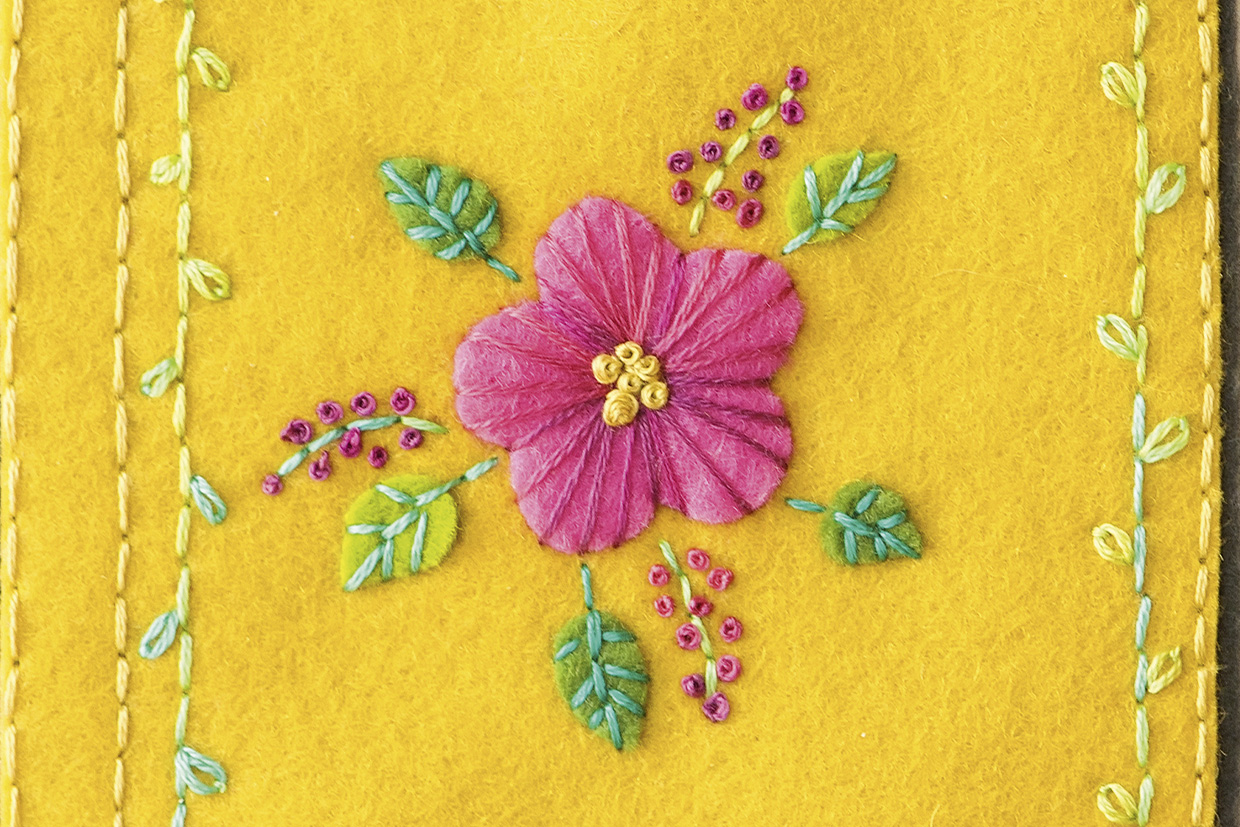
Attach the pink felt flower to the centre of the book using long Straight Stitches in variegated pink, as shown. Then, work six French Knots in the centre of the flower in yellow. Wrap the thread around the needle three times to make a larger knot.

teacup embroidery step 6

Step 7

Next, attach the small felt leaves with a line of Backstitch down the centre and Straight Stitches for the veins using variegated aqua. Backstitch the stems of the berries with variegated aqua, then add the French Knot berries using variegated pink.
teacup embroidery step 7

Step 8

Stitch the centre of the medium flower using French Knots in variegated aqua and the petals using Lazy Daisy Stitches in yellow. Stitch the two small teal flowers with one yellow French Knot in the centre and a circle of teal Straight Stitches for the petals. For the other small flower, do the same thing but reverse the colours. Stitch the leaf sprigs using variegated aqua, working Backstitch for the stems and Lazy Daisy Stitch for the leaves.
teacup embroidery step 8

Step 9

Finishing your ornaments

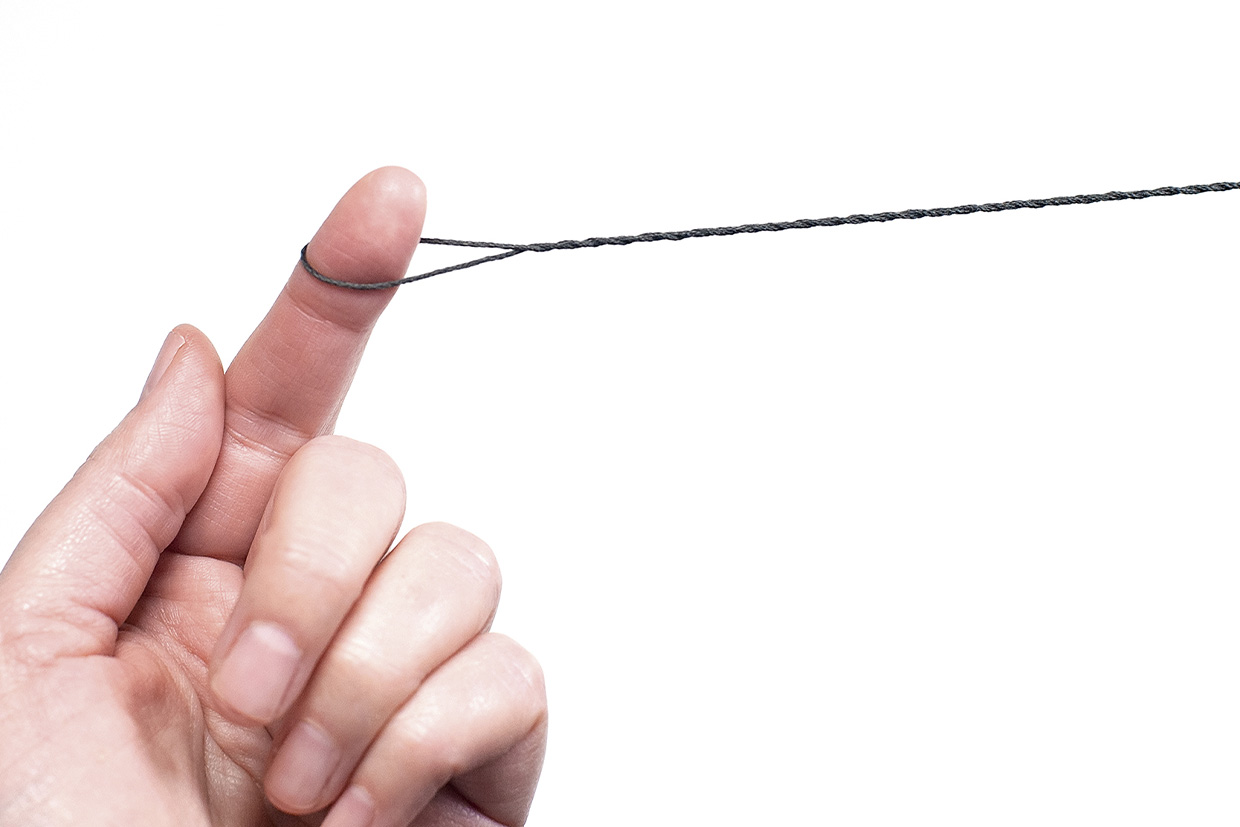
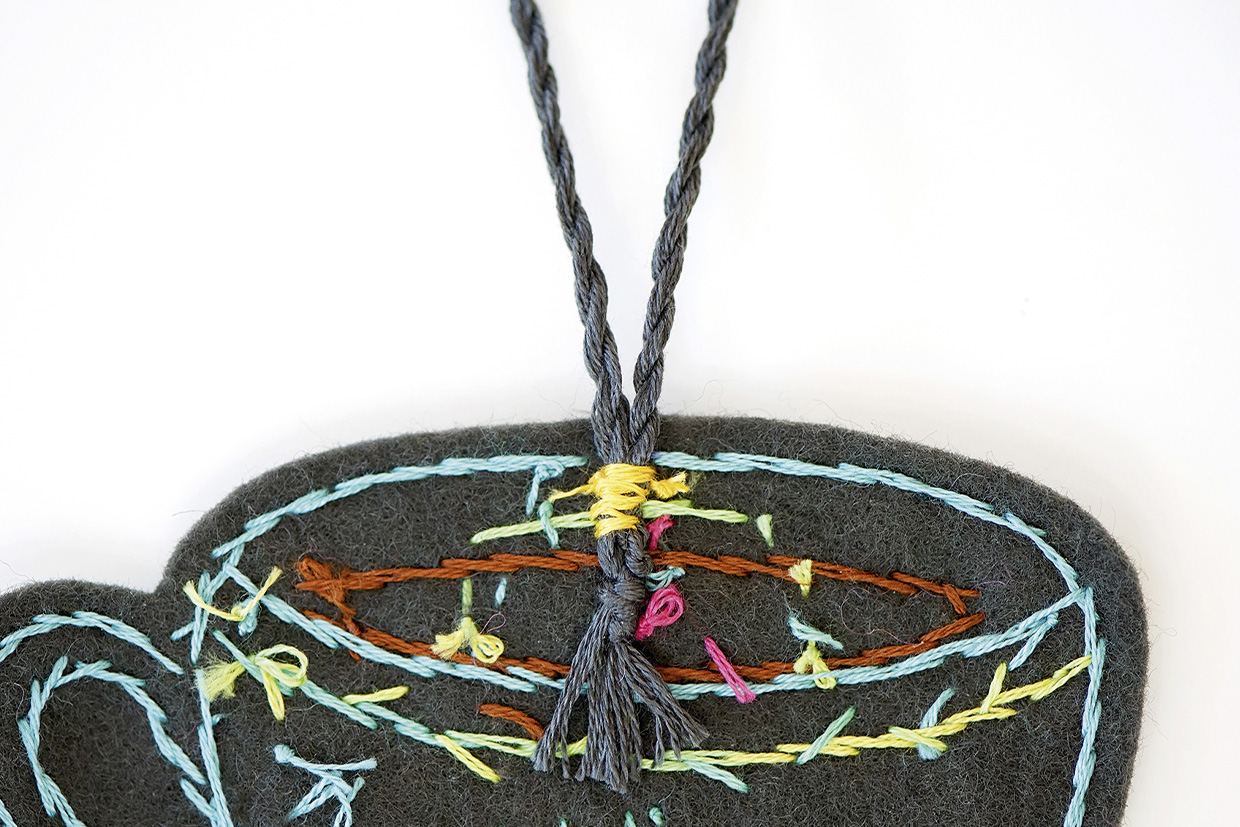
To make the hanging cord, cut a 1m length of all six strands of charcoal. Fold it in half and tie the cut edges together. Hold the tied end with one hand and insert your finger in the loop at the folded end. Wind the pieces until they are tightly twisted.
teacup embroidery step 9

Step 10

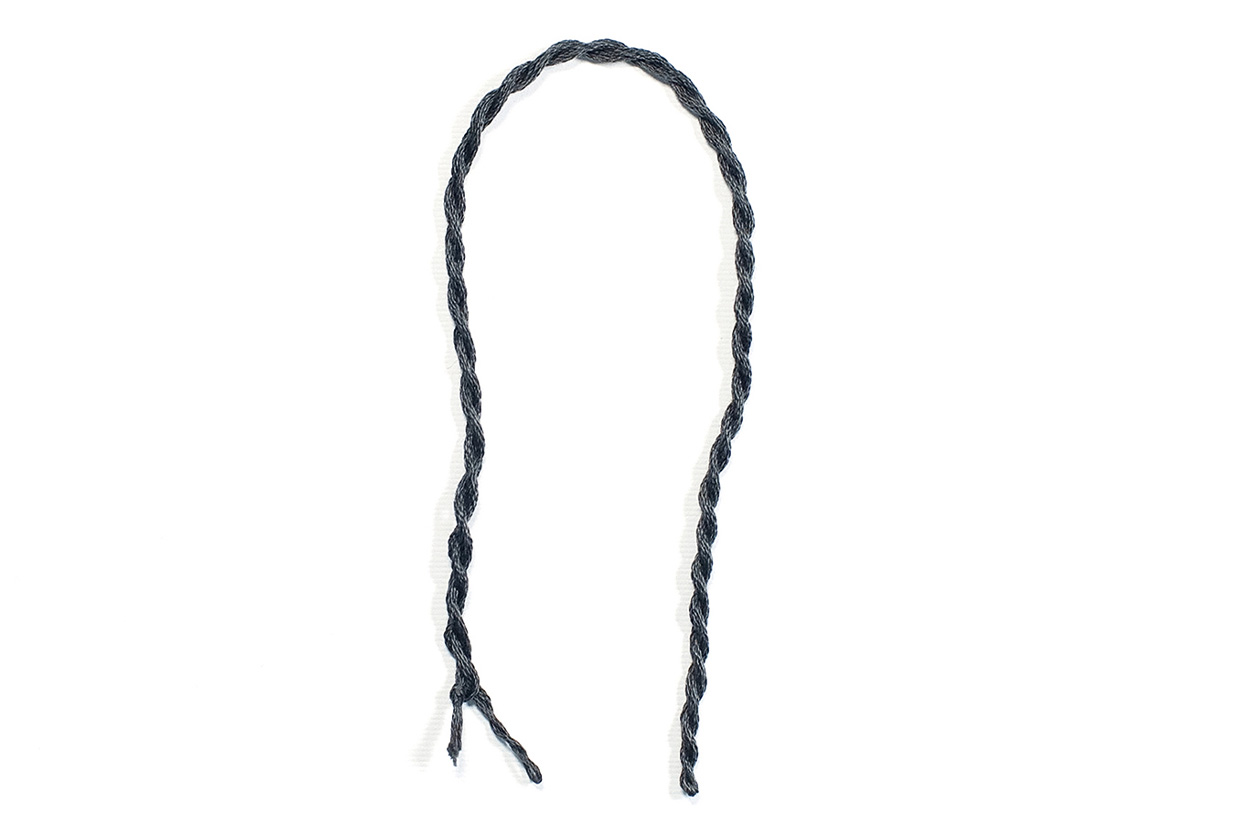
Fold the twisted thread in half – this will cause the threads to spiral around and twist together to create a cord that is now about 25cm long. Tie a knot at the loose ends to keep the cord twisted. Alternatively, you can use a pre-made length of cord if preferred.
teacup embroidery step 10

Step 11

Now, fold the 25cm cord in half again and tie the loose ends together. Glue or sew the tied ends of the cord onto the back of the embroidered design at the centre top.
teacup embroidery step 11

Step 12

Align the embroidered design panel to the matching base piece and Blanket Stitch around the edges with charcoal thread to attach the two pieces together.

teacup embroidery step 12

More like the teacup embroidery

We hope you loved this colourful embroidery hoop. Are you looking for similar projects? Don’t miss our free embroidered buttons pattern or the positive badges embroidery, which are both equally satisfying quick makes! We also have lots more nature-inspired patterns available, try the cactus embroidery, the deer embroidery, the mushroom embroidery pattern, the bee embroidery or this lovely embroidered wall hanging. Looking for a relaxing project, try this beautiful yet easy wildflower design or the plant embroidery. If you’re also looking to delve into machine embroidery or would like to find out more about it take a look at our guide to the best embroidery machine.