All products were chosen independently by our editorial team. This review contains affiliate links and we may receive a commission for purchases made. Please read our affiliates FAQ page to find out more.

How to make an origami Santa

Learn how to make this cute origami Santa with our brilliant step-by-step tutorial. This project is designed for beginners, and we have photos to guide you through each fold.

Try our magazines – get 6 issues from just £9.99!

Published: June 30, 2022 at 8:22 am

Make your own origami Santa using a single piece of square paper. There is no cutting or glueing involved in this tutorial, and although there are a lot of steps, there are no tricky folds, and we have step-by-step photography for each step.

This origami Santa will take around 10 – 15 minutes to fold, although you may take a little longer the first time around. Work on a hard, flat surface so that you can achieve the best folds. If you have a bone folder or paper creaser, use this to burnish each fold and flatten the creases for crisp folds. This will help you later in the tutorial too, as there become more layers to fold at once, and the paper becomes stiffer.

This origami Santa will lay flat, so it's ideal for adding to the front of a card as a focal feature!

Choose some paper that is single-sided with a white reverse side, as this will create the fur lining to Santa’s outfit. We’ve gone for red paper with a white reverse for the steps tutorial, but we love the green version! If you fancy boosting your stash, we’ve rounded up the best origami paper.

If you like this origami Santa tutorial, you might like some of the other origami projects we have here on Gathered. We highly recommend this origami dragon, origami rabbit, origami duck and this origami swan!

If you’re looking for super easy origami projects for children, be sure to check out these fantastic easy origami projects for kids and this easy origami butterfly. All our origami tutorials have easy-to-follow, step-by-step photos for each stage in the construction of the models, so you can fold with confidence. We also have these (super easy) origami cats and this adorable origami owl!

Or, why not keep it simple with this origami heart? Browse our pick of the best origami books, or if you’re on the hunt for more easy origami projects, we have them all collated here, in our easy origami for beginners article.

We love seeing what you make, so don’t forget to share your origami projects with us on Instagram, Facebook or Twitter, too!

Buy an origami kit!

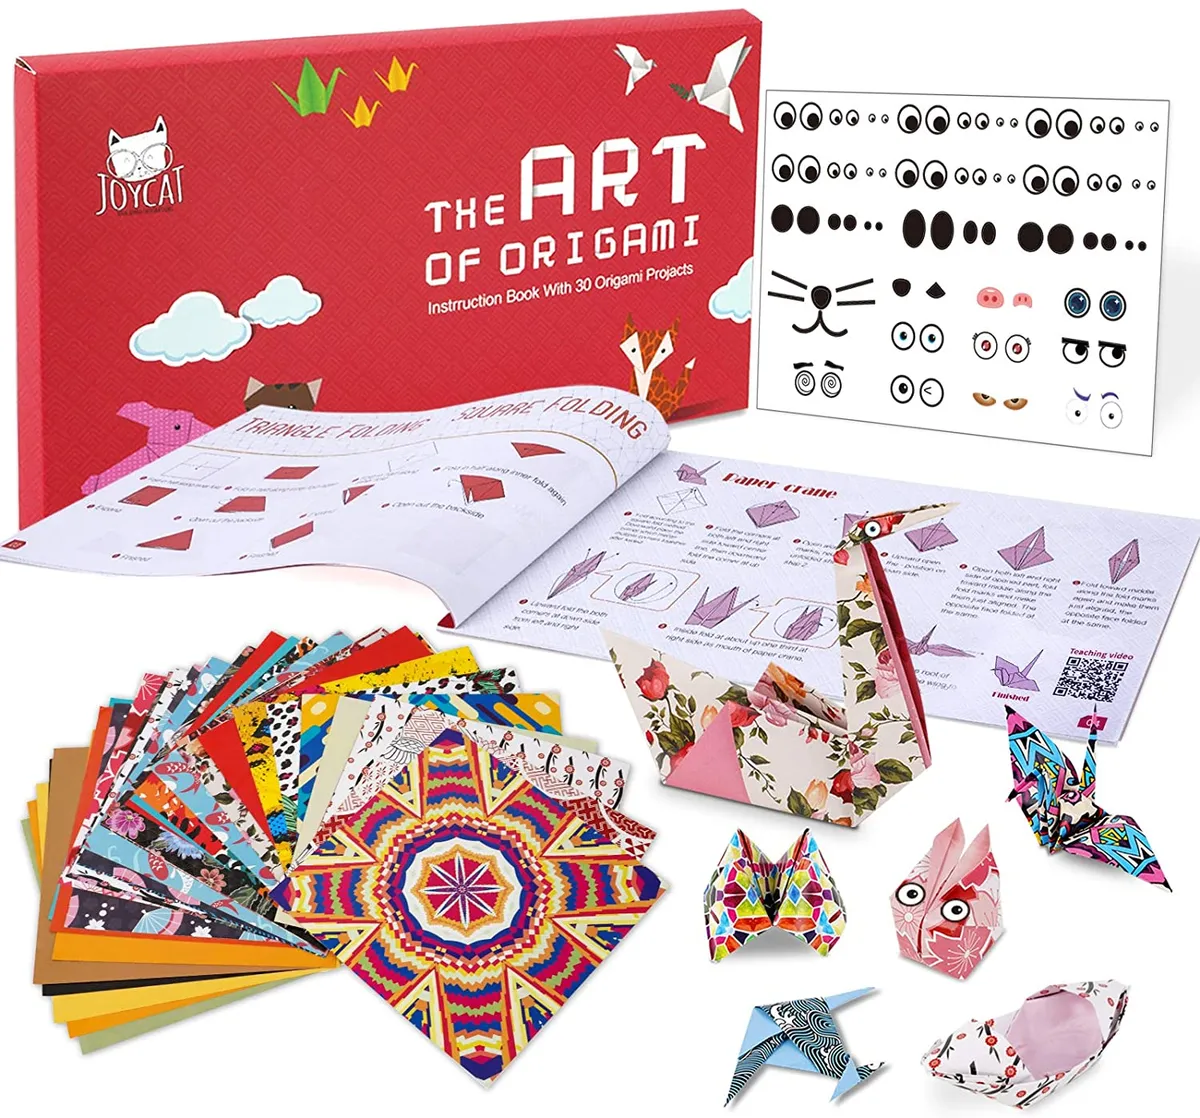
Give the gift of origami this Christmas with this fantastic origami paper kit! It contains 90 sheets of double-sided origami paper, plus a magazine full of instructions to make 30 different origami models. After you're done, finish off your papercraft masterpieces by adding eyes to your animals with the included sticker sheet.

The double-sided origami paper is made up of 30 different designs (three of each) split into 10 animal patterns, 10 kaleidoscope patterns and 10 Japanese patterns, all printed with coordinating colours on the reverse.

Origami Santa tutorial

This easy origami Santa can be made with no knowledge of origami, as long as you take it slow. If you want to jazz up your origami Santa, experiment with different types of paper, or why not give him a white pompom at the end of his hat? We've wrapped his legs in black paper, and given him a belt across his belly to finish.

We love to see your origami models, so be sure to tag us on Instagram if you try out this tutorial!

For the purpose of this origami Santa step-by-step tutorial, we have used paper that is red on one side and white on the other.

Step 1

Start with a square piece of paper. We’re using a piece 25 x 25cm, as this origami Santa gets much smaller as you fold it.

Origami Santa tutorial – how to make an origami Santa, step 1

Step 2

Turn the paper over, and fold it in half, so that the crease is at the top.

Origami Santa tutorial – how to make an origami Santa, step 2

Step 3

Keeping the folded edge at the top, fold one of the corners down so that the vertical edge meets the bottom of the paper.

Origami Santa tutorial – how to make an origami Santa, step 3

Step 4

Repeat on the other side, creating a triangle shape.

Origami Santa tutorial – how to make an origami Santa, step 4

Step 5

Open the paper back up.

Origami Santa tutorial – how to make an origami Santa, step 5

Step 6

Fold one of the corners up. If you’re using a piece of 25 x 25cm paper like we are, this should be around 2cm. This is the start of the fuzzy sleeve cuffs to your origami Santa!

Origami Santa tutorial – how to make an origami Santa, step 6

Step 7

Fold that corner up again to give the sleeve cuff its shape.

Origami Santa tutorial – how to make an origami Santa, step 7

Step 8

Turn the paper over, and repeat on the reverse on the same side as the front (so with the paper turned over this will be on the other side). Fold the corner up first to create the small triangle.

Origami Santa tutorial – how to make an origami Santa, step 8a
Origami Santa tutorial – how to make an origami Santa, step 8b

Step 9

Fold that same corner up again to create a mirror image of the cuff.

Origami Santa tutorial – how to make an origami Santa, step 9

Step 10

Turn the paper back over again so the cuffs are on the left-hand side.

Origami Santa tutorial – how to make an origami Santa, step 10

Step 11

Fold the paper in half to create a square shape.

Origami Santa tutorial - how to make an origami Santa, step 11

Step 12

Next, open up the front layer of paper and flatten to create a triangle shape, with a square shape to the right-hand side.

Origami Santa tutorial - how to make an origami Santa, step 12a Origami Santa tutorial - how to make an origami Santa, step 12b Origami Santa tutorial - how to make an origami Santa, step 12c

Step 13

Turn the model over.

Origami Santa tutorial - how to make an origami Santa, step 13

Step 14

Fold the left-hand edge up, so that it lines up with the top of the model.

Origami Santa tutorial - how to make an origami Santa, step 14

Step 15

Fold down the top layer, so that the corner meets the fold.

Origami Santa tutorial - how to make an origami Santa, step 15

Step 16

Push this corner up, so that there’s a gap between the corner and the fold.

Origami Santa tutorial - how to make an origami Santa, step 16

Step 17

Mountain fold along the first line, so that it tucks inside the model.

Origami Santa tutorial - how to make an origami Santa, step 17

Step 18

Open up the model to reveal a square shape.

Origami Santa tutorial - how to make an origami Santa, step 18

Step 19

Fold the tip of this square up.

Origami Santa tutorial - how to make an origami Santa, step 19

Step 20

Close the square again, bringing the bottom left-hand corner back up to the top right.

Origami Santa tutorial - how to make an origami Santa, step 20

Step 21

Fold the top right-hand corner down, leaving a gap in the middle. The top white line is the brim of Santa’s hat, the middle part is his face, and the triangle at the bottom is his beard!

If you want to draw a face on your origami Santa, leave a slightly larger space in the middle.

Origami Santa tutorial - how to make an origami Santa, step 21

Step 22

Fold the right-hand side down, so that the edge meets the middle. Crease the fold.

Origami Santa tutorial - how to make an origami Santa, step 22

Step 23

Open it back out again.

Origami Santa tutorial - how to make an origami Santa, step 23

Step 24

Fold the bottom right-hand corner up, so that the horizontal line at the bottom meets the middle. Crease the fold.

Origami Santa tutorial - how to make an origami Santa, step 24

Step 25

Open back up. You’ll see there is a cross in the middle.

Origami Santa tutorial - how to make an origami Santa, step 25

Step 26

Using the two creases that you just made, pinch the triangle and fold it in half, creasing from the cross in the middle all the way to the cuff on the right. This is one of your origami Santa’s arms!

Origami Santa tutorial - how to make an origami Santa, step 26a Origami Santa tutorial - how to make an origami Santa, step 26b

Step 27

Fold the arm upward and burnish the creases.

Origami Santa tutorial - how to make an origami Santa, step 27

Step 28

We’re going to make Santa’s arms stick upwards, so fold the arm out to the left-hand side as shown.

Origami Santa tutorial - how to make an origami Santa, step 28

Step 29

Open up the origami Santa model by lifting the top left-hand corner and bringing it all the way over to the right.

Origami Santa tutorial - how to make an origami Santa, step 29a
Origami Santa tutorial - how to make an origami Santa, step 29b

Step 30

Next, we’re going to repeat for the other arm. Fold the left-hand edge inwards, so the diagonal line meets the middle. Burnish the fold.

Origami Santa tutorial - how to make an origami Santa, step 30

Step 31

Open the model back up.

Origami Santa tutorial - how to make an origami Santa, step 31

Step 32

Bring the bottom left-hand corner up so that it meets the middle. Burnish the fold.

Origami Santa tutorial - how to make an origami Santa, step 32

Step 33

Open the model back up to reveal the cross we saw on the other side.

Origami Santa tutorial - how to make an origami Santa, step 33

Step 34

Like before, pinch the two sides together, using the creases we just made as a guide. Fold the arm in half, and crease until the cross.

Origami Santa tutorial - how to make an origami Santa, step 34

Step 35

Fold the arm upwards to that it aligns with the centre.

Origami Santa tutorial - how to make an origami Santa, step 35

Step 36

Fold the arm out at approximately the same angle as the other one. It helps if you open up the model to do this so you can see both the arms.

Origami Santa tutorial - how to make an origami Santa, step 36a
Origami Santa tutorial - how to make an origami Santa, step 36b

Step 37

Turn the model back over, and orient so that your origami Santa is the right way up.

Origami Santa tutorial - how to make an origami Santa, step 37

Step 38

Fold the left-hand corner upwards.

Origami Santa tutorial - how to make an origami Santa, step 38

Step 39

Turn the model over again.

Origami Santa tutorial - how to make an origami Santa, step 39

Step 40

Fold the section on the right-hand side over, creasing the paper along the edge of Santa’s body.

Origami Santa tutorial - how to make an origami Santa, step 40

Step 41

Open up the model and tuck the edge that you’ve just folded round, inside the model. Leave the hand on the outside!

Origami Santa tutorial - how to make an origami Santa, step 41

Step 42

Turn the model over. This is what it should look like from the front! You can stop here if you like, or you can shape the legs a little.

Origami Santa tutorial - how to make an origami Santa, step 42

Step 43

Fold the legs up and burnish the fold.

Origami Santa tutorial - how to make an origami Santa, step 43

Step 44

Approximately 1cm from this fold, fold the legs back down again.

Origami Santa tutorial - how to make an origami Santa, step 44

Step 45

Tuck the top of the legs inside the body to neaten.

Origami Santa tutorial - how to make an origami Santa, step 45

Step 46

If you wish, draw some eyes onto your Santa using a black fine liner pen to finish!

Origami Santa tutorial - how to make an origami Santa, step 46

Step 47

Congratulations, you have completed your origami Santa!

Origami Santa tutorial - how to make an origami Santa, step 47

Step 48

If you want to decorate your Santa, use a black marker pen or strips of black paper, cover his legs and add a strip around his waist for a belt. Glue a pompom to the top of his hat to finish.

How to make an easy origami Santa

Buy origami supplies

Christmas origami paper

How to make an origami Santa – Christmas origami paper

Get into the Christmas spirit with this fun collection of Christmas origami paper. Coming in at 80gsm, it’s a good weight for folding origami models (traditional origami paper is typically thinner as this helps you get a more precise crease). There are 100 sheets with 10 different contemporary-meets-traditional patterns, including geometric animals and swirling foxes.

Christmas paper decorations book

How to make an origami Santa – Paper Christmas book

Give your holiday season the homemade touch, from wrapping paper to tree decorations with Paper Christmas by Emily Dawe. Including 64 templates, Emily shows you how to create and style your Christmas in paper, from greetings cards and gorgeous gift tags to beautiful bunting and seasonal snowflake table runners. Use wrapping paper, origami paper or card with a hint of glitter and a spark of inspiration to make your Christmas extra special.

Single-sided origami paper

How to make an origami Santa – plain origami paper

This plain origami paper is ideal for practising your skills, and it comes with a whopping 50 different colours in the pack, each with two sheets. There’s a 17 x 17cm option, or if you’d like your paper a little bigger – there’s a 20 x 20cm option, too. It’s single-sided, so it’s good for those projects that show a little of the reverse, like this origami Santa, or our lovely origami swan.

Paper creaser

How to make an origami Santa – teflon paper creasers

Get nice, crisp folds on your origami models by burnishing the folds with a paper creaser. They’re also called ‘bone folders’ however, they don’t need to be made of bone and there are modern options available. Teflon paper creasers are a really great alternative as it’s a non-stick material, so it glides super-smoothly along your paper, allowing you to make the best of your origami hobby.

A2 cutting mat

How to make an origami Santa – A2 cutting mat

Folding origami models is much easier if you have a smooth, flat surface to fold on. This A2 cutting mat has printed measurements in both imperial and metric, so it’s useful when following different origami tutorials that require you to measure a certain distance.

Using a professional quality cutting mat will also help to protect your table surface from crafty mess from other projects. This Ansio brand cutting mat is of great quality, and we picked ours up in the sale – so keep your eyes peeled for discounts!


How to make an easy origami Santa

We hope you’ve enjoyed this origami Santa tutorial. We have plenty of other origami and Christmas projects here on Gathered, too – like this gorgeous origami Christmas tree, origami dragon or cute origami rabbit! Or, why not browse the best origami for beginners or origami Christmas decorations for more projects and inspiration?

We’ve also got the perfect projects for small children, so be sure to check out our easy origami for kids. Learn how to make a kid-friendly origami fish, cat and jumping frog, and there’s a video tutorial, too.