
Have you always wanted to have a go at jewellery making? Or perhaps you want to start a side hustle and make your own DIY jewelry to sell? With our jewellery making ideas you can get started today!
We've rounded up 34 of the best jewelry making ideas and tutorials, ranging from easy projects for the beginner crafter (or those who only have a short amount of time to spare) to projects which require a little extra time - all with simple, straightforward - and, best of all, free - tutorials and patterns.
- 16 DIY birthday cards for mom
- Vision board ideas that will change your outlook on life
- Settle in for an autumn painting session with these creative ideas
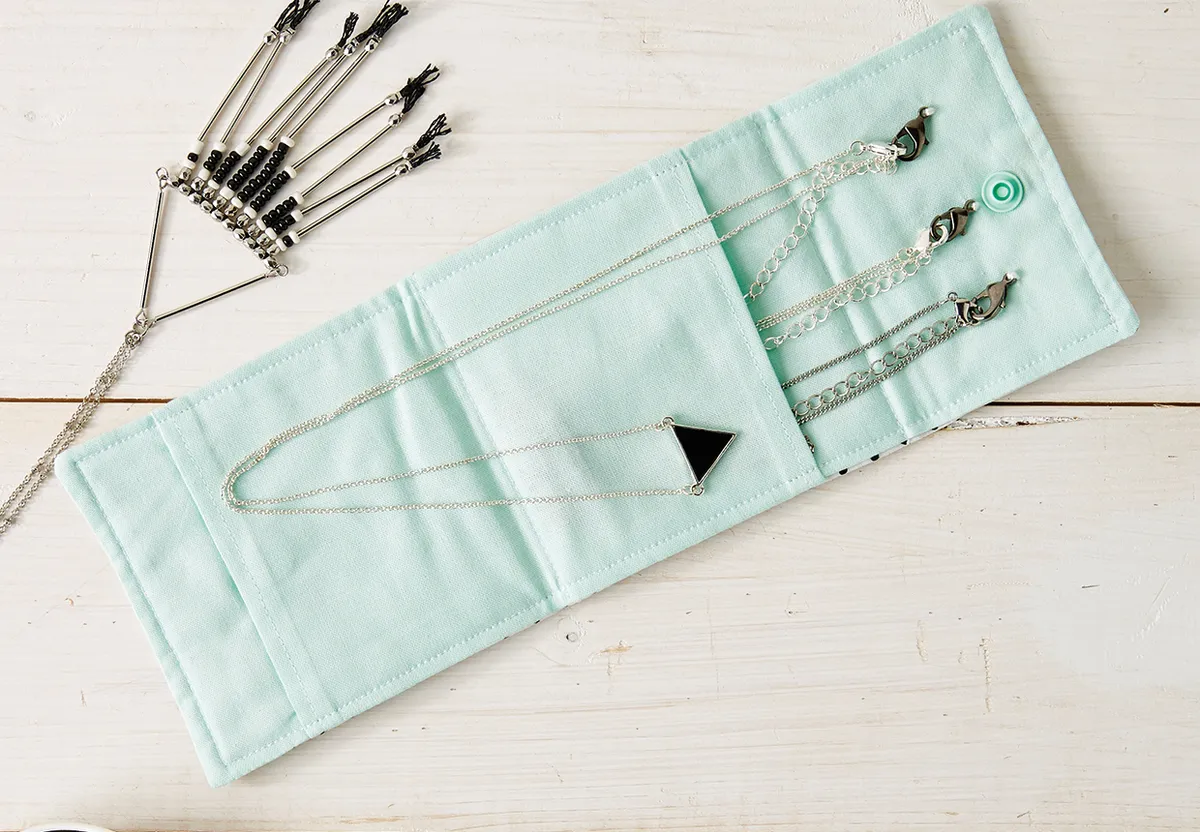
Need to store your new DIY jewellery? How about learning how to make a jewellery roll to keep all your homemade jewellery safe and protected? Want something for your dressing table? Check out this fun tutorial on how to make a clay trinket dish - we've even got a free template for you to make your own Monstera leaf dish!
Easy DIY jewellery making ideas
These projects are ideal if you are looking for quick and easy handmade jewelry ideas - they won't take long to make, and if you're selling your makes at craft fairs or on Etsy, you'll be able to batch make a lot quickly.
1. Make a vintage-style brooch
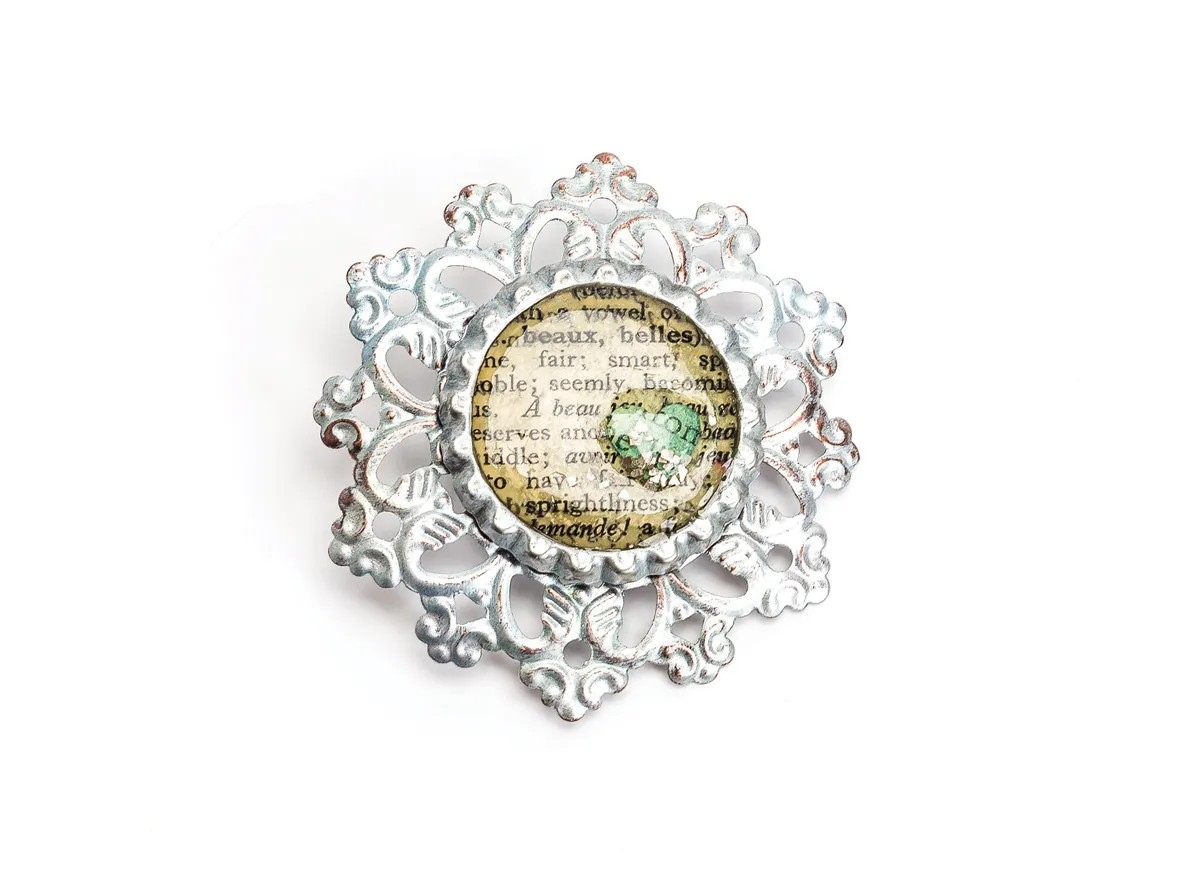
- Flatten a bottle cap using a die-cutting machine or a hammer.
- Cut a circle of book page paper to fit inside the base of the bottle cap; glue into place. Cut a tiny heart from cream text paper, colour with ink and attach (we used Distress Ink – see our guide to ink for the merits of Distress Ink). Apply Glossy Accents over the top of the paper, adding a little chunky glitter around the edges of the heart as you go.
- Die-cut a lace circle from strong card and paint silver (if you don't have strong card, you can cut your shape multiple times and layer up to create a good strong base). Or, if you prefer, paint a large vintage mechanical object silver (old pocket watch parts are excellent for this!). Once dry, mount bottle cap on top and add a brooch pin to reverse with strong glue.
2. DIY a tassel pendant
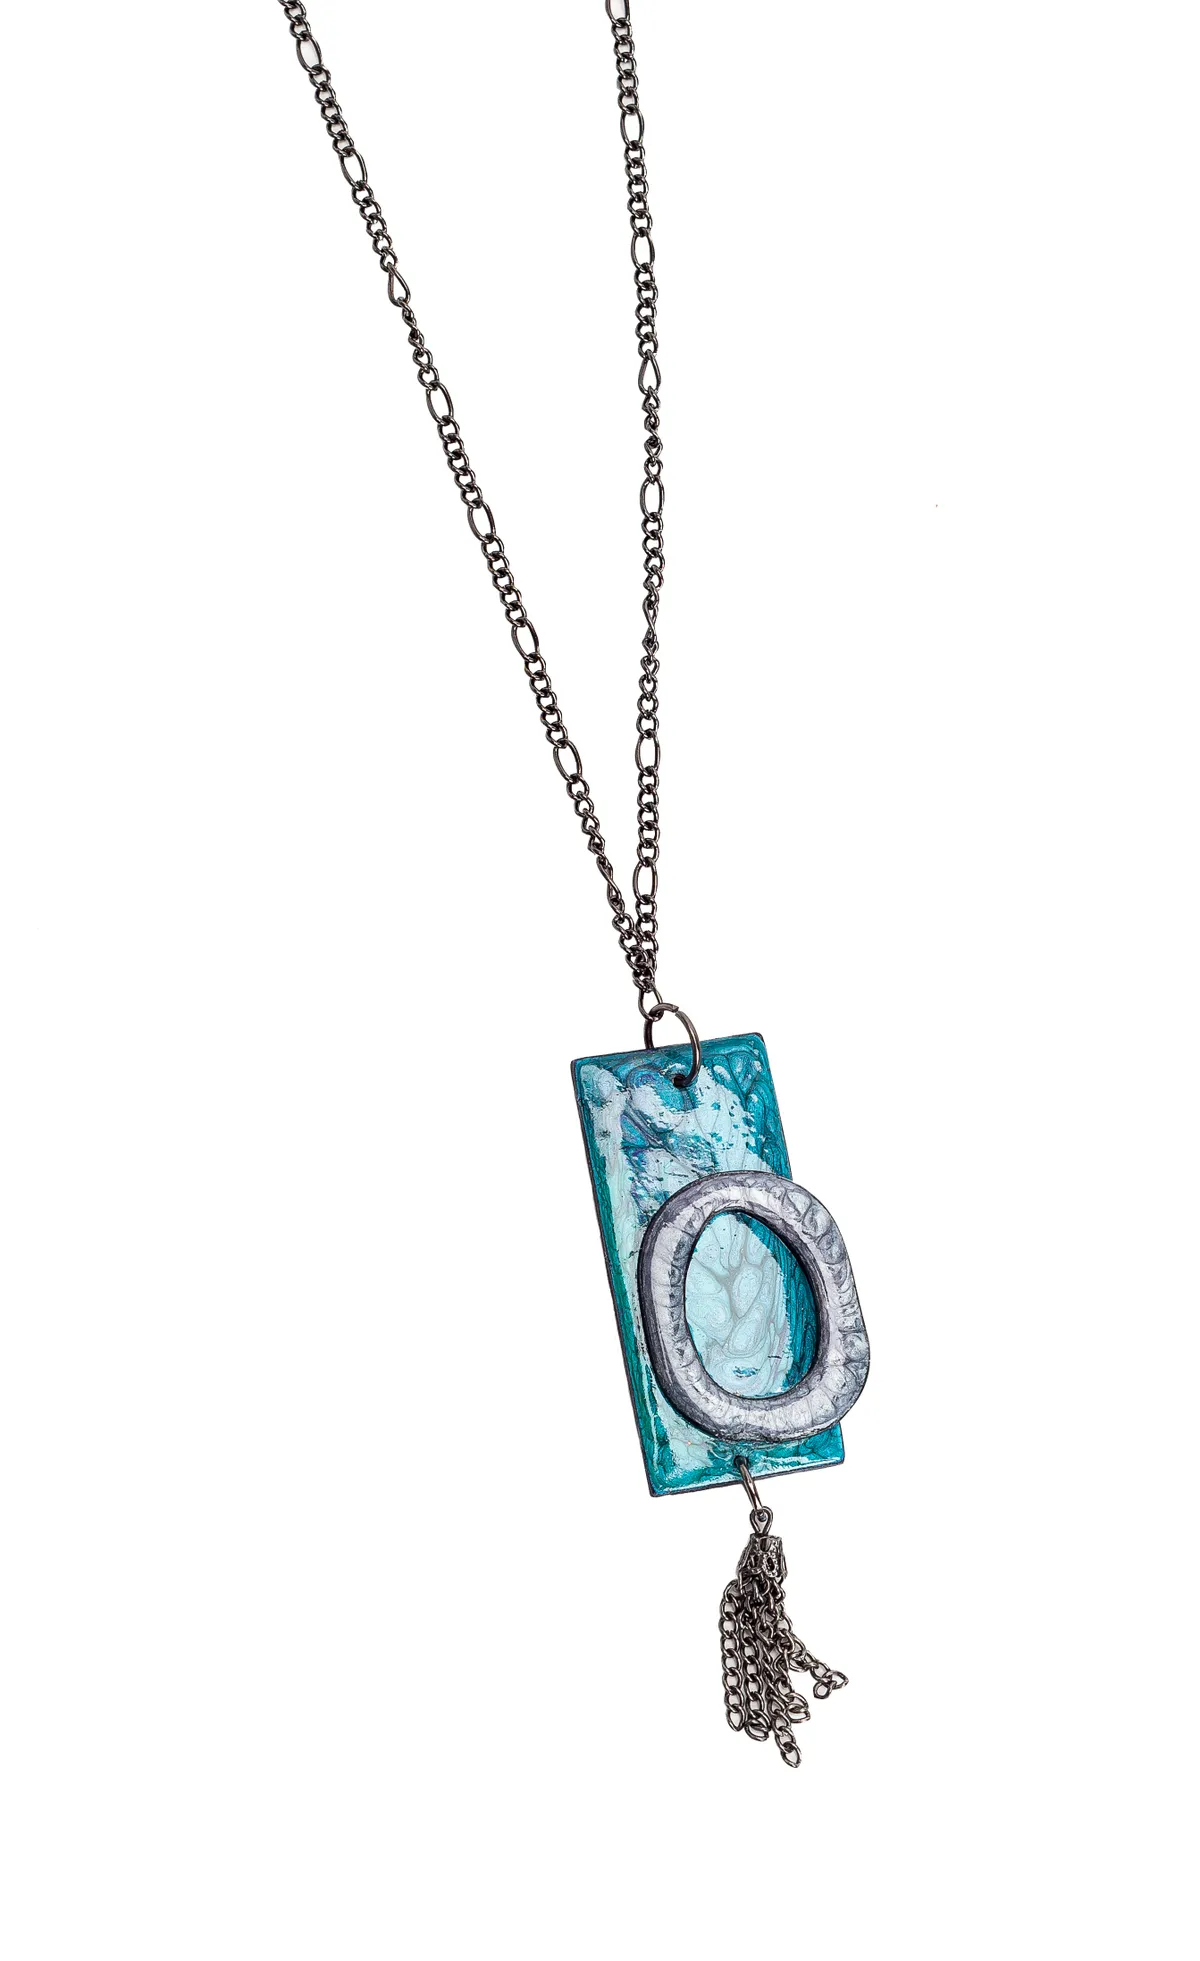
- Cut a 25 x 30mm zero and a 25 x 50mm rectangle from chipboard. Colour both shapes with black ink. Make a small hole in the top and bottom of the rectangle. Seal shapes with matt Multi-Medium.
- Use a dropper to apply Fantasy Prisme paint to the two shapes, using a different colour for each section.
- Assemble the pendant; seal with a layer of clear spray varnish. Thread the bottom hole with a large jump ring and tassel as shown. Add a large jump ring to the top hole; thread onto a coordinating necklace chain to finish.
3. Make your own upcycled earrings
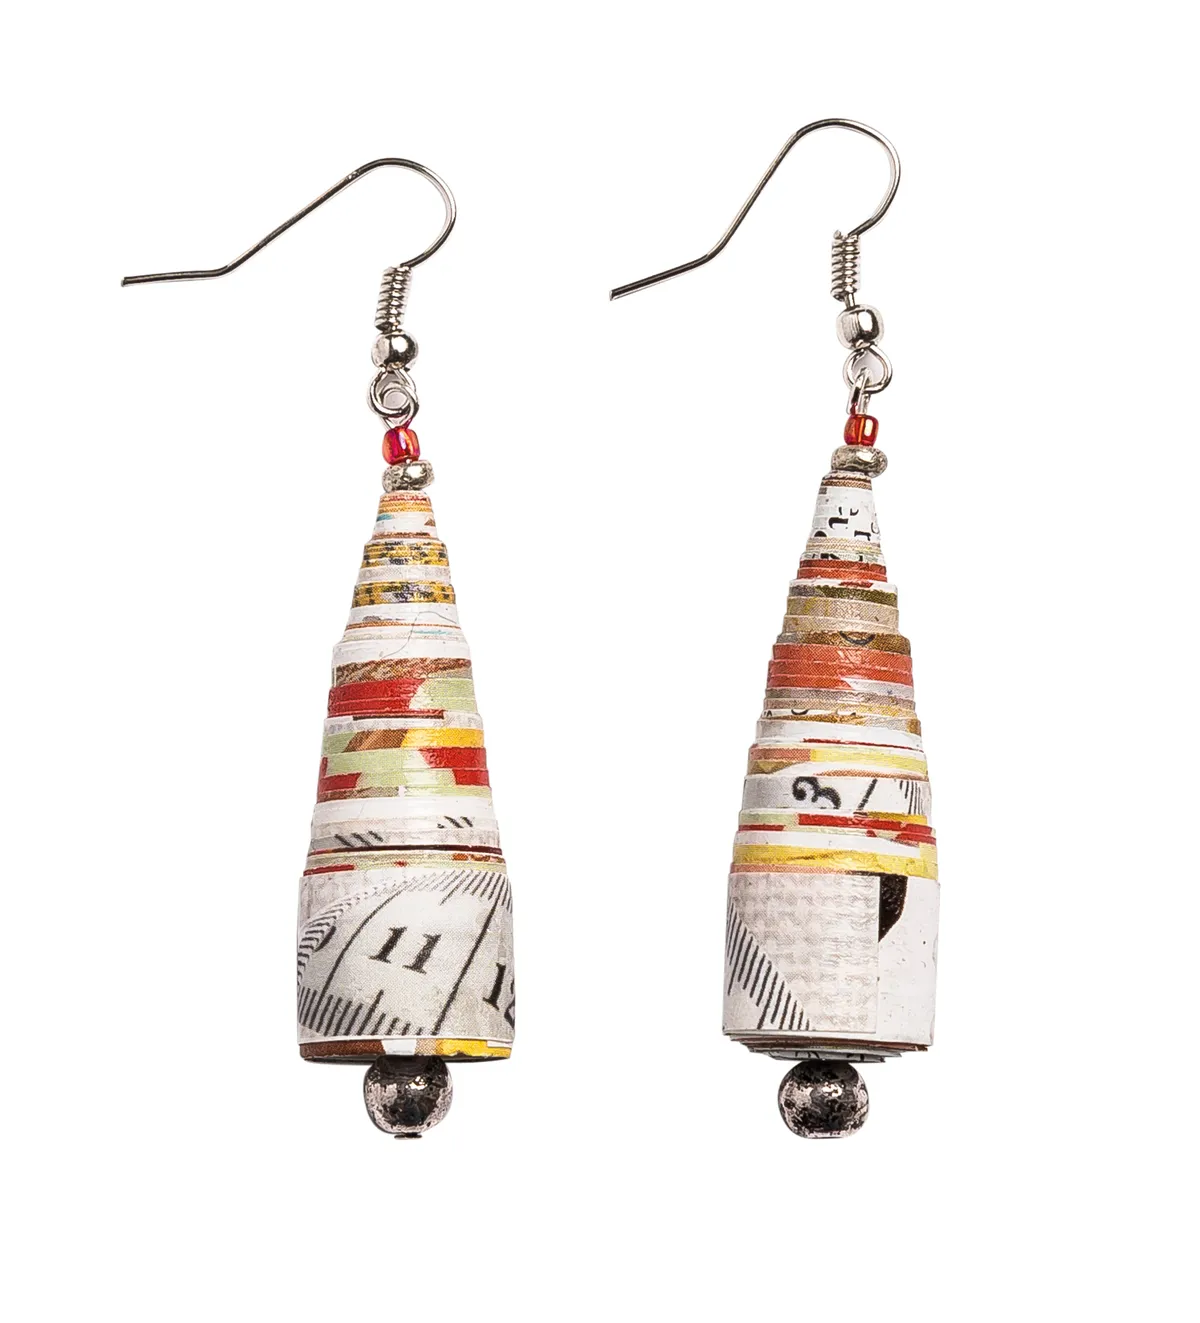
- Tear a page from a magazine. Mark 35mm from one corner along the bottom short edge. Mark 30mm across on the top short edge. Join the marks by drawing a line between the two. Measure 30mm across the top short edge and 25mm across the bottom edge.
- Repeat, reducing the measurements by 5mm till you reach 10mm – five strips in total. Cut out the strips and stick them together to make one long triangular wedge shape. Using a bamboo skewer, roll the strip up from the wide end, keeping the base flat. Glue the tip.
- Make a second earring in a mirror image starting on the opposite edge of a magazine page. Spread a thin layer of glue as varnish and leave to dry.
- Pick up a large bead on a headpin, feed through the paper bead and pick up a colour coordinating seed bead. Bend the headpin over at a right angle, trim to 8mm and form a loop. Attach an earring wire. Repeat to finish the second earring.
Top tip: Choose magazine pages with lots of colours to create a vibrant finish. You can pick page colour schemes to match your home, too!
4. Quilled earrings jewelry making idea
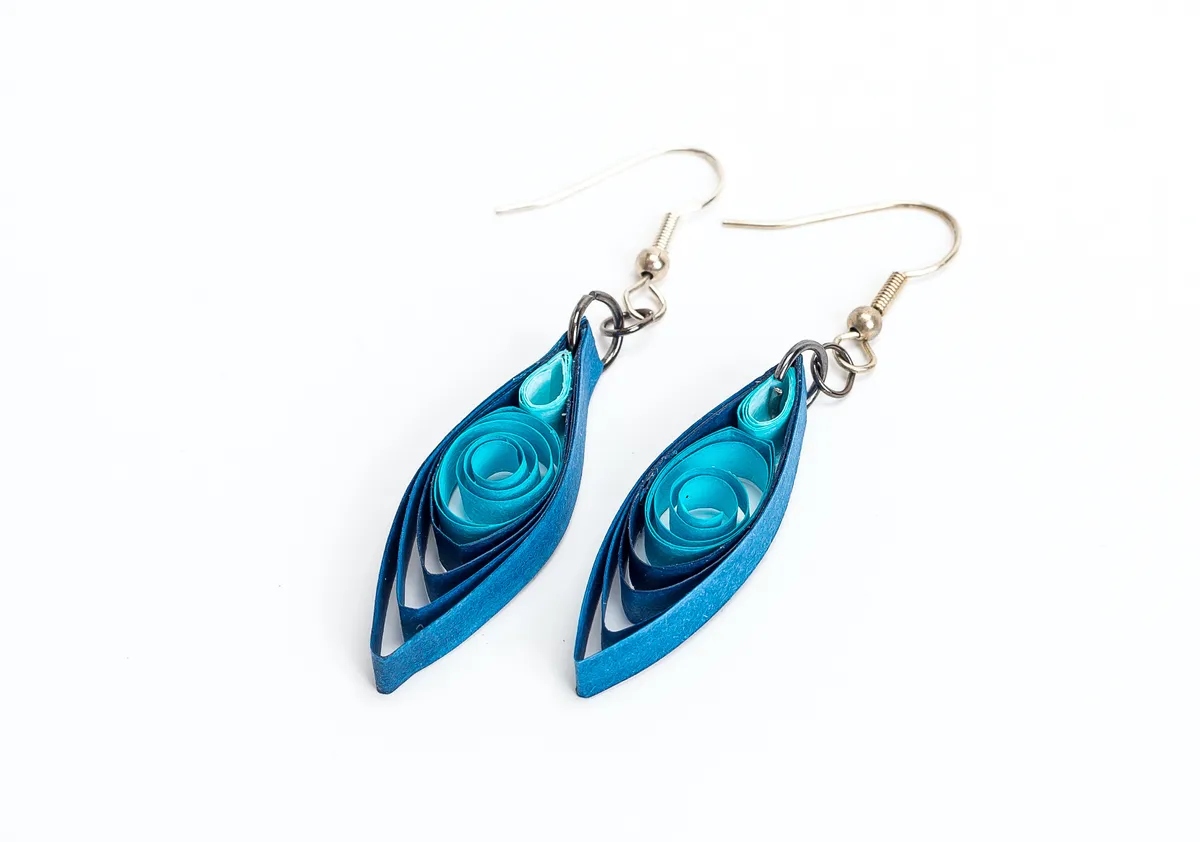
- Roll a light blue quilling strip into a tight coil, glue end and pinch to shape into a teardrop shape.
- Roll a blue strip into a loose coil and glue it to the bottom of the tear.
- Roll a darker quilling strip into a 30mm circle, glue the other elements inside it and shape into a teardrop.
- Thread a jump ring through the top of the large teardrop; attach to a fishhook earring.
- Repeat steps 1-4 to make a pair.
5. Quilled necklace jewellery making idea
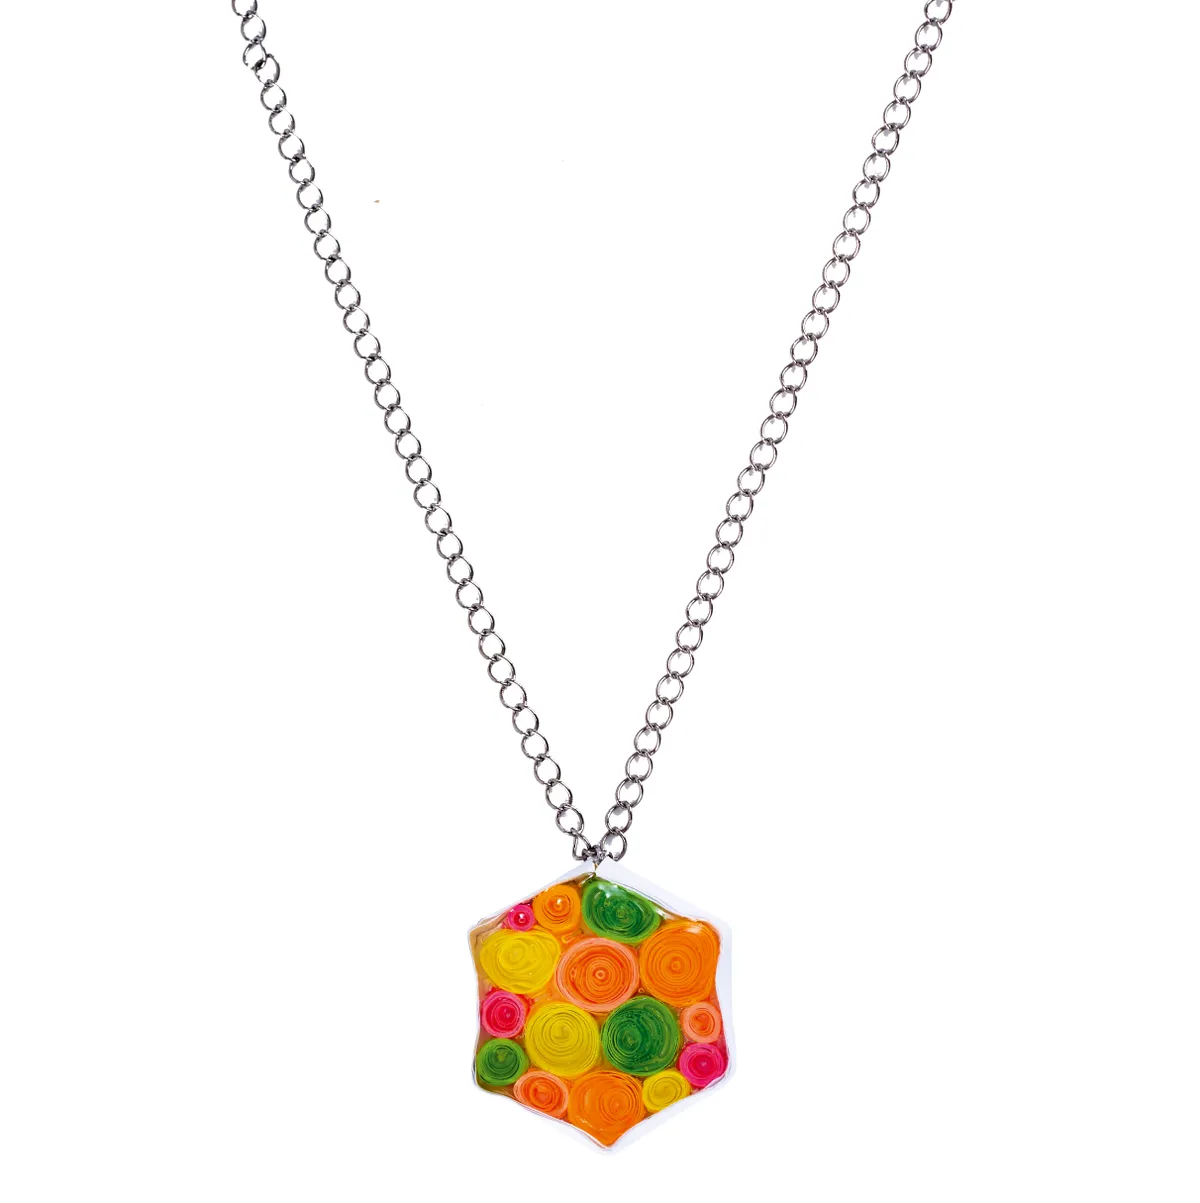
- Cut your base shape from card (we've die-cut a small hexagon shape - but you could use scissors and cut any shape you like!)
- Wrap a strip of quilling paper several times around the outside.
- Make a variety of small, loose circles in various colours to fit inside the shape, then add 3D gloss on top to seal it.
6. Upcycle cork to make earrings
- Cut your corks into 4-5mm slices. Use a wide blade knife to make even width slices. Choose two for the earrings.
- Cut two squares of paper and stick onto one side of each slice with PVA glue (we've chosen pink paper). Leave to dry, and trim around the edge.
- Decorate! We've stamped tiny flowers in dark brown and champagne gold ink.
- Pierce through the cork slice with a large glass-headed pin. Insert a long headpin and add a couple of beads.
- Bend the headpin at right angles above the beads.
- Trim tail to 7mm and form a loop with round-nose pliers.
- Attach the earring wire.
7. Make a shrink plastic necklace
- Stamp or draw your images onto frosted shrink plastic (we've gone for a monogram design) using black permanent ink. Once dry, trim to size and punch a hole in the top left and top right corners of each.
- Colour images on the reverse and then shrink using a heat gun, or in an oven following the manufacturer’s instructions. Glue a piece of book page paper on the reverse to create a vintage feel.
- Assemble the plastic tiles with jump rings and attach the ends to a piece of coordinating chain, to finish.
8. Upcycle a pair of stud earrings

- Cut two circles of old book page paper that fit inside the base of a small bottle top. Colour with Distress Ink.
- Once dry, use the matt Multi-Medium to glue each of the circles into place and seal the top. Leave to dry.
- Pour Glossy Accents over the surface of the paper, add watch parts and continue to pour Glossy Accents until it reaches the top of the bottle cap. Sprinkle with a little of the chunky glitter.
- Glue an earring post to reverse of each cap using a strong adhesive. Attach (via stud) to a tag die-cut from text paper backed with card.
9. DIY beaded necklace
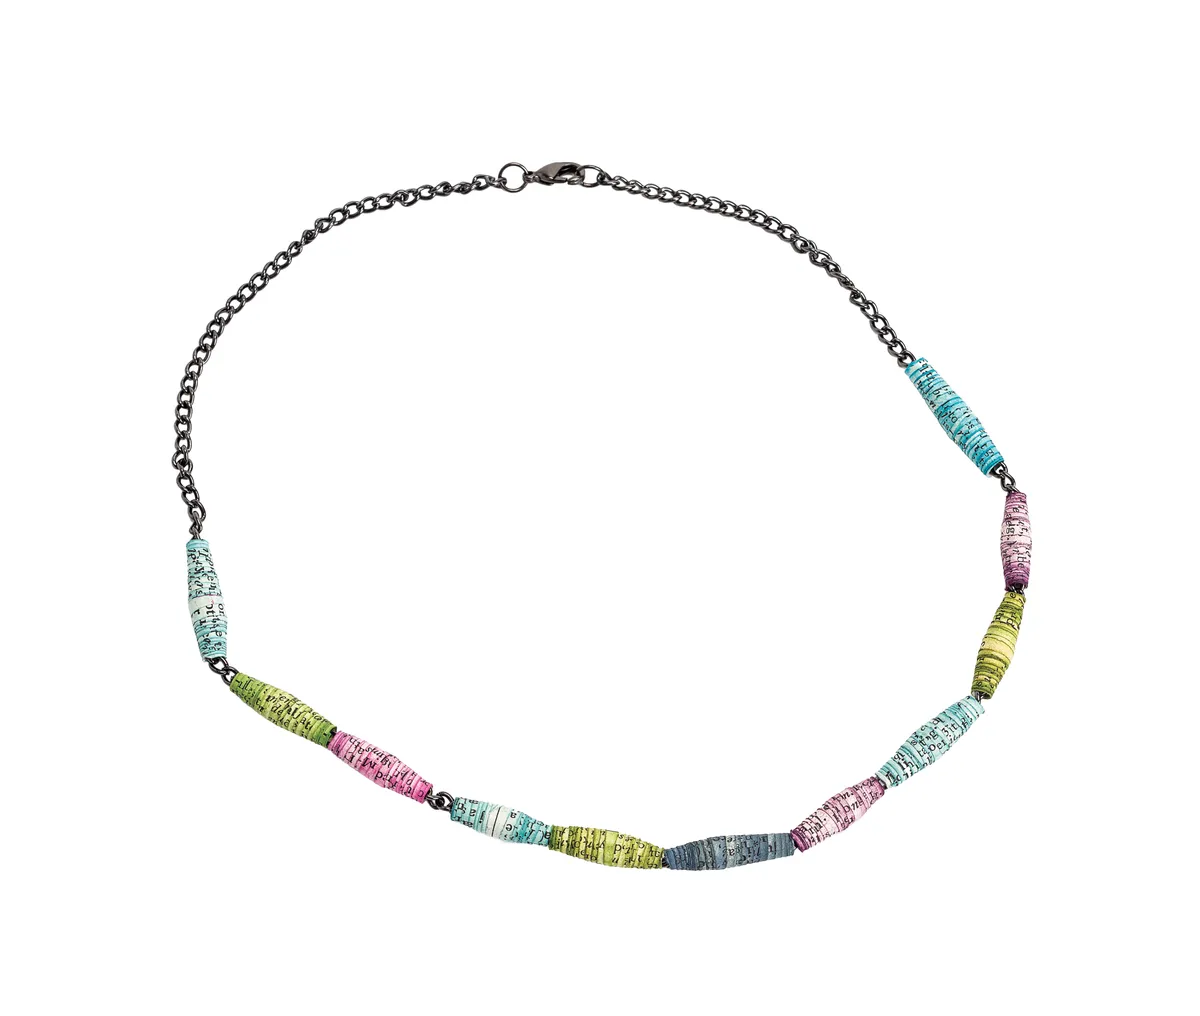
- Cut 11 thin triangles from text paper.
- Colour each with ink (we're using Distress Inks), making sure that the edges are darker than the centres.
- Roll up the pieces around a bamboo skewer to create bead shapes. Glue the ends and remove from the skewer. Thread onto a piece of necklace chain as shown, to finish.
10. Make a flower hair slide
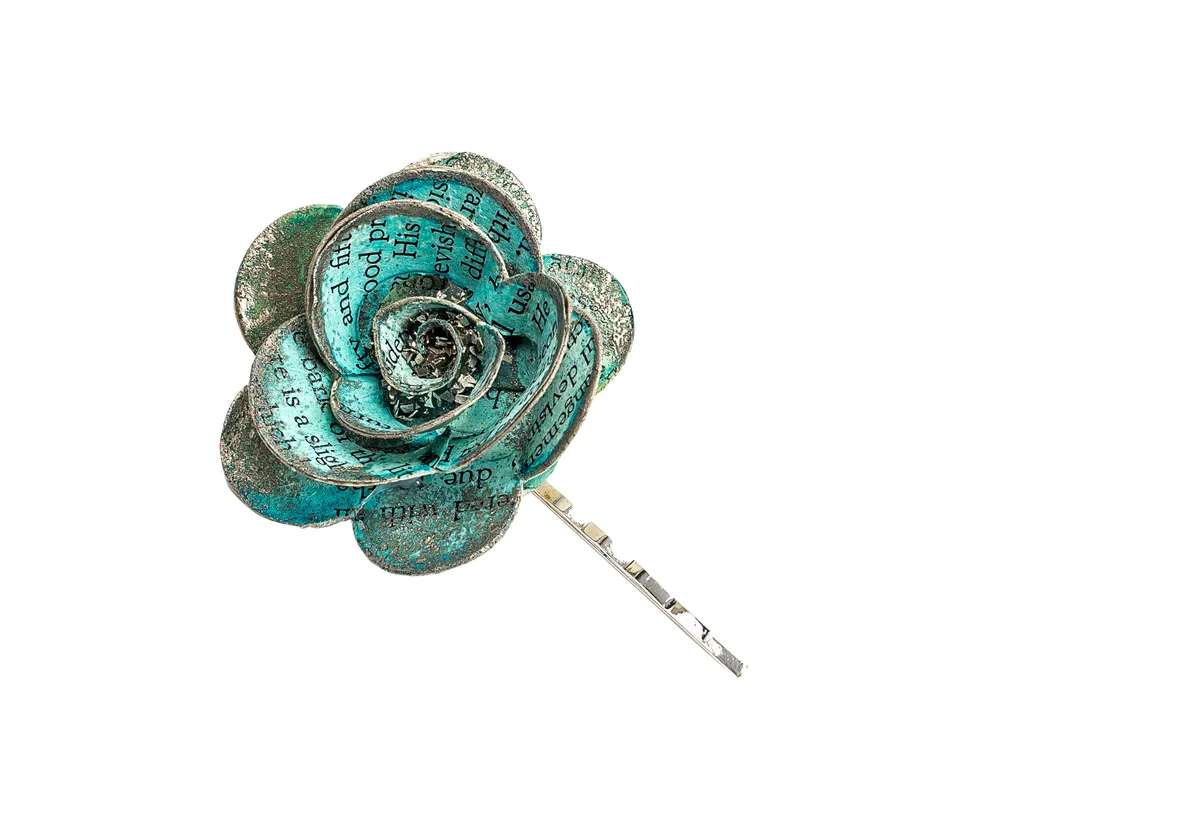
- Colour a piece of text paper with ink (we're using Distress Inks). Once dry, back with card and cut out a spiral from it which has scalloped outer edges.
- Starting from the outside, roll up the spiral to create a flower shape and glue at the centre using a hot glue gun. Sprinkle chunky glitter over the hot glue.
- Dab edges of petals with slow-drying ink, sprinkle with embossing powder and melt with a heat gun. Attach flower to a hair slide as shown, to finish.
11. Upcycled rainbow bangle
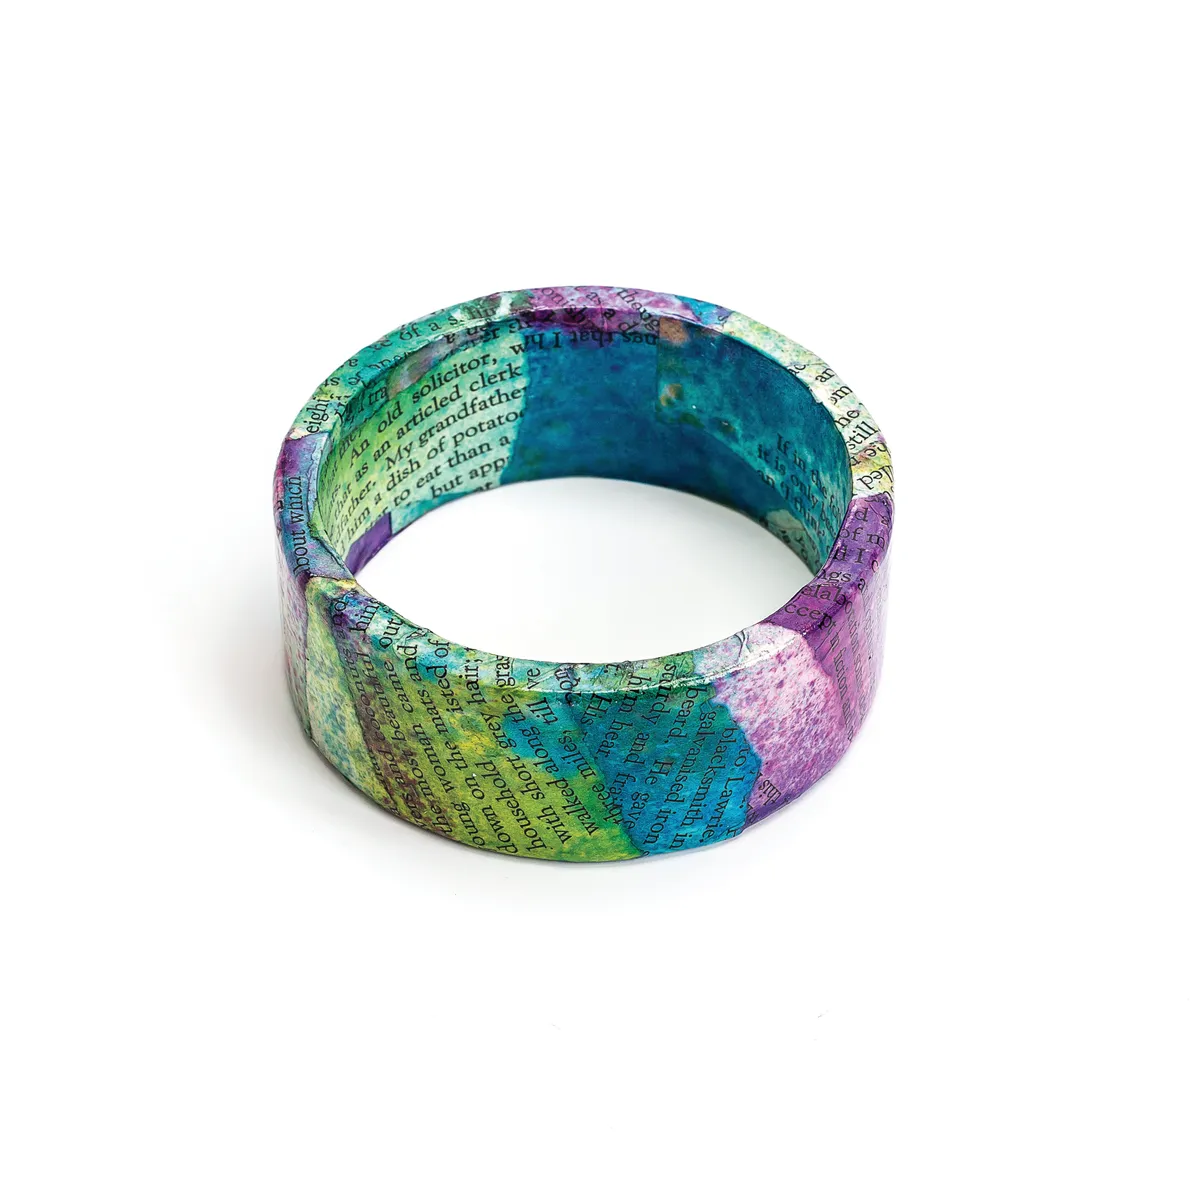
- Tear small strips of old book page paper and colour with ink (we're using Dylusions Ink Sprays).
- Glue strips around a wooden bangle to cover, using Multi-Medium and overlapping the strips slightly as you go. Once covered, coat the bangle with a layer of Multi-Medium to seal.
- Spray bangle with several thin coats of clear gloss varnish, allowing it to dry between each application.
12. DIY cufflinks
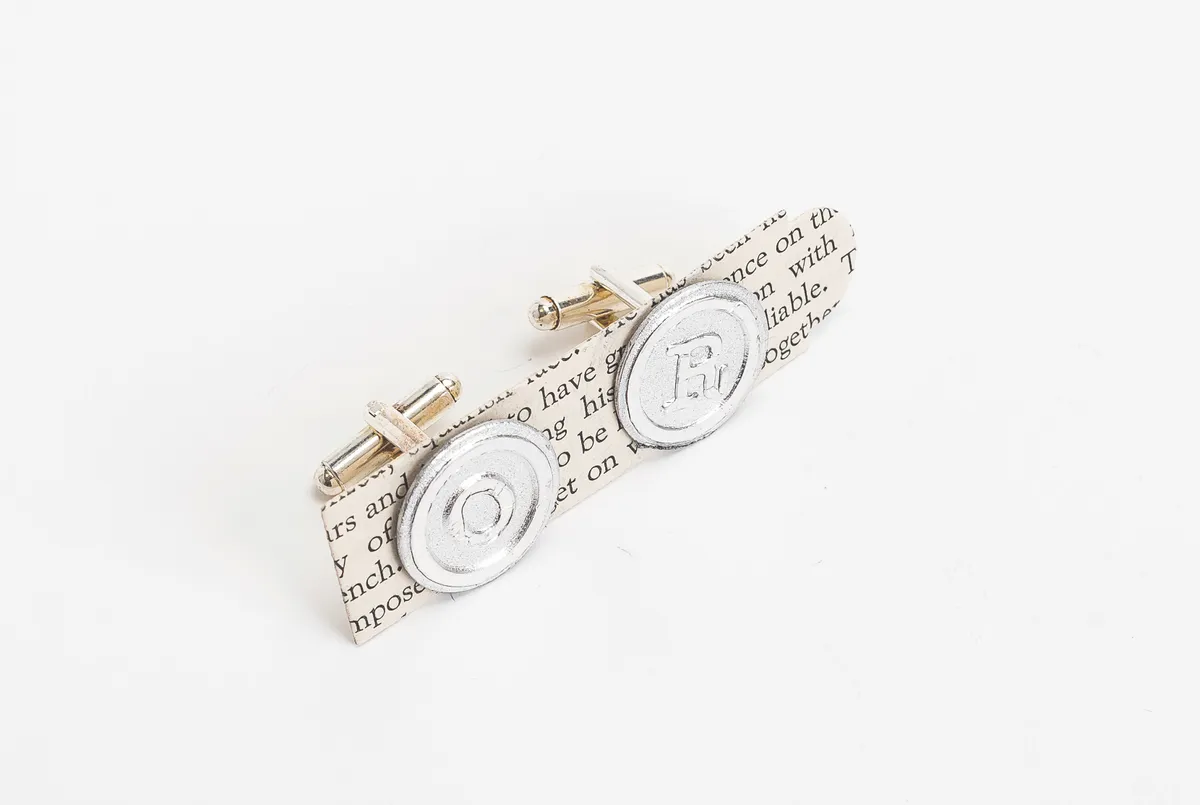
- Stick a piece of adhesive metal foil onto some chipboard and then cut into two 20mm circles.
- To emboss, run the circles through your die-cutting machine with an embossing folder (we're using the Typewriter Keys embossing folder), lining up the circles with your chosen monograms.
- Glue each of the embossed circles to a cufflink back with strong adhesive. Attach (via cufflink bar) to a tag die-cut from text paper backed with card, to finish.
13. Design a book page ring
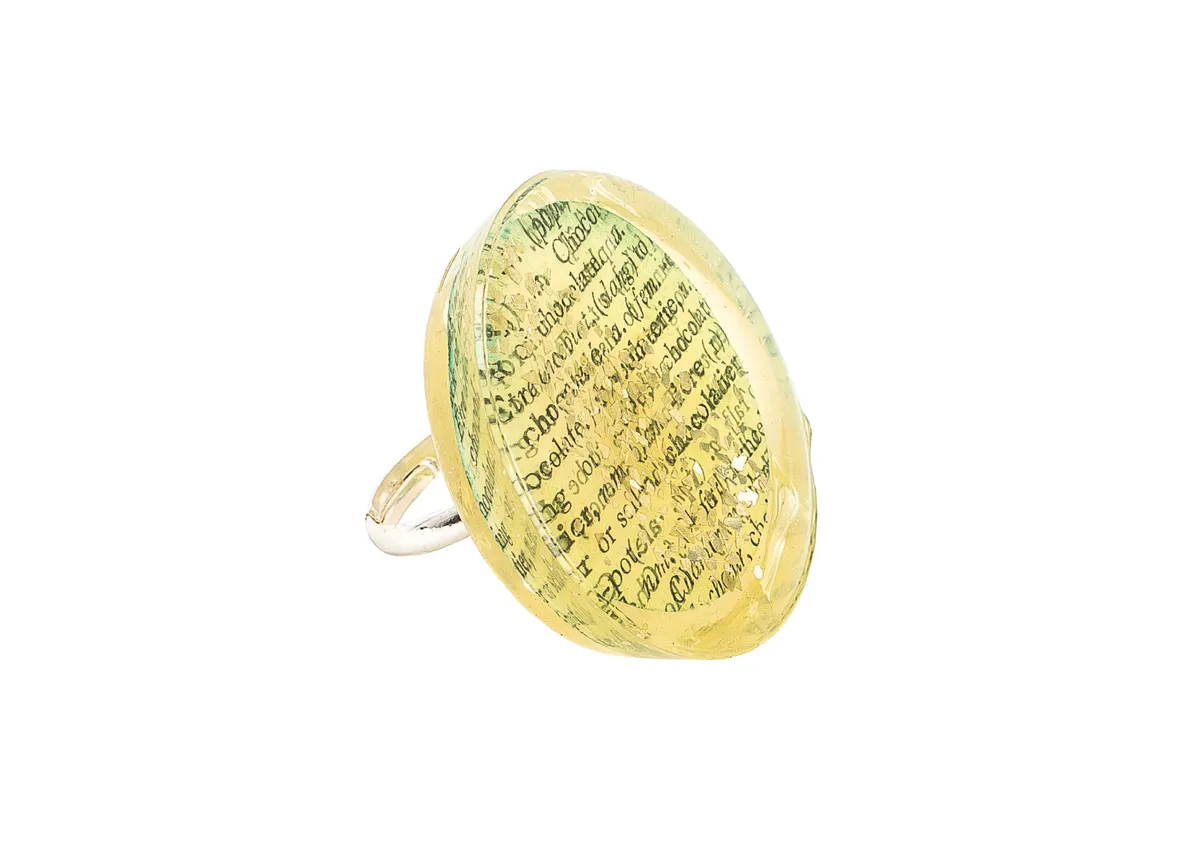
- Cut a circle out of book page paper to fit inside the base of your circular silicone mould with a border around the edge.
- Pour 4 tsp of Melt-It! powder into a foil tray and heat from underneath using a heat gun to melt it. Pour a little bit into the silicone mould.
- Add the circle of text paper to the bottom of the mould so it is facing upwards and then pour a layer of the molten Melt-It! powder over the top. Sprinkle chunky glitter over the top and then pour the remainder of the molten liquid into the mould.
- Once cool, turn the disc over and apply gentle heat to the centre with a heat gun. Push the ring back onto a heated area to secure. Once the liquid has set around the ring back, it is ready to wear!
More DIY jewelry making ideas
If you're a confident crafter and want to move on to some more advanced jewellery making projects, keep scrolling! We have all sorts of free tutorials from beautiful Egyptian-inspired seed bead jewelry to resin jewelry, and provide advice as to how to keep the costs down if you're making and selling your jewellery projects.
14. Lace necklace
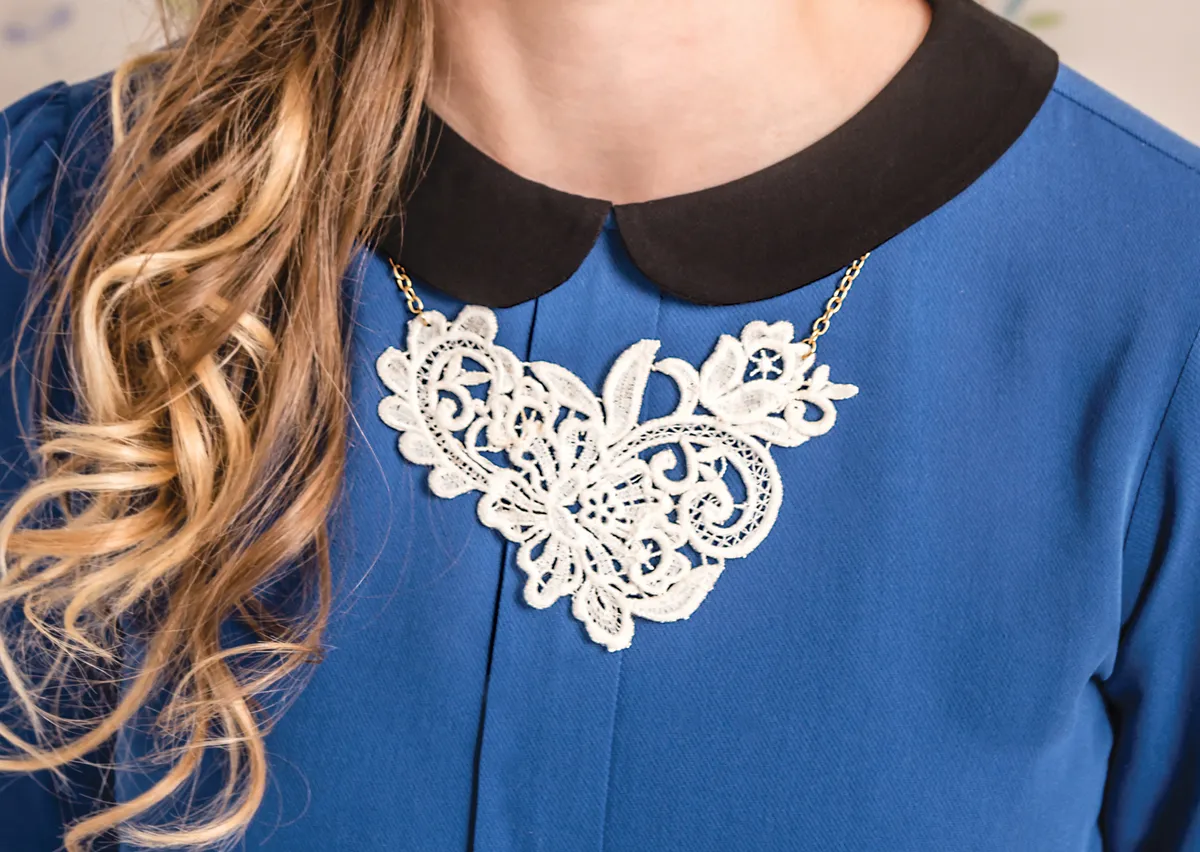
Get the vintage look with this easy DIY lace necklace (also called a lace collar necklace) - it's super easy to make, and you can buy lace pieces if you don't want to cut up your own.
15. Peacock feather earrings
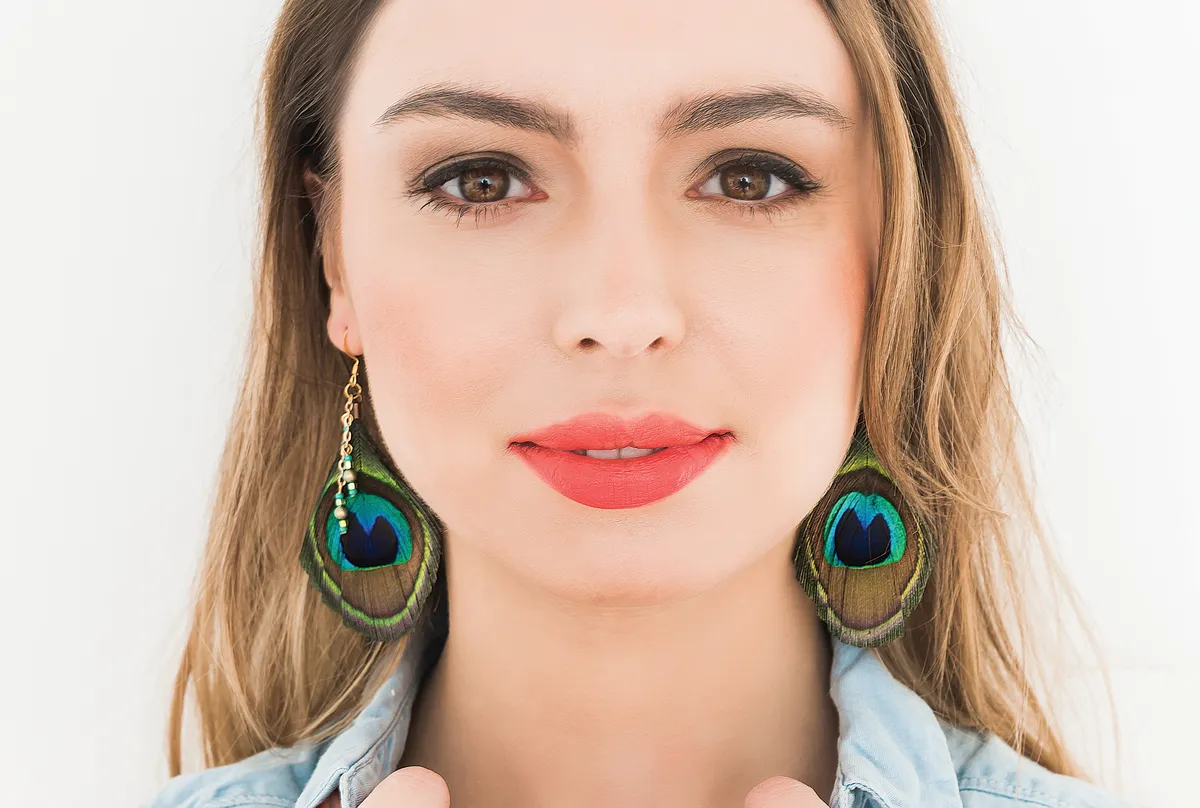
Peacock feathers are timeless and we love this gorgeous peacock feather earrings tutorial. They are lightweight, so won't weigh heavy on your ears, but the bead dangles keep them from flying away in the wind. Beautiful!
16. Square pendant necklace
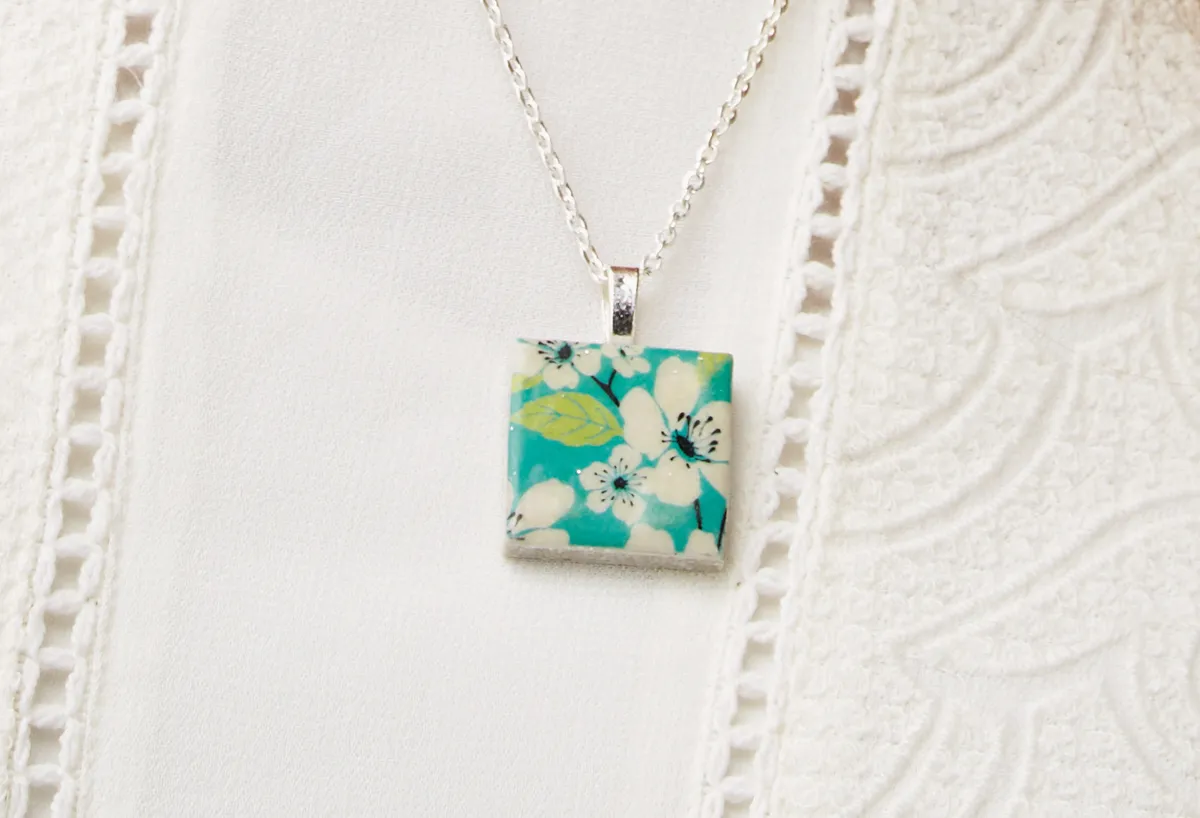
Making square pendant necklaces is the best project if you're looking to make and sell jewelry as a side hustle. Learn how you can bulk make this stunning square pendant necklace, and keep costs down, too!
17. Tassel earrings
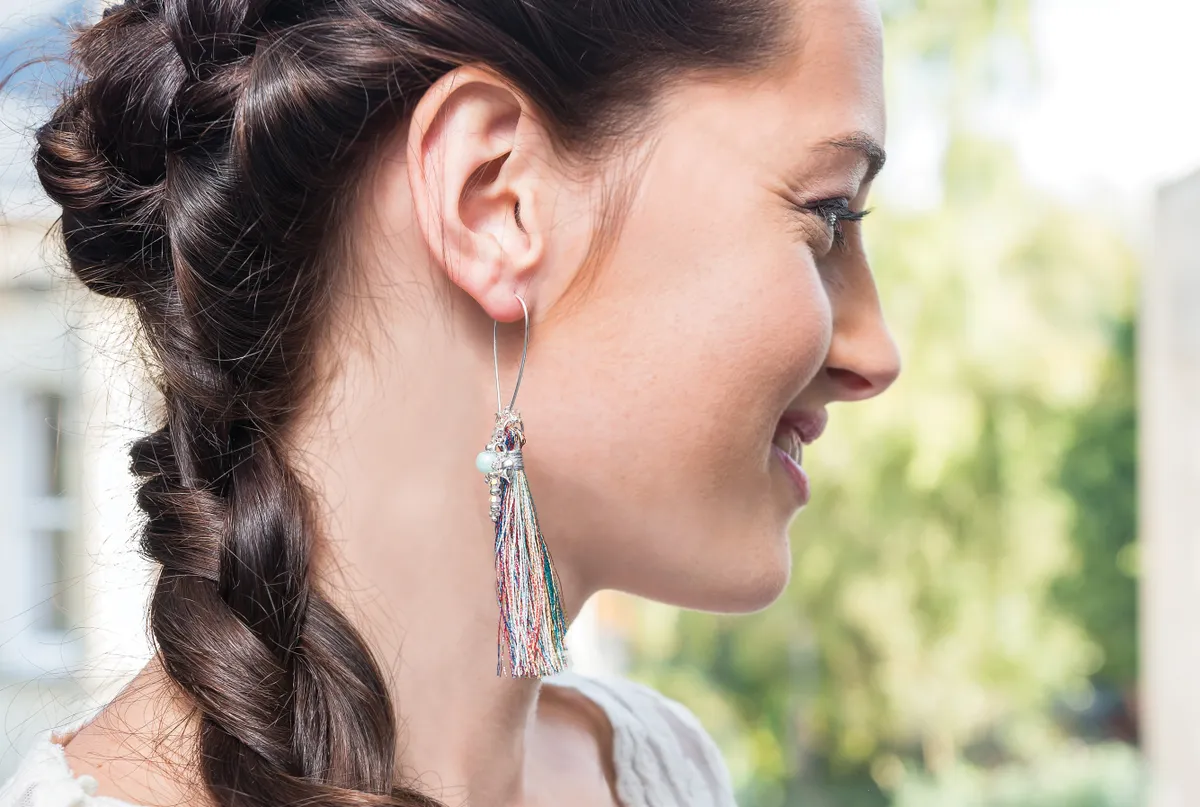
Tassels are having a huge resurgence at the moment (is this the Love Island effect?), and we think these beautiful tassel earrings are simply delightful. Mix and match threads to create your own style - which colour combo will you go for? Find out more in our free, in-depth tassel earrings tutorial.
18. Cross stitch necklace
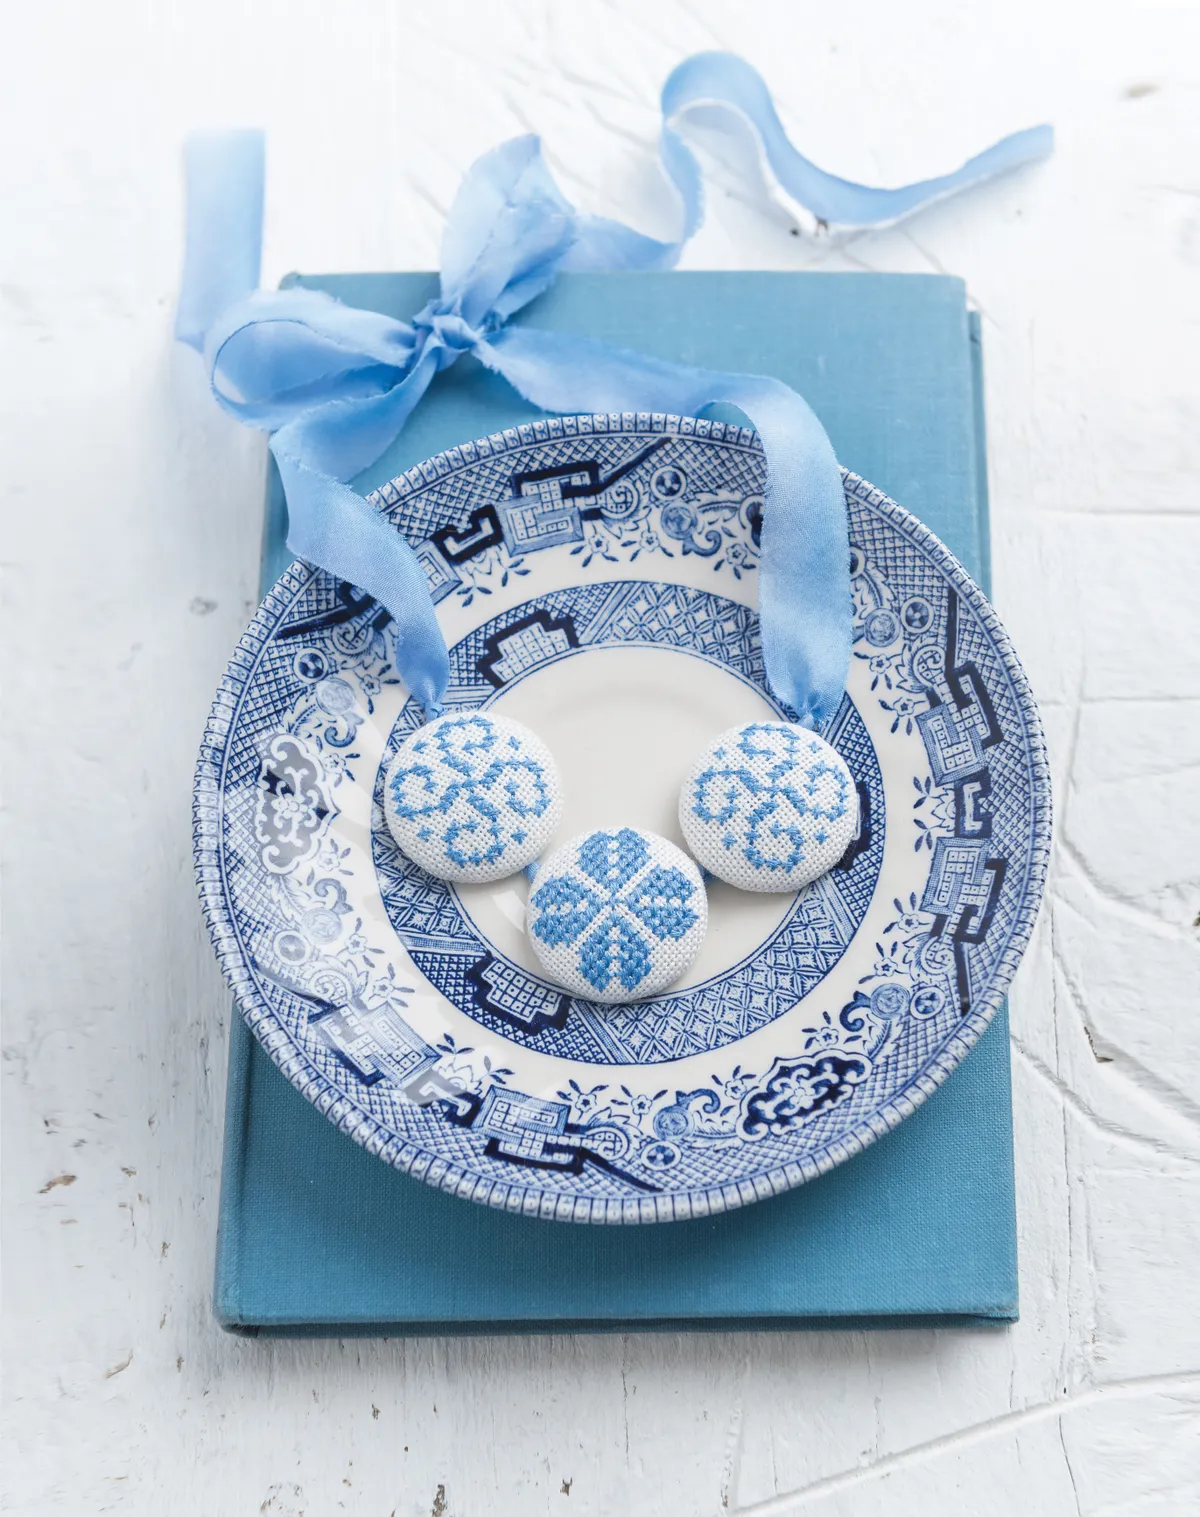
Love cross stitch? If you've landed on our page, chances are pretty high that you love it as much as we do. Some cross stitch projects can take a hot minute to complete - but this cross stitch necklace can be completed in a snip of time - we love the blue ribbon in place of the chain!
19. Beaded creole earrings
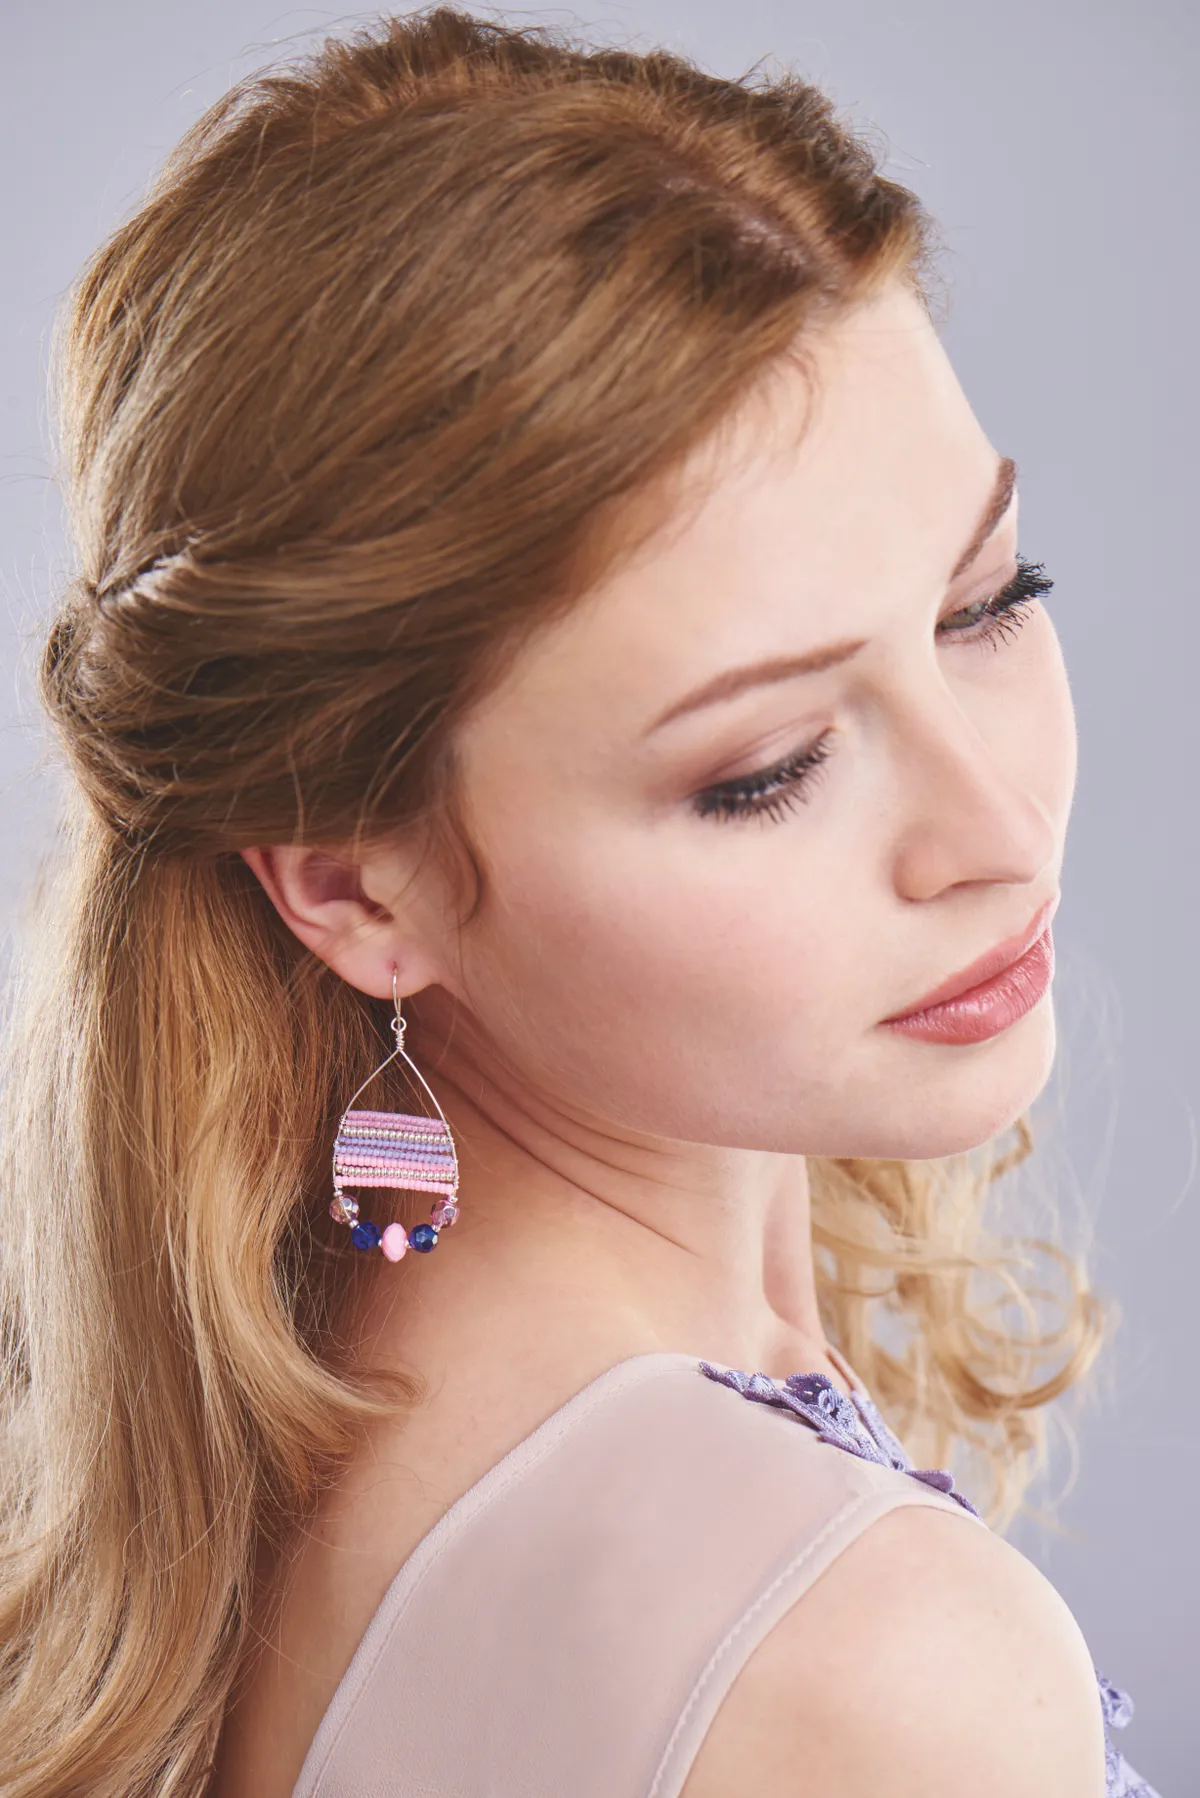
We have lots of seed bead projects up on our website and these beaded creole earrings are simple to make, and look great, too. As with all of the projects on this page, we have a free tutorial so you too can whip up these stunning beaded earrings!
20. Resin necklace
Resin is hot stuff. Everyone is doing it right now - and with good reason. Resin projects are fun to make and it's long-lasting and hardwearing - so it can easily withstand the wear and tear of daily life. If you would like to make this resin necklace, check out our free tutorial, or why not have a browse through our complete beginner's guide to using resin?
21. Rainbow cluster earrings

Cluster earrings have been a staple of many people's jewellery boxes for years, but with just a little know-how, you can make your own! We have a full step-by-step tutorial and picture guide, showing you how to make your own rainbow earrings.
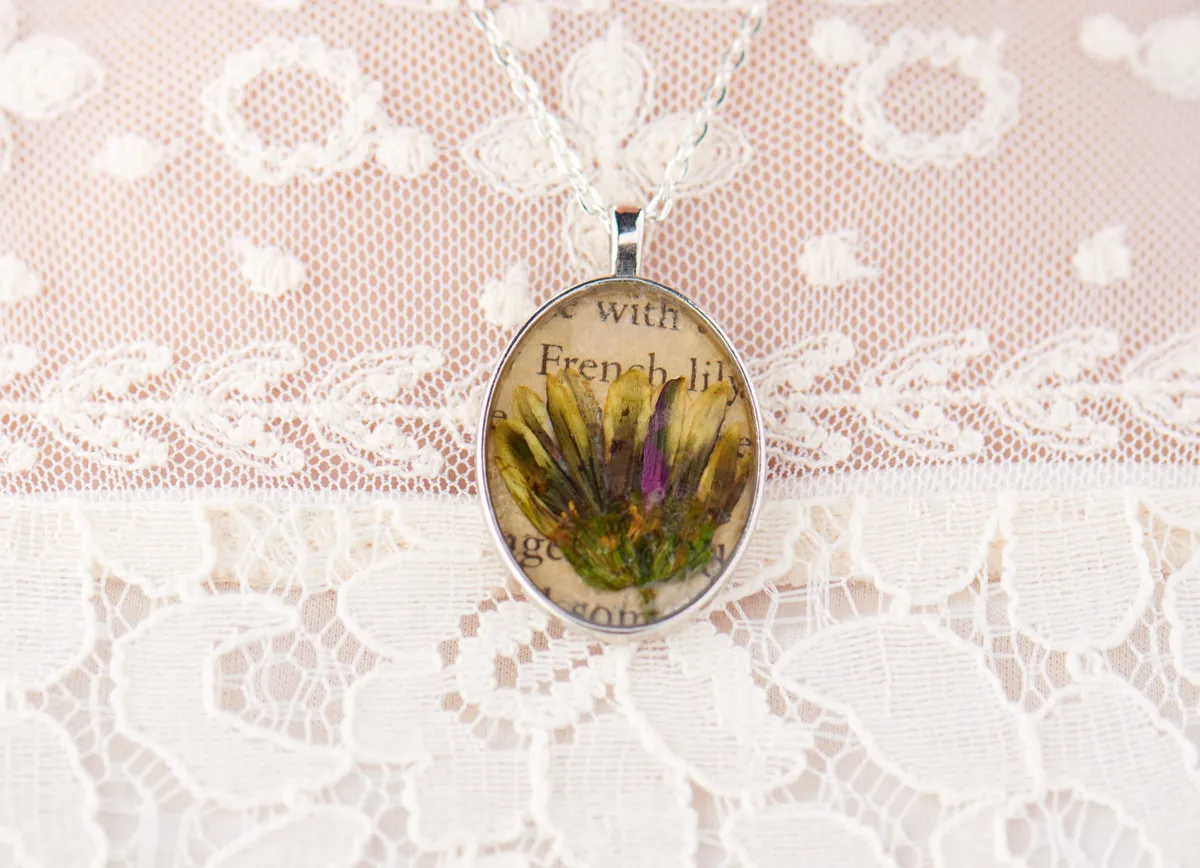
22. Simple pendant
Can you guess what this pendant is made from? It's that old craft favourite - salt dough! Yup - really. Find out how to make your own salt dough pendant - there are three styles to choose from, but the possibilities are endless!
23. Seed bead earrings
These seed bead earrings are fantastic for the summer - but you can switch up the bead colours to suit the occasion or whatever you have to hand! Scroll down for free tutorials on how to make a matching necklace and bracelet.
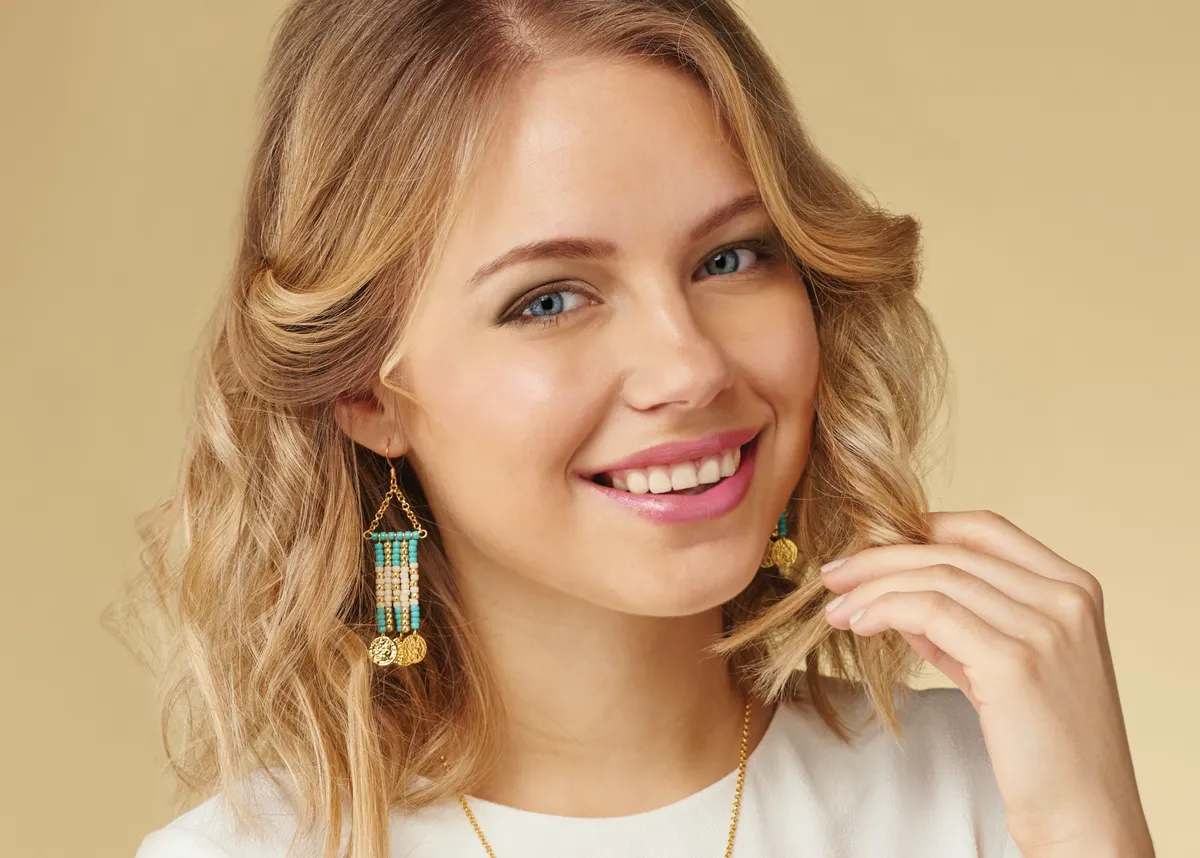
24. Seed bead necklace
This Egyptian-inspired seed bead necklace is easier than it looks - read our full tutorial on how to make a seed bead necklace today!
25. Seed bead bracelets
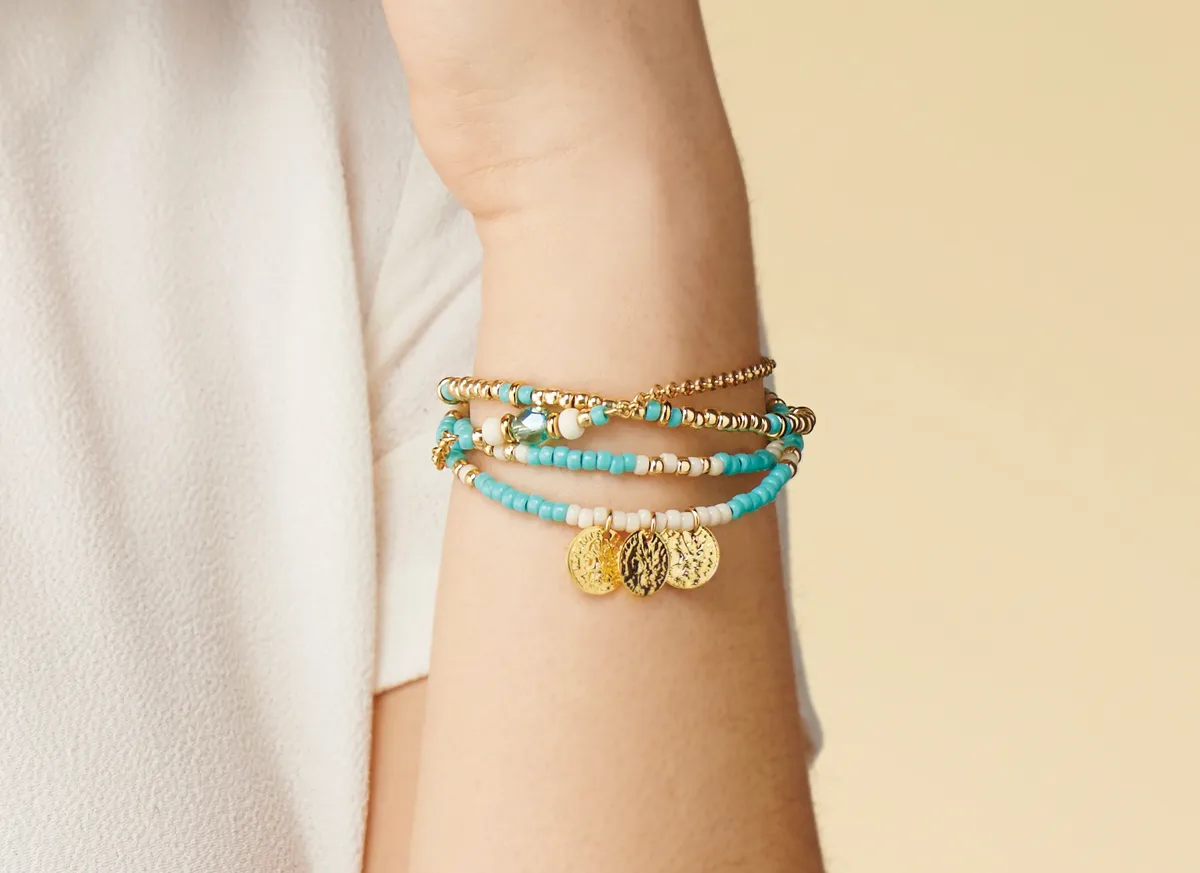
These beautiful seed bead bracelets complete the Egyptian-inspired seed bead jewelry set. We've layered up four seed bead bracelets to create this look, but you can layer as many or as few as you like.
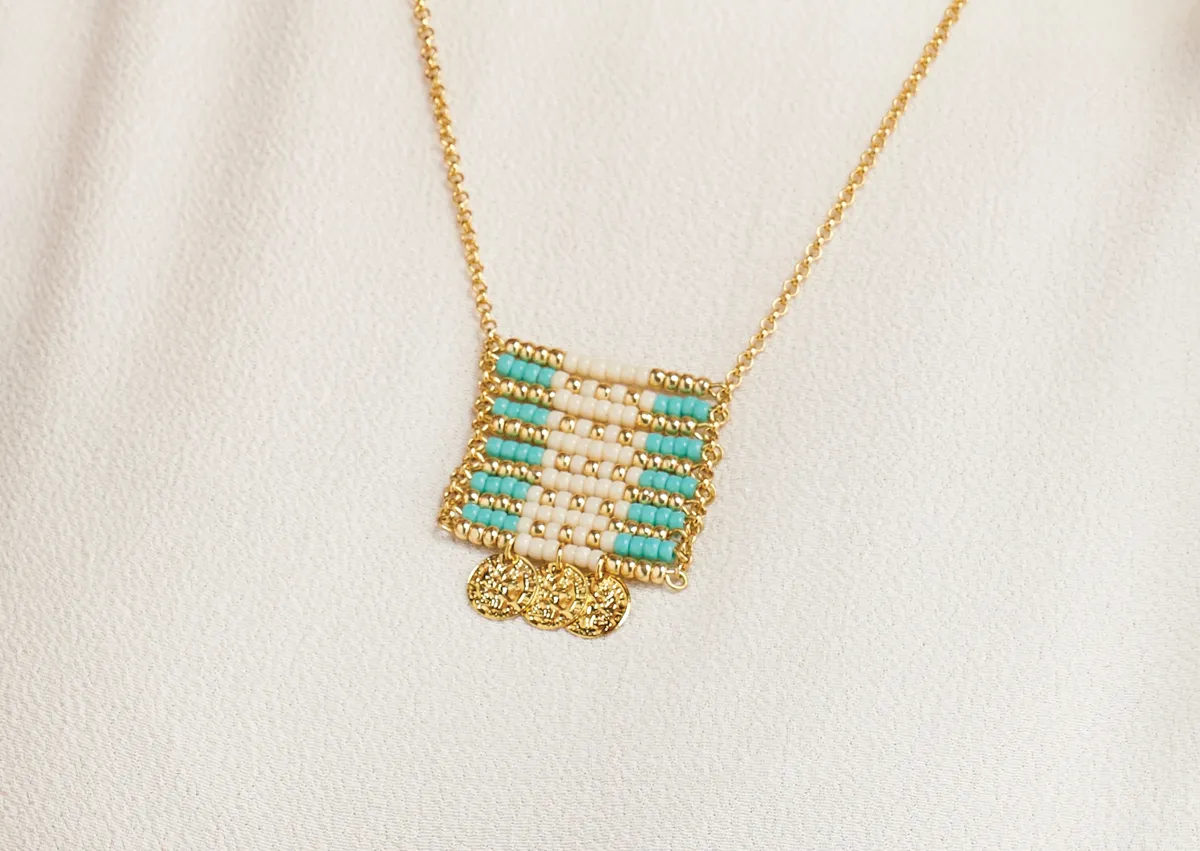
26. Bead weaving necklace
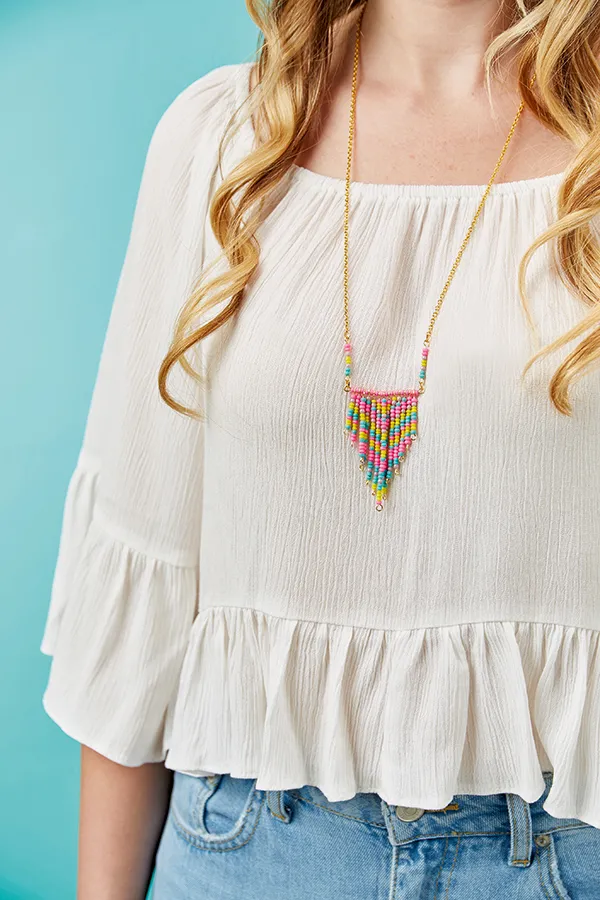
Can you guess we love seed beads? They're so versatile and cheap to pick up, and make the ideal material to use in DIY jewelry making. Try your hand at bead weaving with this fun bead weaving necklace tutorial.
27. Chunky fabric necklace
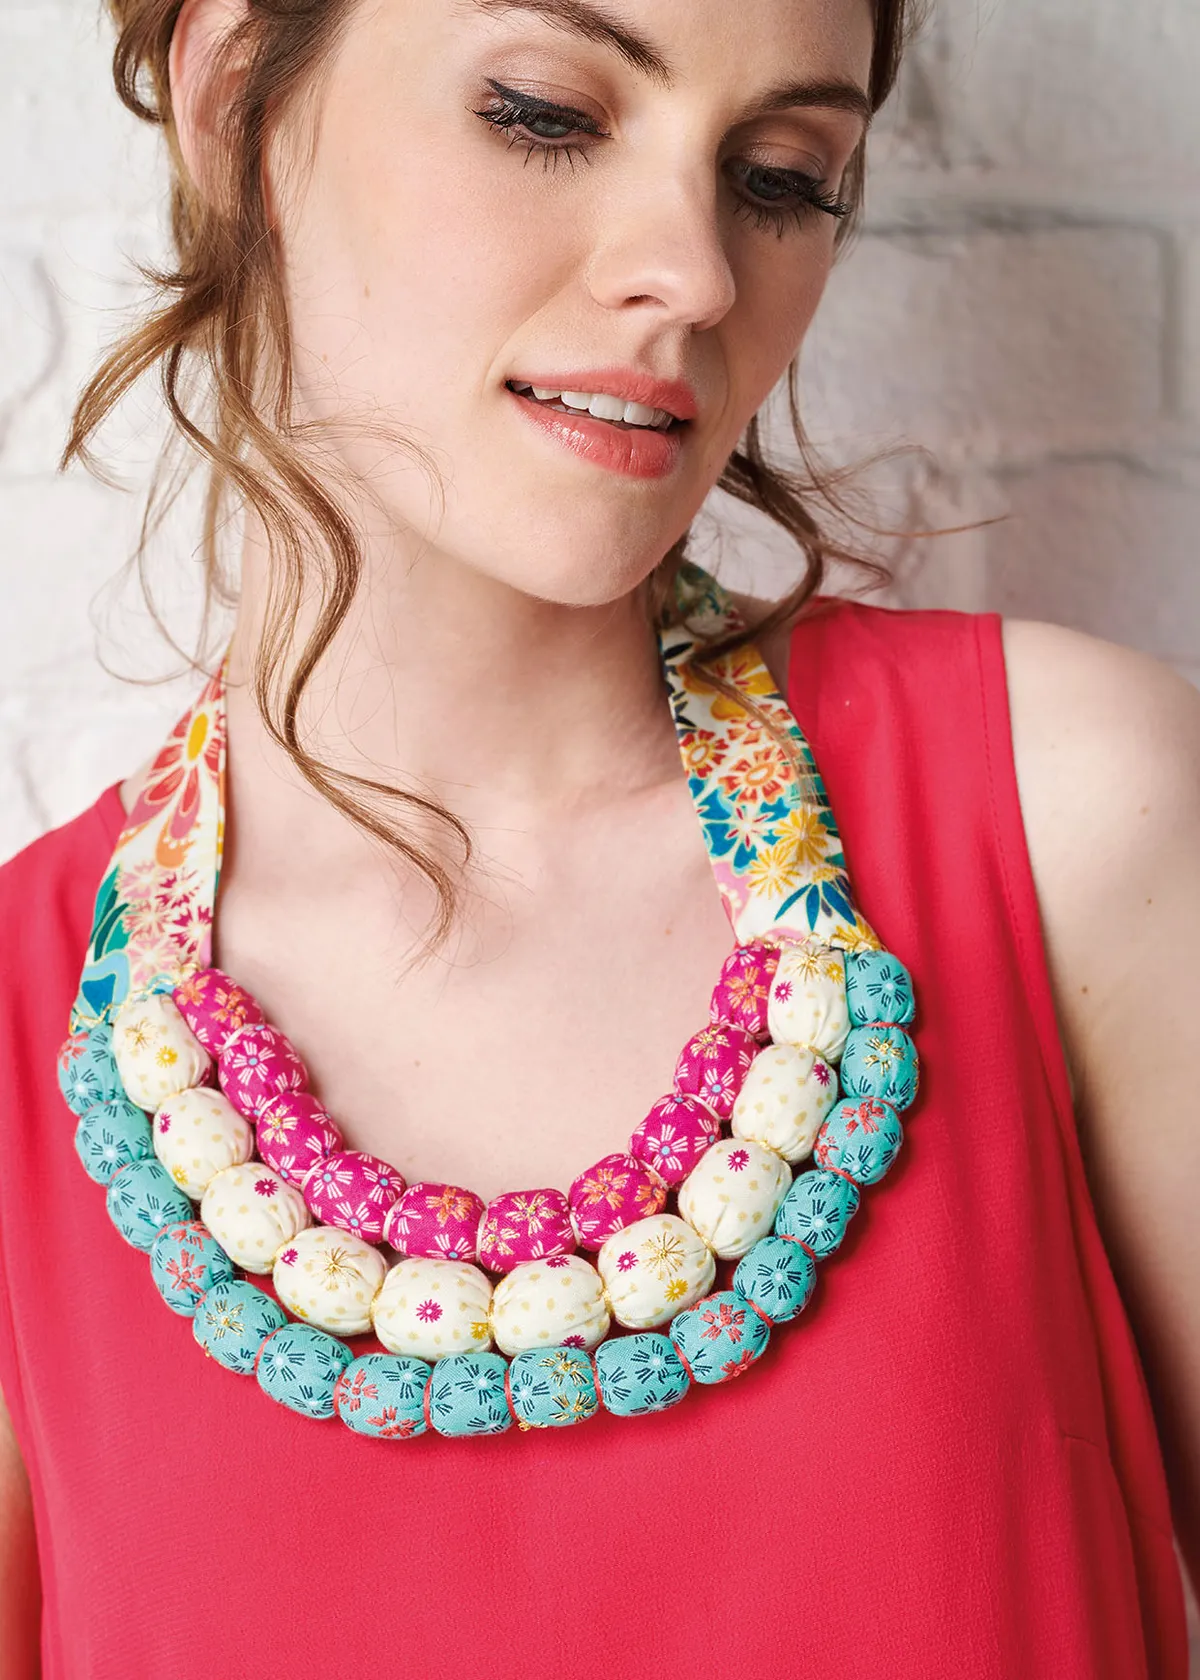
How about this for a bold statement piece? This fabric necklace is the ideal project for using up those precious leftover scraps of your favourite fabrics, and the chunky beads make for an ideal addition to your summer wardrobe. Easily suit the time of year by switching up the fabric!
28. Embroidery thread necklace
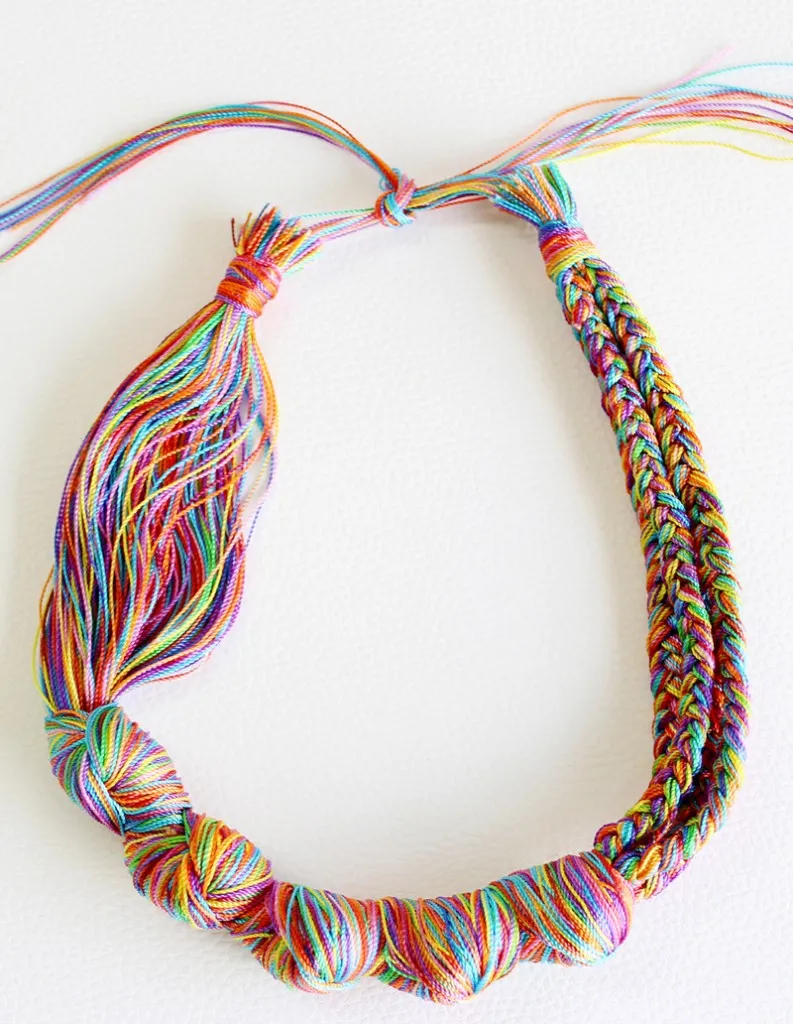
Look at the colours in this beauty! This embroidery thread necklace is another fabulous project for using up your odds and ends - learn how with our free embroidery thread necklace tutorial.
29. Macrame necklace
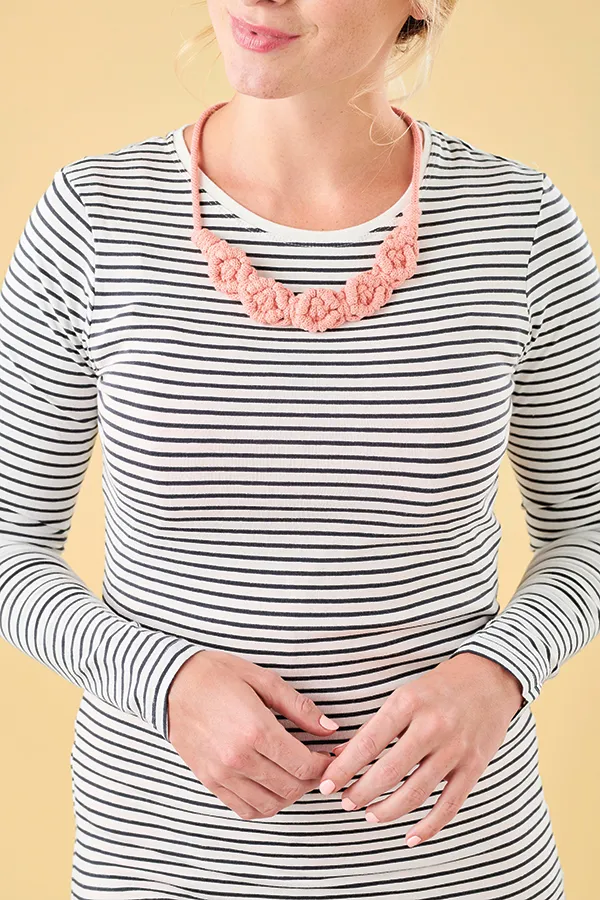
Have you hopped on the macrame trend? Macrame is everywhere right now - there's something super satisfying about the chunky macrame cord and watching the knots come together to create beautiful works of art. Check out this fab macrame necklace tutorial!
30. Knitted necklace
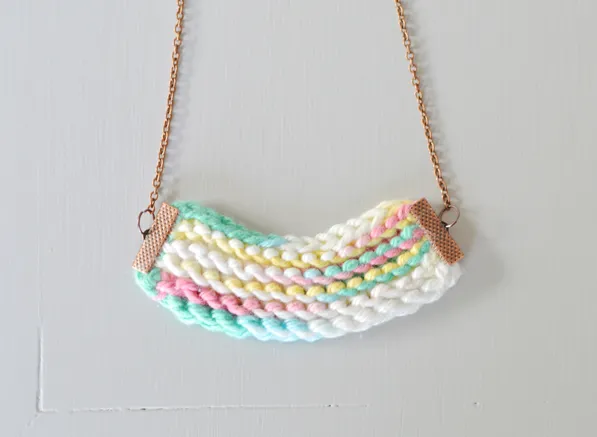
This sweet knitted necklace makes the ideal gift for the knitters in your life - and it's small enough and light enough to send through the post, too. Learn how to make a knitted necklace yourself!
31. 3-tier tassel earrings
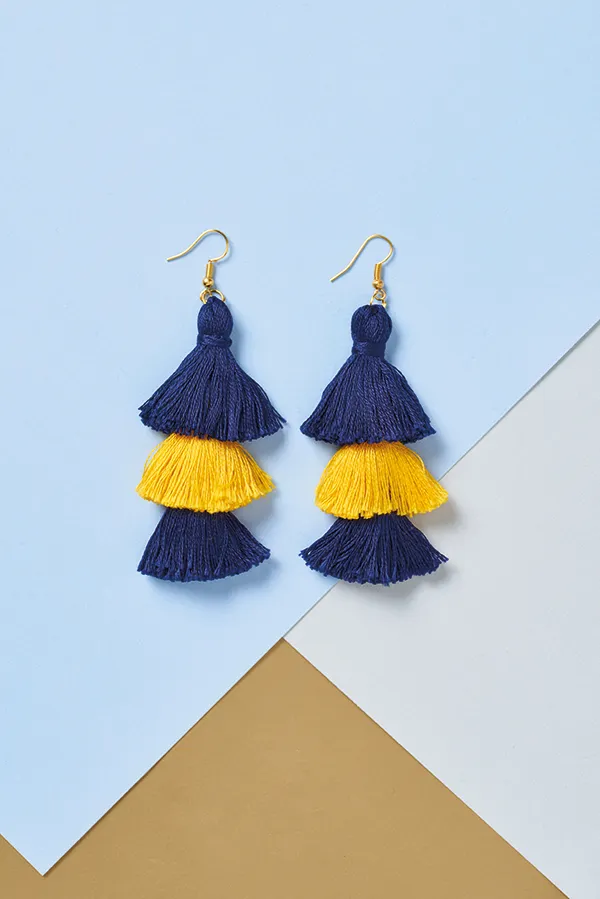
Liked the tassel earrings we showed you further up the page? Why not take a step up and try these 3-tiered DIY tassel earrings from Mollie magazine - ideal for the roaring Twenties!
32. Mandala crochet earrings
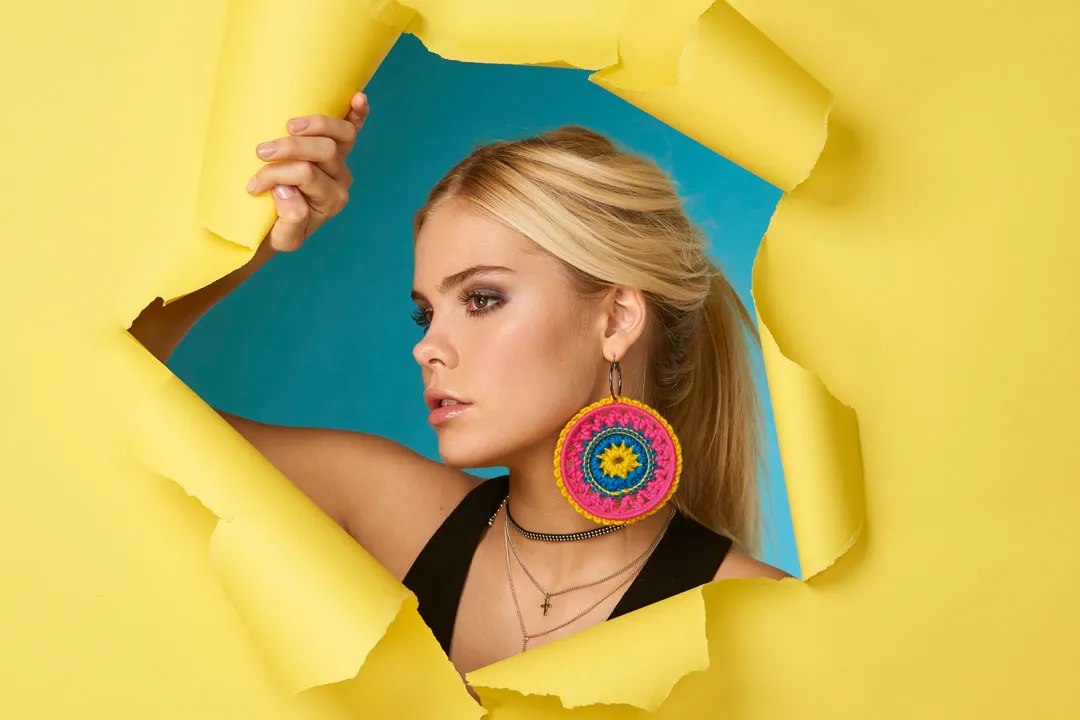
How's this for some statement earrings? Ideal for festivals or summer parties, these bold crochet earrings are sure to brighten up any outfit.
33. Crochet friendship bracelets
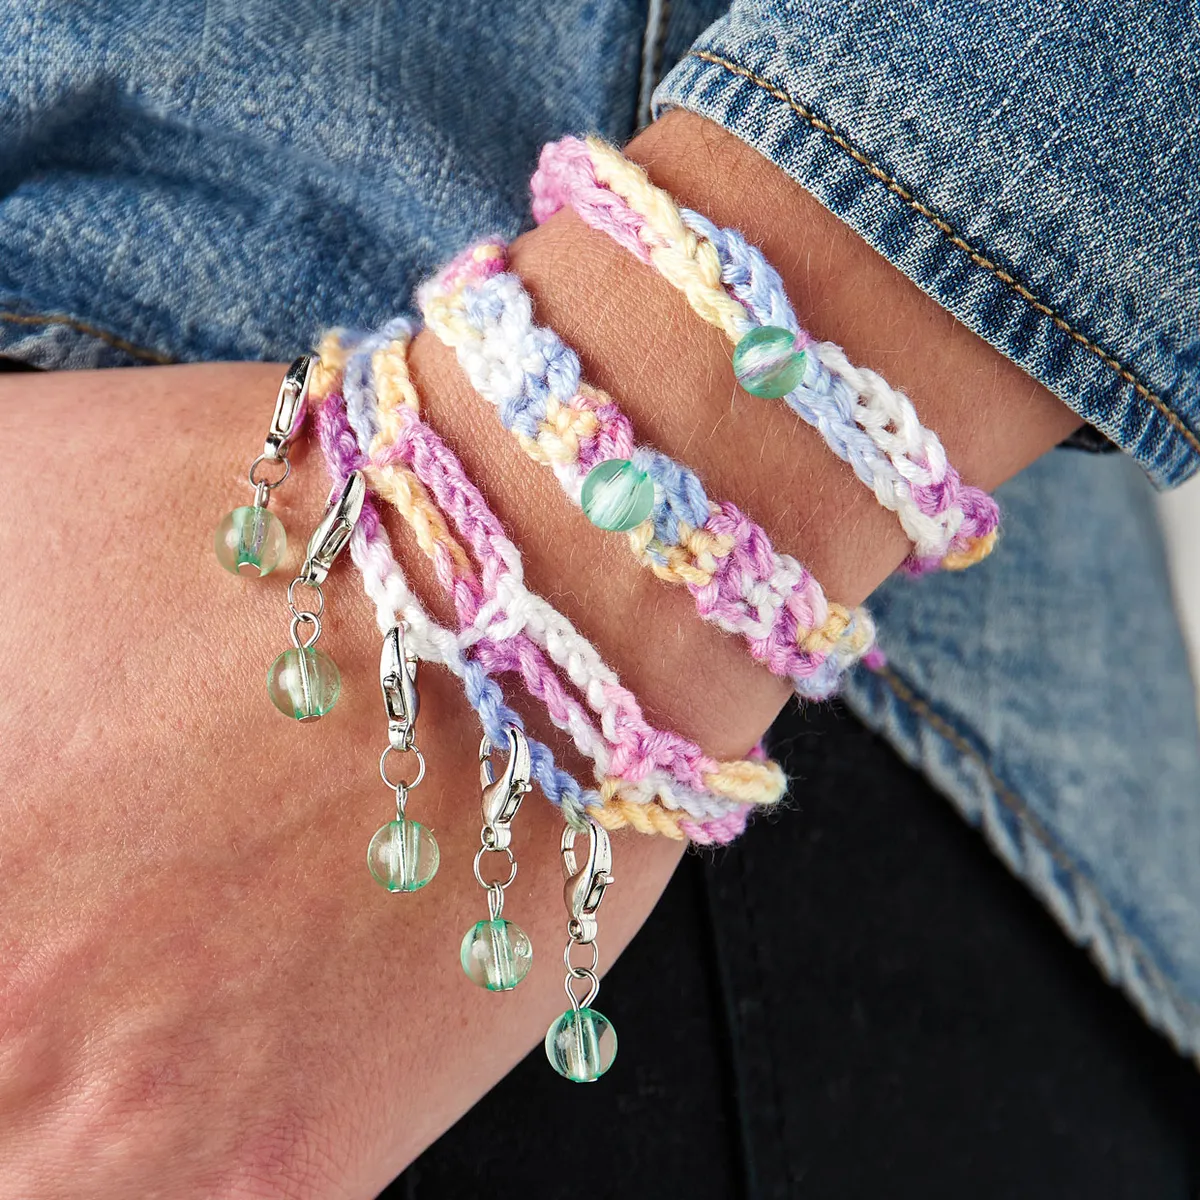
Who doesn't love a friendship bracelet? It's the essential 'travel accessory' and these crochet friendship bracelets are delightful.
34. Traditional friendship bracelets

If you're looking for a traditional friendship bracelet tutorial - don't worry, we've got instructions! Use our how to make friendship bracelets article to make friendship bracelets from DMC cotton for hardwearing, colourfast friendship bracelets.
Jewellery making is fun and the possibilities are endless!
Think jewelry making is complicated? One look at this comprehensive list of ideas and you'll quickly see it doesn't have to be!
You can use simple items like cork, salt dough or even bottle caps to fashion funky earrings, necklaces, bracelets and rings! Have fun and enjoy unleashing your creative side!
Caught the jewellery making bug?
Take a look at this mega round-up of 50 of the best jewelry making kits! If you like having everything to hand in one easy kit then you're bound to find something you love in this selection. From resin to pressed flowers, gems to silver, there's something for everyone here. We've even sourced our fave kits for kids here too!


